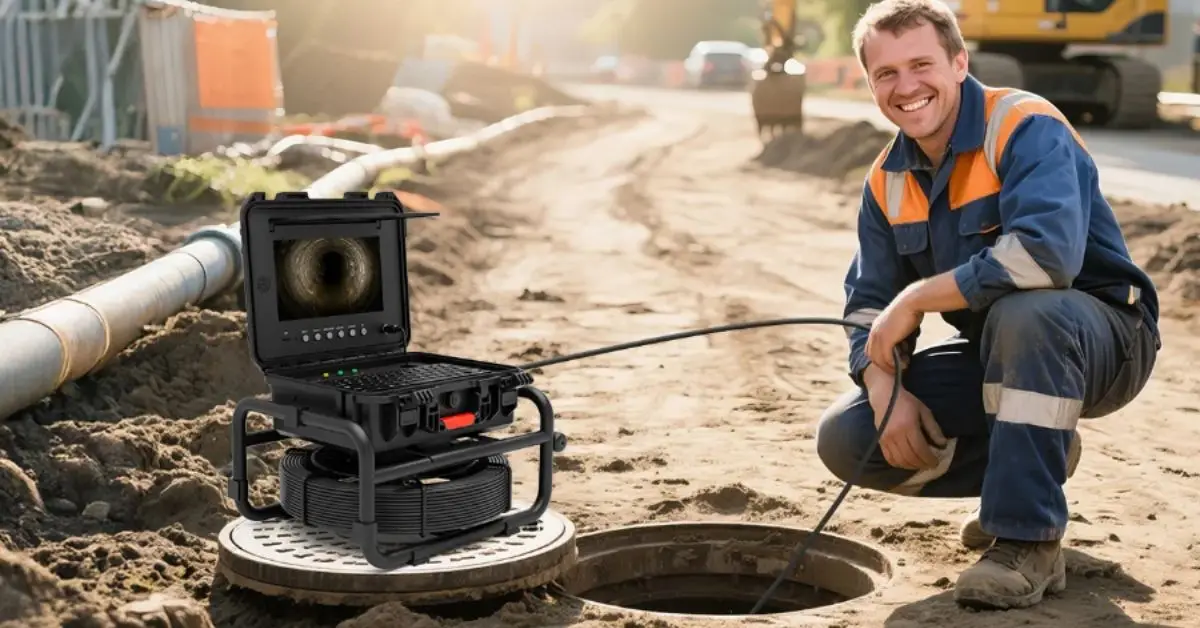
Inspect drains, plumbing, and sewer pipes easily with a pipe camera without digging or dismantling. It gives you a real-time view inside the pipe to help you find blockages, cracks, root intrusion, corrosion, leaks, and other issues not visible to the naked eye. Whether you’re doing a routine inspection or troubleshooting persistent drainage problems, choosing the right camera can significantly improve inspection efficiency. Learning the basics of what a pipe inspection camera is, how it works, and how to use it can help you understand how to choose a pipe inspection camera for plumbers and select the right equipment for your needs.
Table of Contents
- How to Choose the Best Pipe Camera
- Check Camera Head Size and Pipe Compatibility
- Consider Camera Resolution and Image Quality
- Look for the Right Cable Length
- Choose a Suitable Camera Head and Lens
- Check the Camera’s Waterproof Rating
- Consider a Built-In Locator and Sonde
- Monitor and Display Evaluation
- Look for Recording and Photo Features
- Check Battery Life and Power Options
- Consider Portability and Durability
- Types of Pipe Cameras to Consider
- How to Use a Pipe Camera for Drain Inspection
How to Choose the Best Pipe Camera
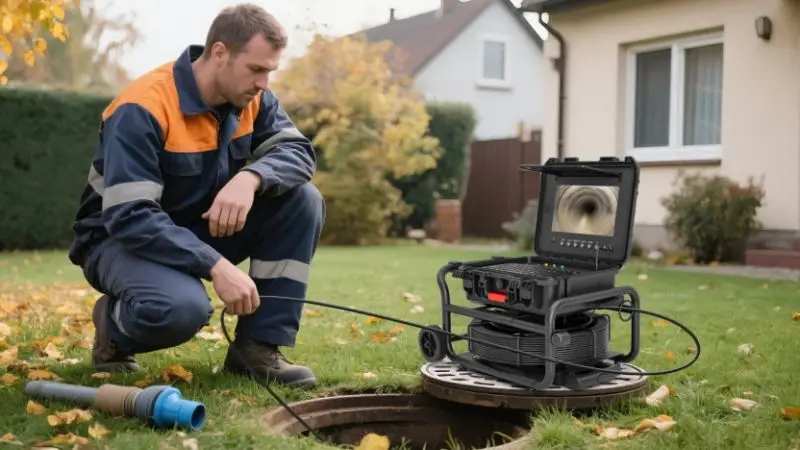
Choosing the right pipe camera depends on the type and size of the pipe you need to inspect. Cam size, image quality, cable length, and durability can affect how easily you complete an inspection. Knowing these factors can help you choose the best pipe inspection camera for plumbing, sewer, and drain work.
Recommended For Your Project
Check Camera Head Size and Pipe Compatibility
The camera head should match the size and position of the pipes you’re inspecting. A smaller camera head fits through smaller pipes, while a larger one may be needed for better visibility and stability. When purchasing a camera, make sure you know the smallest and largest pipe sizes it can fit. Also consider any bends, joints, or other tight spaces the camera may need to navigate. A good-fitting camera will be easier to manoeuvre and will be less likely to get stuck. Choosing equipment compatible with your plumbing system can make inspections easier and help you see inside the pipe more clearly.
Consider Camera Resolution and Image Quality
If the purpose of using a camera is to locate small cracks, buildup, roots, or damaged joints inside a pipe, then the image quality is important. A higher-resolution camera can output sharper pictures, and it will be easier to see details on the screen. It is also crucial to use good lighting because pipes can be dark, dirty, and there may be standing water. In comparing pipe cameras, you should take resolution and the quality of the built-in lights into consideration. A clear image may help to better understand a pipe’s condition and may help to pinpoint the location of a problem within the pipe. This is especially important when inspecting sewer and drainage lines to determine whether any damage has occurred.
Look for the Right Cable Length
During an inspection, the camera will move as far as the cable will allow. A short cable might be sufficient for drains, sinks, and small residential drains, and longer cables may be more suitable for sewer pipes and underground pipes. When selecting a model, consider the typical range you’ll need to cover. Another important factor is cable flexibility, as the camera may need to navigate several bends. Cables that are too stiff are hard to handle, and too flexible can be difficult to force through long stretches. Selecting the appropriate cable length allows for more convenient and efficient inspections.
Choose a Suitable Camera Head and Lens
It is easier to observe various parts of a pipe using the camera head and lens. A small camera head will fit into small openings, and a larger head may have more light power and a larger field of view. Another factor to consider is if the camera head will rotate and/or alter its viewing direction. As the camera bends, a flexible or self-leveling camera may be useful to maintain proper camera orientation in the image. Selecting the right pipe camera for plumbing inspection requires keeping the size of the pipe, its shape and the conditions under which it’s usually inspected in mind. The right camera head can enhance visibility and facilitate the identification of blockages, cracks, roots and other issues.
Check the Camera’s Waterproof Rating
Since drainage and sewer pipes are often filled with water, moisture and other liquids, a pipe inspection camera should be capable of withstanding wet conditions. Be sure to look for the camera’s waterproof rating before buying; you don’t want to end up with a camera that’s not built to take the rigors of its intended use. Properly waterproof the camera head, cable connection and other exposed parts. Routine inspections can cause damage to equipment if a waterproof design is not provided. But you must also adhere to the manufacturer’s guidelines with regard to operating and cleaning the camera. With the knowledge that the water is now protected, inspection of wet pipes can take place with a greater sense of confidence and equipment working life will be extended.
Consider a Built-In Locator and Sonde
This can be easier with a built-in locator and sonde to help tell where the camera head is underground. The sonde will transmit a signal which can be received by a compatible locator from above the ground. This is very handy if you need to know where and how deep a damaged area or blockage is. For instance, a camera might indicate a damaged pipe under a yard or driveway, which the locator can help locate. This can decrease needless excavation and enable targeted repairs. Underground drainage and sewer inspection may be a useful function to have.
Monitor and Display Evaluation
You need to be able to see the image clearly on the monitor as you navigate the camera through the pipe. A bright display can offer help when working in varied light sources or conditions, and larger displays might make it easier to detect minor faults. Before selecting a model, take into account screen size, image quality, controls, and viewing angle. Some of these systems also feature variable brightness or other settings that enhance visibility. If a monitor is the responsive type, it will be easier to understand how to use the pipe inspection camera, as the position and movement of the camera can be seen in real time. Select a display that is easy to look at during longer inspections.
Look for Recording and Photo Features
The recording and photo functions enable the data from inspections to be saved for review later. You can take pictures or video footage of obstructions, cracks, root intrusion, or other pipe issues, rather than just viewing them during the inspection. These records may come in handy if you are comparing pipe conditions over time or when explaining a problem to a property owner or repair professional. Storage is also a consideration, particularly if inspection requires long lengths of pipe. Before you decide on a camera, be sure to see if it allows you to take photos and videos and if you can transfer them. These can help to make inspection documentation more straightforward and organised.
Check Battery Life and Power Options
Battery life determines how long you can use the portable pipe camera without recharging or replacing the battery. If you are going to be inspecting several pipes in a given session, make sure that you have a system that has sufficient battery power to accomplish the job without frequent interruptions. Also be sure to look at charging speed and whether the camera can be used when charging from an external power source. Some systems may feature replaceable batteries while others may have rechargeable packs. Consider where inspections usually take place, and the availability of power. The camera could be more useful for regular plumbing, drain, and sewer inspections if it had dependable power options.
Consider Portability and Durability
If you need to move the camera from one property, work area or job site to another, portability is important. A small system with a small cable reel may be easier to carry around and install. The equipment should also be robust and able to withstand frequent use, especially in challenging plumbing and drainage environments. Look for reusable housing, a quality cable, a protected cable connection, and solid construction. A quality sewer pipe camera can give reliable results when inspecting sewer lines on a regular basis. A balance of portability and durability can make the equipment easier to use, and more likely to resist wear and tear.
Types of Pipe Cameras to Consider
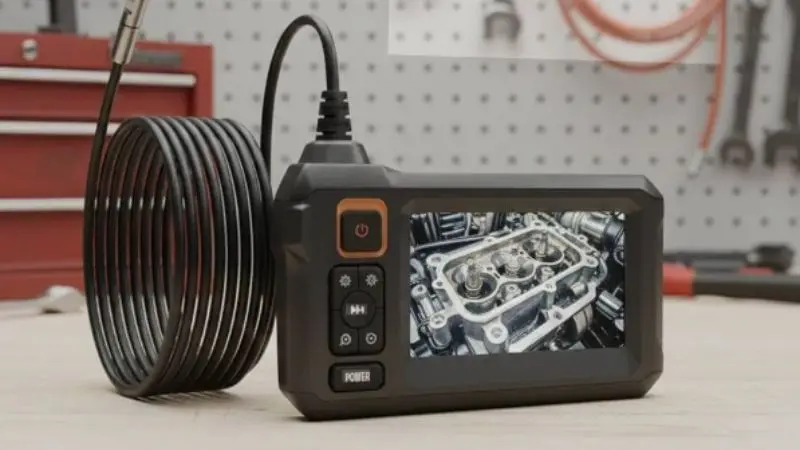
Pipe cameras come in various types for varying circumstances and pipe sizes.
Some are basic and compact, and some are more sophisticated with more advanced features for in-depth sewer and plumbing inspections.
Knowing the different types can help you to select the equipment that fits your inspection requirements.
Push-Cable Pipe Cameras
A push-cable pipe camera is one of the most popular types of pipe cameras used for residential plumbing and drain inspections. They use a flexible cable that you push through the pipe while watching the camera feed on a screen. These cameras can help identify clogs, assess pipe condition, and find common drain issues. The distance and location of the camera’s travel are dependent on the cable length and camera head size. For sinks, toilets, floor drains, and other easily accessed plumbing lines, a push-cable system may be practical. A push-cable model may be an easy choice for an individual learning to use the pipe inspection camera to do basic inspection jobs.
Self-Leveling Pipe Cameras
Self-leveling pipe cameras are designed to maintain the proper orientation of the image as the camera navigates pipe bends and turns. This feature can help to better understand the location and status of pipe defects. If the device isn’t self-leveling, the footage may roll as the camera rolls, making the inspection footage difficult to understand. Suitable for longer and/or more complex pipe systems where maintaining the same view is essential. They can make cracks, damaged joints, root intrusion, and other problems easier to see. A self-leveling system can be useful if you need organized, easy-to-understand footage when doing detailed pipe work.
Pan-and-Tilt Pipe Cameras
Unlike standard fixed-view pipe cameras, pan-and-tilt versions offer more movement of the camera’s viewing angle. The camera head can be adjusted so that it focuses on certain areas of the pipe and not just the direction the camera is pointing. This makes them suitable for larger pipes, intricate drainage setups, and inspections where in-depth viewing matters. Pan and tilt can be useful for probing joints, connections, cracks, etc., from various angles. These systems are often more advanced than basic push cameras and are suitable for professional inspection jobs. One of the factors you will have to take into account when comparing the best pipe inspection camera is whether adjustable viewing is needed.
Drain Inspection Cameras With Locators
Inspection cameras with locators are a combination drain inspection camera that has a built-in locating system for underground positions. The camera can be used to view issues within the pipe, and the locator can be used to determine the camera head’s location above ground. This can be beneficial during underground drain/sanitary sewer inspections. The locating function can be used to get an indication of the approximate area of the camera if it shows that a blockage, damaged joint, or root intrusion exists. This can enhance the accuracy of repairs and minimise unnecessary excavation. Thus, a pipe camera for drain inspection that can locate the pipe can help plumbing professionals and property maintenance teams working on buried drains.
Wireless and Compact Pipe Cameras
Wireless and compact pipe cameras are meant for convenience, portability, and quick inspections. Their compact design can also make them more portable and convenient to handle in smaller areas where larger camera systems may not be able to fit. Some smaller models allow you to wirelessly send inspection footage to a smartphone, tablet, and/or dedicated display and avoid the need for a large monitor system. These cameras are good for inspecting smaller drains, house plumbing, and areas that are difficult to access. But before you select one, you need to look at its camera head size, cable length, image quality, and battery life. A small pipe camera system might be the right choice for simple pipe camera plumbing inspection jobs.
How to Use a Pipe Camera for Drain Inspection
Proper use of a pipe camera can allow you to look inside the drain without opening up walls, floors, or other surfaces.
It entails preparing the drain, moving the camera down the drain pipe, and then closely inspecting the screen.
Regular inspections can help you locate clogs, cracks, roots, leaks, and other drainage issues.
Prepare the Drain Before Inspection
Prepare the drain before using the camera so the equipment can pass through smoothly. If possible, take off any readily accessible drain cover, drain grate, or drain fitting that allows access to the pipe. Remove any heavy debris or standing water (if possible) that might make the camera image difficult to see. Test the camera, cable, monitor, and connections to ensure they work properly. Choose an access point that gives the camera a clear route into the drain. Proper preparation makes the inspection easier and minimizes the risk of damaging the equipment. It also provides a clearer starting point to view the inside of the pipe.
Insert the Camera Into the Pipe
When the drain has been prepared, slowly slide the camera head into the pipe. If you feel resistance, adjust the cable alignment with the pipe opening, and do not force the camera into the pipe. Switch on the monitor to be able to see the camera’s position as it advances. Slowly push the cable as the camera head moves in the direction of the pipe. When bending, only bend the camera slowly; do not bend with force. Knowing how a pipe camera works can help you have control over the camera. The images taken by the camera are displayed live on the camera screen so you can check the pipe as you move forward.
Guide the Camera Through the Drain
Move the camera slowly through the drain, continually monitoring the camera. Move the camera steadily enough to be able to notice differences in the inner of the pipe. If the camera encounters bends, joints, or other obstacles, carefully adjust the cable to ease the camera through the area. Do not rush, as there are important defects that might be overlooked. Be aware of changes in shape, water level, debris, and surface condition of pipes. Proper use of the pipe inspection camera requires control of the camera and cable motion and viewing of the live image. The slower and more deliberate the movement, the better the inspection footage is likely to be.
Check the Pipe Interior Carefully
While moving the camera through the pipe, inspect it thoroughly for any damage or blockage. Check to see if there are cracks, broken seams, rust, roots invading the pipes, grease and/or pooled water, and anything else that looks out of the ordinary. Be aware of any turns in the pipe or of joints merging into the main pipe. Smaller defects can be easier to see with good lighting and good image quality. If you see something unusual, stop the camera and look at that place from different angles, if possible. If you need to know whether the drain needs cleaning, repair, or inspection, drain camera inspection provides a visual assessment.
Record Findings and Inspection Footage
It is important to register the inspection and review the key findings post removal of the camera from the drain. Capture clear video footage or photos of any major issues such as blockages, cracks, root intrusion, damaged joints, or other visible issues. If the system includes distance information, note the approximate location of each problem, too. Footage that is organized may make it easier to compare inspections conducted at different times and to share information regarding the condition of a pipe with a property owner or plumbing professional. If the camera can record and take photos, use the built-in camera to create a useful inspection record. Documentation can also be helpful in decisions concerning future maintenance or repair.
Locate Problem Areas
Once you’ve determined there is a fault, you should identify its approximate location in the drainage system. Some pipe cameras have an inbuilt sonde to transmit a signal to an external locator. This will enable you to get an idea of where the camera head is above ground when it is in the pipe. It can be particularly useful when the compromised area is under a floor, driveway, yard, or other difficult-to-access area. A sewer inspection camera with locating capabilities can help you get a more precise inspection of your sewers. If you know where the problem is, you can plan the repair accordingly and not disturb a larger area than necessary.
Wrap Up
A pipe camera is a practical means of viewing the internal issues of drains, plumbing, and sewer lines. The selection of the camera type, cable length, camera head, image quality, and locating features will make inspections easier and more accurate. Another benefit of learning to use a pipe inspection camera is that it helps you navigate pipes safely and recognize obstructions, cracks, roots, leaks, and other faults. Plumbers need pipe cameras for plumbing inspection, and sewer companies need them for sewer pipe camera inspection; for either of these scenarios, the right camera can yield valuable visual information before maintenance or repairs start. The right type of camera can help pipe inspections be quicker, clearer, and more efficient.
FAQs
What is a Pipe Inspection Camera?
A pipe inspection camera is a flexible camera system that inserts into pipes to send live images to a monitor, allowing you to locate blockages, cracks, roots, leaks, and damage.
How does a pipe camera work?
A pipe camera is a camera that is mounted on a flexible camera cable that is connected to a small waterproof camera. The camera is set to transmit the image to a monitor that is connected, and the pipe has built-in lighting.
How do you use a pipe inspection camera?
Set up the drain, put the camera in the drain, slowly move the camera through the drain, observe the monitor, note defects, and, if available, use a locating device to locate the problematic areas.
What kind of pipe camera is best for drainage inspections?
The most effective pipe inspection camera varies based on pipe size, length of the pipe to be inspected, and the features it is desired to have. Push-cable cameras are excellent for various residential drains and plumbing purposes.
Is a pipe camera able to find underground pipe issues?
Yes, the camera can have a built-in sonde with a locator, which can be used to determine the approximate location of the camera in the ground and can help locate blockages and damage.