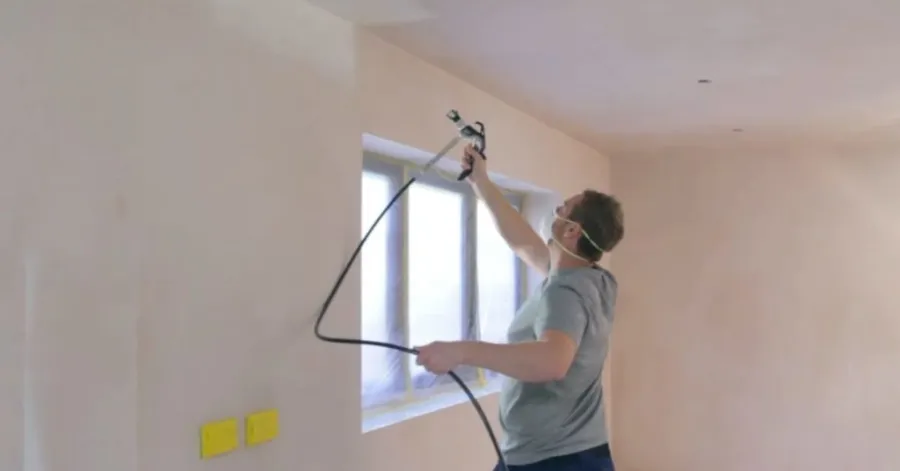
You might be asking yourself whether it is possible to achieve a smooth, professional finish on the walls using an airless sprayer. Yes is the simple answer. It is far quicker than rollers or brushes and can deliver clean, even results when properly applied. Several individuals are unsure whether it is appropriate to paint the interior walls and whether this approach is actually easier and more effective. The trick is to prepare, to work correctly and safely. After mastering the fundamentals of airless spraying on walls, you will never hesitate to complete any room with less effort and time, and achieve a high-quality, neat finish.
Benefits of Using an Airless Sprayer for Walls
Many homeowners want a time-saving painting technique that gives their work a professional appearance. An airless sprayer can simplify a room-remodeling task, whether you are freshening a single room or undertaking a bigger project. It helps you coat areas quickly and provides a smooth, uniform finish.
When you are planning to cover the walls with an airless sprayer, it is helpful to understand its advantages so you can determine whether this is the right option for painting the walls. This process has many benefits compared to older painting instruments, including the ability to cover faster and provide a smoother finish.
Paint Large Walls in Less Time
Speed is one of the main reasons people prefer to paint their walls with an airless sprayer. An airless sprayer does not need to be dipped and loaded, unlike a brush and roller, which constantly need to be dipped and loaded with paint. This will enable you to paint large wall areas in a fraction of the time.
The technique is particularly effective in living rooms, corridors, basements, and open areas where expansive areas require new paint. You do not need to devote a whole weekend to painting: you can usually finish a room within a few hours. With the right technique, an airless sprayer can save time and ensure consistent coverage from one part of the wall to another.
Get a Smooth and Even Paint Finish
A smooth finish is one of the most attractive benefits of spray painting walls. Airless sprayers deliver paint in a fine, uniform coat and can be used to achieve a consistent look across the entire surface. This minimizes the possibility of streaking, unevenness, or variations in texture.
This is the technique preferred by many homeowners who want to know how to achieve a smooth finish using an airless sprayer on the wall, but with less effort, since it achieves a professional appearance with minimal effort. The overall finish can be much cleaner and more polished than with traditional tools, as the paint is evenly sprayed. This makes airless spraying a favorite choice for interior painting projects where the look is most important.
Avoid Brush and Roller Marks
Rollers and brushes may occasionally leave visible paint traces, particularly when the paint is not properly applied or when the section is left to dry before the next one is finished. Such flaws may affect the overall appearance of a newly painted wall.
Using an airless sprayer, the paint is sprayed as a fine mist, which evenly coats the surface. This helps remove common problems such as brush strokes, roller lines, and patchy coverage. It is one that many homeowners will find to be more attractive, in the use of an airless sprayer vs. a roller on walls, in that the spraying effect produces a cleaner and more uniform finish. The result is a well-polished surface that looks as if it were painted by a professional and enhances the room’s overall appearance.
Best Projects for an Airless Paint Sprayer
Airless paint sprayers are very versatile and can be applied to numerous projects. They work very well on interior walls, ceilings, and large open spaces, as well as other surfaces where quick, even coverage is needed. They are also the choice for larger residential work due to their ability to handle larger volumes of work.
When in search of the best airless sprayer to paint house walls, consider the size and extent of the project. Airless sprayers can be especially helpful for constructing new homes, remodeling jobs, and updating rental properties, where speed and quality are equally important. They may also be applied to doors, trim, and cabinets where a smooth and professional finish is required. To the homeowner who may be asking whether airless spraying is superior to brushing the walls, the answer usually lies in the size of the project; however, it is generally faster when it comes to applying the spray to a large area of the wall, and also makes the wall look straight.
Tools and Materials You Need Before You Start
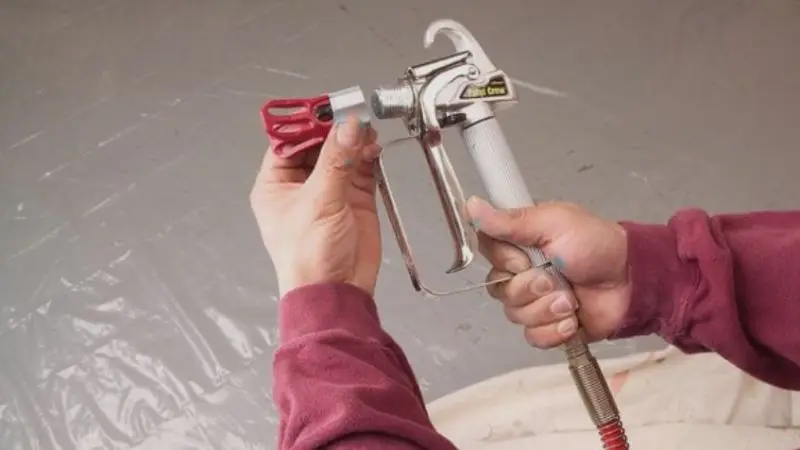
It is essential to acquire the correct tools and supplies before starting to paint. The right equipment can help you work faster and better, and prevent the most common painting problems. Some preparation will help to make the whole project smoother and more enjoyable.
Being a novice or an expert DIY painter, the right sprayer, accessories, and safety equipment will guide you to achieve professional-like results when using an airless sprayer to paint the walls.
Choose the Right Airless Paint Sprayer
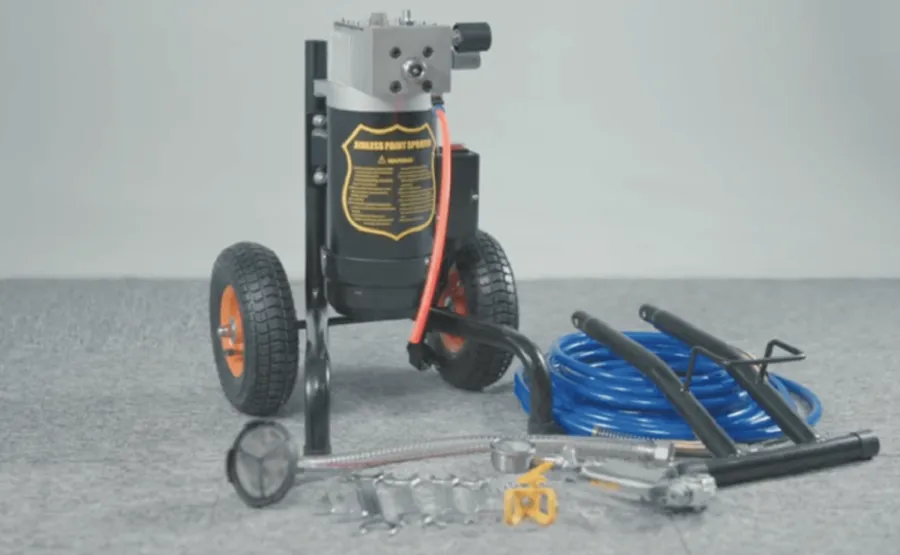
Choosing the appropriate airless paint sprayer is among the most crucial tasks in any painting project. A variety of sprayers are available according to the working load, and the choice should be made based on the size of your work. Smaller models will be used in one-off home projects, whereas larger units will be able to serve several rooms and cover larger surfaces more effectively.
When seeking the ideal airless sprayer to use in painting the walls of a house, consider the following features: variable pressure settings, simple maintenance, and robust structures. A pressure control knob is particularly helpful, as it enables you to regulate the spray pattern and paint flow. To enhance sprayer coverage and ensure that you have a more consistent finish on the project, investing in a quality sprayer can be beneficial.
@beasleysfamily #vevorairlesspaintsprayer #airlesspaintsprayer #painter #painting #paintsprayer #vevorpaintsprayer #vevor #vevortools #vevorttshop #paintspraying #paintersoftiktok #paintspray #airlesspaintsprayers #vevorpaint #vevorstandairlesspaintsprayer
♬ original sound – Beasley
Pick the Correct Spray Tip for Wall Paint
The spray tip is a significant determinant of the finish quality. The appropriate tip size is used to make sure that the paint is spread out on the wall without forming thick areas or uneven application. Large spray nozzles are suitable and will give a smooth finish to most interior wall paints.
The best tip size may depend on the thickness of the paint you are using. The thinner the paint, the smaller the opening should be; and the thicker the paint, the larger the tip should be. Before beginning, always refer to the paint manufacturer’s instructions. The right spray tip will not only enhance the finish but also help avoid common mistakes when applying the airless paint sprayer, including overspraying and uneven paint distribution.
Wear the Right Safety Equipment
One should always consider safety when operating an airless paint sprayer. The intense spray produces a fine spray that may blow in the air and hit your lungs, skin, and eyes. By wearing the right protective gear, these risks have been minimized, and you will be comfortable throughout the project.
Any spraying work should have a quality paint mask or respirator, safety goggles, and protective gloves. Your skin can also be protected against overspray by wearing old clothes or a worn-out coverall. Ventilation is also a must, particularly when painting inside. These few precautions will enable you to work safely and at the same time have your eyes on getting a smooth and professional finish.
Choose Paint That Works with Airless Sprayers
A majority of the current airless sprayers are capable of working with a large range of paints and are thus applicable in most residential painting works. The interior walls are usually painted with latex and acrylic paints since they offer good coverage and durability. Many oil-based paints can also be sprayed successfully when used according to the manufacturer’s instructions.
One of the questions, which many novices pose, is whether you have to thin paint to use an airless sprayer. High-quality airless sprayers can, in most cases, spray latex paint straight from the container without thinning it. A few of these heavier paints, however, might need a little thinning to make them flow more easily and to achieve a uniform spray pattern. Never adjust the sprayer without first looking at the paint label and the sprayer instructions. When using compatible paint and proper preparation, an airless sprayer should help achieve better coverage and a smooth finish on walls.
How to Prepare Walls Before Using an Airless Sprayer
A smooth and professional paint finish is based on proper wall preparation. The most efficient sprayer is no use on a surface that is not ready. When you are planning to paint walls with an airless sprayer, proper preparation will help the paint adhere better, appear less blistery, and last longer. All the steps build on the last one; therefore, they must be taken in sequence to achieve maximum results.
Clean the Wall Surface Properly
Begin by washing the walls to get rid of dust, dirt, oil, and grease. Use a damp sponge or cloth and gently wipe the entire surface. Be particularly meticulous at corners, edges, and places where dirt accumulates around switches or doorways. A clean surface is essential since paint does not cling well to dust or oily places. Unless the wall is cleaned properly, the final finish might be patchy or uneven, which can affect your overall painting outcome.
Repair Cracks, Holes, and Damages
Secondly, examine the wall with attention to cracks, holes in nails, dents, or flaking paint. Seal any holes with wall filler or spackle. Flatten it to make it go into the wall. Once filler is applied, it has to dry up, then proceed to the next step. On checking after dryness, ensure that the surface is even. The importance of repairing these small imperfections is that they are more noticeable once they are sprayed with paint, particularly when using an airless sprayer.
Sand the Wall for a Smooth Base
Sand the wall lightly with a fine-grit sandpaper or a sanding block. This step eliminates sharp edges, ancient paint lines, and roughness, as well as inconsistencies in the texture. The sanding is used to ensure the surface where the paint is applied is capable of receiving the paint and spreading evenly. After sanding, wipe the wall using a dry cloth to get rid of all dust. The first requirement to know how to get a smooth finish with an airless sprayer on walls is having a clean and smooth surface, particularly on interior surfaces.
Mask Windows, Trim, and Floor Areas
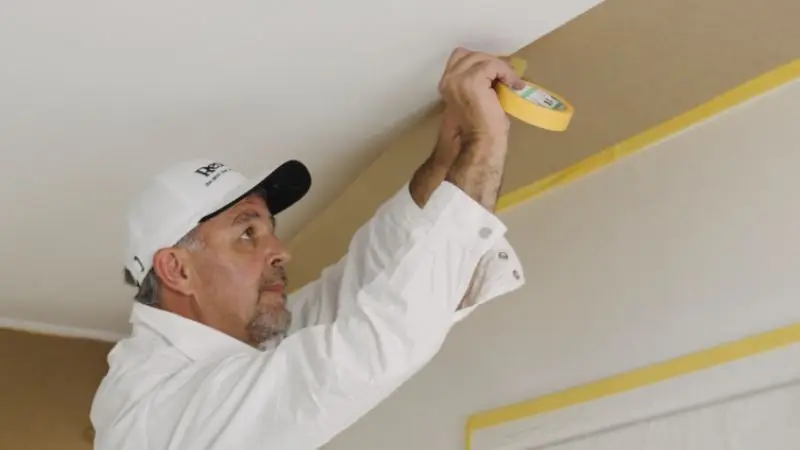
Now protect all areas that should not be painted. Use painter’s tape to cover windows, door frames, baseboards, and trim. Place drop cloths or plastic sheets on the floor to protect against overspray damage. Ensure that the tape is firmly pressed to prevent paint from leaking. Using a sprayer requires masking, as the paint is dispersed in a fine spray. Proper masking will also help you avoid common mistakes when using an airless paint sprayer, such as paint stains on clean surfaces.
Protect Furniture and Room Fixtures
Lastly, remove all furniture from the room whenever possible. Otherwise, place it in the middle and wrap it completely in plastic papers or discarded cloths. Tape or cover electrical outlets, switches, and light fixtures with tape or plastic covers as well. Airless sprayers may produce overspray, which moves in the air; everything should be covered appropriately. This measure ensures a clean working environment and supports your concentration while painting, without worrying about damaging the things around you.
These steps will help achieve a smooth painting process and improved results using an airless sprayer. When it is well prepared, it will always result in a more professional and lasting finish.
Step-by-Step Process for Painting Walls with an Airless Sprayer
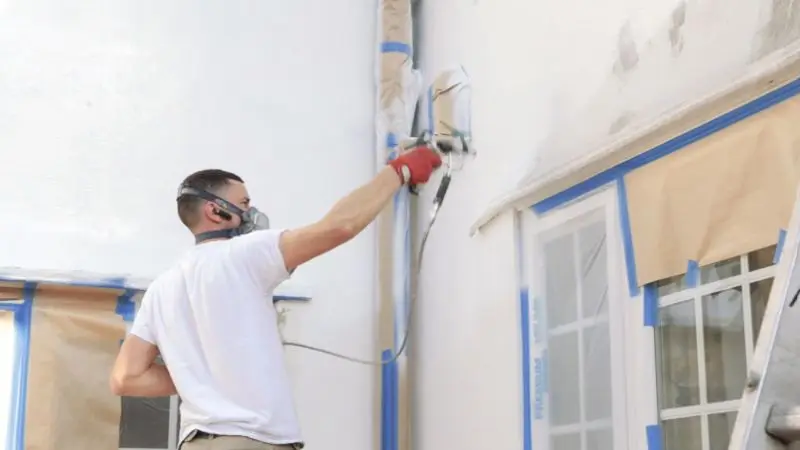
When properly used, wall painting can be much quicker and easier with the help of an airless sprayer. Nevertheless, the trick to a professional finish is to follow a step-by-step approach rather than rushing. The stages can help you regulate the flow of paint, prevent mistakes, and achieve an even coating on the surface. When you concentrate on painting walls with an airless sprayer, it will be very easy if you follow the right setup sequence through to the last coat.
Step 1: Set Up the Airless Sprayer Properly
Start with the sprayer manual, and make sure you have read it before using the machine, to know how the machine operates and how to keep it safe. Install the sprayer on a firm and level surface that is near your painting location. The hose and spray gun should be secured firmly to prevent leaks. Depending on the model you have, fill the paint container or attach the paint bucket. Once everything is put together, plug in the machine and ensure that all parts are tight and secure before startup.
Step 2: Prime the Sprayer Before Painting
Priming is a procedure that removes air from the system and fills the hose with paint. Change the sprayer to prime mode, and insert the prime tube into a waste bucket. Allow the paint to drip until it emerges in a constant and continuous flow with no air bubbles. Then, put the machine into the spray mode. This will help allow the flow of the paint to be smooth, and it is necessary to use an airless sprayer on walls in the best way to prevent uneven spraying or splattering when using the sprayer.
Step 3: Test the Spray Pattern First
Always test the spray pattern on a scrap of cardboard or scrap surface before applying paint to the wall. This will help you understand the paint flow and enable you to adjust the pressure settings if necessary. An appropriate spray pattern must appear as a smooth, even fan outline with no heavy locations or openings. In the case of an uneven spray, adjust the pressure to achieve a balanced spray. This will assist in minimizing some of the errors that people usually make when using an airless paint sprayer, particularly the novices.
Step 4: Apply the First Coat of Paint
Now start painting the wall, holding the spray gun approximately 12 inches off the surface. Begin moving your hand before releasing the trigger, and release the trigger before stopping your movement to prevent paint from accumulating. Apply in smooth, steady lines and overlap each line by approximately half the line to give a smooth coverage. Start at the top of the wall and move to the bottom of the wall. This method helps create superior control and achieve a smooth finish when learning to use an airless sprayer on walls.
Step 5: Maintain a Consistent Distance and Speed
Maintaining a constant distance and speed is highly crucial for a consistent finish. Remain at the same distance from the wall most of the time and swing your arm at a regular speed. Drip or too much build-up of paint may occur when you move too slowly. Going too quickly can cause the coverage to appear thin or uneven. This balance practice will help you master the technique and achieve professional results for interior walls or larger surfaces.
Step 6: Apply Additional Coats if Needed
Once the first coat is dry, examine the wall for uneven spots or uncovered areas. Use a second coat with the same technique if necessary. Most wall-painting projects require two coats to look professional. Proper drying time between dots will guarantee increased adhesion and durability. This is particularly necessary in determining whether you need to thin paint for an airless sprayer because, often, proper layering is more important than thinning to achieve a smooth final finish.
These steps will help you achieve a smooth process and the best results with your sprayer system, and ensure a smooth, professional appearance on your wall.
Common Mistakes to Avoid When Using an Airless Sprayer
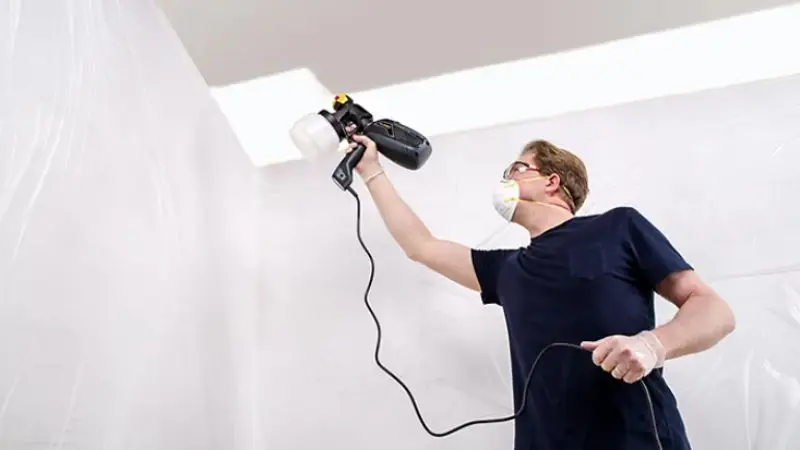
An airless sprayer can help to paint faster and more smoothly, but it requires the proper application. A lot of beginners do not have difficulties with the machine, just a little error in technique or preparation. By concentrating on the task of painting walls using an airless sprayer, you can prevent these mistakes and achieve a cleaner finish.
Mistake 1: Spraying Too Close to the Wall
The most frequent error is to be too close to the sprayer to the surface. This may result in thick spots of paint, drips, and patchy coverage. It might appear that spraying nearer provides better control, yet it only causes more difficulties on the final finish.
Always maintain a 12-inch distance between the sprayer and the wall and stay at that distance. You should move your whole arm, rather than just your wrist, to maintain the spray. It may be good to practice on the cardboard and then learn to control the distance and get better control. This is a basic practice when one is learning how to achieve a smooth finish on the walls using an airless sprayer.
Mistake 2: Using the Wrong Spray Tip
The incorrect spray tip may have a severe impact on your output. A tip that is excessively small will cause the paint to appear thin and streaky, whereas a tip that is excessively big will cause the paint to be wasted and result in a messy finish. Both scenarios result in uneven walls and additional work.
Most interior wall paints can be used with a tip size of 0.015 or 0.017, but it is always best to follow the paint manufacturer’s recommendations. The proper tip helps ensure smooth coverage and minimizes unnecessary adjustments. This is one of the major errors to avoid when using an airless paint sprayer, particularly for novices working on interior projects.
Mistake 3: Skipping Wall Preparation
The other very significant error is failing to prepare the surface adequately. Most individuals just run to paint without cleaning, sanding, and fixing the wall. Nevertheless, paint can also be damaged by dust, grease, cracks, and holes, and it may not stick properly, which may have an influence on the final outcome.
It is always important to clean the surface, fill in any flaws, and sand the wall before commencing. Don’t forget to cover edges and mask floors as well to prevent undesirable splatter of paint. Adequate planning ensures sustainable execution and directly affects the quality of airless sprayer wall painting, resulting in a smoother, more professional surface.
Mistake 4: Applying Paint Too Thickly
Another typical mistake is to apply excess paint at a time. Thick coats might appear to save time, but in most cases they cause drips, uneven drying,g and patchy surfaces. Rather, it is preferable to use thick and thin layers.
Allow one paint layer to dry completely before applying another. This will enable the paint to dry and give a cleaner finish. Light-layered spraying also plays an essential role in determining whether you need to thin paint for an airless sprayer because the right method of application is frequently more crucial than altering the consistency of paint. The thick coats will make it more bulky, so it will be better to avoid them.
Mistake 5: Rushing the Painting Process
Most new people hurry up the job so that they can complete it as fast as possible, yet it will result in poor performance. Excessive speed may result in uneven coverage, spots missed, and spray visible on the wall. The spraying should be done at a steady and controlled rate to be successful.
Be steady and slow when spraying. Concentrate on straight lines and correct overlap per pass. Rushing can also influence decisions about whether to use an airless sprayer or a roller on the walls, because a roller may seem easier, but in reality, the correct spraying technique yields much better results.
Wrap Up
When done properly with an airless sprayer, painting walls can be faster, cleaner, and more professional. When selecting the right equipment, understanding how to spray properly, each detail is significant in the overall finish. When you follow the correct procedure, it is easy to achieve smooth, even walls without streaks or roller marks. Comparing tools or mastering the art, knowing how to paint the walls using the airless sprayer would enable you to achieve more with minimal effort. With practice and patience, you can be assured you can complete any interior painting project and achieve a long-lasting, high-quality finish.
FAQ
What is the best way of cleaning an airless sprayer that has been sprayed?
You are advised to fill up the sprayer with water or the cleaning solution suggested. Use the hose and gun to clean up till it appears clear. Wipe out the tip and filter after spraying to maintain good working equipment.
Is it possible to spray textured walls?
Yes, spraying is applicable to rough walls. You achieve even coloring and access to all the grooves. Move the sprayer slowly, in order to cover all bumps with paint. Test your spray pattern first to make sure you get the best results.
What to do when you see paint run when spraying?
Immediately cease spraying. Take a brush and a flat before it dries. You are able to correct minor mistakes in a short time. Next time, to prevent runs, try spraying in thinner coats.
Is indoor spraying safe?
Spraying can be done safely when some basic safety precautions are taken. Wear a mask and goggles. Open air to fresh air. Put covers on furniture and floors to avoid being covered in paint mist. Before you spray, always check your sprayer to see if it is leaking.
How long is spraying versus rolling?
Walls can be sprayed much faster than rolled. You are able to complete a room within half the time. You conserve energy and obtain a smooth finish. Rolling is more time-consuming, and the marks are left behind, whereas spraying is professional.