
Lighting up your backyard does more than just enhance its appearance—it adds safety, comfort, and functionality to your outdoor space. Still, many beginners hesitate. Which lights should you pick? Where should they go? Is installation tricky? People often hesitate to start due to these common questions.
Don’t worry—with a bit of planning and the right approach, setting up outdoor backyard lighting is simple. Up ahead, we’ll show you exactly how to install outdoor backyard lighting that’s both effective and beginner-friendly.
Tools and Materials
Before learning how to install outdoor lighting on a brick wall, it’s essential to gather all the necessary tools and materials. Being well-prepared prevents delays in the installation process, as no one enjoys wasting time searching for missing items. Let’s break down exactly what you’ll need.
Essential Tools
You don’t need fancy equipment to get started. Most of these tools might already be in your garage or toolbox. Here are the tools required:
- Screwdriver: For attaching fixtures and opening boxes.
- Wire stripper: To remove the plastic coating from wires.
- Pliers: For twisting wires and holding parts.
- Shovel/trenching tool: To dig shallow wire paths.
- Drill: For drilling holes to mount lights.
- Voltage tester: To check if wires are live.
- Tape measure: To space lights evenly.
- Hammer: To tap stakes or anchors into the ground.
Materials List
Now, let’s talk about the materials. These are the items you’ll install or use up during the project:
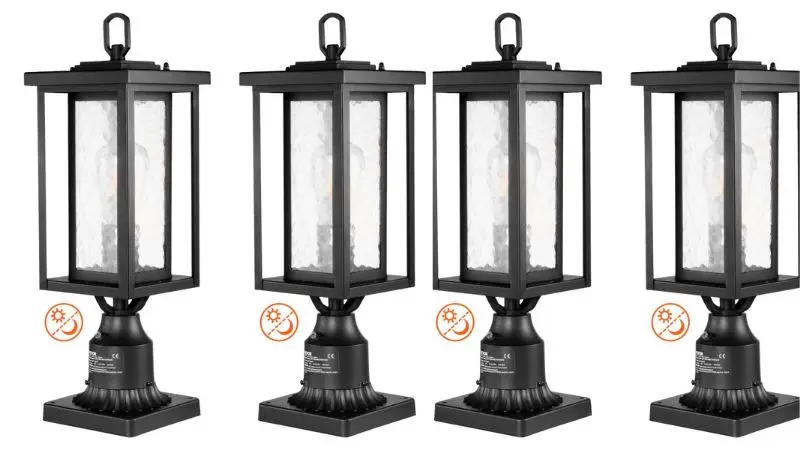
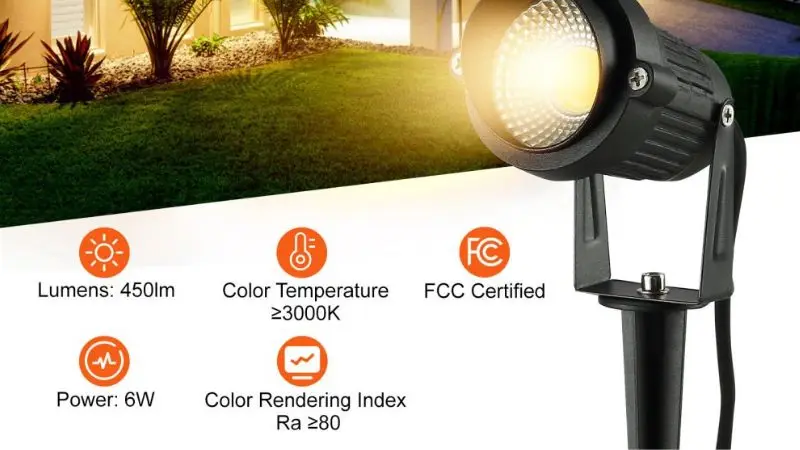
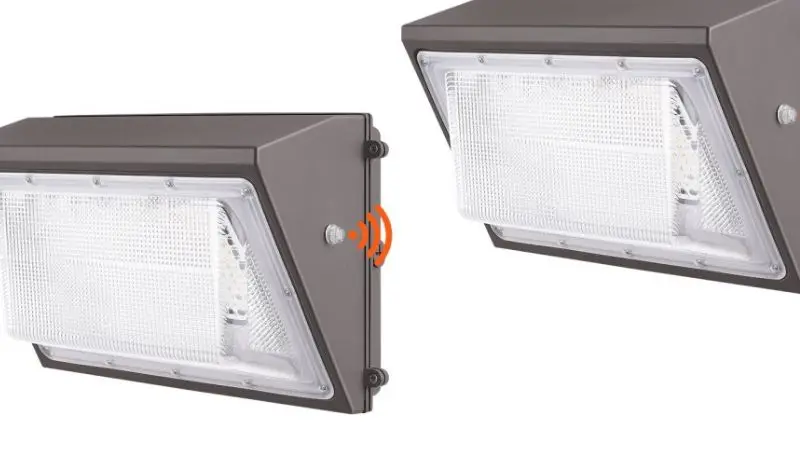
- Outdoor light fixtures: Select from spotlights, path lights, or wall-mounted styles.
- Low-voltage wire: Use 12-gauge or 14-gauge wire for most setups.
- Transformer: Converts your home’s power to safe, low-voltage current.
- Waterproof wire connectors: Keep wire connections protected from moisture.
- Mounting stakes or brackets: Secure fixtures to the ground or walls.
- Electrical tape: Wrap around connections for added insulation and safety.
- Light bulbs: Choose outdoor-rated bulbs that match your fixture type.
Having the correct light bulbs ready will save time and make the process easier, especially when you’re learning how to install outdoor lighting without wiring. You’re almost ready to plan your lighting layout!
Planning

Layout Sketch
Before installing landscape lighting, grab a piece of paper and sketch your yard. Draw your house, walkways, garden beds, and any trees or bushes. Mark where you want each outdoor backyard lighting fixture to go. This step helps you see how your backyard lighting will look at night. You can plan for both beauty and security. Try to space your low-voltage landscape lighting evenly as part of how to install low-voltage outdoor lighting. If you want to highlight a path or a tree, make a note on your sketch.
Power Source
Most people use a transformer for low-voltage landscape lighting, which plays a vital role in a successful installation. Place the transformer near an outdoor outlet and ensure it’s positioned close enough to reach all your backyard lighting fixtures.
You want to avoid running wires across walkways or driveways. If your yard is large, you may need more than one transformer to power it. Always check that it can handle the total wattage. Alternatively, if you prefer a wire-free setup, you can explore how to install outdoor solar lights, which don’t require transformers or nearby outlets.
Safety Tips
Safety comes first when working with outdoor lighting. Always turn the power off before you touch any wires. Use a voltage tester to double-check. Call your local utility company before you dig. You need to know where underground cables and pipes are. Avoid placing wires near irrigation lines. Follow local codes for outdoor wiring. If you feel unsure, ask a professional for help. Learning how to install low-voltage outdoor lighting is easy if you take the time to follow these steps. You can safely install low-voltage landscape lighting if you take the time to follow these steps.
How to Install Outdoor Lighting
Step-by-Step Guide
Ready to get started? Here’s a step-by-step guide showing exactly how to install outdoor lighting on a brick wall. You don’t need to feel nervous. Follow each step, and you’ll see your backyard lighting come to life.
- Plan Your Layout
Use your sketch from earlier. Place your outdoor backyard lighting fixtures where you marked them. Double-check the spacing. Ensure you have enough wire to reach each location.
- Set Up the Transformer
Mount your transformer near an outdoor outlet. Keep it off the ground. Plug it in, but don’t turn it on yet.
- Lay Out the Wire
Unroll your low-voltage landscape lighting wire. Lay it along the ground, following your planned path. Leave extra wire at each fixture location, giving you room to work.
- Dig Trenches
Use a shovel or trenching tool to dig a shallow trench, about 3 to 6 inches deep. Place the wire inside, keeping it safe from lawnmowers and foot traffic.
- Connect the Fixtures
At each spot, cut the wire. Use your wire stripper to remove about half an inch of insulation. Use waterproof connectors to keep fixture wires dry and secure during how to install outdoor lighting without wiring. Twist them tight. Wrap with electrical tape for extra safety.
- Install Fixtures
Push stakes into the ground or mount lights on walls. Make sure each fixture stands straight. Aim the lights where you want them to shine.
- Connect to the Transformer
Attach the primary wire to the transformer. Follow the instructions that came with your kit. Double-check each connection.
- Test the System
Now you can turn the power on. Check each light. If one doesn’t work, don’t worry. You’ll learn how to fix it in the troubleshooting section.
Trenching and Wiring
Trenching and wiring can be tricky, especially when you’re figuring out how to install low-voltage outdoor lighting the right way. Start by digging a trench along the planned path—about 3 to 6 inches deep. This keeps your low-voltage landscape lighting line protected. Lay the wire flat in the trench and avoid sharp turns. If a walkway is in the way, tuck the wire under the edge or use a conduit to secure it in place.
Pull up a loop of wire at each fixture spot—this gives you slack when connecting lights. Part of mastering low-voltage lighting installation is making sure your wire connections are waterproof. These keep dirt and water out. Snap them tightly, then wrap them in electrical tape for extra safety.
Connecting Fixtures
Now, it’s time to install a fixture at each marked spot. Strip the ends of the wires. Match the wires from the fixture to the main line. Wondering how to install outdoor solar lights that include waterproof connectors? Twist the wires together until they feel snug. Push the connectors down into the trench. It keeps them hidden and safe.
Mount each light. For path lights, push the stake into the ground. For wall or deck lights, use screws or brackets to secure them in place. Make sure each light points where you want. Adjust the angle if needed.
Pro Tip: Use LED bulbs to save energy and extend the life of your landscape lighting.
Testing and Troubleshooting
You’re almost done! Now, you need to test your system. Plug in the transformer. Turn the power on. Walk around your yard. Check each light. If a light doesn’t turn on, don’t panic. Use this quick checklist:
- Check the bulb: Sometimes, a bulb isn’t screwed in all the way.
- Inspect the connectors: Ensure each waterproof connector is securely tightened.
- Test the wire: Use a voltage tester to see if power reaches the fixture.
- Check the transformer: Make sure it’s plugged in and switched on.
- Look for breaks: You might have a cut wire if a whole section is out.
Remember: If you’re unsure about the steps, refer back to this guide for a transparent process from start to finish. You’ll get excellent results and enjoy your new lights every night.
Install a Porch Light
How to Install a Porch Light
Want to brighten your entryway and improve safety? Installing a porch light is a great beginner project. If you’re learning how to install outdoor lighting without wiring, these simple steps also apply. Start by turning off the power at the breaker—safety first. Remove the old fixture by loosening the screws and gently pulling it from the wall.
Check the wiring: ensure the black, white, and ground wires are connected correctly. Match and twist them with your new light using wire connectors, then tuck them back in. Secure the fixture with screws so it sits flat, just like other outdoor lighting installations. Add the bulb and cover, and switch the power back on to test.
Are you unfamiliar with wiring? Discover how to install outdoor lighting without wiring by utilizing battery-powered or solar options instead.
Wall and Deck Lights
Wall and deck lights function similarly to porch lights. You can use the same installation steps for outdoor lighting to install either a porch light or a deck light. Select a spot that brightens your path or stairs. Mark the location—drill holes for the mounting bracket. Connect the wires just like you did with the porch light. Securing the fixture and adding the bulb is another example of how to install outdoor lighting on a brick wall if you’re mounting it on a masonry surface.
If you want to install a porch light on a deck post, use a weatherproof box. This protects the wires from rain. Test the light before you finish. You will enjoy a brighter, safer outdoor space.
Final Steps
Adjustments
You have completed the installation of your outdoor lights, but you may notice a few adjustments that need to be made. Walk around your yard at night. Look at each light. Does it shine where you want? Occasionally, a light points too high or too low, which is a common issue when learning how to install outdoor solar lights. Try turning the fixture or moving it a little on the ground.
If you see dark spots, add another light. If a place looks too bright, you can move the fixture back or replace the bulb with one of lower wattage. Small changes can enhance the installation of outdoor lighting and the overall appearance of the yard.
Maintenance
Regular maintenance keeps your system in top shape and ensures it works efficiently. Start by checking your lights every few months. Inspect the fixtures for dirt or leaves. Wipe them clean with a damp cloth.
Check the bulbs. If one burns out, replace it with the same type. Ensure the new bulb is suitable for outdoor use; your choice can affect how to install outdoor lighting on a brick wall. Inspect the wires and connectors. Push any loose cables back into the ground. Tighten any loose fixtures.
Maintenance Checklist:
- Clean fixtures and lenses
- Replace burnt-out bulbs
- Check and secure wires
- Adjust fixtures as needed
Note: After heavy rain or snow, check your lights. Water can move wires or cause fixtures to tilt.
Conclusion:
You just learned how to install outdoor lighting step by step. You planned your layout, gathered the necessary tools, set up your lights, and made any necessary adjustments. Always follow safety tips and check your work, especially if you’re learning how to install outdoor lighting on a brick wall.
- Try smart timers or color-changing bulbs for more fun.
- Look for guides if you want to add more lights later.
With a bit of care, your outdoor lighting will keep your yard bright and safe for years to come. Enjoy your beautiful space every night!
FAQ
How deep should I bury the wires for outdoor lighting?
You should bury the wires about 3 to 6 inches deep. This keeps them safe from lawnmowers and foot traffic. If you have pets that dig, go a little deeper.
Can I use regular indoor lights outside?
No, you should not use indoor lights outside. Outdoor fixtures are weatherproof and safe for rain or snow. Look for the “wet rated” label on the box.
Do I need an electrician to install low-voltage lighting?
You can install low-voltage lighting yourself. The system is safe for beginners. If you feel unsure or need to connect to your home’s main power, call a licensed electrician.
What if one of my lights stops working?
First, check the bulb. If it’s fine, inspect connectors and wires to ensure everything is secure and dry. Still not working? Test the transformer.


