Are you fed up with the simple and dull stair handrails that most homes comprise? Many homeowners suffer the dilemma of impersonality in their living spaces. The difficulty lies in the nature of cookie-cutter designs that do not represent individual style. Now, picture the frustration of commuting up and down stairs every day, meeting a railing that is so dull. No worries! In this guide, you’ll uncover the basic process of creating your DIY stair railing to give your home a unique look. Say goodbye to dull and hello to customised ones!
| Sr. No. | Material | Installation Difficulty | Installation Duration (Average) | Total Cost (Average) |
| 1 | Wood | Moderate | 8 to 16 hours | $500 to $2,000 |
| 2 | Metal | Moderate to Advanced | 12 to 24 hours | $1,000 to $3,000 |
| 3 | Cable | Easy to Moderate | 4 to 8 hours | $200 to $1,000 |
| 4 | Vinyl | Easy | 4 to 8 hours | $150 to $800 |
| 5 | Prefabricated Kits | Easy | 4 to 8 hours | $300 to $1,500 |
Table of contents
DIY Stair Railing – Tools and Materials You Need
A custom stair railing adds a special touch to your home. This DIY project is as doable and rewarding as possible if you use the right tools and materials for work.
Tools You Need for DIY Stair Handrail
- Measuring Tools: Precise fit requires accurate measurements, which measuring tools cater effectively.
- Miter Saw: Perfect for cutting accurate angles in the railing parts.
- Drill with Bits: For drilling holes to acco`mmodate screws and other fasteners.
- Screwdriver or Screw Gun/ Wrenches: It is critical for securing railing elements in place.
- Sanding Block or Electric Sander: It smoothens out the rough edges and surfaces.
- Level: Ensures that the installation is straight and balanced.
- Paintbrush or Stain Applicator: To paint or stain the railing in your chosen color.
- Safety Gear: A safe workplace will require gloves, safety glasses and ear protection.
Materials You Need for DIY Stair Rail
- Balusters/Spindles: Vertical posts that support the handrail.
- Handrail: The upper part of the railing to hold on for support.
- Newel Posts: Vertical support that you place for the bottom and top of stairs.
- Base Rail: The lower section of the railing that gives additional reinforcement.
- Screws: Multiple sizes exist that assist in keeping components secure together.
- Filler: To patch up holes and gaps to make a neat finish.
- Finishing Nails: Balusters attached to the handrail and base rail.
- Paint or Stain: It adds aesthetic value and safeguards the material.
- Sandpaper: Various grits to smooth surfaces during and after construction.
- Sealer/Protectant: This preserves and extends the life of the material.
- Glue: Strengthens the connections between joint units for better stability.
Stepwise Procedure for DIY Stair Railing
Here is the step-by-step process for do it yourself staircase railing:
Step 1: Planning Do It Yourself Staircase Railing
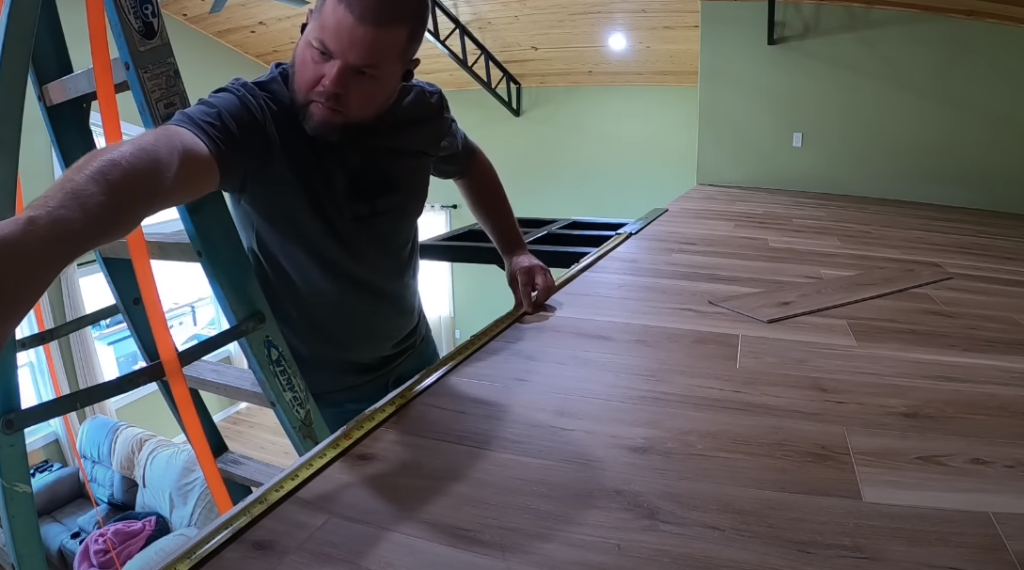
Measure your stair’s length and height precisely. Make use of measuring tape for accuracy so that the railing fits perfectly. There are turns and landings in your staircase; mark these angles, as they will help you make the right cuts during construction.
Now, determine the design or style for the DIY stair rail you want. Custom, modern, or more traditional look – which do you prefer? Think about the general theme of your home for a consistent look. With this in mind choose materials suited to your style. Choose sturdy wood or metal based on long-term usability and looks.
Remember, the success of your DIY task depends on careful planning. Visualize the end product and plan accordingly for each step. Once designed, move towards implementation confidently, armed with accurate measurements and a clear vision. Comprehensive planning ensures that not only does your DIY handrail fit perfectly. But it also contributes to making the appearance of your home better. With thoughtful intent and forward-thinking, you are set to create a staircase railing that shows off your flair.
Step 2: Posts Installation
Thus, accuracy is everything when you are installing posts for do-it-yourself staircase railing or your homemade stair rail. Start by measuring and marking where your posts are going to be on the staircase. Use a measuring tape to ensure accuracy, and chalk mark the spots where newel posts will rest.
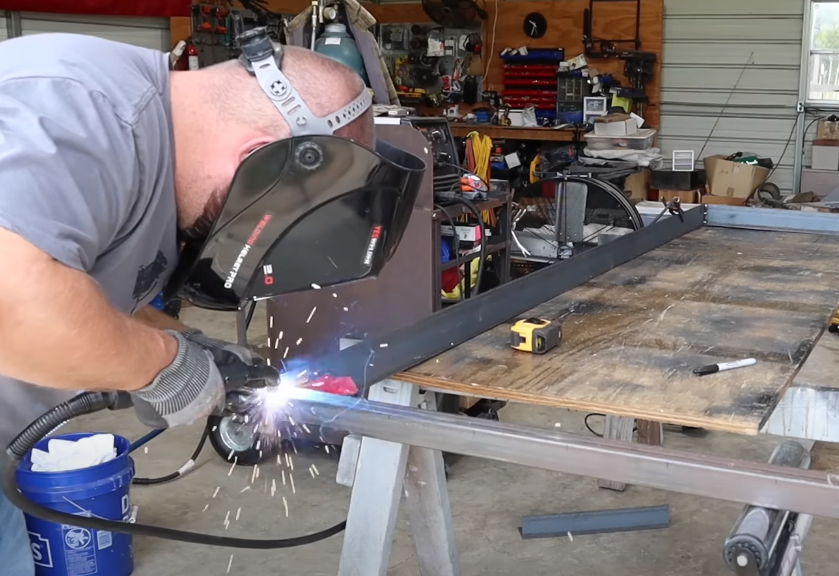
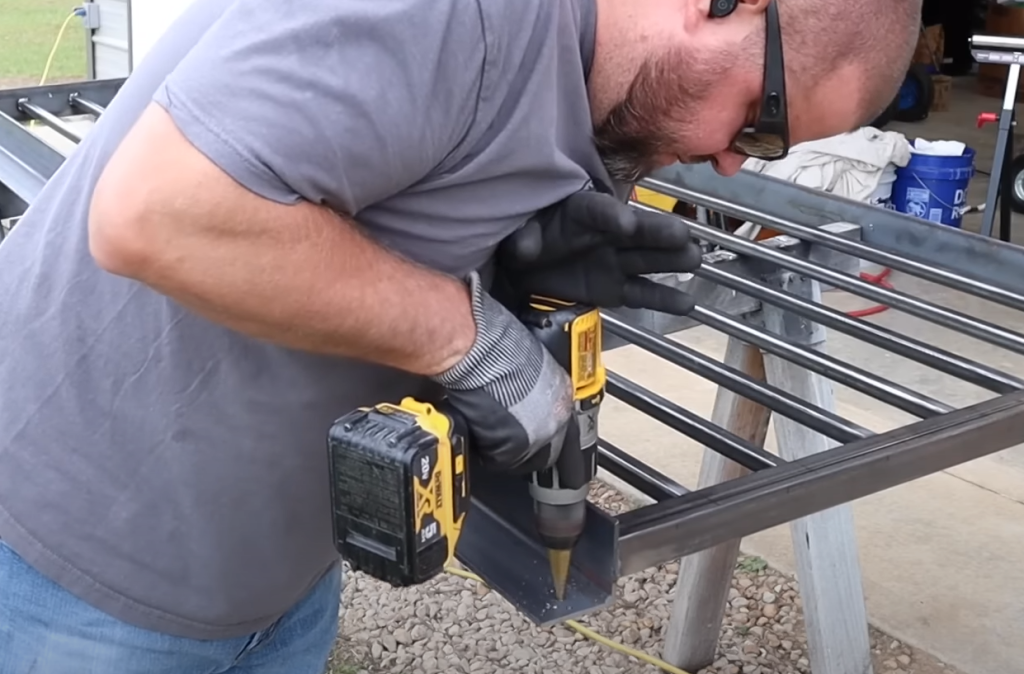
Next, nail the posts in position using a drill and suitable screws. This is true if you are working with wood, but if you are working with metal, then you need to weld the joints. Make sure the connection is firm enough to provide a good basis for your railing. As you secure the posts, ensure that they line up with the spots marked on the stairway.
Check the installed posts for DIY stair rails attentively to see if they are level. A level ensures that your railing is straight and even. Place the level on top of the posts horizontally to make sure they are parallel with the terrain. Also, verify the vertical alignment to be sure about an upright position.
With proper size measurement, stable post setting, and regular level reviewing, you can ensure a good foundation. This makes diy stair railings not just nice to look at but also safe and steady for many years forward.
Step 3: DIY Stair Handrail Installation
To successfully install your DIY handrail for stairs, begin by measuring how long it should be. Use a miter saw to cut the handrail to fit your staircase precisely. Make sure that measurements are double-checked to avoid any unevenness.

Then, secure the handrail firmly to the newel posts. Ensure you place it tight and flush with the posts for stability. Fix the handrail by screwing it and building together a quality support structure.
Install and check angle alignment. Make sure that diy staircase handrail follows the natural curve of your stairs. Use a level that will offer functional support as well for proper alignment and presentation.
Attach accurately at every point so as to be snugly fitting. Ensure that there are no gaps or wobbling by tightening the screws correctly. This hands-on, DIY handrail for stairs technique ensures the ability to install a stair handrail all by yourself. This enhances security but personalizes your stairs, too. By doing these steps, you will have a professional appearance, and your stairs will become the center of attention at home.
Step 4: Balusters Installation
To start a DIY stair railing installation, measure and cut balusters to the required size using the miter saw. Make sure your measurements are accurate for a perfect fit. Then, outline and adjust every baluster’s location along the base rail with a measuring tape for equal spaces.
Fasten the balusters to the bottom of the handrail with screws. Arrange them to perfection in order to keep a clean and level look. If possible, use a leveller to check the level. As you fasten each baluster, ensure that the spacing is consistent to give structural robustness to your railing. Spend time on this step and as each baluster you mount in place. One by one, your staircase is turning into a customized artistic highlight of your home.
Step 5: Final Touching
With your DIY stair railing assembled, it is time for the finishing touches to ensure a professional and polished look. Use an electric sander to make the railing’s edges even by rubbing gently along its entire length. This step is very important for achieving a fine finish that not only feels good on the skin but also adds beauty.

Then, pick your preferred paint and spread it smoothly over the railing. Not only does this step colour the material, but it also guards against any damage.
Remember, you manipulate it aesthetically. Now is the time for embellishments if you want them. It can be fancy designs or just some simple decorations, but these finishing touches turn your DIY railing from something practical to make your home safer and more stylish.
Step 6: Final Examination
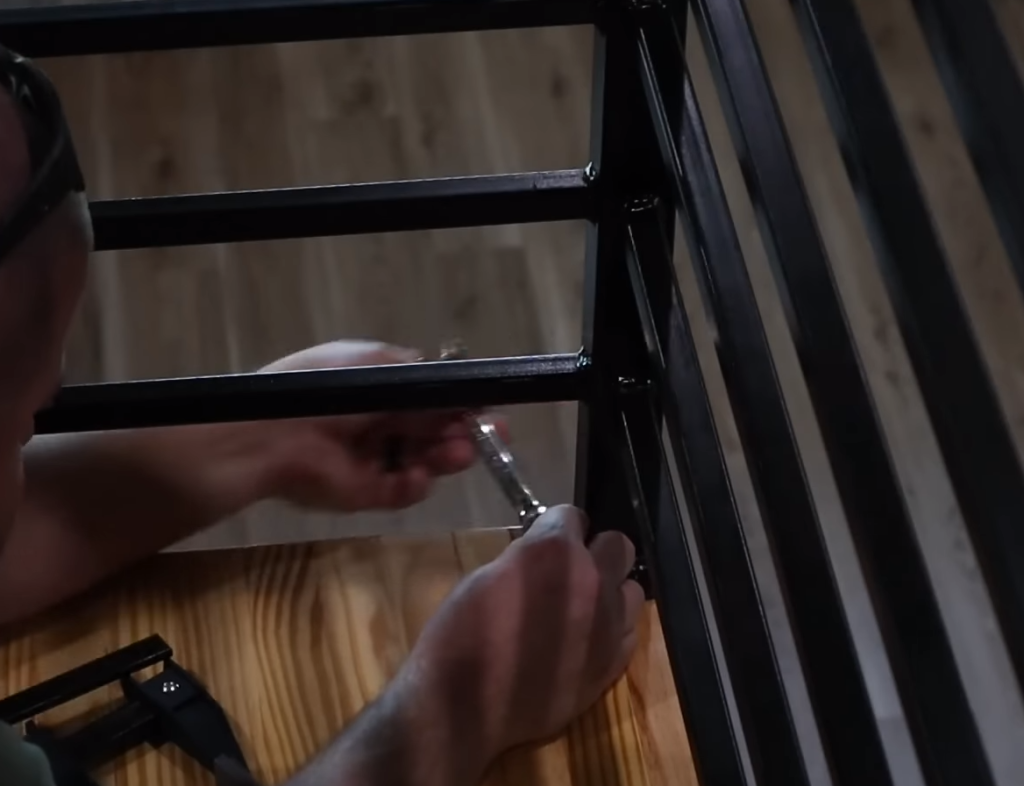
In your DIY stair railing final test, check every detail for possible mistakes or defects instead. First, make sure that each part is firmly attached. Make sure that balusters are securely fastened to the base rail with proper screws or nails. Check the handrail for sturdiness, ensuring it is tightly fastened to both newel posts and balusters.
Check for any gaps or misalignments in the components that can be seen. If you find errors, fix them immediately so that your finished work is neat. Make sure that balusters are evenly spaced and the railing as a whole is straight with measuring tape level.
Deal with adjustments for DIY stair rails where possible. Also, add more screws using a screwdriver if a particular component seems loose, or apply some glue to provide additional support. Smooth any rough edges or surfaces to achieve a smooth finish.
Note this last check is important for the overall success of your do-it yourself stair railing project. By eliminating errors and providing secure connections, you will obtain a professional-looking appearance.
Safety and Precautionary Measures While Setting Up DIY Stair Rail
When beginning your homemade stair railing, safety should be first. To ensure a secure and hazard-free installation, follow these comprehensive precautionary measures:
Preparatory Precautions:
First, rid the workspace of any clutter or obstacles before jumping in. Find a sturdy ladder and provide good lighting for your project. Wear safety gear – gloves, goggles and ear protection to shield yourself from probable hazards.
Material Selection Precautions:
Choice of good quality durable materials for DIY stair handrails that meet safety standards. Inspect the wood for defects or signs of weakness before cutting it. Ensure that all tools are in good working order. Do not use damaged or dull blades to eliminate the probability of accidents during construction.
Installation Precautions:
Glue together or weld all the parts of the DIY stair rail neatly with no loose or even wobbly elements. Be very cautious while dealing with power tools, and ensure you always double-check your measurements to general Precautions: avoid errors.
General Precautions:
To ensure that the workplace remains clean and orderly during this project. Do not allow children and pets to get near the construction site. Finally, use the instructions of manufacturers for any devices or tools used during this process.
Conclusion
In conclusion, you’ve armed yourself with the knowledge required to take down DIY handrail installation. Your newly acquired skills make your home very personal. Dive in – don’t just dream about your handrail; make it happen! First and foremost, motivate yourself to go ahead, pick up the tools now and start empowering your unique masterpiece of a staircase. Your home deserves that uniqueness, and you have the power to make it happen.
Are you ready for this journey? For the best DIY Staircase railing installation tools choices, check out VEVOR’s catalog. Raise your level of craftsmanship by using their quality tooling. Changing your staircase is not just a project; it’s an embodiment of style. Take that opportunity to be creative and individual by using stairs. Unleash the DIY stair railing spirit, and let VEVOR help you create the ideal stair handrail for your space.


