
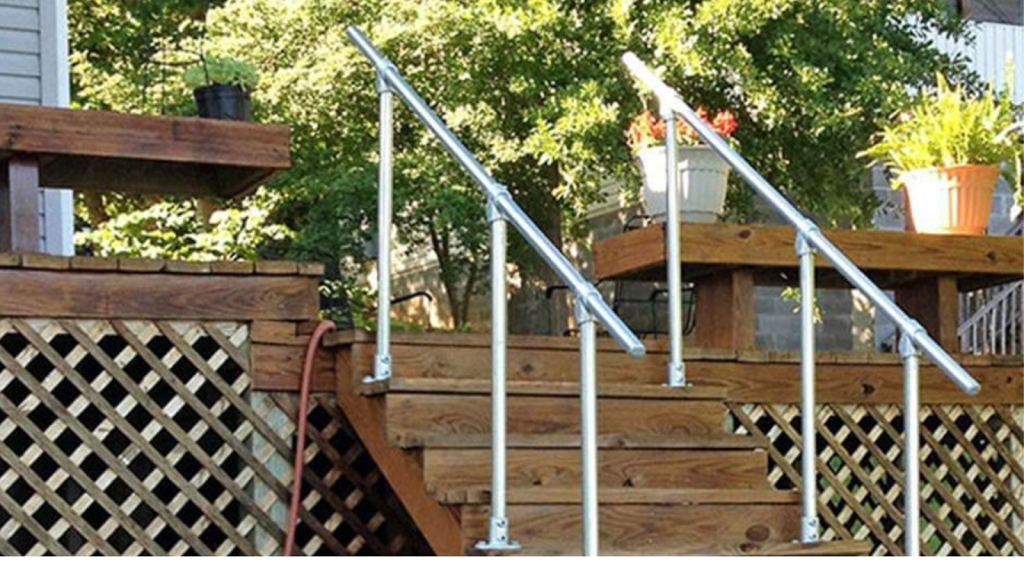
Elevate your outdoor spaces with your craftsmanship on a DIY outdoor stair railing project. Here is a complete guide for everyone, including a pro craftsman or a novice. Follow the easy step-by-step procedure to DIY outdoor stair railings for your porch or deck – the perfect way.
By learning the DIY procedure for crafting a handrail on the stairs you provide safety for children or elders of your home. It also increases the aesthetics and adds a touch of class to the exterior of your property. With it comes the advantage of having DIY satisfaction for tackling the installation and crafting of the stair railing – on your own.
Ready to dive in? Let’s break down the process, step-by-step so you can easily tackle the crafting of stairs handrailing for your outdoors from scratch.
Table of contents
Tools/Materials Required to DIY Outdoor Stair Railing
Gather your tools right there for you before actually trying to hit the stair railing DIY.
Tools You Need To DIY Outdoor Stair Railing
To install stair railing on 3-4 steps, you can use this VEVOR black handrail for outdoor steps, which has a distance of 43.8” between the upper and the lower post. For this particular design the height of the stairs can be only 26” (66 cm). To match the stair railing for your particular need you can check these VEVOR handrails to align with your project.
For the design we are working on today, for this DIY stair handrails: you need the following tools.
- Driveway Markers
- Hammer
- Safety Bollard 48 Inch
- Rotary Hammer Drill Corded Drills 1-1/4″ 4 Modes SDS-Plus Chipping Hammers
- 3/8″ Cordless Electric Ratchet Wrench Set
- Safety glasses to protect your eyes from flying metal shavings
- 4 Bolts(Anchor bolts) to bind your posts to the concrete.
- Level for alignment.
- Measuring Tape for precise measurement.
- Vacuum
Materials Needed For DIY Outdoor Stair Railing
In our case, for the concrete steps, we need a metal railing, so these are the materials we require.
- 6-foot, 1.25-inch structural pipe
- 3-foot, 1.25-inch structural pipes(need 2)
- 1.25-inch end caps(need 2)
- 1.25-inch, 45-degree short tee fittings(need 2)
- 1.25-inch floor flanges(need 2)
How To DIY Metal Handrails For Outdoor Concrete Steps
Pre-Assembly
Before you install the stair railing you need first to do some pre-assembling of the parts.
- Loosely tighten all Allen screws in fittings.
- Secure 3-foot pipes into floor flanges and tighten.
- Mount and tighten 45° short tees on top of 3-foot pipes.
- Slide 6-foot pipe through short tees and tighten.
- Omit end caps for easier assembly on the stairs.
As you have set the railing now it is time to test where you want to place the floor flanges.
You need to select the meatiest part on the stairs for placing your floor flanges; make sure you avoid the edges.
Use levels to determine if the railing is straight upright making a right angle. For longitudinal alignment, it is good if you can visually check if the pipes are aligned.
Now, you need a marker to make a dot on the steps for each anchor bolt hole.
Once you have finished marking the dots at the correct places, time to disassemble the railing and lay them aside.
Anchor Holes Drilling
To mark the drill depth, you need to first measure your anchor bolts, and add ¼ inch to that measurement. Now you need to mark your hammer drill’s bit with tape for exact measurement of the holes.
Make sure to drill straight and drill till the drill bit reaches the tape mark on it for secure anchoring.
Use the vacuum to dust out the holes; now it’s time to mount the floor flanges.
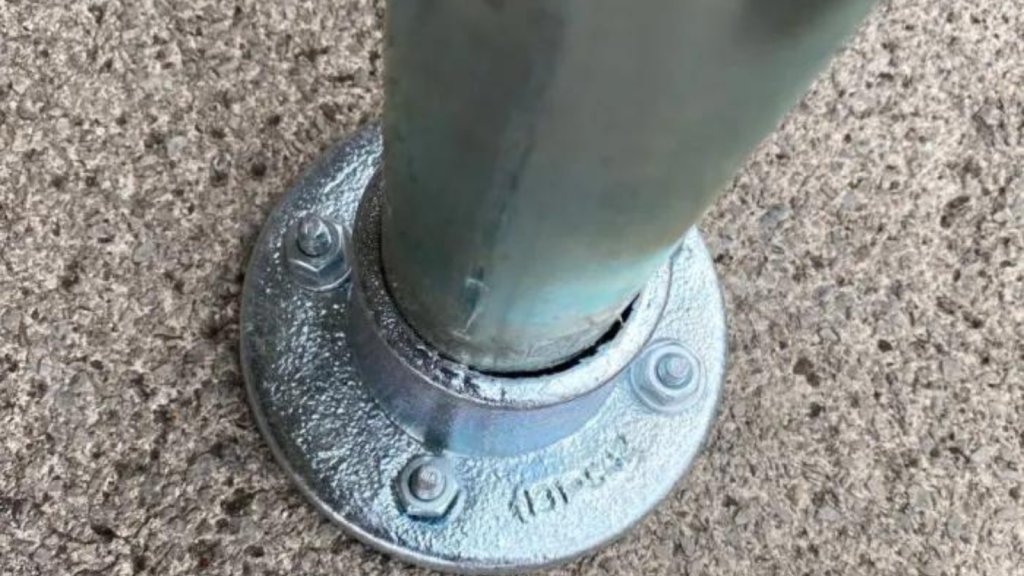
Mounting of Floor Flanges
As you have drilled the holes, it’s time to place the floor flanges right over the drilled holes, you know alignment is important in any DIY. Next, you need to insert the bolts through the flanges hole; it is ideal to tighten the screws into holes by using a hammer. To tighten the nuts over the top screws, you must use a wrench but avoid over-tightening.
Time To Mount Small Pipes With Short Tees
Now, you need to mount one small tee on the 3-foot short pipes; each pipe has 1 short tee on the upper part, and the lower part goes in the flanges. Tighten it enough so it stays in place, you have to anyways adjust it later for perfect angle and alignment.
Make sure you won’t tighten the short tee too much because you will need further adjustments later.

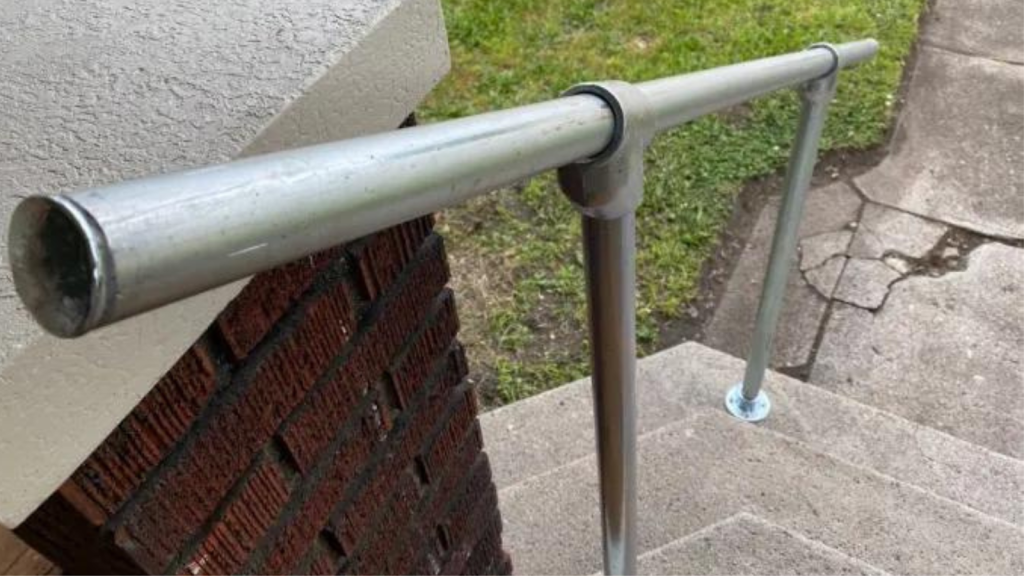
Time To Install Big Railing(6 foot)
Get the 6-foot-long pipe you have and slide it through the short tees over the small pipes. Make sure the long pipe has the same distance extended on both sides. Time for loosely tightening the short tees.
Final Adjustments
You need to make two different adjustments to get the accurate stair railing, first you may loosen or tighten the floor flanges and second, loosen or tighten the small tees so the 6-foot pipe has the right placement you need.
Once everything is according to your needs, you need to tighten the flanges and the tees to get accurate stair hand railings for your outdoor concrete steps.
After everything is in place, you need to cap the long pipe on both ends. You can use a hammer to install and fix those end caps.
Time To Enjoy Your DIY Outdoor Hand Rails
Now as you have installed the pieces together, you can enjoy your outdoor stair rails for years to come; you will only sometimes need to tighten the screws, but other than that, it is totally sturdy and will remain maintenance-free.
Time To Enjoy Your DIY Outdoor Hand Rail
Now as you have installed the pieces together, you can enjoy your outdoor stair rails for years to come; you will only sometimes need to tighten the screws, but other than that, it is totally sturdy and will remain maintenance-free.
Tips On Outdoor Handrail DIY: Expert Tips For Best Results
To get your DIY outdoor stair railings in the most desirable form, you need to follow the expert tips that we have gathered for you.
By following these tips, you will be able to get the outdoor stair handrail with the best results.
- Planning is an important part you need to do detailed planning. It is good if you sketch the detailed plan layout.
- Gathering all materials before you actually carry on the installation of the stair railing is essential, so you may have all the things you require to DIY your hand on the best stair railing you can do yourself.
- Safety comes first; whatever you do, have personal safety by wearing protective gear.
- Property safety is also important; make sure you carry on each process at a distance from the windows of your home so there may not be any damage to the property.
- Always make sure you know the building codes of the community you are living in, better safe than sorry.
- Check two to three markets before you buy your materials so you get the right material within your budget.
- You can check different materials and styles to make your railing unique and, most importantly, within your budget and according to your needs.
FAQs about DIY Outdoor Handrails
Conclusion
Crafting metal handrailings for your outdoor stairs was a journey, and you have made that journey possible with your skills and expertise. You learned how to precisely take the measurements and install the metal handrails for your concrete steps outdoor. If you want that the hand railing is secured you need to make sure you follow each step given above. Always try to utilize expert tips in making your DIY project successful. If you wish to have an easy installation of the handrailing, you must check out the high-quality handrails available at VEVOR for your next DIY project.


