It is critical to keep dental instruments clean to ensure patient safety and avoid cross-contamination. This is done more easily, efficiently, and less work-intensive with a dental ultrasonic cleaner machine, which employs high-frequency sound waves to eliminate debris in hard-to-reach spaces. Whether it is a busy dental clinic or a small practice, selecting an appropriate cleaner can enhance performance and support appropriate sterilization practices. This guide will discuss the working principle, main parts, main features, correct use, care, and purchase of a dental ultrasonic cleaner machine to help you find the most appropriate equipment to suit your professional cleaning requirements.
Table of Contents
What Is a Dental Ultrasonic Cleaner Machine and Why Is It Used?
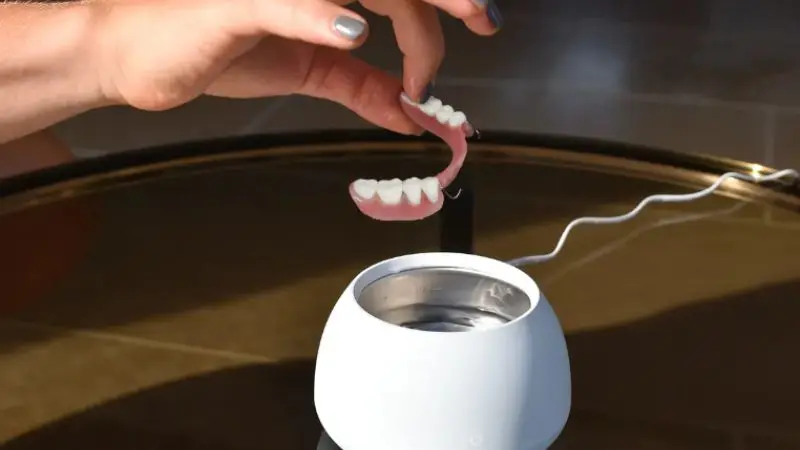
The instruments used in the dental profession come into contact with saliva, blood, and other dirt; therefore, cleaning is a crucial aspect of infection control. An ultrasonic cleaner machine is used to remove debris prior to sterilization, so the instruments are ready to be used safely again. Learning how these machines operate and the various models they have can enable you to choose the appropriate model to use in your dental practice.
What Is a Dental Ultrasonic Cleaner Machine?
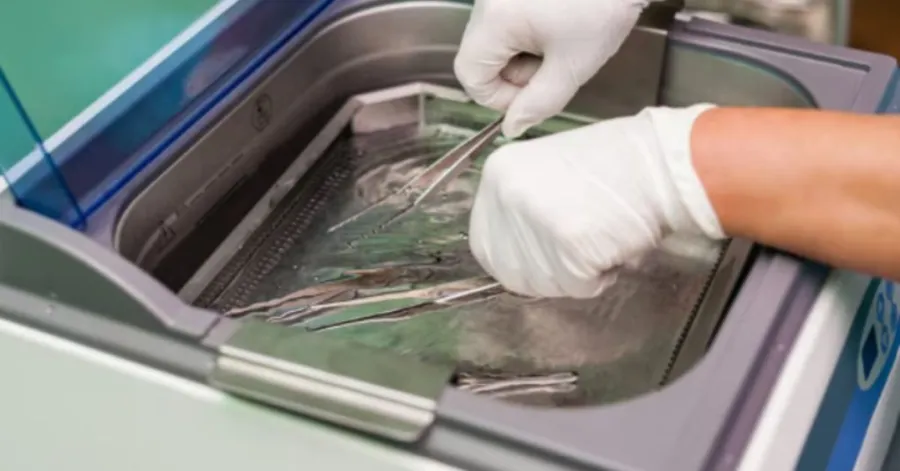
A dental ultrasonic cleaner machine is a specialized machine that cleans dental instruments with the help of high-frequency sound waves. The machine does not use manual scrubbing, but instead generates microscopic bubbles in a cleaning solution. These bubbles burst quickly, releasing blood, plaque, tissue, and other contaminants on instrument surfaces. This cleaning technique can access small crevices and hinges that are usually missed by brushes. Ultrasonic cleaning is effective in eliminating debris, but the instruments still have to be sterilized. A digital dental ultrasonic cleaner also allows accurate control of cleaning time and temperature, making the cleaning process more effective and uniform in busy dental clinics.
Why Dental Clinics Use Ultrasonic Cleaning
Ultrasonic cleaning is important in dental clinics because it provides predictable results and reduces the time spent cleaning dental equipment manually. An effective dental-instrument ultrasonic cleaner is of high quality and can reach hard-to-reach spots without harming sensitive instruments. This enhances cleaning quality and reduces the risk of cross-contamination before sterilization. Ultrasonic cleaning also minimizes staff contact with infected equipment during manual cleaning, which can contribute to a safer workplace. Many clinics prefer a professional dental ultrasonic cleaner because it handles larger instrument loads, improves workflow, and supports strict infection control requirements in today’s dental practice.
Types of Ultrasonic Cleaner for Dental Instruments
There are various types of ultrasonic cleaners for dental instruments, and the choice depends on the workload and size of the clinic. Smaller practices with fewer patients per day would use compact units, whereas busier dental offices cleaning multiple sets of instruments each day would use larger capacity machines. Other models have heating features that enhance cleaning performance by helping cleaning solutions work more efficiently. A computerized dental ultrasonic cleaner has programmable settings, timers, and temperatures,s which are more convenient and consistent. When selecting the appropriate machine, you will need to consider the instrument volume, the space available to you, cleaning needs, and the functions your clinic must have.
Professional vs. Tabletop Dental Ultrasonic Cleaner
Professional models and tabletop models offer good cleaning, but they suit various purposes. A professional dental ultrasonic cleaner is designed for daily use, has larger cleaning tanks, and greater capacity for instruments, which makes it best suited to hospitals and busy dental clinics. Comparatively, a tabletop dental ultrasonic cleaner is small, can fit on countertops, and would be appropriate in smaller dental offices or in a personal practice. Although tabletop units take up less space, professional models usually have advanced controls, heating, and larger tanks that improve efficiency when processing multiple batches of instruments.
How Does a Dental Ultrasonic Cleaner Machine Work?
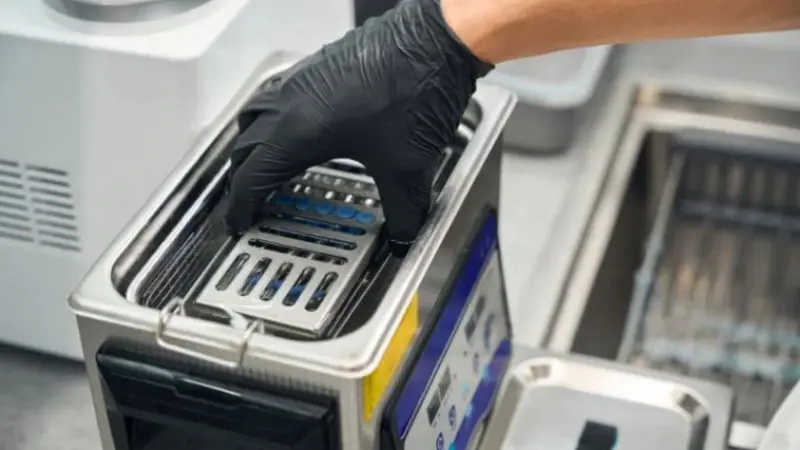
New-generation ultrasonic cleaners use advanced sound waves to clean contaminants without harsh scrubbing. The process is not rough on dental equipment and efficiently cleans areas that are hard to reach by hand. Knowing how a dental ultrasonic cleaner machine works can help you understand why it has become an ordinary part of instrument cleaning before sterilization.
The Science of Ultrasonic Waves
To know how a dental ultrasonic cleaner machine works, it is important to first know what ultrasonic sound waves are. The machine transforms electrical energy into high-frequency vibrations using transducers in the cleaning tank. The vibrations are passed through the cleaning solution, resulting in millions of microscopic bubbles. Since the bubbles are created throughout the liquid, each instrument immersed in it is cleaned evenly. Compared with manual methods, ultrasonic wave cleaning can be done on complex instrument shapes without handling them too much. This technology provides reliable, clean performance and helps maintain the condition and lifespan of valuable dental tools.
How Cavitation Removes Dirt and Debris
The most important process that contributes to the effectiveness of ultrasonic cleaning is cavitation. Rapidly developing and breaking microscopic bubbles release tiny bursts of energy that loosen dirt, blood, tissue, polishing compounds, and other contaminants on instrument surfaces. These bubbles enter narrow, hinged, serrated, and textured surfaces that are difficult to clean with a brush. Since the cleaning process takes place in the solution, even the instruments are cleaned without being abrasively cleaned. This makes ultrasonic cleaning a reliable technique for cleaning dental instruments before the sterilization process begins.
Step-by-Step Cleaning Process
The cleaning process begins by filling the ultrasonic tank with water and a suggested cleaning solution. Dental instruments are placed in a basket so they are not in direct contact with the tank surface. Upon activating the machine, the ultrasonic waves create cavitation bubbles, which clean all exposed surfaces. Once the cycle is complete, the instruments are removed and washed with clean water before being dried completely. They are then checked for any remaining debris and then proceed to the sterilization process. These steps can be used to achieve effective cleaning and contribute to the proper process of infection control.
The Role of Cleaning Solutions
Cleaning solutions are also a significant component of ultrasonic cleaning, in that they aid in the dissolution of oils, proteins, and organic debris more effectively than water alone. Most dental ultrasonic cleaners are best matched with specially developed enzyme or instrument cleaning solutions to boost cavitation. The right solution helps protect dental instruments and improves cleaning efficiency. Household detergents or harsh chemicals should not be used, as they can destroy instruments or weaken cleaning. It is important to follow the cleaner manufacturer’s recommendations to achieve consistent results and prolong the life of the machine and dental tools.
How Long Does an Ultrasonic Cleaning Cycle Take?
Most ultrasonic cleaning cycles take five to fifteen minutes, though this varies depending on the contamination level, the type of instrument, and the machine settings. Heavily contaminated instruments might take a slightly longer cleaning cycle, while lightly used instruments tend to clean faster. A dental ultrasonic cleaner is a digital device that lets you fine-tune the cleaning time for each instrument load. The right choice of the cycle enhances cleaning performance without exposing instruments to unnecessary processing. By adhering to the cleaning time recommended by the manufacturer, you can ensure efficient cleaning and the durability of your dental equipment.
Main Parts of a Dental Ultrasonic Cleaner Machine
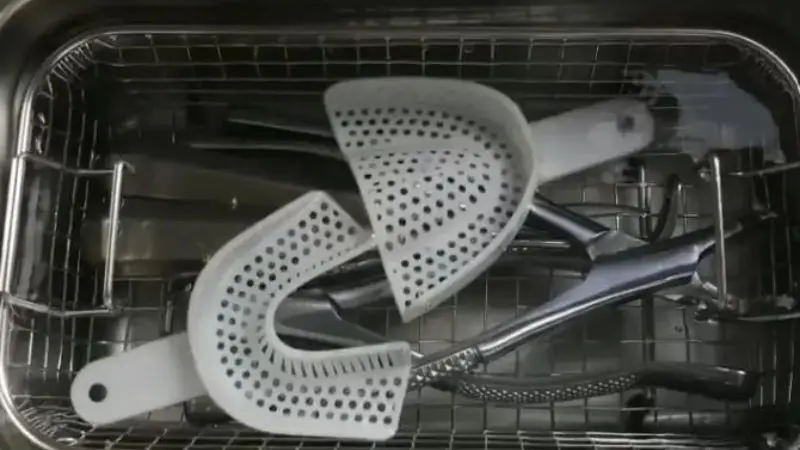
A dental ultrasonic cleaner machine consists of several key components that work together to provide consistent cleaning results. Each part performs a specific task, including generating ultrasonic waves and supporting instruments safely during the cleaning process. Knowing these sections helps you use the machine properly, maintain it regularly, and choose the appropriate model for your dental clinic.
Stainless Steel Tank and Cleaning Basket
The primary chamber where the cleaning process is performed is the stainless steel tank. It is built to avoid corrosion, endure daily wear, and conduct ultrasonic energy effectively throughout the cleaning solution. Most quality machines use medical-grade stainless steel, which makes them durable and provides long-lasting service. Within the tank, there is a cleaning basket that holds dental instruments at the top of the tank, above the bottom, so the ultrasonic waves travel uniformly around all surfaces. The instruments are also stored in the basket to avoid scratches and unwarranted wear. A heavy tank and a basket enhance cleaning efficiency and preserve precious dental equipment.
Ultrasonic Transducers and How They Work
The elements that produce sound waves that clean the dental instruments are referred to as ultrasonic transducers. These transducers convert electrical energy into high-frequency vibrations, which are transmitted through the cleaning solution. When the vibrations propagate within the liquid, they create millions of microscopic-sized bubbles that form and burst very rapidly. This is referred to as cavitation, which removes blood, tissue, plaque, and other contaminants in the hard-to-reach places. To achieve a balanced distribution of energy, there are often more than one transducer on a professional dental ultrasonic cleaner such that the equipment has an equal share of deep cleaning in each cycle.
Heating System and Temperature Control
Numerous ultrasonic cleaners have a heating system to enhance cleaning efficacy. A warm water solution is more effective at dissolving proteins, oils, and organic debris than cold water alone. Temperature controls enable you to set the heat based on the cleaning solution and the type of dental instruments being processed. Keeping the correct temperature enhances cleaning efficiency and helps keep delicate instruments from unnecessary exposure to excess heat. By following the manufacturer’s instructions, you can ensure the heating feature is safe and provides consistent cleaning results each cycle.
Digital Features That Make Cleaning Easier
A computerized ultrasonic cleaner for teeth comprises advanced controls that simplify everyday use and precision. Digital displays enable you to program cleaning time schedules, adjust temperatures, and regulate every cleaning cycle accurately. Many models also include preset programs, automatic timers, and safety shut-off features, making routine cleaning easier. These features help minimize manual changes and improve uniformity across cleaning cycles. Digital controls in busy dental clinics enhance efficiency and simplify processing multiple batches of instruments without compromising cleaning quality and reliability.
How to Choose the Right Tank Size
The tank size to select is determined by the number of dental instruments your practice cleans a day. A small clinic can use a small tabletop dental ultrasonic cleaner that occupies less space and is still able to perform regular cleaning work. Larger practices may need larger tanks to clean more than one set of instruments at a time, improving the workflow and reducing waiting time. Choosing a machine with the appropriate capacity also helps reduce water and cleaning solution waste. When buying an instrument, first think about your daily use volume, the space you have, and how much you expect to grow before buying a new instrument.
How to Use a Dental Ultrasonic Cleaner Machine Step by Step
Operating a dental ultrasonic cleaner machine properly can improve cleaning outcomes and reduce unnecessary damage to dental tools. The correct procedure also improves workflow and ensures that the instruments are ready to be sterilized. Knowing every step will make daily cleaning more effective and support a high level of hygiene in every dental practice.
Prepare Dental Instruments Before Cleaning
Prior to placing instruments into an ultrasonic cleaner, take out the large visible debris by rinsing them as per the manufacturer’s instructions. Movable and hinged jointed instruments should be opened to allow access of all surfaces by the cleaning solution. The disposable items should not be put in the machine, and broken tools must be separated to be examined or fixed. The separation of instruments based on material and cleaning requirements enhances efficiency in cleaning as well. The cleaning process is carried out successfully with the help of ultrasonic cleaning that is fully prepared to clean the contaminants, and instruments are prepared to be sterilized.
Fill the Tank with the Right Cleaning Solution
Always make sure the cleaning tank is filled with the required quantity of water and a cleaning solution specially formulated to clean dental instruments. The appropriate solution enhances the cavitation process by breaking down blood, proteins, saliva, and other organic debris. Do NOT use household detergents or harsh chemicals, as they can ruin the machine and dental instruments. For optimal cleaning, fresh cleaning solution must be made as per the manufacturer’s instructions and changed often. The ultrasonic cleaner of dental instruments can be used reliably in all cleaning regimes using the appropriate solution.
Place Instruments Correctly in the Cleaning Basket
Put the instruments in the cleaning basket in a stacked and non-stacked manner. Adequate spacing enables the ultrasonic waves to freely circulate around all instruments, giving clean results. Hinged instruments must be left open to allow the cleaning solution to access small joints and concealed places. Do not put instruments directly on the bottom of the tank since it can decrease cleaning performance and damage the tank and the instruments. Proper loading enhances the cavitation, safeguards precious equipment, and makes sure that each tool is clean before proceeding to the sterilization step.
Start and Complete the Cleaning Cycle
After loading the instruments, use the recommended cleaning time and temperature based on the manufacturer’s instructions. A computerized dental ultrasonic cleaner simplifies this process and has programmable controls and precise timers. Turn the machine on and make sure the cleaning cycle is complete. As the cycle runs, ultrasonic waves generate cavitation bubbles, which remove contaminants from all exposed surfaces. Finishing the entire cleaning process improves cleaning performance and prepares instruments for the next phase of reprocessing without causing unnecessary wear.
Rinse, Dry, and Prepare for Sterilization
Once the cleaning cycle has been completed, wipe the instruments out of the basket and rinse them well with clean water to remove the cleaning solution. Wipe all instruments with a lint-free cloth or compressed air (when needed). Before packaging each item to be sterilized, inspect it carefully to make sure that no noticeable debris is left. Keep in mind that ultrasonic cleaning does not sterilize instruments; it only cleanses them. Combined rinsing, drying, inspection, and sterilization are the best assurance that dental instruments are safe to use in the clinic.
Mistakes to Avoid When Using the Machine
There are a number of common errors that can lower cleaning efficiency and decrease the lifespan of your equipment. When the basket is overloaded, the ultrasonic waves cannot reach all surfaces, and when the appropriate cleaning solution is not used, cleaning performance can decrease. Laying instruments on the bottom of the tank can destroy instruments and the machine. Cavitation is also limited when the cleaner runs with old or contaminated solution. Selecting an appropriate dental ultrasonic cleaner is just one step. Proper use, adherence to maintenance regimes, and frequent replacement of cleaning solution will ensure consistency in cleaning over the years.
Wrap Up
One of the dental instruments necessary to clean dental instruments prior to sterilization is a dental ultrasonic cleaner machine. Knowing its parts, working mechanism, and significant purchasing attributes, you can select equipment that addresses the needs of your clinic on a daily basis. Investing in a professional dental ultrasonic cleaner is worth it to enhance cleaning efficiency, preserve valuable tools, and uphold infection control standards. Maintenance and proper functioning also help extend the machine’s life and maintain stable performance. Whether you need a small tabletop unit or a larger electronic one, choosing the right machine offers long-term, reliable cleaning for all dental offices.
FAQs
How does a dental ultrasonic cleaner machine work?
A high-frequency sound wave in a dental ultrasonic cleaner machine forms bubbles of cavitation that remove dirt, blood, and debris in dental tools prior to sterilization, even in areas that are hard to access.
Is ultrasonic cleaning able to sterilize dental instruments?
No. Ultrasonic cleaning can clean instruments, but does not sterilize them. All instruments should be rinsed, dried, and sterilized with an acceptable dental sterilization technique after cleaning.
What cleaner ought I to use?
When cleaning the instruments in an ultrasonic cleaner, always apply a cleaning solution that is specifically designed to be used in the cleaner. These solutions enhance cleaning performance and guard the machine and dental equipment.
What influences the price of the dental ultrasonic cleaner machine?
The price of the dental ultrasonic cleaner machine varies with the tank size, ultrasonic power, heating option, digital control, build quality, brand, warranty, and other features included with the machine.
Which is the best dental ultrasonic cleaner machine?
The best dental ultrasonic cleaner machine depends on your clinic’s workload, tank capacity, digital capabilities, longevity, and cost. Select a quality model that suits your day-to-day cleaning requirements.