
Fixing your bike at home saves money and gives you more control over your repairs. You might find that a do-it-yourself bike repair stand makes the job easier and fits your space better than store-bought options. Many riders turn to DIY bike repair stand setups for a cheap and creative way to keep their bikes ready for the next ride.
With a do-it-yourself bike repair stand, you can customise every detail. Consider your tools, your home space, and how you envision your DIY home bicycle repair stand functioning. Homemade bicycle repair stands let you tackle repairs like a pro with a bicycle repair stand made just for you.
Quick Guide
Choosing a Stand
Choosing the right bike repair stand can feel tricky, but it doesn’t have to be. Start by thinking about how you like to work on your bike. If you want a project that saves money, a DIY bike repair stand might be perfect for you. Here are some quick tips to help you choose:
- If you want something quick and straightforward, look for an easy-to-build bike stand.
- For small spaces, try a wall-mounted or collapsible stand.
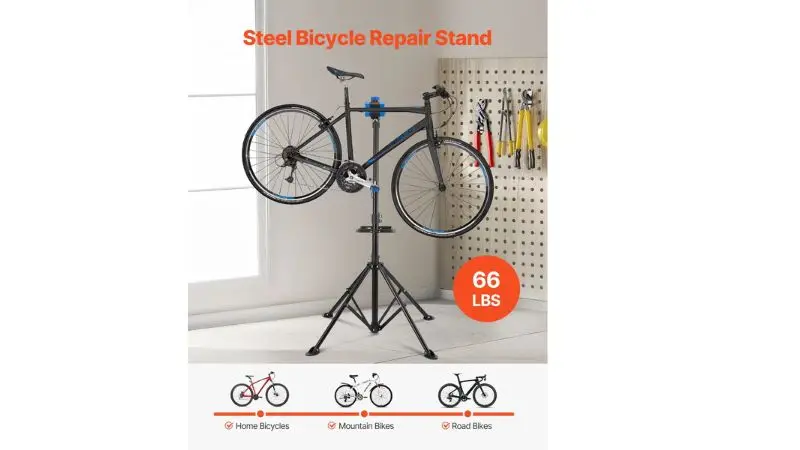
- If you work on heavy bikes, choose a sturdy design, such as a steel pipe or a sawhorse stand.
- Want to move your stand around? Portable stands or a PVC bike repair stand are suitable options.
Factors to Consider
Before you start building, think about a few essential things:
- Budget: Some stands cost almost nothing if you use scrap materials.
- Tools: Check if you have the right tools for the job. Some stands require only a drill and a saw.
- Space: Measure your workspace. Ensure your stand fits and leaves sufficient room for movement.
- Bike Type: If you have a carbon bike, avoid clamping the frame. Use a stand that holds your bike by the seatpost or wheels.
Wood Stands
Wood makes an excellent choice for building your DIY bike repair stand. You can find scrap pieces in your garage or pick up supplies at a local hardware store. Wood stands feel solid, look good, and you can shape them to fit your space. Let’s check out some creative ideas you can try at home.

Scrap Wood Stand
Do you have leftover wood from another project? You can turn those scraps into a handy DIY bike repair stand. Start by gathering sturdy pieces, such as 2x4s or plywood. Build a simple “T” or “H” shape for the base. Add a vertical post to hold your bike.
Use a clamp or a padded hook at the top to support the frame or seatpost. You don’t need fancy tools. A saw, some screws, and a drill will do the job. You can even paint or stain the wood to match your garage or shed.
Sawhorse Stand
A sawhorse stand gives you a sturdy DIY bike repair stand that can handle heavy bikes. You can use two wooden sawhorses and a long wooden beam. Place the beam across the sawhorses. Hang your bike by the saddle or top tube using straps or hooks.
This setup feels stable and provides ample room to work. You can move the sawhorses around or fold them up when you finish. If you’re looking for a cost-effective and durable option, this design is well-suited for most home mechanics.
Folding Plywood Stand
If you need to save space, try a folding plywood stand. Cut two large pieces of plywood into matching shapes, like an “A” frame. Connect them with hinges at the top. Add a crossbar or shelf for extra support.
Attach a clamp or padded hook to hold your bike. You can fold this stand flat and store it behind a door or in a closet. It’s light enough to carry outside on sunny days.
Wall-Mounted Clamp
A wall-mounted clamp saves floor space and keeps your bike off the ground. Mount a strong wooden bracket or arm to a wall stud. Attach a clamp or padded hook at the end.
Swing the arm out when you need to work on your bike, then fold it back when you finish. You can adjust the height to fit your bike. Ensure you use strong screws and anchors to keep the stand securely in place.
Metal & Pipe Stands
Metal and pipe stands give you a strong and reliable way to hold your bike. These stands work great if you have a heavy bike or want something that lasts a long time. You can use metal pipes, PVC, or even old metal frames.
PVC Pipe Stand
PVC pipe stands are lightweight, inexpensive, and easy to assemble. You can find PVC pipes at any hardware store. Cut the pipes to the required size and connect them using elbows and tees. Make a base, then add a vertical post to hold your bike.
Use a clamp or a padded hook at the top. PVC stands work well for lighter bikes, but you can make them stronger by using thicker pipes. It is one of the cheap do-it-yourself bike repair stand ideas.
Steel Pipe Stand
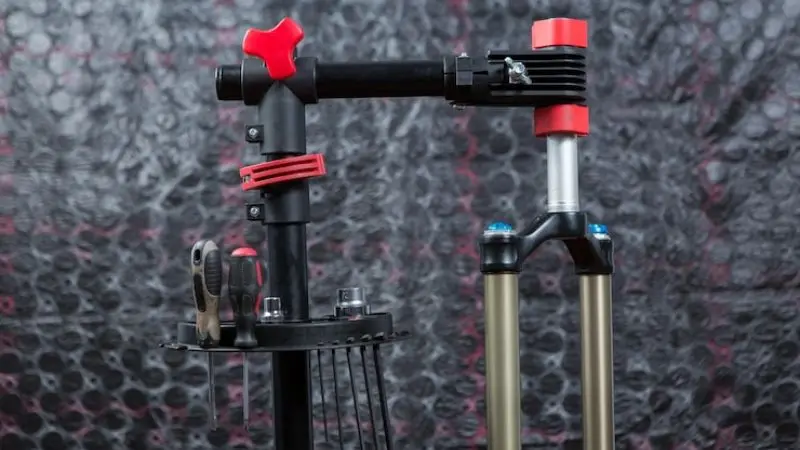
Steel pipe stands feel solid and can hold even the heaviest bikes. You can use threaded steel pipes and fittings to build a custom frame. Make a broad base for stability. Add a vertical pipe and attach a clamp or cam-actuated micro clamp at the top.
This type of clamp lets you hold your bike tightly without damaging the frame. Steel pipe stands cost more than wood or PVC, but they last for years. You can paint the pipes to stop rust and make your stand look cool.
Tripod Conversion
Do you have an old tripod? You can turn it into a DIY bike repair stand. Attach a clamp or padded jaw to the top of the tripod. Adjust the legs to get the right height and angle.
Tripods fold up small so that you can store them anywhere. This stand works best for light to medium bikes. It’s a great choice if you’re looking for something portable.
Recycled Metal Frame
You can build a stand from old metal furniture or scrap metal. Look for a sturdy frame, like an old table or chair base—Weld or bolt on a vertical arm. Add a clamp or hook to hold your bike. This idea lets you recycle and save money.
Metal and pipe stands offer numerous options for building a sturdy, long-lasting DIY bike repair stand. Try one of these ideas if you want something that can handle any bike you own.
Everyday Items

Ladder Stand
You may have a ladder in your garage or basement. You can turn it into a quick DIY bike repair stand. Just open the ladder and place your bike’s top tube across one of the rungs. Use a bungee cord or a strap to keep the bike steady.
This setup works well for cleaning your chain or adjusting your gears. You can move the ladder anywhere. When you’re finished, simply fold it up and store it away. This idea works best for light repairs.
Workbench Clamp
A workbench clamp can hold your bike steady while you work on it. If you have a sturdy workbench, attach a large clamp or vice to the edge. Place your bike’s seatpost or a safe part of the frame in the clamp. Tighten it gently so you don’t crush the tube. This method provides a firm hold without requiring a new stand.
Trunk Rack Repurpose
Do you have an old trunk bike rack? You can use it as a repair stand. Set the rack on a sturdy table or against a wall to ensure stability. Hang your bike on the arms, just like you would on your car.
Secure the bike with straps. This trick saves money and gives your old rack a new job. You can even take it outside for repairs on sunny days.
Storage Hook Stand
A heavy-duty storage hook can turn into a simple bike stand. Screw the hook into a ceiling joist or an intense beam. Hang your bike by the front wheel or the saddle.
This setup lifts your bike off the ground, so you can spin the wheels and work on the drivetrain. You can use this idea in a garage, basement, or even a shed. It keeps your bike out of the way when you’re not fixing it.
Portable & Space-Saving
Collapsible Stand
You want a stand that disappears when you finish fixing your bike. Try building a collapsible stand. Use folding legs and a removable clamp. You can make the frame from wood, metal, or even PVC. When you finish, fold it up and slide it under your bed or into a closet. This idea works well if you live in a small apartment or need a portable bike repair stand for travel.
Door Frame Clamp
A door frame clamp lets you turn any doorway into a repair spot. Use a padded clamp that grips the frame without leaving marks. Hang your bike by the seatpost or top tube. You can set this up in seconds and take it down just as fast. This portable bike repair stand works exceptionally well if you don’t have much floor space.
Tabletop Mini Stand
Sometimes you just need to fix a flat or adjust your gears. A tabletop mini stand helps you do quick repairs. Build a small frame from wood or metal. Add a clamp or a padded slot for your bike. Place it on a sturdy table. You can carry this stand anywhere, so it is perfect for a portable setup.
Over-the-Door Hanger
An over-the-door hanger gives you a clever way to lift your bike off the ground. Use a strong hook or padded arm that hangs over the top of a door. Hang your bike by the saddle or handlebars.
This stand saves space and keeps your bike out of the way. If you want a portable solution, these ideas help you fix your bike anywhere. You do not need a big garage or fancy tools..
Upcycled Ideas
Office Chair Base
Do you have an old office chair that squeaks or wobbles? You can turn that base into a sturdy bike repair stand. Remove the seat and keep the wheeled base. Attach a vertical pipe or wooden post where the seat used to be.
Add a clamp or padded hook at the top. Now you have a mobile stand that rolls around your workspace. You can move this stand anywhere in your garage. The wide base keeps your bike steady while you work.
Camera Tripod Stand
A camera tripod can become a handy bike repair stand. Open the tripod legs wide for stability. Attach a clamp or padded jaw to the top where the camera would go. Place your bike’s seatpost or top tube in the clamp. You can also use the old bike stand as a repair stand.
Pallet Wood Stand
Pallets are readily available and often free. You can build a strong bike stand with just one pallet. Cut the pallet into sections. Stack and screw the pieces together to make a base and a vertical support. Add a hook or clamp at the top.
You can paint or stain the wood for a custom look. This stand feels solid and provides a secure place for your bike’s repairs.
Bike Parts Stand
Do you have old bike parts lying around? Use them to build a unique repair stand—Weld or bolt together old handlebars, seatposts, or frames. Create a base with a wheel or crankset. Attach a clamp or hook at the top.
This stand shows off your creativity and keeps old parts out of the landfill. You get a one-of-a-kind repair stand that fits your style.
Do It Yourself Bike Repair Stand Comparison
When you consider all these creative ideas, you may wonder which do-it-yourself bike repair stand best suits your needs. You should compare each bicycle repair stand by cost, difficulty, portability, and sturdiness.
Cost Overview
You can build a simple bicycle repair stand using scrap wood, PVC, or repurposed furniture. Most ideas cost very little, especially if you use things you already have. Some stands, such as the steel pipe or folding plywood, require a few additional supplies. To save money, opt for a design that utilises recycled or leftover materials.
Difficulty
Many stands are easy to build. You just need basic tools and a little time. Some, like the steel pipe or custom bicycle workstand, require more skill. If you’re new to DIY, start with a simple project. You’ll learn as you go and gain confidence.
Portability
If you want a portable stand, look for designs like the tripod, PVC pipe, or collapsible stand. These move easily and store in small spaces. Some stands, like wall-mounted or pallet wood, stay in one spot. Consider where you’ll use your stand most often.
Sturdiness
A sturdy do-it-yourself bike repair stand keeps your bike safe. Wood and steel stands hold heavy bikes well. Lighter stands, like tripods or over-the-door hangers, work best for quick fixes. Always check that your stand feels solid before you start repairs.
DIY Home Bicycle Repair Stand Tips
Safety
You want to stay safe every time you work on your bike. Start by checking that your stand feels stable before you lift your bike. If you build a do-it-yourself bike repair stand, make sure all screws and bolts feel tight. Test the stand with a gentle push.
If it wobbles, fix it before you hang your bike. Never clamp the frame of a carbon bike. Use the seatpost or a padded hook instead. Always keep your tools close so you do not have to reach far. Wear gloves when using sharp tools or working with metal.
Customisation
You can make your DIY home bicycle repair stand fit your needs. Add hooks for tools or a tray for bolts and nuts. Paint the wood or metal to match the color of your home or garage. If you want to work on your bike outside, add wheels to your stand.
Try using foam or rubber padding where your bike touches the stand. This keeps your bike safe from scratches. Homemade bicycle repair stands let you get creative. You can even add a light for late-night repairs.
Maintenance
Keep your stand in good shape so it lasts. Check for loose screws or bolts every few months. Wipe down the stand after each use, especially if you work on your bike outside.
If you notice rust on metal parts, clean them off and apply a thin layer of oil. For wood stands, check for cracks or splinters. Sand rough spots and repaint if needed. A clean, strong stand makes every repair easy and safe.
Bicycle Repair Stand Resources
Seeking additional assistance with your DIY project? You can find tons of inspiration and step-by-step do-it-yourself bike repair stand guides online. Here are some of the best places to learn new tricks and see how others build their own stands.
YouTube Tutorials
YouTube makes learning easy. You can watch someone build a stand from start to finish. You can pause, rewind, and follow along at your own pace. Many creators share tips for using simple tools and materials you already have at home. Here are some popular YouTube channels and videos to check out:
- RJ The Bike Guy: He shows how to build a DIY bike repair stand at home with PVC pipes.
- Park Tool: This channel covers pro tips and DIY hacks for every home mechanic.
- Ginger On Wheels: Watch him turn scrap wood into a sturdy stand.
- Global Cycling Network (GCN): They offer quick fixes and creative ideas.
Pinterest Guides
Pinterest is a goldmine for creative ideas. You can scroll through photos, diagrams, and step-by-step instructions. Many users share their builds, so you can see what works in real garages and apartments. Try these steps to get started:
- Type “DIY bike repair stand” in the Pinterest search bar.
- Save your favorite pins to a board for easy access.
- Look for pins with clear photos and simple instructions.
- Check the comments for extra tips from other builders.
Bottom Line:
Building your own DIY bike repair stand allows you to save money, get creative, and take pride in your work. You can find a project that fits your skills and space. Why not give it a try? You might surprise yourself with what you can build.
Have you made your bike stand? Share your ideas, tips, or questions in the comments below!
FAQ
1. How much weight can a DIY bike repair stand hold?
Most homemade stands hold regular bikes just fine. If you have an e-bike or a heavy mountain bike, use thicker wood or metal. Always test your stand with a gentle push before hanging your bike.
2. Can I build a repair stand without power tools?
Yes, you can! Some stands use only hand tools like a screwdriver, wrench, or saw. Consider a ladder stand or a storage hook if you prefer a simple solution.
3. Will a DIY stand damage my bike?
If you use padding where your bike touches the stand, you protect the paint and frame. Never clamp a carbon frame. Always check for sharp edges before you hang your bike.
4. What if I have very little space?
You still have options! Wall-mounted clamps, over-the-door hangers, or collapsible stands work great in small rooms. You can fold or store them when you finish.
5. How long does it take to build a simple stand?
You can build some stands in less than an hour. Scrap wood or PVC stands go together quickly if you want a custom design, but plan for a little more time.


