
אין צורך בציוד מיוחד או בשנים של ניסיון כדי להכין עגלת גריל מתגלגלת שתוסיף רמה חדשה לגמרי של כיף לכל ברביקיו בחצר האחורית. חשבו על עגלת גריל מתגלגלת משלכם, כזו שמתאימה בצורה מושלמת לאזור שלכם ותהיה בסגנון שלכם. עגלה חזקה ופונקציונלית. עגלת גריל מתגלגלת ניתן להרכיב כדי להקל על הצלייה ולשמור את כל הדברים החיוניים במקום אחד. ניתן לבנות עגלה חזקה וניידת באמצעות ציוד פשוט וחומרים עמידים המגנים מפני מזג האוויר. היא מציגה אפשרויות התאמה אישית חדשניות שיתאימו לאורח החיים החיצוני שלכם. היא מציעה דרך חכמה לשלב ניידות, אחסון ושטח הכנה לפתרון קומפקטי אחד. מדריך זה ילווה אתכם בתהליך שלב אחר שלב. הוא יראה לכם כיצד לבחור את הגריל והחומרים המתאימים, להרכיב הכל ולחבר את המערכת שלכם בצורה מאובטחת. עם העיצוב הנכון, היא יכולה לתפקד כחלל הכנה, יחידת אחסון וריהוט פטיו, הכל באחד. בבלוג זה, תגלו כיצד תוכלו להכין עגלת גריל משלכם בעזרת מעט מאוד כלים וחומרים שניתן למצוא בחנויות הקרובות. זה יאפשר לכם להרשים את החברים והקרובים שלכם עם כישורי ה"עשה זאת בעצמך" שלכם!
מדריך מלא לבחירת חומרים, כלים וגריל מתאים
זהו מדריך "עשה זאת בעצמך" לבניית עגלה חיצונית מתגלגלת לגריל. הוא מדגיש גם את הצורך לתכנן ולהשתמש בחומרים עמידים בפני מזג אוויר כדי למנוע בזבוז זמן ולתכנן עגלה שיכולה לעמוד בגשם, שמש ושימוש תכוף במהלך ברביקיו. הוא מכוון לבחירה נכונה של הגריל בהתאם לצורכי המשתמש, כגון גודל, משקל וזרימת אוויר, כדי להפוך אותו ליציב ובטוח. בסך הכל, כל התנאים הללו, חומרים מתאימים, תכנון נכון ובחירת הגריל הנכונה יכולים להפוך את תהליך הבנייה לפחות בעייתי, ואת המוצר הסופי לחזק ונעים לעבודה. חומרים משובחים, ציוד וגריל מותאם כראוי מובטחים לספק את השליטה הנדרשת בחום במהלך בישול בחוץ.
חומרים נדרשים לעגלת גריל מתגלגלת
הרכב את החומרים הדרושים לבניית עגלת גריל מתגלגלת DIY לפני הבנייה. זהו אחד האמצעים שהופכים את הפרויקט לקל יותר. זה מאפשר לך לזהות את החומרים הדרושים לפני תחילת העבודה. זה גם חוסך את הזמן והמאמץ שהמשתמש היה מבזבז בקביעת החומרים הדרושים לו. זה גם מקטין את זמן ההרכבה, ומאפשר למשתמשים להתמקד בבנייה. יש להשתמש בחומרים שאינם רגישים לגשם, שמש ותנועה כבדה. העגלה תחזיק מעמד לכל החיים ותיראה הרבה יותר טוב בכל ברביקיו. הרבה יותר קל להכין אותה עם החומרים הנכונים, מה שהופך את התהליך ליעיל יותר. עגלת גריל מתגלגלת חזקה מסתמכת על חומר בעל חוזק מאוזן היטב.
ראשית, הרשימה הבאה אמורה להיות מועילה:
- מסגרת ומדפים/עץ שעבר טיפול במזג אוויר/עץ שעבר טיפול בלחץ (עץ) או קורות עץ שעברו טיפול בלחץ.
- גלגלים חזקים (לפחות שניים מהם צריכים להיות ניתנים לנעילה)
- ברגים וברגים (מגולוונים לשימוש חיצוני).
- תומכי מתכת או תומכי פינה.
- צבע לעץ או לצבע חיצוני.
- ידיות או ידיות למגירות.
- ווים לכלי אוכל
- תבנית או משטח גריל (לשים מתחת לגריל)
כלים נדרשים לעגלת גריל DIY
כדי לבנות עגלת גריל DIY, נדרשים כמה כלים פשוטים כדי להבטיח שהבנייה נכונה וההרכבה בטוחה. היכולת לבחור את התכונות הנדרשות על עגלת גריל מתגלגלת מועיל, מכיוון שהוא מכין את העגלה ומבטל ניחושים במהלך ההתקנה. הוא אומר למשתמשים איזה כלי הם צריכים לפני שהם מתחילים לעבוד. זה מפחית בלבול וחשש. זה גם מסייע לעבוד בקלות רבה יותר, בזמן ובבטחה. על ידי ידיעת אילו כלים הם צריכים, המשתמשים יכולים להכין את סביבת העבודה שלהם. זה לא פרויקט עשה זאת בעצמך מסובך של תחנת ברביקיו ניידת. יש לשמור על בטיחות בפרויקט גם על ידי לבישת ציוד מגן אישי. את רוב הכלים הללו ניתן למצוא במוסך או בסככה שלכם:
- חורים נעשים באמצעות מקדחה.
- מסור משמש לחיתוך עץ לפי מידה.
- מדידה נכונה באמצעות מד הארכה.
- המברג הורכב.
- כדי לשייף את הקצוות המחוספסים, יש להשתמש בנייר זכוכית.
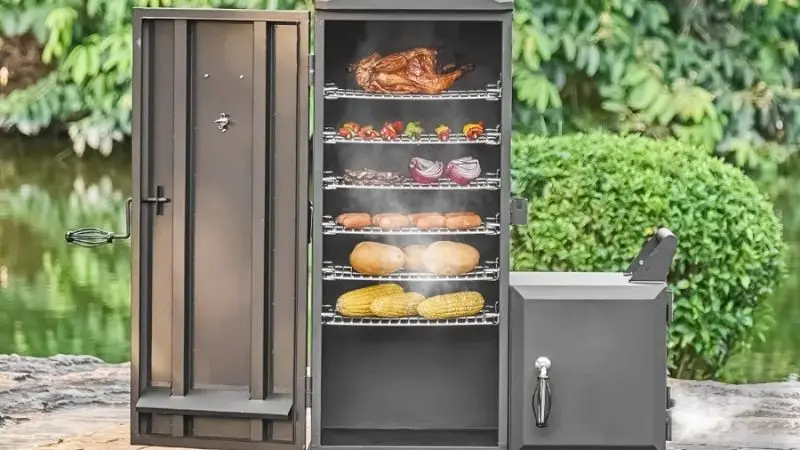
בחירת הגריל הנכון
בחירת הגריל הנכון היא חיונית לעגלת גריל מתגלגלת לבניית עגלת גריל DIY. חשבו על הדרך בה אתם מעדיפים לצלות. האם אתם מעדיפים גריל פחמים קטן או גריל גז? מדדו את הגריל שלכם, ולאחר מכן בנו את העגלה. ודאו שלעגלה יש קיבולת מספקת למשקל ולגודל של הגריל שלכם. ייתכן שתצטרכו יותר מקום להכנה או אחסון אוכל אם אתם מבשלים בחוץ. ודאו תמיד שהגריל שלכם בטוח ואינו חוסם את זרימת האוויר. תכונה זו עוזרת למשתמשים להבטיח שהגריל מתאים לעגלה בצורה נכונה ופועל בצורה בטוחה ונוחה. ברור איזה סוג גריל מתאים ביותר לעגלה. זה מפחית את הסיכון לתאונות והופך את הבישול בחוץ לבטוח יותר עבור כולם. מדריך זה עוזר למשתמשים לבחור בביטחון גריל שמתאים היטב ופועל ביעילות על העגלה. הוא מבטל ניחושים ועוזר למשתמשים להימנע מבעיות נפוצות שעלולות להתעורר כאשר גריל גדול מדי. זה גם עוזר להבטיח שהגריל יושב כולו על המשטח מבלי להיתלות מעבר לקצוות.
מדריך בנייה והתקנה שלב אחר שלב לעגלת גריל

מדריך זה ידריך אתכם בתהליך יצירת עגלת גריל בהתאמה אישית בחצר האחורית שלכם. הוא מתמקד בתכנון ומדידת הגריל והעגלה כדי להבטיח התקנה ואיזון נכונים. המשתמשים לומדים ליצור מסגרת יציבה, להוסיף גלגלים לחלל ולבנות מדפים ואחסון. הוא כולל גם מדריך לשיוף, צביעה וגימור כדי להגן על העגלה מפני תנאים חיצוניים. לבסוף, הוא מתאר את התקנת הגריל כיציבה, בטוחה ואמינה.
תכננו את העיצוב והמידות שלכם
התחילו את פרויקט ה"עשה זאת בעצמך" שלכם על ידי שרטוט עגלת הגריל המתגלגלת שלכם, ולאחר מכן קחו עיפרון ונייר. חשבו על השטח הדרוש לכם לגריל, למדפים ולאחסון. מדדו את עגלת הגריל המתגלגלת החיצונית שלכם וקבעו את מיקום הגריל. מדידה זו תאפשר לכם לא לעשות טעויות בעתיד. היא מאפשרת למשתמשים להרכיב או לבחור עגלה שמתאימה לחלל, לגריל ולסגנון הבישול שלהם. היא מבטיחה שהגריל יישאר יציב מלמעלה, לא תלוי בצדדים ולא יהיה לא מאוזן. היא תעודד את המשתמשים לחשוב היטב על פעולותיהם לפני ביצוען, ותעזור להם להימנע מבעיות עתידיות. עליכם למדוד פעמיים לפני שאתם חותכים כל חתיכת עץ. אתם רוצים שהכל יעבוד בצורה מושלמת.
מכלול מסגרת לעגלת גריל
הכינו את העץ שעבר טיפול בלחץ שלכם ולאחר מכן חתכו אותו בעזרת מסור לגודל. יש לבנות בסיס מלבני מוצק, שאליו תקבעו את הרגליים בכל ארבע הפינות. עליכם לקבע את כל אלה באמצעות ברגים מגולוונים ותושבות מתכת. אתם מעוניינים גם במסגרת חזקה לעגלת הגריל המתגלגלת שלכם. זה עוזר לשמור על הגריל במקומו בצורה מאובטחת למעלה ומונע ממנו להיתלות מהצדדים או להיות עקום. זה גם מבטיח שהעגלה תוכל לנוע בחופשיות דרך שערים או קומות כאשר אינה בשימוש. מסגרת מדודה היטב הופכת את הבישול למרגיע יותר, במיוחד עבור עמדות ברביקיו ניידות או בעת הכנת אוכל להגשה. היבט זה משפר את הבטיחות, הנוחות, הארגון והעמידות תוך חיסכון בזמן ובאנרגיה.
הוסף גלגלים לניידות
כדאי למצוא דרך להפוך את המסגרת ולהדביק גלגלי גלגלים כבדים לשתי הפינות. עליכם לוודא ששני הגלגלים נעולים. זה שומר על יציבות עגלת הגריל המתגלגלת בזמן הבישול. קל להזיז את העגלה בחצר האחורית הודות לגלגלים שלה. זה מאפשר למשתמשים להזיז את עגלת הגריל שלהם לאן שהם רוצים מבלי להרים אותה. זה גם מאפשר למשתמשים לגלגל את העגלה מעל פטיו, דקים או חצרות בקלות. עגלת הגריל המתגלגלת החיצונית גם מהנה יותר לשימוש עם גלגלים. זה שימושי במיוחד עבור אנשים עם פטיו קטן או חללים חיצוניים משותפים. הגלגלים הופכים גריל נייח לתחנת בישול ניידת ונוחה. תכונה זו מאפשרת בישול בחוץ והופכת אותו לבטוח יותר עבור כולם.
בניית מדפים ואחסון
חיתוך עץ הוא שלב נוסף המשמש לייצור מדפים ואזורי אחסון. ניתן להשתמש בברגים כדי לקבע אותם למסגרת. יש להוסיף ווים לכלי ברביקיו. ניתן להשתמש במגירה או בסל לאחסון נוסף. מדפים אלה משמשים לאחסון מכשירי בישול חיצוניים. הם מספקים אזורים ייעודיים לאחסון כל הפריטים הדרושים בזמן הצלייה, ומונעים הצפת משתמשים במקומות שקשה להגיע אליהם. ניתן גם לעצב אותם כך שימנעו הצבת חפצים דליקים בקרבת חום, ובכך ליצור אזור בישול בטוח יותר. הם הופכים את עגלת הגריל המתגלגלת לתחנת גריל חיצונית שלמה. זה מאחד הכל במקום אחד, חוסך זמן ומוסיף נוחות ונוחות.
שיוף, צבע וגימור
נקו את הקצוות המחוספסים באמצעות נייר זכוכית והסירו אבק. אזורים אלה משויפים, מה שגורם לעגלה להרגיש בטוחה ונוחה למגע. זה גם מונע דוקרנים, שריטות או חתכים בעת השימוש בעגלה. צבעו את עגלת הגריל המתגלגלת הביתית שלכם בצבע או איטום חיצוני. זה מגן על העגלה שלכם מפני גשם ושמש ומאפשר להכל להתייבש לפני שאתם ממשיכים. זה גם יוצר ציפוי מגן המגן על העגלה מפני תנאי חוץ, כולל שמש, גשם ולחות. זה גם מאפשר למשתמשים לבחור צבע שמשלים את הפטיו, המרפסת או הטעם האישי שלהם. לאחר מכן מתבצע ההליך הסופי, כגון איטום או ציפוי שקוף, המספק הגנה נוספת. זה הופך אותה לבעייתית יותר וקלה יותר לניגוב לאחר הבישול.
התקנת הגריל בצורה בטוחה
ראשית, הניחו שטיח עמיד בחום או יריעת מתכת על המדף העליון. עליכם להניח את הגריל שלכם עליו ולאבטח אותו באמצעות סוגריים במידת הצורך. כיצד לבנות עגלה מתגלגלת לגריל שלכם? עקבו אחר ההוראות הבאות במדריך הגריל שלכם. בטיחות חשובה בעת בניית... עגלה מתגלגלת עבור שימוש במנגל. אם הגריל אינו מותקן כהלכה, הוא עלול להתהפך בזמן הבישול, ולגרום לכוויות, שריפות או נזק לעגלה. גריל המותקן היטב מסייע לשמור על העגלה במצב תקין, להאריך את חייה ולשמר את מראהה. הוא גם מסייע בהגנה על משטחים וחומרים מסביב מפני נזקי חום.
עכשיו יש לכם הוראות שלב אחר שלב לבניית עגלת גריל עשה זאת בעצמך שמתאימה לחלל ולסגנון החיצוני שלכם!
עגלת גריל מתגלגלת DIY: רעיונות לאחסון, הכנה והתאמה אישית
עגלת הגריל גם מאחסנת כלים במקומות נגישים בקלות, מה שהופך את הצלייה לקל ובטוחה יותר. היא מספקת אזור הכנה נוסף, מה שמקל על התקנת שולחן צד מתקפל או קרש חיתוך נשלף. התאמה אישית של העגלה שלך באמצעות צבע או שבלונות היא דרך להוסיף סגנון, עמידות ומגע ייחודי לעגלה שלך. שינויים אלה הופכים עגלת גריל פשוטה לתחנת בישול חיצונית נוחה, מאורגנת ומושכת.
הוספת ווים ומחזיקי כלי אוכל
אתם רוצים שעגלת הגריל העצמאית שלכם תשמור על הכלים שלכם בהישג יד. ווים ומחזיקי כלים יהפכו את עגלת הגריל הנשלפת לחוץ לנוחה יותר. אתם יכולים לחבר ווים ממתכת לצד הגלגל של עגלת הגריל שלכם. לאחר מכן תוכלו לתלות את המלקחיים, המריתות, המברשות וכו', כך שתוכלו להרים אותם בקלות. השתמשו בפס מגנטי עם סכינים. אפילו סל קטן יכול לשמש לרטבים או תבלינים. קלט קטן זה יכול לעשות הבדל עצום בחוויית הבישול הכוללת. הוא מספק לכל אחד מקום, מה שמקל על שליפה קלה של כלים בעת הצורך והחזרתם למיקומם המתאים. הוא שומר על חלל הבישול נקי ויעיל. הווים והמחזיקים ממזערים כיפוף, מתיחה ותזוזת כלים.
התקנת שולחן צד או קרש חיתוך
שולחן צד נוסף או קרש חיתוך יכולים לספק מקום נוסף להכנת אוכל. ניתן להשתמש בשולחן מתקפל המחובר לעגלת הגריל המתגלגלת שלכם. ודאו שהוא חזק, באמצעות צירים מוצקים. קרש חיתוך נשלף נוח מאוד לקיצוץ ירקות או חיתוך בשר. ניתן להזיז אותו לפי הצורך. תכונות אלו יהפכו את... עגלת גריל DIY נראה יותר כמו תחנת גריל אמיתית. שולחן צד מובנה מספק משטח נוסף במידת הצורך. זה חוסך זמן ואנרגיה, במיוחד בעת הכנת ארוחות למשפחה או לאורחים. זה ממזער את העומס ומבטיח היגיינה משופרת. שולחן הצד המתקפל שימושי, מכיוון שניתן לפתוח אותו בכל עת שצריך ולקפל אותו כאשר אינו בשימוש. הוא גמיש, נשלף לניקוי או אחסון, ומתאים בקלות.
התאמה אישית באמצעות צבע או שבלונות
ייתכן שתהיו אופנתיים עם צבע או שבלונות. בחרו צבע חיצוני שעומד בפני שמש וגשם, וחשבו על צבע או דוגמה בהירים. אתם אמורים להשתמש בשבלונות על צורות משעשעות או ראשי התיבות שלכם. אתם יכולים אפילו לשים להבות או עיצובים של אוכל. נגיעות מיוחדות אלה הופכות את עגלת הגריל המתגלגל שלכם למרכז חדר החוץ שלכם. אתם הופכים אימון רגיל בחוץ למשהו מיוחד. אחרי שהחברים שלכם יראו את עגלת הגריל המתגלגלת שלכם, הם ירצו להכין בעצמכם. זה עתה לימדו אתכם כיצד להכין עגלת גריל מתגלגלת באזור החוץ שלכם. חשבת על זה, ייצרתם אותה ונתתם לה את המגע האישי שלכם. תוכלו לבשל ולארח באמצעות העגלה החדשה שלכם.
- בדקו את העגלה שלכם לעתים קרובות לאיתור ברגים רופפים ושמרו על ניקיוןה לשימוש לאורך זמן.
אתם תרגישו גאים בכל פעם שתדליקו את הגריל!
לעטוף
ניתן לבנות עגלת גריל מתגלגלת בעצמכם כדי להאריך את חיי הבישול בחוץ. על ידי תכנון נכון של העגלה, בחירת חומרים מתאימים וביצוע הוראות הרכבה שלב אחר שלב, תקבלו עגלה בטוחה ועמידה לאורך זמן שמתאימה לחלל. ניתן להשיג זאת על ידי שילוב גלגלים, מדפים, ווים ומחזיקי כלים בעגלה כדי להפוך אותה לניידת, מאורגנת וקלה יותר לשימוש. היא גם אופנתית ועמידה לאורך זמן, מה שמראה את האופי שלכם. ניתן לגלגל את עגלת הגריל שלכם על גלגלים לאורך כל עונת המנגל עם תחזוקה נאותה. הפרויקט הוא יצירתי, פונקציונלי ונוח, והוא יכול להפוך כל חצר אחורית לגריל משופר יותר.
שאלות נפוצות
מה אני יכול לעשות כדי להבטיח שמזג האוויר לא יגרום נזק לעגלת הגריל שלי?
יש להשתמש בצבע חיצוני או בחומר איטום לעץ. כאשר העגלה אינה בשימוש, יש לשמור אותה מתחת לסככה או לסככה.
רמז: עדיף לנגב את העגלה לאחר שהיא נרטבת.
האם אני יכול להשתמש בכל סוג של גריל על העגלה שלי?
הכי קטן גרילי פחמים או גרילי גז ניתן להשתמש. ודאו שאתם בודקים את המשקל והגודל לפני הבנייה. ודאו שהעגלה שלכם יכולה לתמוך בגריל ואינה מתמלאת באוויר.
מה אם העגלה שלי מרגישה רעועה?
בדוק את כל הברגים והברגים. קשר דברים המתאימים באופן רופף.
הוסיפו סוגריים נוספים במידת הצורך.
לפני שמתחילים לבשל, נעלו את הגלגלים.
איך אתם שוטפים את עגלת הגריל המתגלגלת שלי?
נקו את המשטחים בעזרת מטלית רטובה. יש להשתמש במי סבון עדינים לטיפול בכתמים קשים.
הערה: הימנעו משימוש בכימיקלים חזקים. הם עלולים לפגוע בצבע או בגימור העץ.


