
Installing a small wall mount fan may be a fun and straightforward DIY project if you have the necessary abilities. The right tools and gear will help you stay safe and reduce the risk of common calamities. This method is equally significant from a safety perspective. You and your property should be safe from electrical connections and mounting equipment. A little fan that clips to a wall is perfect for anywhere you want more airflow, such as your bedroom, kitchen, garage, or office. You may never have done much home renovation work before, but with the right tactics, you can confidently complete the installation.
In this article, you’ll learn about the right tools, safety precautions, and a step-by-step technique to install a tiny wall-mounted fan.
- Essential Tools and Materials Needed to Install a Small Wall Mount Fan
- Safety Precautions Before Installing a Small Wall Mount Fan
- How to Choose the Best Location for a Small Wall Mount Fan
- Step-by-Step Guide to Install a Small Wall Mount Fan Safely
- Common Mistakes to Avoid When Installing a Wall Mount Fan
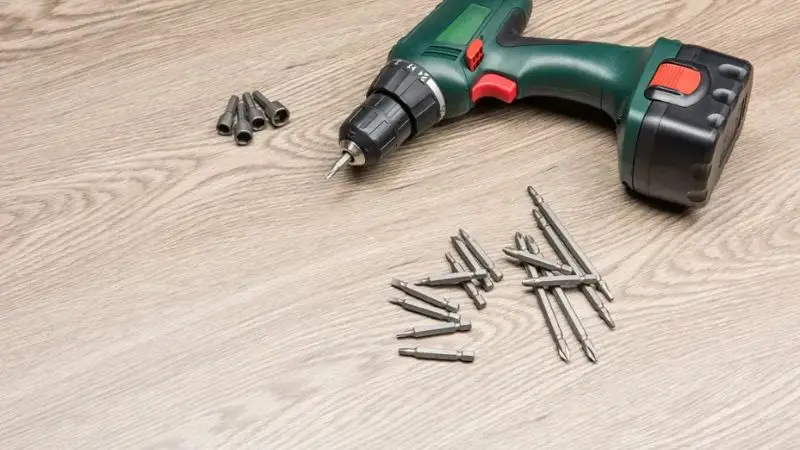
Essential Tools and Materials Needed to Install a Small Wall Mount Fan
@ashtonbrown007 VEVOR Wall-Mount Misting Fan #VevorMistingFan #WallMountFan #Vevor #PatioMistingFan #MistingFan
♬ original sound – AshtonBrown007
Basic Installation Tools Checklist
Before you install quiet small wall mount fan, make sure you have all the tools you’ll need. By preparing ahead, you may save time, reduce errors, and help ensure a secure installation. These tools will help you take accurate measurements, determine the best position for mounting the fan, and securely attach it to the wall.
What you need:
- Tape measure
- Pencil or felt-tip marker
- level
- Drill with drill bits.
- Phillips and flat-head screwdrivers
- Stud finder
- Strong step stool or step ladder
Mounting Hardware and Safety Equipment
The use of the appropriate mounting hardware and protective gear is required for best small wall mounted fan for bedroom. To ensure that you have the appropriate screws, anchors, and brackets, check the fan box. If you have a wall constructed of drywall, you should use heavy-duty anchors. Brick or concrete should be secured with masonry screws.
Always wear safety goggles and gloves when drilling and handling hardware. If you are going to drill into concrete or brick, be sure you have a dust mask on. Always consult the directions of your wall-mounted fan before you start. This allows you to avoid mistakes and keeps your installation safe.
Safety Precautions Before Installing a Small Wall Mount Fan
Turn Off Nearby Electrical Sources
Disconnect any electrical sources in the local work area before installation. If possible, turn off the circuit breaker and unplug nearby devices. This simple technique drastically minimizes the risk of an electric shock. Just to be on the safe side, use a voltage tester to make sure no power is present in the area where you will be working.
Check the Wall Type and Weight Capacity
Walls might be plaster, brick, concrete, wood, etc. Each small wall mount fan for office has a varied weight capacity. If you are installing on sheetrock, use a stud finder to detect the wall studs. They are stronger. If you intend to mount the fan on a brick or concrete wall, make sure that the wall can securely support the fan’s weight and that the mounting hardware will fit. With proper supervision, accidents and damages can be prevented.
Read the Manufacturer’s Installation Instructions
Before you begin, read the energy efficient wall mount fan’s installation documentation carefully. The product packages that manufacturers ship to consumers contain critical specifications, including electrical connections, mounting requirements, and safety tips. These suggestions are necessary to follow to prevent common installation mistakes and to ensure the fan works properly after installation.
Identify Hidden Wiring and Pipes Before Drilling
Before you drill any holes, always check the wall for hidden electrical wiring, plumbing lines, or other obstructions. Use a wire and pipe detector and sweep the area well. Accidentally drilling into a pipe or wire can cause costly repairs, considerable damage, or electrical hazards. Checking the wall for a few minutes can save you headaches and time later on.
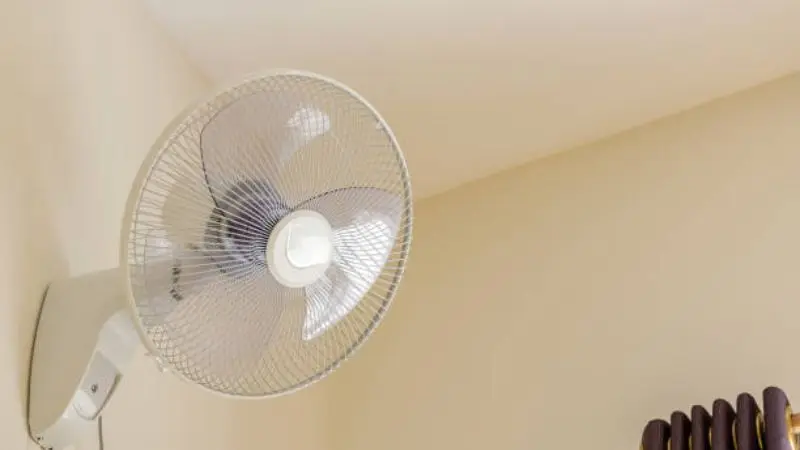
How to Choose the Best Location for a Small Wall Mount Fan
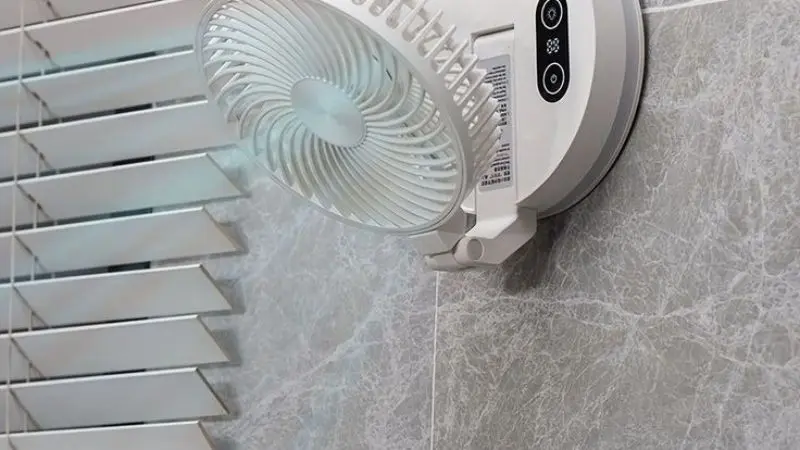
Recommended Mounting Height for Optimal Airflow
A minimum of six to eight feet above the ground should be the height at which you position your small wall fan for kitchen. At this height, the fan can circulate air more effectively throughout the space. A tape measure should be used to determine the height. Take precautions to ensure the fan is not positioned near the ceiling. Do you want the air to move freely?
Areas to Avoid When Installing a Wall Fan
Make sure your small wall mount fan for office is not placed near tall furniture, bookcases, or curtains. The presence of these items impedes airflow, making it more difficult for the fan to function. Avoid places where air does not circulate well. Installing the fan immediately above seating areas or beds is not advisable. You are looking for a fan that is not only efficient but also totally risk-free.
Ensuring Easy Access to Power Outlets
Determine a location that is close to a power outlet. It would not be a good idea to run the line all the way through the room without stopping. It is best to avoid doing so. Your best small wall mounted fan for bedroom will remain unharmed and protected thanks to this. You must use an extension cord rated the same as the fan when performing this task. It is important to ensure that the cord does not pose a tripping hazard.
Positioning the Fan for Maximum Room Coverage
The most effective way to ensure your fan covers as much area as possible is to place it on the wall. Once you’ve placed the fan where you want it, make sure it faces the center of the room. Adjust the angle for best airflow. If your room is large, you might want to put two fans in it. Your task is to create a welcoming atmosphere that makes every room feel warm and inviting.
Step-by-Step Guide to Install a Small Wall Mount Fan Safely
Step 1: Measure and Mark the Mounting Position
Start with the height at which you want to hang your energy efficient wall mount fan. Locate the sweet spot using a tape measure, typically 6 to 8 feet above the floor. Pencil at site. Pick a spot with good air circulation and easy access to a power outlet. Use a level to create straight lines for correct placement. This step forms the basis for a safe and stable installation process.
Step 2: Locate Wall Studs or Suitable Anchor Points
If mounting to drywall, use a stud finder to find wooden studs. Clearly identify stud locations. If your wall is brick or concrete, locate solid spots for masonry anchors. If you don’t have enough support for a quiet small wall mount fan, you can stick it to a wall, and it will fall. Always use solid anchor points to support the weight of your wall-mounted fan safely.
Step 3: Drill Pilot Holes Carefully
Drill a few test holes in the areas you marked. 4) Select a drill bit the same size as your bolts or screws. Drill slowly and steadily to prevent damaging the wall. If you discover hidden pipes or wires, stop right away. This careful drilling keeps your home safe and keeps the job going effectively.
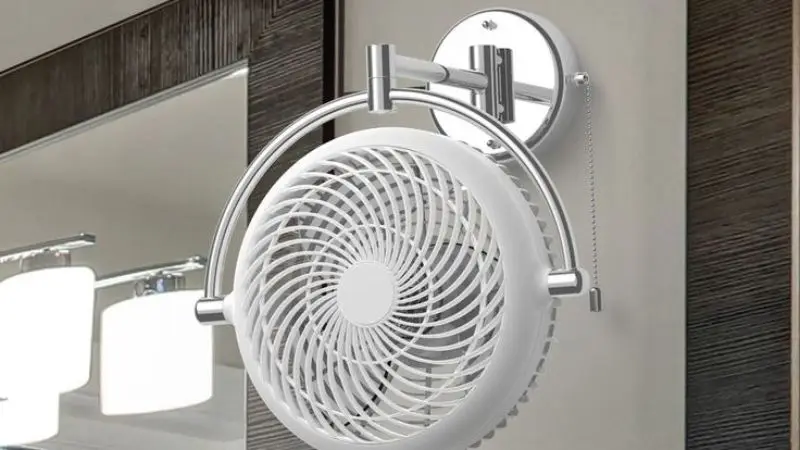
Step 4: Secure the Mounting Bracket to the Wall
Bolt and screw the bracket onto the appropriate wall type. Screws should be snug but not over-tight; the wall may be damaged. Level and square the bracket to the wall. Make sure this bracket is sturdy before you hang your tiny fan on the wall.
Step 5: Attach the Fan Unit to the Bracket
Take the little small wall mount fan for office and line it up to the bracket. Mount the fan with the screws or clips included with the fan. Ensure that the fan is well secured and does not wobble. Not only would mounting a fan on the wall correctly prevent mishaps, but it would also improve its performance.
Step 6: Connect the Power Supply Properly
Connect the fan’s power cord to a socket near the fan. Do not run the cord across walkways. Use a heavy-duty extension cord rated for your fan, if needed. Ensure the power source is steady and the cord is not a tripping hazard. If the installation process is connected correctly, it will be completed securely.
Step 7: Test the Fan for Stability and Performance
Turn on your small wall fan for kitchen and watch it function. Listen for any weird noises or activity. Make sure the fan is securely fastened while it is on. Check the fan’s mounting and shut it down if anything appears suspicious. You can hang a tiny fan on the wall; this is a great way to ensure it functions effectively and stays in place.
Common Mistakes to Avoid When Installing a Wall Mount Fan
Mounting the Fan on Weak Surfaces
It is not a good idea to put your fan on a wall that is either compromised or damaged. A ceiling fan is too heavy for drywall without studs beneath it, for paneling that is too thin, or for cracked plaster. The energy efficient wall mount fan can topple over, which could result in harm or property loss. You must always examine the wall before beginning. To locate studs in solid wood, use a stud finder, and for masonry, use appropriate anchors.
Using Incorrect Screws or Anchors
Your best small wall mounted fan for bedroom can become unsafe if you use screws or anchors that are not appropriate. Little screws or plastic anchors might not be able to support the fan’s weight. Use the hardware that came with your fan, or use heavy-duty anchors for your wall type. The fan may become loose over time if you utilize the incorrect hardware.
Ignoring Manufacturer Weight Requirements
Read the quiet small wall mount fan’s directions for how much weight it can support. You could damage yourself if the wall or hardware cannot support the fan’s weight. Follow the instructions that came with the product. This will make sure your fan is working and your location is secure.
Installing the Fan Too Close to Furniture or Obstacles
Placing your fan near furniture, drapes, or shelving will restrict airflow. The fan is not effective in cooling the room. Allow at least two feet of space surrounding the fan. This allows air to circulate and your fan to operate safely.
Conclusion
In conclusion, installing a small wall mount fan is a manageable project when you follow the correct steps and prioritize safety. Taking the time to prepare your tools, choose a suitable mounting location, and follow the manufacturer’s instructions can help ensure a successful installation. Before turning on the fan, always check that it is securely mounted and that all electrical connections are properly completed. Regular cleaning and maintenance will keep the fan running efficiently and extend its lifespan. By working carefully and following safety guidelines, you can enjoy improved airflow, comfort, and reliable performance from your wall-mounted fan for years to come.
FAQ
How do you know if your wall can support a fan?
Use a stud finder to check for wooden studs or solid areas. If the wall feels weak or moves, pick another spot for your fan.
Can you install a wall-mount fan without a drill?
You need a drill for most walls. If you use only a screwdriver, the fan may not stay secure. Always use the right tools for safety.
What should you do if your fan wobbles after installation?
- Turn off the fan.
- Check the bracket and screws.
- Tighten any loose parts.
- If it still wobbles, reinstall the fan for better stability.


