
Yes, screen printing on hats is totally possible right from your home—and it’s easier than you think! With the right tools and a little patience, you don’t need a factory setup to get amazing results. Start with a sturdy hat that fits well and holds its shape.
Whether it’s a snapback, cap, or bucket hat, screen printing on hats adds a personal touch to your style. If you’ve ever wondered how to screen print on fabric like your favorite cap, you’re in the right place. It’s fun, creative, and totally doable—even for beginners. Let’s get started on your custom hat journey!
Gather Your Screen Printing Supplies
Before getting into the fun of custom hat printing, make sure you have everything you need. The right tools not only make the process easier but also help you get cleaner, more professional results. Whether you’re a beginner or testing a new method, having reliable materials sets you up for success. Let’s break down the essential supplies for screen printing on hats at home.
Use a Hat Platen or Find an Alternative
A hat platen offers a flat, firm base that holds the hat in place during printing. This keeps your fabric wrinkle-free and helps your design stay sharp. If you don’t have one, you can use something simple like a paint bucket or bowl—as long as it fits snugly inside your hat and stays still. A firm surface is key to preventing ink smudges and crooked prints.
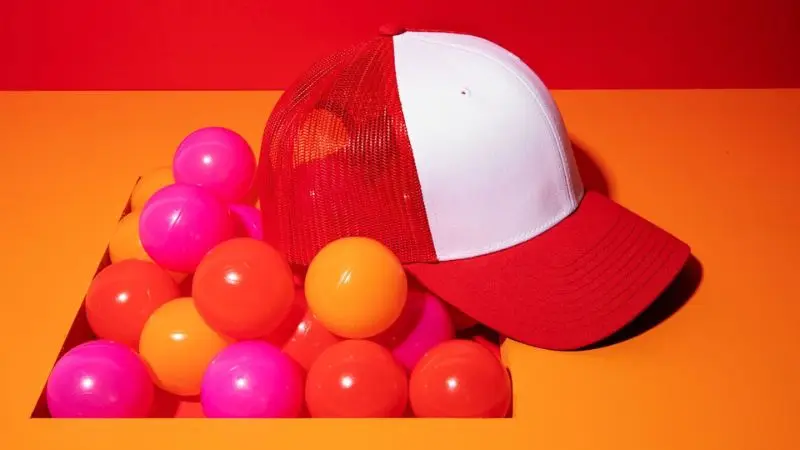
Hats with smooth front panels, such as trucker hats, foam front hats, or five-panel styles, work best. These hat types offer the ideal shape for sharp, centered designs.
Select the Right Screens and Inks
A small screen, around 4″x6″, is best for hats because it matches the smaller printing area. It allows more control, especially if you’re learning how to screen print logos on hats at home. Use plastisol ink for bold, long-lasting results. If you’re transferring artwork, you’ll need transparency or transfer paper.
Pair your screen with a squeegee that fits its size. If you’re asking, “Can you screen print on mesh trucker hats?”, the answer is yes—just make sure your screen and squeegee can handle the curve of the front panel.
Other Helpful Tools for Better Results
To finish your design, you’ll need heat to cure the ink. A heat press machine works best, but a heat gun can also do the job. This locks in ink and keeps it from fading after washes. Duct tape helps block off screen areas you don’t want to print, and basic cleaning supplies like water and paper towels keep your space tidy.
With all these tools ready, you’re set to begin your first project. These basics are all you need to kick off your step-by-step guide to screen printing caps at home.
Prepare for Successful Screen Printing on Hats

Before you start printing, it’s important to create the right setup. Good preparation gives you sharper prints and fewer mistakes. From choosing the right hat to setting up your workspace, each step plays a role in your final design. This part of your step-by-step guide to screen printing caps will help you get ready like a pro.
Choosing the Right Hat for Printing
The hat you choose affects the final look of your design. Hats with smooth, flat panels are the easiest to work with. Foam front hats, trucker hats, and five-panel hats are top choices for screen printing on hats. These styles offer a solid printing surface with fewer seams.
While baseball caps are possible, their curved fronts and stitching can make printing harder. Look at the front panel and every time you are about to print, check that the surface is smooth and solid; the design will emerge much cleaner and will last even longer.
Set Up Your Printing Workspace
An organized clean space helps make your printing easy. Locate a solid table that has good light. Spread plastic or newspaper to absorb any spills of ink. Organize all the equipment you want to work with within arm’s reach, such as your squeegee, screen, and ink.
This makes you speedier and does not make you so messy. Ensure that your heat press, if you have one, is up and running to do curing. The proper arrangement lessens accidents and makes you more focused on applying the slip evenly and positioning the design accordingly.
Prepare the Hat Surface
Have your hat in condition before you print. Clean the front panel with a lint-free cloth to remove the dust and oils that may influence the ink. Remove wrinkles by smoothing with hands or some gentle steam–but not too hot.
Put the hat directly on the platen or in some other source, such as a petite bowl or a can of paint. Ensure that it fits firmly so that it does not move when printing. Tape can be used inside the hat to keep any parts together where necessary. When prepped well, the ink transfer would be better, and the final look crisp.
Screen Printing on Hats: The Creative Process
When you are set up with your hat and tools, now you have to bring your design to life. The best thing to do is to create your own design and print it. How to use your stencil and the ink is key to learning the techniques of screen printing at home. So, let us have a walk through it.
Step 1: Create a Simple Design and Stencil
The first thing to do is to select an outspoken, legible style. Small or thin details should be avoided because there is not much space in hats. Your illustration is hand-drawn with a black marker, or you may print digitally, but make sure there is enough print to cover the size of the front panel of the hat.
To turn your artwork into a stencil, place it under a transparent screen or use transfer paper to trace it. If you’re using emulsion, coat your mesh screen and let it dry in a dark room. Then expose it to light with your design on top. Wash out the soft parts, and your stencil will be ready to use in your heat press machine or manual setup.
Step 2: Set Up the Screen for Hat Printing
And then put down your hat on the platen or on a level piece. The front panel is to be flat and solid. Your print may end up distorted or crooked if your hat moves or is not flat. Place your screen under the printing position, so that it is aligned with the front of the printer.
Clone grip or sticky the screen at rest. Triple check to be sure that the screen is in contact with the hat throughout the design space. You can work around that by stuffing the inside of the hat with a small towel to bring up the surface on which lips are padded, in case you see gaps. A level and stable screen assembly is also necessary in the case of step-by-step instructions for screen printing caps.
Step 3: The process of Screening Printing on a Hat
Now we have to put in the ink. Take about a teaspoon of plastisol ink and place it on the top edge. Pick up your squeegee at an angle and run the squeegee down at an angle over the design hard and smooth. The movement drives the ink into the stencil and the fabric.
Carefully move the screen and look at the print. In the case of light spots, put the screen back down again and repeat. Hats may be problematic in the sense that they are curved. To enhance contact, pressing down on the screen during printing will increase your contact, or using the smaller-sized screen that fits the curve of the hat. This simplifies the procedures to be undertaken on how to screen print logos on hats at home without smudging them.
Curing and Cleaning After Screen Printing
Once your design is printed, the job isn’t done just yet. Curing the ink and cleaning your tools are the final steps in your step-by-step guide to screen printing caps. These two parts make a big difference in how long your design lasts and how well your equipment performs the next time.
Curing the Print with Heat
The procedure of fixing the ink to the fabric through heating it is called curing. The ink can also crack or be washed out after a few wears without curing. This is an important step that one should take when learning how to screen print logos on hats at home.
The best results can be achieved with the help of a heat press machine or a less expensive heat gun:
- Keep the heat gun just above the print
- Gently move it over the design within 30-60 seconds.
- Keep an eye on the ink until it dries up and becomes smooth, not sticky
Wait till the hat has cooled down, and then touch the design. Correct curing makes your personal prints stick out and last.
Cleaning Tools After Printing
It is good practice to clean your tools as soon as you finish printing to avoid the ink drying and wearing out your screen/squeegee. It is a small, time-saving, and easy regimen to make your materials last longer, especially as you intend to do more screen printing on hats in the near future.
In order to clean up effectively, here is how to do it:
- Use a paper towel to clear excessive ink
- Use warm and detergent water to wash your screen, squeegee, and tools
- Wet the screen in running water
- Brush back and forth in a soft scrubbing manner using a soft brush where necessary
- All dry out using a clean towel, then store
Cleaning your tools makes sure they are always ready to be used in your next creative activity and will help you maintain consistency in the outcome of your creative activities.
Troubleshooting and Screen Printing Tips for Better Results
Screening the logos onto hats is learnt at home through trial and error. It is part of the process, and with a curved surface, there will always be mistakes. In this area, you are going to be able to find out where to look when you have common problems and how to solve them, as well as give some practical hints to make your results better.
Common Screen Printing Mistakes
You could have some problems with the prints when you are new to using screen printing on hats. The majority of them can be solved easily when you realize what to focus on:
- Ink Bleeding: This will happen when the ink bleeds outside your design. You may be placing too much ink or printing too hard. With the next shot, make it a little lighter and shorter in ink.
- Patchy or fading design: Uneven prints may indicate that the screen is not lying flat. It is important to ensure that your hat is secured to the platen and the screen is fitted with a contact to the front panel in a uniform manner.
- Smudging: You might notice that your print becomes blurry, in which case you probably moved the hat or the screen. Make sure that everything is in the right position by squeezing the squeegee twice.
- Ink Not Cured: Whatever ink that is in your print does not dry or bleach out. Follow the suggested time on heat with your heat press machine or heat gun.
Training should be performed on discarded or used hats to gain confidence and avoid wasting material.
Helpful Tips for Screen Printing on Hats
Regardless of whether you are just starting out with screen printing on hats or are simply trying to enhance your outcomes, any of the below tips will assist you to learn how to successfully do it faster:
- Whether in the work or study area, make sure it is clear of clutter so that accidents do not happen.
- The lines and shapes are to be bold and plain ones, as it is very difficult to print on curved areas with fine detail.
- Before you print your final piece, test your setup on an old hat.
- By cleaning your tools every time you use them, you will reduce wear and tear on them.
- Keep calm- this is just the experience of printing.
With these DIY screen printing tips, you’ll see steady improvement in every hat you make. Don’t worry about early mistakes. Every successful printer started where you are now!
Conclusion
Screen printing on hats at home is a fun and creative way to make custom designs. With the right tools, a little practice, and some patience, you can turn simple hats into personalized gifts or even products to sell. Start with bold designs, keep your setup steady, and always cure the ink properly.
Don’t worry if things go wrong at first—every mistake helps you learn. Whether you’re making team hats, party favors, or building a small business, this skill is worth mastering. Keep printing, keep improving, and enjoy the process of creating something truly your own!
FAQ
How do I keep my hat from moving while I print?
You can use a hat platen or put a bowl inside the hat. Tape the hat down if it still slips. This keeps your design sharp and stops smudging.
Can I use regular fabric paint instead of plastisol ink?
You can try fabric paint, but plastisol ink works better for hats. It gives brighter colors and lasts longer. Fabric paint may wash out faster.
What should I do if my print looks faded?
Check if you used enough ink. Make sure the screen touches the hat evenly. Try adding a second layer of ink. Always cure the print well with heat.
Do I need special hats for screen printing?
- Trucker hats
- Five-panel hats
- Foam front hats
These hats work best. They have a flat front, which makes printing easier. Avoid hats with lots of seams or heavy stitching.


