
An RV awning is an essential part of your camping experience. It provides shade and protection from the elements while you’re outside enjoying the great outdoors. However, over time, the fabric on your RV’s awning can become damaged or worn out. When this happens, it’s important to replace the fabric to ensure your awning continues to function properly and to protect your RV from the elements.
In this comprehensive guide, we will take you through the step-by-step process of replacing the awning fabric on your RV. By following these instructions carefully, you can rejuvenate your RV’s awning and continue to enjoy shade and protection during your outdoor adventures.
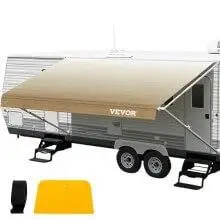
How to Replace Awning Fabric on an RV
In this part, we’ll show you how to replace the awning fabric on your RV, and we’ll also recommend some high-quality replacement fabrics from VEVOR to make the process even easier.
Step 1: Gather the Necessary Tools and Materials
Before you begin replacing your RV’s awning fabric, it’s important to gather all the necessary tools and materials. You will need:
- Replacement awning fabric
- Screwdriver or drill
- Pliers
- Tape measure
- Scissors or utility knife
- Safety goggles
- Ladder or step stool (if needed)
- Assistant (optional but recommended)
If you’re not comfortable working with power tools or climbing ladders, it’s a good idea to hire a professional to replace your awning fabric for you.
Step 2: Remove the Old Fabric from the RV’s Awning
Once you have your tools and materials, the first step in replacing your RV’s awning fabric is to remove the old fabric from the awning. To do this, follow these steps:
- Roll up the awning and secure it in place using the straps provided.
- Using a drill and socket wrench, remove the bolts holding the awning arms to the RV. Make sure you have a helper to support the awning as you remove the bolts.
- Carefully lower the awning to the ground.
- Remove the old fabric from the awning. You may need to cut the fabric away from the awning using a pair of scissors.
Step 3: Install the New Fabric on the Awning
Once you have removed the old fabric, it’s time to install the new fabric on the awning. Follow these steps:
- Lay the new fabric out on a flat surface and make sure it’s the correct size.
- Attach the new fabric to the awning using the screws and clamps provided. Make sure the fabric is centered and taut on the awning.
- Roll up the awning and secure it in place using the straps provided.
Step 4: Reattach the Awning to the RV
With the new fabric installed on the awning, it’s time to reattach the awning to the RV. Follow these steps:
- Raise the awning up to its original position using the awning arms.
- Using a drill and socket wrench, reattach the awning arms to the RV. Make sure the bolts are tightened securely.
- Using a drill and socket wrench, reattach the awning arms to the RV. Make sure the bolts are tightened securely.
Step 5: Test the Awning to Make Sure it Works Properly
Now that the new fabric is installed and the awning is reattached to the RV, it’s important to test the awning to make sure it’s functioning properly. To do this, follow these steps:
- Roll out the awning to its full extension.
- Make sure the awning is level and not sagging in any areas.
- Test the awning’s locking mechanism to make sure it stays securely in place when it’s extended.
- Roll up the awning and make sure it rolls up smoothly and evenly.
- Test the awning’s locking mechanism when it’s rolled up to make sure it stays securely in place.
Conclusion
Replacing the awning fabric on your RV can seem like a daunting task, but with the right tools and instructions, it can be a straightforward process. By following the steps outlined in this article and using high-quality replacement fabrics like those offered by VEVOR, you can ensure that your RV’s awning continues to function properly and protect you and your RV from the elements. Remember to always follow safety precautions when working with power tools and ladders, and if you’re not comfortable doing the work yourself, consider hiring a professional to do it for you. With a little bit of effort, you can keep your RV’s awning in top condition for years to come.


