One of the best methods to enhance security, safeguard gardens, and protect small animals is to use chicken wire on a fence. It does not need extensive building projects, but rather than just a wooden fence, chain link fence, or garden enclosure, add some chicken wire to give an added line of defense. The question of how to put chicken wire on a fence is a common query among many homeowners due to its affordability and practicality for numerous outdoor tasks. A good, tidy, and sound end product can be achieved by following a proper step-by-step process for installing chicken wire fences. Even novices can successfully complete the project with the right tools, preparation, and installation methods, and have a long-lasting performance.
- Tools and Materials Required for Installing a Chicken Wire Fence
- How To Prepare A Fence Before Installing Chicken Wire
- Step-by-Step Guide To Installing Chicken Wire On A Fence Properly
- How To Strengthen A Chicken Wire Fence And Make It Last Longer
- Common Mistakes To Avoid When Installing Chicken Wire On A Fence
Tools and Materials Required for Installing a Chicken Wire Fence
It is necessary to know what tools and materials one will require before commencing any fence work. An adequate installation is quicker, cleaner, and much easier to control. When you are studying how to put chicken wire on the fence, it is better to prepare everything beforehand in order to avoid any delays and errors. It also simplifies the entire step-by-step process of installing the chicken wire fence into a more well-organized and easily followed process. The question of the simplest method for putting chicken wire on a fence is also being sought by many beginners, and the main task that simplifies everything is preparation. The stability and strength of the fence are also enhanced by having the right materials. With all the preparation in place when you start the job, the work runs more smoothly and efficiently throughout.
Basic Tools Needed for Chicken Wire Installation
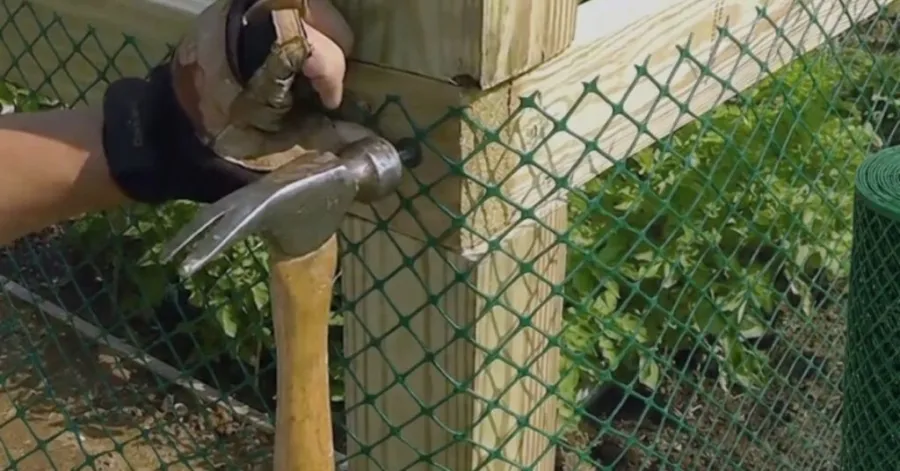
Simple equipment is highly significant for constructing a robust and attractive chicken wire fence. You will have to use wire cutters to cut the mesh to the right size and pliers to wind and fix the wire in place. A measuring tape will help you maintain good spacing and straightness along the fence line. The chicken wire is usually secured to a wooden fence post using a hammer or staple gun. These are the tools needed to learn how to repair chicken wire to fence posts properly, without loose parts.
Strong gloves should also be worn as the edges of chicken wire can be sharp, and minor cuts can be made. Marking materials, such as a pen or chalk, will help you plan the layout for fixing the wire. The installation process will be made easier and more precise with fewer errors when all of these tools are in place.
Different Types Of Chicken Wire And Fence Options
Chicken wire comes in a variety of sizes, and these have different uses. The most popular option is galvanized chicken wire since it is coated to avoid rust and lasts longer outdoors. It can also be covered with PVC-coated wire with additional protection and a more aesthetic appearance, particularly in gardens and ornamental fences. Mesh size is also important since the smaller the openings, the greater the protection of plants and small animals.
Chicken wire may be attached to wooden fences, metal posts, or chain link fences. All kinds of fences have a slightly different manner of installation. To illustrate, in the process of teaching how to attach chicken wire to a chain link fence, there are strong ties or binding wires that are used to secure the mesh firmly and avoid it falling or having loose spots. The question of how to install chicken wire around a garden fence is also sought by many people; this normally involves numerous precise alignments so as to ensure protection of plants, as well as maintaining a tidy structure.
@beckenholdt Replying to @geovanniguerrero37 here’s our “Vevor” Chicken coop #vevor #vevortools #vevorttshop #chickens #chickencoop
♬ original sound - Becken
Safety Equipment Needed For Fence Installation Work
Great care should be taken when handling chicken wire, as the edges are sharp and may be hazardous. Wearing heavy gloves is an extra precaution to keep your hands safe when working with and laying out the wire, which can easily cut the hands. Safety goggles can also be used to save your eyes in case of loose wire ends, which can snap up during installation.
Powerful shoes are useful to keep your feet dry when using them on uneven surfaces or when moving heavy objects. Extra protection against scratches is offered by long sleeves and durable clothing. Wearing the right safety gear, you can work more comfortably and get uninjured as you install your fence easily and efficiently.
How To Prepare A Fence Before Installing Chicken Wire
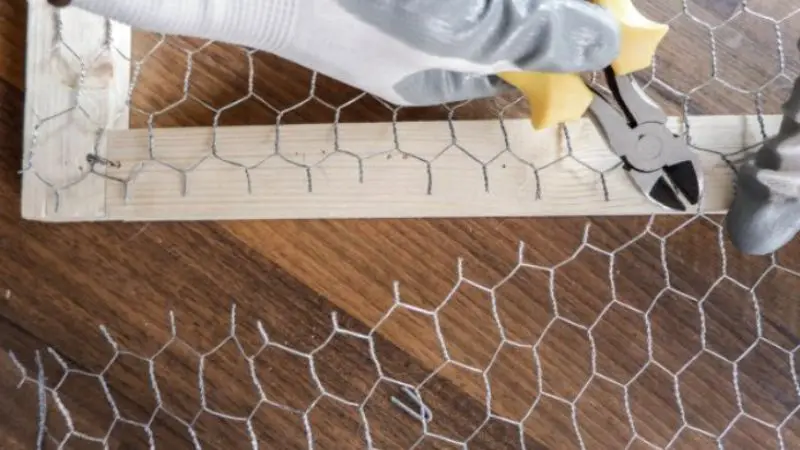
Proper preparation of the fence before installation of the chicken wire is highly important in achieving a strong and long-lasting effect. A properly made fence is very useful in making sure that the wire is tight, straight, and does not go loose over time. When you are learning how to put chicken wire on a fence, such a preparation step simplifies the entire process and makes it more precise.
Preparation also eliminates installation errors and gives time to ensure all the fences are ready to carry the wire correctly. This is the cornerstone of a long-lasting and unsullied fencing system.
How To Check And Repair a Fence Before Installation
Always ensure that you have checked the whole fence before commencing work. Check on loose nails, broken wood, rusted metal, and weak posts, which can influence the strength of the installation. Any area that has been damaged must be repaired or replaced to be able to proceed in order to ensure the chicken wire remains well supported.
When you are thinking of how to install chicken wire on a wooden fence, this step will be even more crucial since wood that is not resistant will make the wire slump or loosen. Ensure that posts are upright, stable, and well rooted in the ground. Washing away old dirt or rust also helps enhance grip when attaching the wire. A solid base for the fence ensures a secure, durable final installation.
How To Measure Fence Area For Chicken Wire Installation
It is imperative to measure the area of the fence properly before cutting or installing chicken wire. Use a measuring tape to find the exact length and height of the fence. This will help you determine how much material you require and avoid wastage or shortages in the process.
In the case of learning to install chicken wire around ga arden fence, precision in measurement is even more vital since garden fences tend to have corners and a lack of uniformity. Measure out all parts carefully and identify them in a way that ensures the layout remains in order. Check measurements twice before proceeding with the chicken wire to ensure it is a good fit, with no openings or strain.
How To Cut Chicken Wire To The Correct Size
Once this is measured, the chicken wire is cut to the appropriate size. Place the wire on a clean, flat surface to avoid bending or twisting when cutting. Cut along the lines correctly using good wire cutters so that the fitting is correct.
A lot of individuals seek how to install chicken wire on fences in the most convenient way, and proper cutting is one of the elements in that procedure. When necessary, it is always good to cut a little bigger piece so as to make some changes when installing. This helps ensure adequate coverage and a close fit when affixing the wire to posts or frames. Cuts that are made carefully enhance the strength as well as the appearance of the final fence setup.
Step-by-Step Guide To Installing Chicken Wire On A Fence Properly
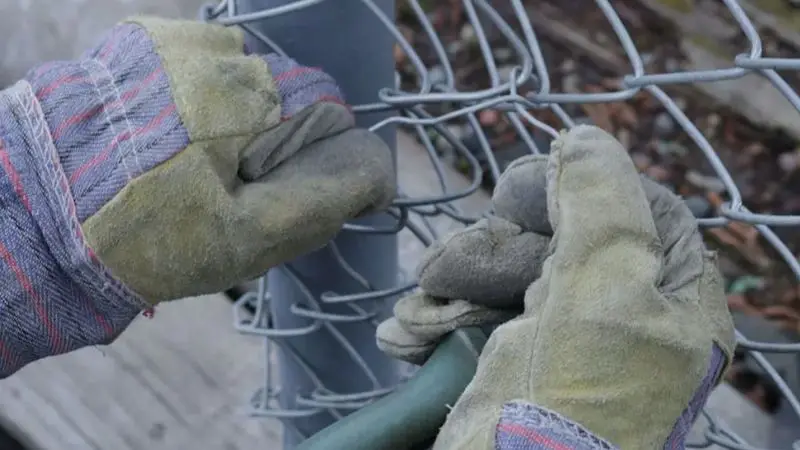
Once you have prepared your fence, you are now ready to install the chicken wire. This is where technique comes in, since any little error can have an impact on the strength and look of the fence. When learning to install chicken wire to fence, it is best to follow clear instructions to achieve a clean and stable finish. The most common question that many individuals seek the answer to is how to install chicken wire on the fence in the easiest way, but the step-by-step approach is the surest.
The steps are based on the previous ones; thus, when performed in the right sequence, it will be more stable, aligned, and long-lasting.
Step 1: Start From One Corner Of The Fence
Start installation at one end of the fence, which is fixed. This will assist you in keeping the chicken wire on course and make everything straight at the start. Roll the wire along the length of the fence without twisting or bending too much, but keeping it close to the surface.
Unlike the previous stage, it is important to learn how to repair chicken wire to the fence posts since the initial fixing is the foundation of the whole construction. Before proceeding, make sure that the corner is secured well to ensure that the wire remains in position. A proper start will ease the rest of the process and avoid the uneasy positioning in the future.
Step 2: Attach Chicken Wire Using Staples Or Ties
After positioning the wire, begin securing it to the fence using the appropriate technique. In wooden fences, staples are usually employed, whereas in metal fences, strong ties or binding wires are usually needed. Fix the wire periodically to keep it in place and not loosen it.
When learning how to repair chicken wire to fence posts, this is a very critical step in ensuring long-term strength. For metal structures, you need to know how to secure the chain-link fence with chicken wire so it is evenly tied down with sturdier ties. Correct fastening will ensure that the wire is straight and will not hang over the years.
Step 3: Keep The Chicken Wire Tight And Even
Going along the fence, remember to keep the wire in a level position without bending it too narrow. Light tension is used to ensure a flat and smooth surface. Do not over-pull; this can destroy the mesh or cause lumps in the pressure to the posts.
Check alignment often to make the wire remain straight and in a straight line. Even and steady installation enhances the strength and appearance. This is necessary to attain a clean finish, particularly in longer lengths of fences where minor errors can be easily perceivable.
Step 4: Secure Edges And Corners Properly
Installation is complete; all edges and corners should be secured. These are the most pressured areas and, therefore, require additional reinforcement. Bend the wire around the posts at the corners and insert some extra staples or ties to ensure that everything stays firmly in place.
In installing chicken wire around a garden fence, one should pay special attention to corners since garden fences tend to bend and are of irregular shape. Properly fastening edges will help avoid their loosening over time and will enhance the structural stability and safety of the fences.
How To Strengthen A Chicken Wire Fence And Make It Last Longer
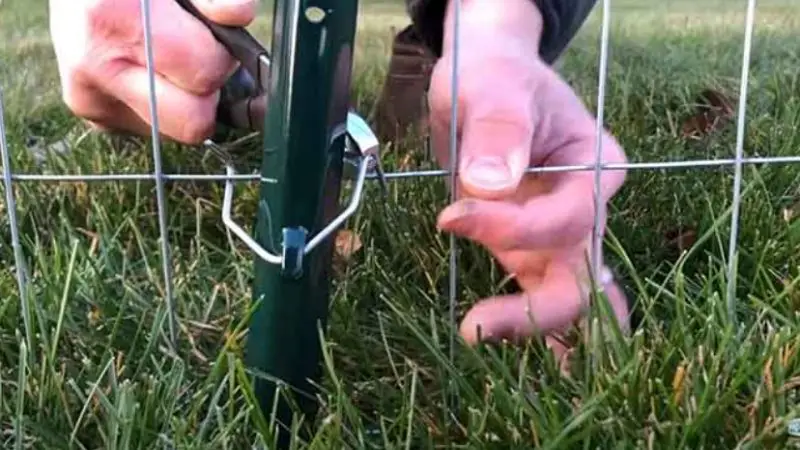
Once the chicken wire has been installed, the second most important thing is to ensure that the fence remains strong and durable over the years. Unreinforced fences might become loose, sag, or develop weak spots over time. If you are learning to fit chicken wire to the fence, reinforcing the structure is a significant part of the process. Proper cleaning and maintenance of the fence enable it to withstand weather and day-to-day use.
Investing an extra minute to strengthen the fence will help you save on future expenses for repairs and replacements.
Step 1: Add Extra Support To Weak Sections Of The Fence
The first step would be to check the fence and identify any weak points that can be reinforced. They commonly occur at corners, gate openings, joints, or at points where the posts are farther apart. These points can be reinforced by adding additional staples, ties, or support wires, which can increase overall stability.
When teaching how to repair chicken wire fencing posts, one should ensure that all the posts are gripping the wire. Reinforcing the weak areas prevents the mesh from being pulled down and allows the fence to maintain its shape over time. A properly supported fence is stronger, safer, and more reliable during other weather conditions.
Step 2: Protect The Chicken Wire From Rust And Damage
One of the most frequent causes of damage to chicken wire is rust, particularly in cases where the fence is in contact with rain and moisture for a considerable time. Early signs of corrosion can be detected through regular inspections before they become major issues. It is also advisable to keep the fence clean to prevent dirt and moisture from accumulating on the wire.
This step is particularly significant when you are working on how to install chicken wire around a garden fence because, in this case, garden areas tend to remain wet. Galvanized chicken wire and proper drainage around the fence can greatly lengthen the life of a fence. Rustproofing the wire prevents rust and maintains the fence in good condition and appealing over many years.
Step 3: Check For Gaps And Repair Loose Areas
The last one is to examine the whole fence, whether there are any gaps, or loosely attached parts, or parts where the wire is no longer taut. The tiniest holes can diminish the fence’s effectiveness and allow animals or garbage to get through. Walk the fence line and inspect each part carefully in case of any weakness.
When attaching the chicken wire to the chain-link fence, ensure the wire is securely fastened to the fence. Tie or fasten any loose sections with extra ties or fasteners. Repairing holes at an early stage helps keep a fence secure and prevents minor issues from becoming more serious repairs in the future.
Common Mistakes To Avoid When Installing Chicken Wire On A Fence
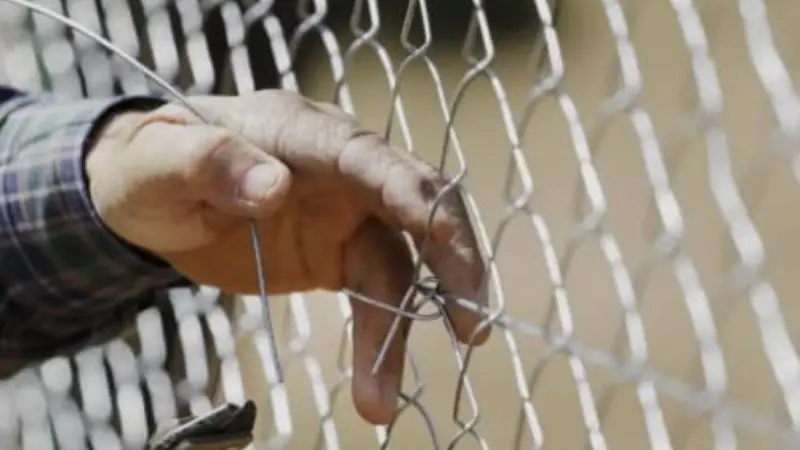
Even a simple chicken wire work can get issues in case some errors are not taken into consideration during the installation. Minor mistakes can result in loose parts, lack of proper coverage, or a fence that fails to withstand as long as it was meant to. When learning how to install chicken wire on a fence, knowing these are the most common mistakes will enable you to create an effective and more professional job.
Being careful in details and preventing mistakes during installations can save you time, minimize the amount of repairs, and enhance the overall life of your fence.
Step 1: Avoid Installing Loose Chicken Wire
The most frequent error that is made is the chicken wire being too loose when installed. A loose wire may hang down over time, causing weak areas and lowering the functionality and aesthetic of the fence. It is also easily damaged by exposure to wind, animals, or through everyday use.
There are a number of individuals who want to install chicken wire on a fence in the easiest manner, and they are likely to hurry up, yet it is important to have the right tension. The wire must be drawn in a straight manner across the fence without being overstretched. By making the wire tight at the start, this assists in producing a safe and durable fence system.
Step 2: Avoid Incorrect Measurements And Cutting Mistakes
Incorrect measurements frequently lead to material waste and installation delays. Checking the area of the fence prior to cutting the wire can assist in making sure it fits and lessens the number of modifications in the future. The smallest errors in measurements can cause gaps or leave any areas uncovered.
This is particularly widespread when considering how to install the chicken wire around the garden fence, where corners and odd shapes may complicate measurements. Never cut the wire without checking the dimensions. The correct measurements will allow the installation process to be smooth and lead to a cleaner and more professional-looking fence.
Step 3: Avoid Using Weak Staples, Ties, Or Fasteners
The fastening materials may be of low quality and may weaken the entire fence, even when the chicken wire is high quality. The weak staples, ties, or connectors can loosen with time, making the wire slide or break off the fence structure. The use of long-lasting fastening materials can enhance stability and avoid issues in the future.
In learning how to repair chicken wire to fence posts, it is essential to employ powerful staples or fasteners, which can deal with the pressure over time. Similarly, anyone with the task of attaching chicken wire to a chain link fence is expected to use top-quality ties that are meant to be used outside. High-quality fastening materials offer enhanced support and are useful in ensuring that the fence is kept in place for years.
Wrap Up
When you take a step-by-step approach to the process, it becomes easy to learn how to install chicken wire on a fence. Preparation, precise measurements, fastening, and maintenance are all significant in producing a long-lasting fence. Whether you want to know how to install chicken wire on a wooden fence, how to install chicken wire on a chain link fence, or how to install chicken wire around an arbor fence, proper installation techniques can help prevent most of the problems and boost its performance over time. With the right materials and proper installation, you will be able to construct a strong fence that is not only protective and stable but also worth your money in the future.
FAQs
How Can You Easily Put Chicken Wire on a Fence?
The most convenient method of installing chicken wire on a fence is to begin on one end, maintain the wire taut, and hold it in place by staples or by tying it at frequent points.
How do I Fit Chicken Wire on a Wooden fence?
To know how to install chicken wire on a wooden fence, to install the wire using galvanized staples, to maintain the even tension of the wire, and to fix it to each corner of the fence post.
How to Attach Chicken Wire to Chain Link Fence?
To install a chicken wire on a chain link fence, heavy-duty wire ties or zip ties can be used to secure the mesh and connect it to the chain link.
What is the Frequency of Checking My Chicken Wire Fence?
Check your fence periodically (after every few months) to see whether it has rust, loose fasteners, hanging wire, or holes. Constant repairs can help prolong the life and efficiency of the fence.
Is it possible to install chicken wire around a garden fence?
Yes, the question of how to install chicken wire around a garden fence is a popular one. It helps to shield plants against animals and still allows air to circulate and visibility.