
Gone are the days of bulky wooden beams blocking your view. Cable railings are the latest design style for decks, balconies, and staircases. They’re the in-thing that merge minimalism with class and cost-efficiency. By installing cable railing, you can transform your outdoor setup into something really sleek and less obstructive. And the best part is that installing cable railing is so easy to do, you don’t need any professional to chip in.
In this article, you’ll learn all about how to install cable railing. From the basic tools to a step-by-step guide on how to install cable railing, you’ll be drawn into another DIY adventure that is as satisfying as it is beautiful.
So, ditch the old tacky wooden beams, and say hello to the beauty and benefits of the trending outdoor decor style – cable railings.
Table of contents
Benefits of Cable Railing Over Traditional Railings
For years, decks and balconies have always been designed using bulky traditional railings. The heavy barriers such as wooden beams and metal railings were designed for support. Although they were pretty sturdy, they often created an entirely different set of problems. They were obstructive, hard to install, hard to maintain, and also caused domestic accidents. And that’s why cable railings are built with a difference.
Unlike traditional railings with multiple difficulties, cable railings are minimalist in appearance, which makes them classy. What’s more is that, with cable railing installation, you don’t have to worry about maintenance cost or enduring an obstructed view. You won’t even have to manage space.
With this step-by-step guide, you’ll realize that you can easily install cable railing. By installing cable railing, you get to enjoy all the best bits of traditional railings without the negatives.
It’s time to show you how to install cable railing. But first, you need tools.
Cable Railing Tools
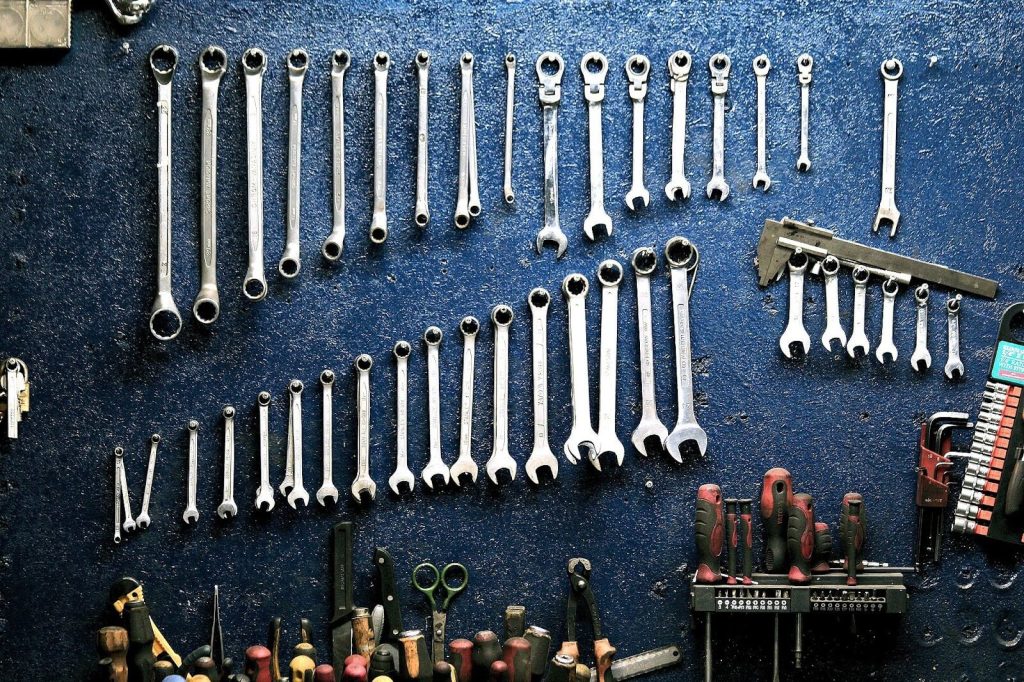
Installing cable railing requires a set of DIY tools. For starters, you need a reliable drill that’ll help with creating holes and driving screws. You’ll need wrenches to help with tightening the cables and other fittings. A tape rule is essential for measurement, and you can support it with a marker.
You’ll also need a cable cutter for clean and precise cuts. A crimping tool will come in handy for joining the cables to the rail fittings. A level and tensioning tool will help you monitor the tightness and even level of your cables during installation.
Summarily, you need:
- Drill
- Wrench
- Cable cutter
- Tape rule and marker
- Crimping tool
- Level
- Tensioning tool
If it all looks too complicated, you can simply get a cable railing installation kit.
Once all your tools are ready, it’s time to begin the cable railing installation.
The 5 Steps For Cable Railing Installation
Now that you’ve decided to ditch traditional railing, here’s what you need to do to install cable railing.
Step 1: Choose the right cable railing kit
The first step to start your cable railing installation is to pick the right cable railing installation kit. If you’re a hardcore DIYer, you may have all the installation tools in your shed. But if you’re a beginner with no tools, you may find it confusing to buy the tools bit by bit. So, your best bet would be to purchase a cable railing installation kit. The kits typically come with tools recommendation.
The good news is that cable railing installation kits aren’t so pricey, and you can easily find strong tools from different manufacturers online. Irrespective of the kit you buy, ensure that it strictly complies with your local regulations on cable railing installation.
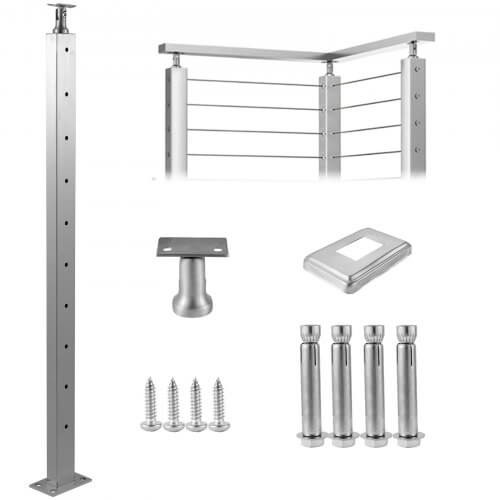
One of the best cable railing installation kits in the market is the VEVOR stainless steel stair railing cable kit. These five-star kits are designed with simplicity and ease of installation in mind.
When selecting cables, prioritizing durability and compliance is paramount. In this regard, VEVOR’s stainless steel cables come highly recommended. Renowned for their exceptional flexibility, durability, and longevity, they have earned accolades from satisfied customers.
For starters, most VEVOR steel stair railing cable kits have pre-drilled holes for convenient installation. You’ll also find non-perforated steel stair railing posts by VEVOR that allow you to maximize the DIY experience. Overall, VEVOR steel posts need little maintenance as they’re coated to survive external conditions and also maintain high aesthetics.
Up next, let’s build your cable railing frame.
Step 2: Build your cable railing frame
Once you’ve picked your cable railing kit and bought your cable, it’s time to lay the foundation. This step involves building the frame that you’ll install the cable railing on. Note that most cable railing kits come with pre-drilled posts that makes it easier to build your frame. These posts are usually either wooden or metallic.
The big question is; is there any difference between how to install cable railing with wood posts compared to how to install cable railing with metal posts? In truth, the major difference is really about maintenance, installation is relatively the same. Wooden posts require periodic sealing and might not last as long as metallic posts which are low-maintenance.
To build your cable railing frame, mark the locations for the posts according to the manufacturer’s specifications. The recommended spacing for cable railing installation posts is 42 inches wide. However, you can tweak these specifications based on your desired railing length.
Once you’ve marked the positions for the posts, use foundation anchors or base plates to hold the posts in place. Then, attach intermediate railing posts between each post to improve the frame’s stamina and ensure that everything is fastened tightly.
Once this is done, it’s time to move on to the next step.
Step 3: Drill holes into your cable railing posts
If your cable railing posts are not pre-drilled, this step is important for you. Once the posts have been firmly positioned with 42 inches separating them, it’s time to drill the holes for the cable railings.
If your cable railing installation kit comes with instructions for drilling holes, you can use that as a guide. You may also want to consider local regulatory guidelines for drilling holes into the cable railing posts. However, if you need more hands-on experience, you can personally choose your desired hole sizes and mark the drill spot on each post. It’s advisable to leave a space of 3.5 inches between each hole.
When drilling, ensure that you start with small pilot holes. This way, you’ll avoid making mistakes such as oversized holes, wrong spacing and poor alignment. When drilling, work one post at a time – including the intermediate railing posts, and always double-check your measurements and alignment.
Up next, we’ll explore how to install cable wire railing.
Step 4: Install the railing cables
Having drilled the holes into the posts, it’s time to install the cables. At this point, you simply need to run the cable wires through the drilled holes. Knowing how to install wire railing is simply a matter of imagining that you’re threading a needle.
Once again, if your cable railing installation kit comes with a guide on how to install wire cable railings, you can comfortably follow the instructions. However, the process simply requires you to thread a cable through one level of drilled holes, and move onto the next cable and level. Note that the cable wires are meant to be parallel to each other. As such, you should avoid threading a cable through different levels of holes since this would obstruct other cables and you’ll have to start afresh.
Once you’re done threading the cable wires through the posts, it’s time to advance to tightening and cable cutting.
Step 5: All-important finishing touches
The final step in installing cable railing is to stretch out the cables for firmness and cut off the excess cables. This is where your tensioning tool and cable cutter will come in handy.
To provide firmness in the cables, draw out the cables and use your tensioning tool to stretch the cables until they feel taut. Use a wrench to tighten the bolts and cable fittings one post at a time. Always double-check the cable tension when doing this.
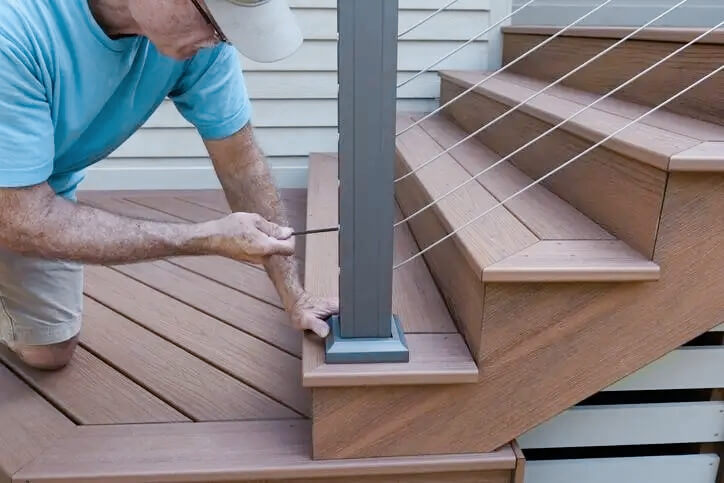
Once you’ve stretched the cables and tightened the bolts across all the posts, you’ll be left with excess cables sticking out. Use your cable cutter to cut the excess. Give an inch space from the cable fitting to avoid snapping from cutting the cable too short.
Let’s have a recap.
Key Takeaways
Congratulations on trying your hands on this DIY adventure of installing cable railings. Here are the key things to note:
- The first step to an amazing cable railing installation is choosing the right kit. VEVOR’s steel cable railing installation kits and stainless steel cables are some of the best in the market.
- The next step is to build the frame and ensure that the posts are evenly spaced by 42 inches.
- For posts that aren’t pre-drilled, drill each post with holes that are spaced by 3.5 inches. Always start with small pilot holes.
- Threading the cables through the posts comes next. Ensure that you thread each cable on a parallel level.
- Complete your installation with tightening the cables and cutting excesses.
- Having the right tools and following local regulations when installing cable railing is non-negotiable. The right tools and regulatory compliance would make your installation safe and easy.
- VEVOR steel cable railing installation kits are designed with safety and ease in mind. You’ll have less to worry about in terms of measurement, durability, price and safety when using VEVOR steel cable railing installation sets.
Do you want to know more about cable railing installation? Check out our answers to cable railing installation FAQs below.
FAQS About Installing Cable Railing
How much does it cost to install cable railing?
The cost of installing cable railing varies depending on some factors. Hiring professionals, kit purchase from manufacturers or unit-buying would influence the cost of installing cable railings. But the cost of installation ranges from $50 to $300 per linear foot.
How safe is cable railing?
Generally, cable railing are very safe especially when installed properly. The more you comply with local regulations and recommended measurements, the safer the result. It’s also a safe option as kids won’t be able to climb the cable railings and risk falling.
Can cable railing go around corners?
Yes, cable railing can be installed to go around corners. When it comes to how to install cable railing around corners, you need to consider two things; using pre-bent corner posts, or using additional posts to go around the corners. But this comes at extra cost.
How far can cable railing span without support?
There’s no precise limit to how far cable railings can cover without support. This is because the span of cable railing is determined by cable length, regulatory requirements, possible load, and preferred level of tension and deflection. Most manufacturers however recommend between 4ft to 6ft as the maximum non-support span for cable railings.
Does cable railing need a top rail?
Generally, cable railings only need a top rail for safety and also based on local regulations. Some regulations require a top guardrail for safety. Also, top rails are practical for adding some decoration to the overall installation.


