
Has your shower drain started leaking? You can easily fix small issues. But the question is whether it is a plumbing issue or a small problem. Dont be overwhelmed; we are here to help you. This detailed guide shows you how to fix a leaking shower drain. You just need basic tools to address the leaking drain. If you know the root cause, you can fix the issue in minutes. Let’s discuss some main problems and solutions.
Common Causes of a Leaking Shower Drain
Have you ever noticed that water is not flowing smoothly? It remains on the floor while showing. This indicates a problem with the drain. Drains can be clogged or leak for many reasons. Some of them are explained below.
Worn-Out or Damaged Drain Gasket
The drain gasket separates the shower pan from the shower drain. This gasket may degrade or crack over time. As a result, water seeps through, causing the shower pan to leak. The ceiling beneath your shower may have water stains. You should be able to fix a leaky shower drain gasket. If you notice mold or a musty odor, it might be from the gasket. If you detect clogs early, you may quickly resolve the problem.
Loose or Corroded Drain Flanges
How can you cure a concrete floor shower drain leak? The drain is secured by drain flanges. Water may seep out if they rust or become loose. This causes the shower pan to leak. Water may be dripping from below or accumulating around.
Cracks in the Shower Pan or Tiles
A cracked shower pan lets water leak through. Even small cracks can cause big problems. Water seeps through these cracks, causing a leaking shower pan. Check for chips or lines in the pan or tiles. If you spot any, you need to fix them right away.
Improper Drain Installation
How to seal a leaking shower drain? Sometimes, the drain was not installed correctly. Maybe the plumber did not seal it well. This mistake can cause a leaking shower pan. You may notice leaks soon after a new shower is installed. If you suspect this, you might need to reinstall the drain or seek assistance.
Tools and Materials Needed to Fix a Leaking Shower Drain
Before you start fixing your shower drain, you need to gather the right tools and supplies. Having everything ready makes the job easier and faster. Here’s what you should grab:
Basic Tools (Wrench, Screwdriver, Pliers)
How to fix a shower drain leaking into the ceiling below? You don’t need fancy equipment for this repair. Most of the tools are probably already in your toolbox.
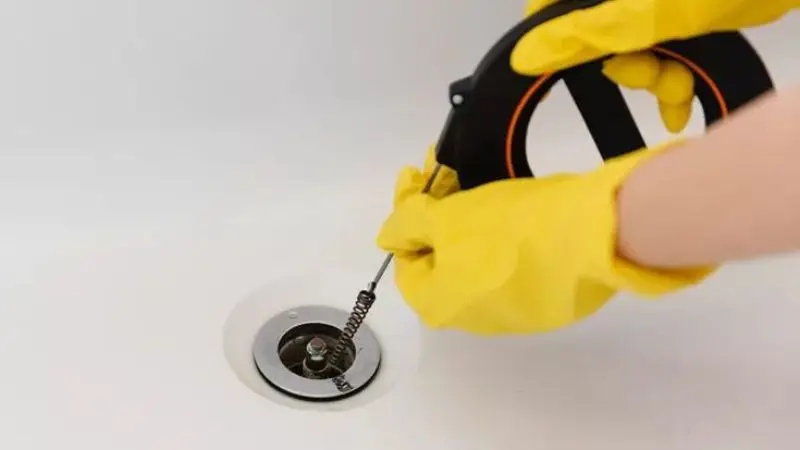
- Sewer Inspection Camera: Helps you identify the root cause of the problem.
- Wrench: You use this to loosen or tighten nuts and bolts around the drain.
- Screwdriver: This helps you remove the drain cover and any screws you find.
- Pliers: You might need pliers to grip and pull out old parts or to hold things steady.
Plumbing Supplies (Drain Gasket, Plumber’s Putty, Silicone Sealant)
You need a few plumbing items to make a solid repair.
- Drain Gasket: This rubber ring stops water from leaking. Replace it if it looks worn or cracked.
- Plumber’s Putty: You use this soft material to seal joints and gaps.
- Silicone Sealant: This waterproof adhesive keeps water from seeping through tiny gaps.
Safety Gear (Gloves, Protective Glasses)
Safety comes first. You want to protect your hands and eyes while working.
- Gloves: These keep your hands clean and safe from sharp edges.
- Protective Glasses: Wear these to shield your eyes from dust or debris.
Step-by-Step Guide: How to Fix a Leaking Shower Drain
Ready to get started? This step-by-step guide will show you how to fix a leaking shower drain with simple tools and clear instructions. You can follow these steps even if you have never tried to fix a leaking shower before.
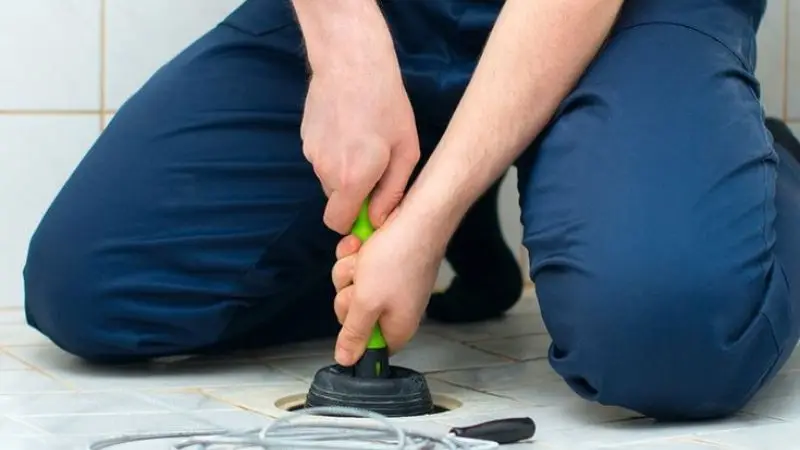
Step 1 – Remove the Shower Drain Cover
First, get your screwdriver. Remove the shower drain cover. Most lids have visible screws. Keep the screws in a safe place so you don’t lose them. If the lid is stuck, use pliers to gently raise it.
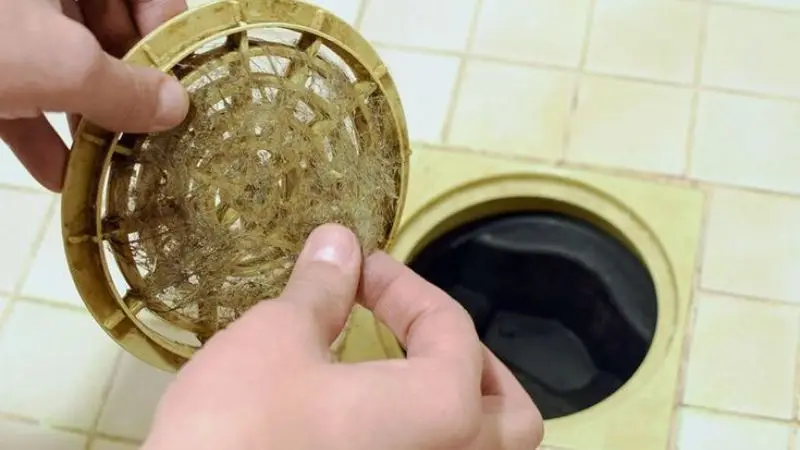
Step 2 – Inspect the Drain and Shower Pan
Now peek inside the drain. Inspect for any evidence of damage or old putty. If you need extra light, shine a flashlight. Inspect the shower pan for cracks or discoloration. This allows you to determine whether you need to fix more than simply the drain.
Step 3 – Replace or Repair the Drain Gasket
If you see a worn gasket, replace it. Pull out the old gasket with your pliers. Put in a new one. This is a key step in fixing a leaking shower drain. If you want to replace a shower drain, start with the gasket. A good gasket will stop leaks and help you fix a leaking shower for good.
Step 4 – Use silicone or Plumber’s Putty to Plug the Drain
Roll some plumber’s putty between your palms. Press it along the drain’s border. Another alternative is silicone sealant. Any step-by-step tutorial for repairing a leaky shower drain must contain this step. The seal prevents water from seeping out.
Step 5 – Replace the Drain Cover and Check for Leaks
Replace the shower drain cover. The screws should be tightened. Check for leaks and run some water. If no water is visible, you did the correct fix. You may now easily repair and replace a leaky shower drain!
DIY vs. Professional Help

When You Can Do It Yourself.
Many shower drain leaks are fixable by yourself. If you find water beneath the shower or a gradual trickle, you should probably only tighten a component or replace a gasket. Most of the tools are already in your house. If you have the necessary tools, troubleshooting the problem is straightforward. Following the procedures outlined above can help you prevent leaks and water damage before they worsen. Here are several signs you can fix on your own:
- The leak is small and easy to identify.
- The drain cover is easy to remove.
- You observe a loosened flange or a worn gasket.
- You feel comfortable using basic tools.
Indications that a Plumber is Needed
A simple remedy is not always enough to fix a leak. If you see any of the following difficulties, contact a plumber.
- The water leak continues even after you have cleaned it.
- You see cracks in the tiles or shower pan.
- The drain appears to be rusty or jammed.
- Strong odors or mold grow around the shower.
Conclusion
Now you can save on expensive plumber repairs. You can fix the small issues by yourself. You just need to be patient. The few basic tools and this guide are all you need. The most helpful tool is the sewer inspection tools. This will help you detect problems early and reduce the risk of more severe damage.
FAQ
How do I know if my shower drain is leaking?
You might see water stains, smell something musty, or notice wet spots under the shower. Check for these signs after you use the shower.
Can I use silicone instead of plumber’s putty?
Yes, you can use silicone sealant. It works well for waterproofing. Just make sure the area is clean and dry before you apply it.
What if the leak comes back after my repair?
Don’t worry! Sometimes leaks return. Check your work. Tighten everything. If water still leaks, you might need a new drain or help from a plumber.


