Starting with a heat press might seem tricky, but it’s easier than you think. With the right heat press guide, anyone—even a total beginner—can create custom designs in no time. You don’t need special skills, just a little practice and the right steps. This beginner’s heat press tutorial breaks everything down so it’s simple to follow. From setup to pressing your first design, you’ll feel more confident with every project. Take your time, start with easy materials, and enjoy the creative process. Soon, you’ll know exactly how to use a heat press machine and make designs you’re proud of.
What Is a Heat Press?
Are you planning to get started on custom t-shirts, tote bags, or any kind of gift in fabric? Then it is time to learn more about what a heat press machine is and how it operates. This is a must-have tool that can help DIY creators achieve clean and long-lasting transfers at home. If you want to create something useful or something to play with, then you should study so as to get better outcomes.
So, it is time to see more details about how the heat press machines work and why they are perfect beginner machines.
The Principles of a Heat Press Machine
A heat press machine is also a method of applying heat along with pressure to your design onto fabric. It has a drawing of a platen on which you lay your material. This is because the top plate warms and presses the pattern on the cloth. The temperature and time controls are available in most machines, and you are free to set the settings according to the material or type of transfer.
The ability to operate a heat press begins by learning these controls. This is an essential part of a heat press tutorial that any beginner should know: the combination of heat and pressure will lead to smooth and clean work.
The Reason to Use a Heat Press
A heat press machine is an excellent tool to learn printing. It evenly heats, applies a firm pressure, and has lasting effects—far superior to a regular iron. It can be easily used with any good guide, whether you are customizing shirts or making gifts.
Here’s why beginners love it:
- Works with vinyl, sublimation, and transfer paper
- Ideal for t-shirts, hats, bags, and mouse pads
- Delivers fast, professional-quality results at home
- Easy to learn with step-by-step instructions
With every project, you’ll gain confidence and enjoy the creative process more.
Beginner’s Guide: Heat Press Machine Types
Selecting the appropriate heat press is one critical decision every novice requires. Having some general differences in the styles of the machines, it is best to know what each style entails in order to make a choice. Understanding the kind of model that best fits your space and level of comfort will greatly simplify your heat press experience.
So, what are the most common ones and how do they work?
Clamshell vs. Swing-Away
Most individuals have to decide between clamshell and swing-away heat press machines when setting off. They are different and have their own benefits, relying on the way you work, as well as on your available space.
- Clamshell machines operate by opening and closing like a clam. The top plate is lifted up and pressed down directly. They are small, portable, and fit nicely in small areas.
- Swing–away machines are machines with a heated top that swings away. This allows you greater space to set materials safely without any risk of burns. This style is more comfortable and safe for some beginners.
The two styles are simple to approach. It is all about what suits your setup and what you are comfortable with.
Choosing the Right Model
To choose the right machine, you should consider the types of projects you are going to work on, the available space, and your confidence when working with heat tools. The following heat press machine guide will enable you to pay attention to those features that matter most initially.
These are some beginner-friendly points to remember as you peruse your options:
- Machine Size: Smaller presses work well on t-shirts and tote bags. The bigger ones are used to display bigger items.
- Control Simplicity: Try to find machines that have clear, easy to use time and temperature buttons.
- Workspace Fit: If you work with a limited space such as a home studio, select a small one.
- User Reviews: Beginner reviews often reveal which machines are easiest to handle and which ones to avoid.
A good beginner’s heat press tutorial always emphasizes starting with what feels manageable. With each project, you’ll learn more about your machine and gain the confidence to try new techniques. This step-by-step guide to using a heat press at home makes it easier to choose the right setup from day one.
Prepare Materials
Before you press your first design, it’s important to get your materials ready. Choosing the right fabric and transfer type makes a big difference in how your project looks and lasts. From smooth cotton to stretchy blends, your results depend on the combination you use.
Let’s go over the fabric types, transfer methods, and how to prepare your workspace the right way.
Selecting Fabric and Transfers
The first step to achieving optimal performance of your heat press machine is to choose the appropriate fabric. The easiest to work with is cotton: it takes designs and presses well and evenly. The blending of polyester and fabrics also works perfectly, but it might require the lower temperatures. Never allow heat damage by reading the label on the garment.
Then select the type of transfer. Heat transfer vinyl (HTV) works well with clean solid designs and with transfer paper you can print out colourful images at home. Both are ideal in shirts, bags, and so on. The compatibility of fabrics and transfer is emphasized in any heat press guide to the successful project.
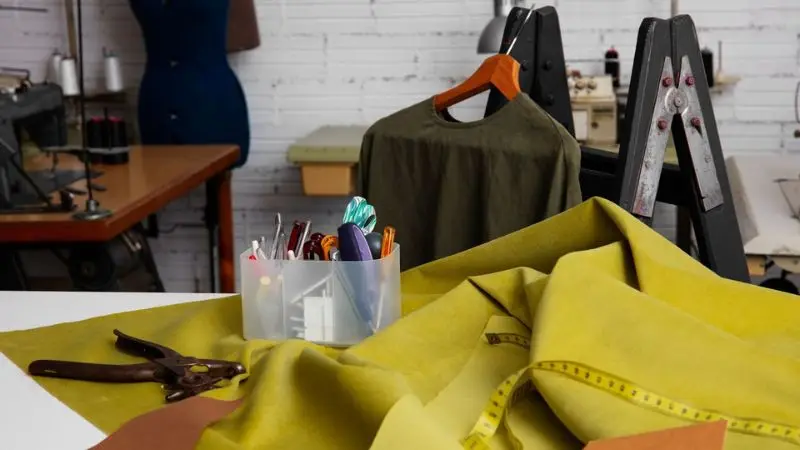
Gearing Up Your Workspace
Clearing up the workspace is the key to the trouble-free pressing. Clean a strong table or counter and put your heat press machine in such a way that the vents are not hindered. Use any transfer paper, vinyl, scissors, ruler and tape that you have nearby.
Always press materials that are wrinkle-free and flat. You should avoid accidents by keeping drinks, pets and clutter out of your space. To be on the safe side, use heat resistant gloves when close to the hot platen. It is a fundamental step in any tutorial on heat press by a beginner and an excellent habit to develop early on.
How to Use a Heat Press

Learning how to use a heat press might feel intimidating at first, but with a few simple steps and some patience, anyone can do it. Once you understand the setup and process, you’ll be able to create custom t-shirts, tote bags, or gifts with ease.
This step-by-step guide to using a heat press at home will help you get started, even if you’ve never used one before.
Setting Temperature and Time
Begin by placing your heat press on a sturdy, flat surface with no clutter around it. Make sure nothing blocks the vents. Plug it in and turn it on using the power switch. Most heat presses feature a digital display to set the temperature and timer.
Use the control panel to adjust both settings according to the fabric you’re pressing. Wait for the machine to fully heat up before using it—usually, the display will beep or indicate when it’s ready. This part of the heat press guide ensures your vinyl or transfer paper bonds cleanly to the fabric.
Positioning Fabric and Design
Once your heat press is heated, it’s time to prepare your item. Lay your fabric flat on the lower platen, removing any wrinkles or lint with a clean cloth or lint roller. Place your design using heat transfer vinyl or transfer paper in the correct direction.
For transfer paper, the printed side should touch the fabric. With vinyl, the shiny side generally faces up. Align your design with a ruler or measuring tape to ensure it’s centered. If needed, secure the design with heat-resistant tape so it doesn’t shift while pressing.
Pressing and Peeling
Now lower the top platen onto the material and apply firm, even pressure. The press will count down the time you previously set. Once the timer ends, carefully lift the top plate without jerking or shifting the fabric.
Peel the backing according to the type of transfer you used—some need to be peeled hot, while others require cooling first. If any part of the design doesn’t stick, cover it with a protective sheet and press again for a few seconds. This final step helps make your designs clean, polished, and long-lasting.
Troubleshooting
Even with the right setup, mistakes can happen when using a heat press. That’s part of the learning process. Instead of getting frustrated, focus on identifying the problem and fixing it. A little practice and patience will make troubleshooting much easier over time.
Below are some of the most common mistakes beginners face and how to correct them.
Common Mistakes
If your design doesn’t come out right, chances are it’s due to one of a few common errors. Spotting these early can save your project and improve your overall results.
Some frequent mistakes include:
- Setting the wrong temperature or time
- Forgetting to preheat the fabric
- Placing the transfer paper upside down
- Using too little pressure during the press
- Peeling the transfer too early or too late
If your design peels or fades after pressing, double-check your time and temperature settings. Always follow the instructions that come with your specific heat transfer vinyl or transfer paper. This heat press guide reminds you that every material reacts differently, and small adjustments often solve the problem.
Fixing Transfer Issues
Sometimes everything looks fine, but the transfer just doesn’t stick the way it should. Designs may fade, crack, or lift around the edges. Troubleshooting these common issues helps improve both your technique and final results.
Here are a few fixes you can try:
- Faded designs: Increase the temperature or press time slightly, and make sure the transfer paper suits your fabric.
- Lifting edges: Add more pressure during pressing and reapply with a protective sheet.
- Sticky residue: Lower the temperature next time to prevent overheating the transfer.
- Cracking designs: Reduce time or heat to avoid burning the vinyl or paper.
If you face the same issue more than once, test on scrap fabric before moving to your final product. This approach is common in every beginner’s heat press tutorial because it gives you room to adjust and learn safely.
Maintenance Tips
Proper maintenance keeps your heat press machine working safely and efficiently. When you clean and store it the right way, it performs better and lasts longer. Regular care also helps avoid problems that could affect your transfers or damage your fabric.
This part of the heat press guide walks you through basic maintenance steps you can follow at home.
Cleaning the Heat Press
Keeping your heat press clean is very easy but necessary. Whenever working on a machine, always start by unplugging the machine and letting it cool down. Do not put on bare hands an uncleaned hot platen. When cooled, wipe gently the surface with a soft piece of cloth. In case there is sticky vinyl or transfer paper leftover material, put in some rubbing alcohol in the cloth.
Avoid jagged or coarse tools-they may scratch (mark up) the platen. In more stubborn areas, it would meet the end result with a mild non-abrasive cleaner. And be sure to clean the lower platen, too-it gets gummed up with dust and lint very quickly, and this can influence fabric alignment and press-out.
Storage and Maintenance
Any machine that you have to leave idle without being used, you should also store rather than just clean it. Store your heat press at a dry, secure place to avoid wetness. Wrap it in a cloth or dust cover in order to protect against dirt.
Coil the power cord in such a way that you need not form a bend or twist quickly on the cord. Bolts and screws should also be periodically checked once a month and those that are loose tightened down. This basic maintenance will aid in avoiding mechanical problems and assisting smooth pressing experience each time you use it.
Heat Press Guide: Tips for Success
Once you’ve learned the basics, the next step is mastering the little details that improve your results. Avoiding beginner errors and experimenting with different materials will help you grow more confident. Whether you’re crafting for fun or building a business, these tips can make your heat pressing experience much smoother.
Let’s look at how to avoid common mistakes and build your skills through practice.
Avoiding Beginner Errors
Every beginner makes mistakes—but many can be avoided with a little planning. This heat press guide helps you catch issues early and press with confidence. Before each project, double-check your settings and materials. Even small errors can ruin a design, so get in the habit of following a simple mental checklist.
Here are a few tips to keep in mind:
- Preheat the fabric before placing the design.
- Face the transfer the correct way—usually printed side down.
- Apply even pressure to ensure the entire design sticks.
- Keep your space clean and clutter-free to avoid errors.
- Follow the instructions that come with your vinyl or transfer paper.
With these habits in place, you’ll feel more confident and avoid the most common beginner pitfalls.
Practice and Experimentation
The best way to improve your results is through consistent practice. The more you experiment, the more you’ll learn about different fabrics, transfer types, and pressing settings. This beginner’s heat press tutorial encourages you to go beyond the basics and find what works best for your style.
Try out different practice tasks like:
- Test various temperature settings to see what works best for each fabric.
- Adjust pressure levels to learn how they affect adhesion.
- Use a variety of designs to explore what looks clean and professional.
Keep a notebook where you track what worked and what didn’t. Over time, you’ll build your own custom heat press guide based on experience. Progress comes with every project—so enjoy the process, learn from mistakes, and celebrate your improvements.
Wrap Up
Heat pressing is an enjoyable and satisfying way of designing custom designs at home. It does not matter whether you are decorating gifts, shirts, and bags; the process on a heat press takes some time and practice. Have the right materials and settings to be followed on your machine, and always keep your place clean.
Do not worry about making mistakes; every project teaches you something new. You will get better with time and each press, with a little bit of patience and the right habits in place. Follow this heat press guide to be on course and equip yourself. You will soon be making professional-quality items with confidence and creativity in your own space.
FAQ
What can I do to tell whether my heat press is hot enough?
The majority of the heat presses are equipped with a digital display. Wait until it displays your selected temperature. A heat thermometer can also be applied to be extra accurate. Always preheat your machine, then begin to press.
Is it possible to apply a heat press to any kind of fabric?
A heat press can be used on blends, cotton, and polyester. Certain fabrics can scorch or be melted. The first thing you need to do is always check the label of the cloth. Do a practice on a scrap sheet when you are uncertain.
Why will my design not adhere to the shirt?
Wrong temperature, time, or pressure may make your design not stick. Check your settings twice. Ensure that you use the correct transfer material on your fabric. Press out once more with a protective sheet.
Do I have to get a special printer that uses transfer paper?
Yep, you will require an inkjet or laser printer, depending on the type of transfer paper you will be using. Instructions for the transfer paper should always be read. Using the improper printer may destroy your design.
What should I do in order to clean my heat press?
Allow your heat press to cool and unplug it. Clean up the platen using a piece of cloth. In the case of sticky spots, use some rubbing alcohol. Do not ever use sharp tools. Make cleaning a regular habit to keep your machine in very good condition.


