
It might seem hard to drill a straight hole, but it becomes easier with time and the right method. One just needs a steady hand, a little bit of patience, and a simple guide to drilling straight holes in order to achieve good results. You do not need costly aids; even a simple jig and a quality drilling machine guide will help you stay on target. By ensuring you have the correct alignment and taking your time, you can soon make clean, straight cuts in any simple project.
Tools You Need for Drilling Straight Holes
The first rule when drilling straight holes is to always start with the right tools, since accuracy in the tools used is more important than in the work being done. The easier the tools you use are and the right ones you use, the easier it becomes to control the drill and avoid mistakes. This also helps beginners get the hang of it without being overwhelmed.
The correct arrangement can make a world of difference when you are learning how to drill straight holes by hand, especially when you are a beginner. All the tools play a little yet significant role in ensuring that your drilling is consistent and uncontaminated. When you have the right equipment, you find your work much easier and more precise from the start.
How to Choose the Right Drill for Straight Holes
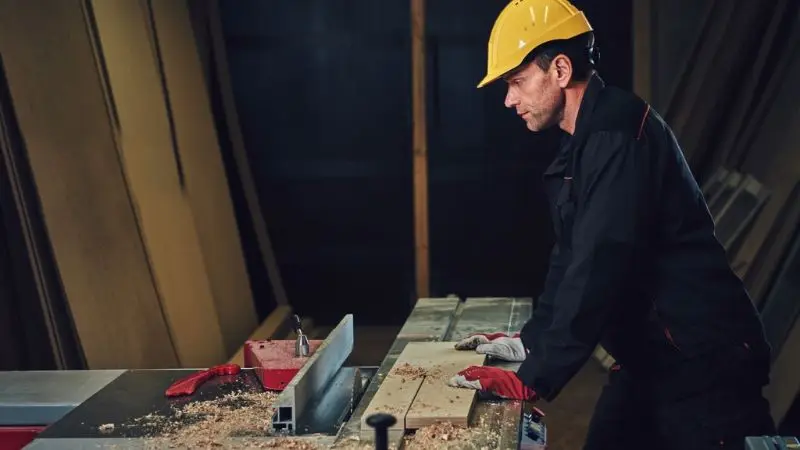
The proper choice of drill is significant, as it directly affects how steady your hands feel while you are working. Most novices will be satisfied with a simple corded or cordless drill. The point here is to choose a drill that seems balanced and comfortable to hold. When the drill becomes too heavy or hard to control, your hand may shake and leave uneven holes.
Control is of greater concern than power when it comes to how to keep a drill straight as one drills into metal or wood. An adjustable-speed drill will allow you to start slowly and maintain accuracy at the beginning of the hole. This minimizes slipping and enhances accuracy. Both hands are also better for holding the drill firmly, providing greater stability and control.
The right drill will simplify the process and help gain confidence through increased practice.
@avichihuas Magnetic drill de la marca VEVOR
♬ original sound – avichihuas
How to Select the Right Drill Bits for Clean and Straight Holes
Drill bits are essential for drilling straight, clean holes. Various materials require different bits, like wood, metal, or plastic. In the case of wood, the twist bits and the brad-point bits are the most appropriate choices, as they start in a fixed position and minimize slippage. Applying the incorrect bit can easily create crooked or uneven holes.
The sharpness is also a very important factor. A bit of handling dullness may wander off the marked point and introduce errors. With your bits sharp, you can stick to a step-by-step process of drilling perfectly straight holes with greater precision and fewer chips.
Always make sure that the bit is firmly secured in the drill before starting. Direction can also be impacted by a loose bit and decreased control during drilling.
How to Mark Drill Points Accurately Before Drilling
One of the most important steps for accuracy is to mark the drill point correctly. A pencil or a marker will help you clearly see where the hole ought to start. Once you have marked, a small awl or nail can be used to create a small dent on the surface. This dent helps point the drill bit so that, by the time you start working with it, the bit does not slip.
A ruler or square also comes in handy when you need a straight line or several holes lined up in a line. Proper marking assists tools and techniques to drill straight holes accurately by providing you with a clear starting point.
Good marking eases the drilling process and minimizes errors, particularly for novices who learn the control and precision.
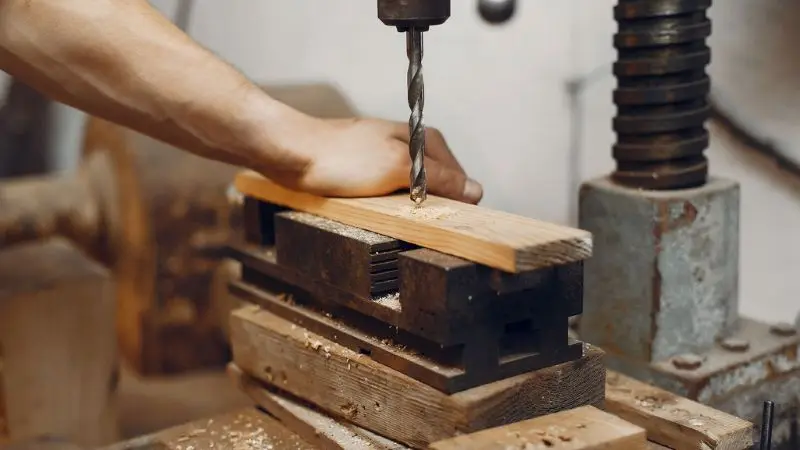
How to Use Clamps and Supports for Stable Drilling
Clamps and supports are essential because they keep your material in place while you drill. When the surface is in motion, the drill may slip and form angled holes. The workpiece is firmly clamped or vised so you can concentrate on operating the drill properly.
It is also helpful to place a scrap of wood under what you are working on to protect your surface and keep everything in place. This is quite useful for instructing beginners on how to drill straight holes by hand, since the material is guaranteed to be straight, making the process much easier.
When your workpiece is stable, you can control the drill more precisely, enhancing safety and accuracy.
Preparation Steps for Drilling Straight Holes

Proper preparation is a significant factor in accuracy and control before drilling begins. When you have a plan of how your setup will be, the drill will naturally follow the right direction without being forced. At this point, most errors can be easily prevented.
Preparation helps you stay focused and reduces the risk of slipping or leaving uneven holes. It also helps to give a clean and smooth finish, more so when you are using a step-by-step guide on how to drill perfectly straight holes.
Now we will take a simple, straightforward look at each preparation step.
Mark the Drilling Spot Accurately
The first and most important step towards accuracy is to mark the correct position of the drill spot. Begin by drawing a small, transparent dot in the location where you wish the hole. This is the initial point, your reference point. To achieve greater accuracy, you may use a ruler or square to create a short straight line through the surface. This allows you to verify the location more conveniently before drilling begins.
To have better control, use an awl or nail to make a small impression by pressing it into the dot to form a small dent. This dent prevents the drill bit from slipping when you first start. It is a simple and strong technique that provides a clear guideline for drilling straight holes in any material.
Good marking helps you stay accurate, minimizing mistakes during drilling. It also helps to make your work appear cleaner and more professional, even when you are a beginner.
Secure Your Workpiece for Safe Drilling
It is extremely important to keep your workpiece stable, as movement can lead to crooked or unsafe drilling. Attach clamps to the material and ensure the material is firmly clamped to your table or work surface. If there are no clamps, ask someone to help you hold onto it while you are working. The most important thing for accuracy is stability.
Using a scrap of wood under your project not only protects the surface beneath but also supports the drill bit as it passes through. It also helps in avoiding the destruction of your table. These are simple tools and methods of drilling straight holes in the right spot to help you have complete control over the process.
A constant workpiece will enable you to give full attention to the drill and not fixate on movement. This ensures that drilling is much easier, safer, and more precise throughout the process.
Set Up Your Drill Before Starting
To have clean, straight holes, you need to set up your drill correctly. The first thing to do is select the appropriate drill bit for your material and ensure it is sharp and firmly seated in the chuck. Any loose part may cause wobbling and loss of accuracy.
Before starting, hold the drill in a straight position. Test it out sideways and upwards to ensure that it is absolutely straight. This makes you know how to hold a drill straight as you drill into metal or wood without losing its straightness.
Start slowly and avoid applying too much pressure. Allow the drill to work, and you lead it softly. This control is highly significant for the novice in developing the right drilling habits. The correct installation will give you confidence, and every hole will be cleaner and straighter than before.
Step-by-Step Guide for Drilling Straight Holes
When drilling a straight hole, it is much easier to follow a logical sequence of steps rather than rush. Every step will keep you in control and enhance accuracy throughout the process, from start to finish. These steps will build your confidence with practice and enable you to achieve cleaner results each time.
This drilling straight hole guide has been created to enable you to grasp each step in a simple and practical manner. By taking the right steps, you will automatically minimize errors and increase alignment.
Step 1: Place and Hold the Drill Correctly on the Mark
Begin by centering the drill bit on the point you have marked on your piece of work. Ensure the tip is placed within the small dent or mark you made earlier. It is better to hold the drill with both hands to have more control. One hand must remain on the main handle; the other must hold the front of the drill.
Position yourself so that you are looking straight at the workpiece. You are to align the drilling point with the eyes so you can see clearly what you are doing. Always keep your elbows close to your body, as this helps reduce shaking and provides more stability.
When your material is clamped in a proper way, you should experience less trouble in concentrating on balance and direction. This arrangement is a significant element of the tools and techniques of drilling straight holes precisely because of a stable start, resulting in greater accuracy during the process.
Step 2: Check Drill Alignment Before Starting
Prior to switching the drill on, ensure it is properly aligned. The drill must be at an ideal 90-degree angle with the surface. Look at it sideways, then on top, to ensure it is not tilted in any direction.
You may take a small square or a sheet of wood as a visual guide, useful for helping you judge the angle. Such a simple check will contribute to more effective control and reduce the likelihood of hollows being uneven. A couple of seconds at this point can greatly enhance your end product.
This is particularly useful when learning to maintain the drill straight when drilling into metal or wood, since proper direction is the basis of accuracy. When the angle appears off, change your hand position prior to starting to drill.
Step 3: Start Drilling Slowly and Gently
Start drilling at a slow speed to allow the drill bit to align with the marked point. Allow the tip to bite into the material without excessive pressure. When you force it, the bit can slip and be out of place.
Once the bit has formed a small groove and appears stable, you can gradually increase the speed. Hold your hands constant and your eyes to the drilling point. This step-by-step guide to drilling straight holes perfectly because it sets the direction early.
A slow and cautious start helps maintain accuracy and avoid early mistakes that are hard to rectify later.
Step 4: Maintain Straight Angle While Drilling
The deeper the drill gets, the more you want to remember to maintain the drill in the same straight position. View it from various angles as one works to ensure that it does not tilt. In case you observe any kind of movement or drift, then stop and tighten your grip, and proceed.
It is best not to hurry since speed may lead to a lack of control. Rather, work on gradual movement and constant pressure. Should it be necessary, slightly draw the drill back and re-align it before proceeding once more. These are little corrections that are made to ensure that there is accuracy in the process.
This step is crucial in a drilling manual on straight drilling, since the slightest tilt can affect the final outcome. Frequent inspection will keep your hole straight from the beginning till the end.
Using Jigs and Drill Guides to Keep Holes Straight
When you have simple drilling aids (jigs, drill guides, etc.), drilling straight holes is much easier. These are used to support your hand and keep the drill at the right angle. They minimize mistakes and assist you in working with greater assurance and control.
These instruments also enhance your precision with practice and ease in your work. They can be used by a novice and by an advanced user who would like to achieve higher results with ease.
How to Make a Simple 90-Degree Wooden Drill Guide
An example of a simple tool that you can create at home using scrap wood is a 90-degree wooden drill guide. It will help you maintain the drill in an absolutely straight position when working on small projects. It is a highly convenient alternative in case you are studying straight drilling techniques.
- Prepare two little straight-edged pieces of wood.
- Combine them in order to create a powerful L shape.
- Your work surface should be L-shaped, with the drilling area at one end.
- With the inside corner, go around your drill at right angles.
This is a basic tool to assist you in making a straight drill when boring into metal or wood by providing your hand with a tangible advantage to follow. It enhances stability and minimizes slippage at the start of the drilling process.
You can also clamp the guide to gain even greater control, keeping both hands free and further increasing accuracy.
Easy Homemade Jigs for Better Drilling Control
Homemade jigs are easy-to-use gadgets made from basic materials that enable you to drill much more precisely. They come in handy when you need more control without necessarily having to purchase costly equipment. These concepts are particularly useful in practice and little projects of DIY.
- A reusable guide is a wooden block straight and with a straight hole drilled through it.
- To help keep you in a vertical position, place a small bubble level on the top of your drill.
- Trim pieces of scrap wood with a stack of scrap, and drill through the pieces to form a temporary alignment tool.
These basic techniques support the tools and methods used to drill straight holes with high precision by helping keep track of direction and reducing mistakes.
They can also be used in the learning process through practice, especially when one has to gain control of the hand and also gain confidence in the drilling process with time.
Choosing Ready-Made Drill Guides for Accurate Results
Commercial drill guides are made to provide you with the exact control, but with no additional effort. These are instant, ready-to-use tools to assist you in making clean, straight holes with less practice. They come in various designs that will suit your project requirements.
- Simple drill blocks are used in simple, straight holes in wood.
- Angled or flexible drilling work adjustable guides.
- Drill press means accuracy, stability, and heavy-duty.
They are commonly employed when working through a step-by-step guide to drilling straight holes, especially when this is very important.
They are easy to operate and save time by maintaining the drill constant throughout the process. Nevertheless, be sure that the drill bit can adequately fit into the guide so that it can perform accurately and with ease.
Common Mistakes That Make Holes Uneven or Crooked
With the right tools and techniques, even tiny errors can affect the straightness of your holes. All these problems occur when you are in a hurry, not prepared, or when you lose control during drilling. By listening to these, you will be able to achieve better accuracy and consistency.
When using a guide in drilling straight holes, it is equally important to avoid these common mistakes as it is to follow the right steps. Even a small increase in control can yield a tremendous difference in your final outcome.
Drill Bit Slipping Away From the Mark
Among the most common is when the drill bit leaves the marked point at the start. This normally occurs when the surface is smooth or when the drilling is started too fast without good control over the drilling. The bit is easily lost on the wrong path when there is no fixed starting point.
To avoid this, one should always initiate drilling at a slow rate and ensure that the bit settles in the material before exerting more pressure. When the marked point is slightly dented, it also serves to keep the bit in place and enhances accuracy. This is a significant section on how to drill straight holes by hand for beginners, as a controlled start results in better alignment at the start.
A consistent initiation will mean that the hole will start in the right location, which is necessary to maintain the accuracy of the entire process.
Holding the Drill at the Wrong Angle
The other general error is leaning the drill when at work. The slightest alteration of the angle may lead to a crooked hole. It is not something many beginners notice until the hole becomes deeper, making it harder to correct in the future. Improper alignment may also affect the fit of screws or joints in your project.
To have better control, one should face the working piece directly, and the body’s position should be kept steady. When you are shaking, it is best to keep your elbows close to your body as this helps to reduce shaking and enhances balance. The technique of checking your drill sideways and frontally before and during drilling helps to maintain a straight position.
It is a significant component of maintaining a straight angle when drilling metal or wood, since the ability to keep the angle constant throughout the drilling process leads to cleaner, more precise results.
Using the Wrong Drill Bit for the Material
Another error that may impact the quality of your work is using the wrong drill bit. Every material will need a particular kind of bit in order to cut smoothly and be controlled. When the bit is not matched to the material, it may slip, overheat, or develop rough edges.
With wood, brad-point and twist bits are generally the most suitable, as they provide clean entry points and minimize slippage. For metal, high-speed steel bits are more appropriate, as they can withstand heat and pressure. Plastic can be cut using a standard twist bit, although excessive force may cause the material to crack.
Selecting the right bit is important for drilling straight holes with precision, enhancing stability, and cutting performance. The right bits are always sharp and correct, giving cleaner, straighter, and more reliable results.
Wrap-Up
Once you have the right process, the right drill, and you have avoided the common pitfalls, then drilling straight holes becomes quite simple. Good control is achieved naturally with time and regular practice, good marking, and proper alignment.
Simple supports such as jigs, guides, and clamps help maintain the drill’s stability and minimize errors. Simple routines like slow starting, angle checking, and selecting appropriate bits do make a big difference in accuracy.
In a simple project, with practice, you can use a guide in drilling straight holes and achieve clean and precise results.
FAQ
What can I do to determine whether my drill is straight?
See on the side and over. A guide is a small square or block of wood. Always believe your eyes and check frequently.
Is it possible to do straight holes without a jig?
Yes! Direct drilling can be achieved by marking well, keeping the drill straight, and checking your angle. Scrap wood is a good practice.
What shall I do should my hole begin to go crooked?
Stop drilling. Pull the bit out. Restart your drill. Go slow and steady. Stop halfway to check your angle.


