
You may make your own DIY yard sweeper with only a few simple tools and materials. Wondering what a homemade yard sweeper does? It’s great for collecting leaves, grass clippings, and other yard detritus. If you’re new to diy projects, don’t worry – a diy yard sweeper is easy to create and budget-friendly. You’ll also learn how to diagnose, customize, and maintain your diy yard sweeper, so it stays in perfect shape.
In this article, we will discuss how to build a DIY yard sweeper using simple equipment and inexpensive supplies. You will learn how a DIY yard sweeper works, how to build one step by step, and how to personalize, troubleshoot, and maintain it for effective yard cleanup and long-lasting performance.
Tools and Materials Needed to Build a DIY Yard Sweeper
Essential Tools for the Project
How to build a DIY yard sweeper for leaves and grass without costly or professional equipment. The basic tools required are mostly ordinary equipment in a garage or workshop. Before starting your project, get hold of a tape measure to ensure correct sizing, a hand saw or hacksaw to cut the materials, and an electric drill with drill bits to assemble. You will also need a set of screwdrivers, an adjustable wrench, pliers,s and a hammer to bolt individual parts together. Always wear protective gloves and safety eyewear when using. Having all of your supplies in front of you before you begin will make it easier and more organized to create your DIY yard sweeper.
Tip: Always wear your safety gear when cutting or drilling. It protects you and lets you focus on the project.
Materials List
You may make a homemade yard sweeper plans for lawn cleanup at home, either from new parts or recycled materials. It’s a low-cost, useful activity for homeowners. A lot of the things you need you probably already have at home, in your garage, or at your local hardware shop. The primary structure is often made of metal or wooden rods, and old mower wheels are used to assist the sweeper to glide easily across the yard. An axle rod connects the wheels, and stiff bristle brushes sweep away leaves, grass, and debris. Debris is collected in a huge mesh bag or tarp; bolts, nuts, screws, and metal brackets provide support and stability. You will also need a handle or tow hitch to tow the sweeper around your yard comfortably.
Estimated Cost of Building a Homemade Yard Sweeper
An affordable project to keep your yard clean without breaking the bank is a step by step guide to making a DIY lawn sweeper with wheels. The basic components are rather cheap: wheels run $10-20, brushes $10-15, frame materials $15-25, and hardware (bolts, nuts, etc.) $5-10. Usually, you will have to pay an extra $5-$10 for a collection bag or tarp. Most DIY yard sweepers are between $40–$70. You can save even more by using recycled or spare parts from older equipment. But it’s also a terrific way to creatively and practically use outdated materials and save money.
Planning Your DIY Yard Sweeper Design
Choosing the Right Size for Your Lawn
You want your cheap DIY push yard sweeper design for backyard maintenance to work in your space. First, take a look at your yard. Is it small, medium, or large? If you have a tiny yard, a little sweeper is recommended. If you have larger lawns, you need a wider sweeper. Measure the breadth of your mower or rake. Use that as a guide to your sweeper width. Most individuals purchase a sweeper in the 20 to 30 inch range.
Sketching the Yard Sweeper Blueprint
Grab a pencil and some paper. Draw your sweep, I mean, you don’t have to be an artist. Only the most crucial parts are shown: the collection bag, brushes, wheels, and frame. Label each part. This sketch shows how everything fits together. You can also use a ruler to draw straight lines.
Here’s a quick checklist for your blueprint:
- Mark the width & length of the frame.
- Show where the wheels and axle go.
- Slide the brush system under the frame.
- Add the collecting bag at the rear.
- Position the handle or the tow hitch properly.
This step by step guide to making a DIY lawn sweeper with wheels makes your design clear before you start building.
Safety Considerations Before You Start
Safety first. Always wear gloves and eyewear when cutting or drilling. Maintain the cleanliness of the work area. Lay out your tools so you won’t trip. If you use power tools, ask for guidance if you are unsure. Inspect your materials for sharp edges or splinters. Planning helps you build a good sweeper and keeps you safe.
Step-by-Step Instructions to Build a DIY Yard Sweeper
Step 1 – Build the Main Frame
How to build a DIY yard sweeper for leaves and grass? First, place your rods or pieces of wood on a flat surface. Double-check that the length and width specified on your plan are exact with your tape measure. The parts are to be trimmed to the suitable size. They are fastened together with bolts and metal brackets. The frame should have a robust feel. You want it to be tough when you are sweeping your yard.
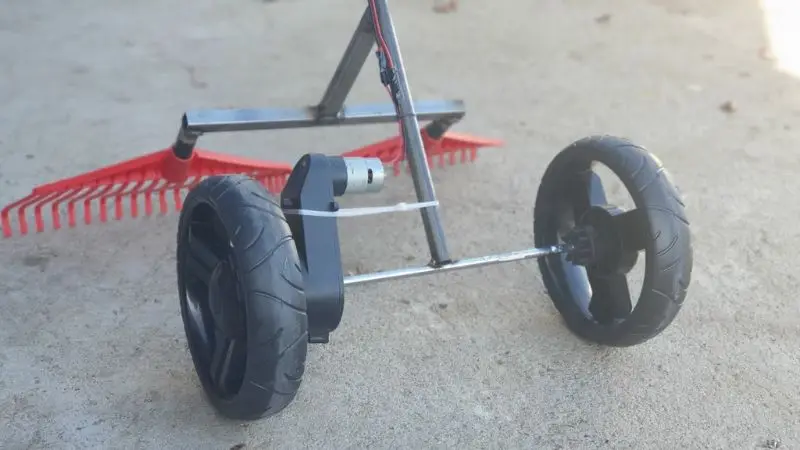
Step 2 – Install the Wheels and Axle
Slide the axle rod forward through the holes placed at both ends of the frame. Put the wheels on either side of the car. Make sure the nuts are tight enough so the wheels spin freely without wobbling. A nice method to test it is to roll the frame back and forth. If it goes off without a hitch, you are ready to move on to the next step.
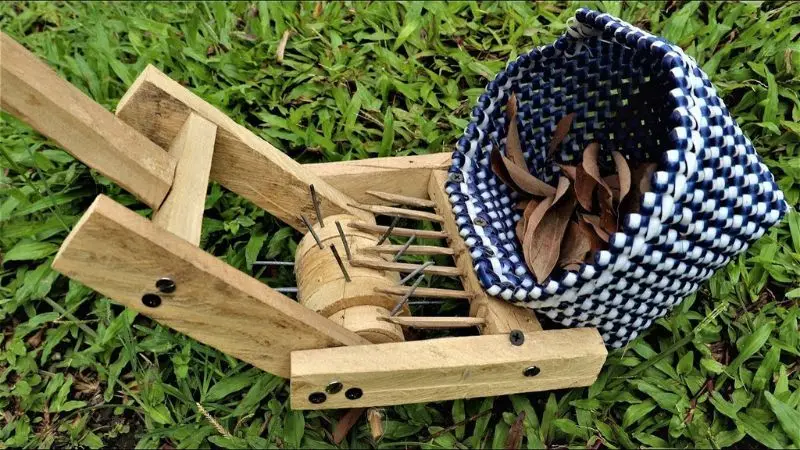
Step 3 – Create the Sweeping Brush System
It is recommended that you attach your brushes with firm bristles to the underside of the frame. They should be spaced so they cover the entire width. Put screws or brackets on each brush to keep it in place. The brushes ought to make contact with the ground, but they shouldn’t drag too much. This configuration will enable your do-it-yourself yard sweeper to pick up leaves and other small debris.
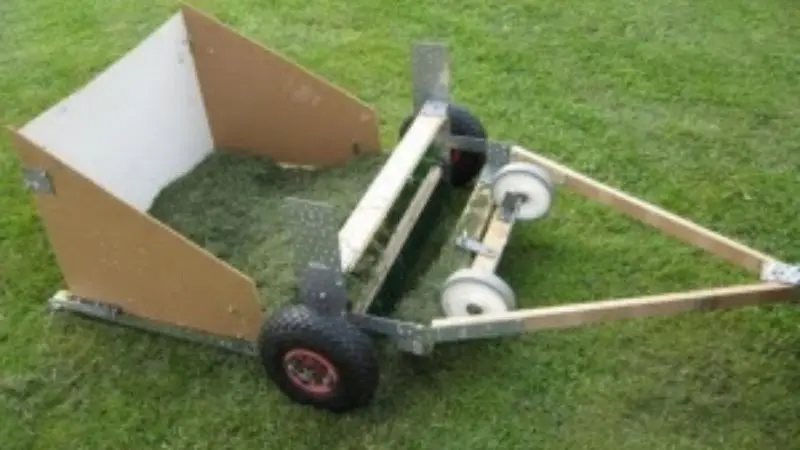
Step 4 – Build the Debris Collection Hopper
Attach your tarp or mesh bag to the back of the frame using strong fasteners. You can either tie it with zip ties or with strong clips. The bagger will pick up anything the brush picks up. Make sure the opening is lined up with the brushes, so nothing gets left behind.
Step 5 – Attach the Handle or Tow Hitch
If you intend to push the cheap DIY push yard sweeper design for backyard maintenance, secure the handle to the front of the frame. Instead, you should install a tow hitch if you intend to trailer it. It is important to ensure that the handle or hitch is secure. Ideally, you will have no issue maneuvering your do-it-yourself yard sweeper.
Step 6 – Test and Fine-Tune the Sweeper
If you want to test out your sweeper on your lawn, take it outside and drive it around. See how it picks up bits of litter. If required, adjust either the brushes or the bag. Sometimes you will need to take the brushes down to a lower floor to conduct certain jobs. Until you get satisfactory results, you should continue testing.
Best DIY Yard Sweeper Design Tips for Better Performance
How to Improve Debris Collection Efficiency
To achieve the best results with your homemade yard sweeper plans for lawn cleanup at home, make a few easy adjustments and maintain proper sweeping behavior. Begin by setting the brushes so they barely contact the ground—too firm a press on the brushes will drag and impede movement. A brush setting that’s too high can miss particles. It’s also preferable to sweep when the grass and leaves are dry so that wet debris doesn’t stick to the brushes and cause jams. Be sure to empty the collecting bag often, as a full bag can impair efficiency and cause debris to fall back on the grass. Finally, run at a consistent, manageable rate so that the sweeper picks up as much garbage as possible in one pass.
Weatherproofing Your Homemade Yard Sweeper
If you don’t take adequate care of a do-it-yourself yard mower, rain, sun, and changing weather can soon break it down. Use outdoor paint on any wood surfaces to maintain a beautiful look and keep water damage and rot at bay. Coat metal parts with a rust-resistant spray to prevent corrosion from weakening the frame, axle, or gear over time. All, proper storage is vital. If possible, place your yard sweeper in a barn or shed. If you have to leave things outside, cover them with a tarp to keep them safe. This step by step guide to making a DIY lawn sweeper with wheels will keep them out of the rain and sun. Treat your sweeper well, and it will last you for many seasons. This will save you time and money on future repairs or replacements.
Common DIY Yard Sweeper Mistakes to Avoid
Many first-timers make the same mistakes while building their first homemade yard sweeper plans for lawn cleanup at home, but with a little foresight, these mistakes can be easily avoided. It’s a common mistake to jump in without planning or design, which often leads to confusion, a poor fit, and wasted materials. Another problem is the use of poor-quality or cheap fasteners; unsecured bolts and screws can cause the entire structure to become unstable over time. Some also make the frame too large, making the sweeper hard to push, turn, and control well. Finally, failing to inspect the quality and positioning of the brushes might limit performance. Worn or poorly adjusted brushes will not take up leaves and dirt efficiently.
DIY Yard Sweeper Maintenance and Care
Cleaning the Sweeper After Use
You want your cheap DIY push yard sweeper design for backyard maintenance to last a long time. To keep it in good shape, you need to clean it after each use. Begin by shaking out the collection bag or tarp. Remove leaves, grass, and any trapped material. If you notice dirt on the brushes or wheels, scour them clean with a strong brush. Sometimes you may need to hose down the sweeper. Make sure to dry all parts before storing them.
Inspecting Moving Parts Regularly
How to build a DIY yard sweeper for leaves and grass? You have to watch the moving parts a lot. Wheels, axles, and brushes work hard every time you sweep. “Make sure bolts or nuts are not loose. If you find any, tighten them. Turn the wheels and note how easily they turn. If the axle squeaks, grease it. Inspect the brushes for wear. Replace the bristles if they look flat or broken.
Try this simple inspection routine:
- Inspect the wheels and axle for damage.
- Try turning the wheels and feel for smooth action.
- Check the brushes for worn bristles.
- Tighten any loose bolts or screws.
- If necessary, lubricate moving parts.
Conclusion
Now you know how to create a DIY yard sweeper step by step, and the method is simple enough even for beginners. This project lets you save money by using recycled or cheaper materials, giving existing parts new life. This makes cleaning up your yard lot faster and more efficient, especially in the fall season when leaves pile up quickly. Plus, you can tailor the sweeper to the size of your yard and to your demands for greater performance. Once it is built, try out your sweeper on different parts of the lawn, making slight adjustments to the brushes or the bag until you achieve the best results.
FAQ
How long does it take to build a DIY yard sweeper?
You can finish your sweeper in one afternoon. If you have all your tools and materials ready, you might need just 2–4 hours. Take your time and enjoy the process.
Can I use recycled materials for my sweeper?
Yes! You can use old wheels, leftover wood, or even a broken rake. Recycled parts save money and help the environment. Just make sure everything feels sturdy and safe.
What types of debris can my DIY sweeper pick up?
Your sweeper works best on dry leaves, grass clippings, and small twigs. Wet or heavy debris might clog the brushes. For best results, sweep when your lawn is dry.
How do I store my yard sweeper?
Store your sweeper in a dry spot, such as a shed or garage. If you must leave it outside, cover it with a tarp. This keeps it safe from rain and sun.


