
Want to add privacy to your outdoor seating area? You will definately need to build a DIY patio screen. Yes, you can make a screen from scratch using a few simple tools. It will also keep bugs and mosquitoes away from you. You can install a see through materail as a screen. It will allow the air flow. You can also enjoy the outdoor weather. Moreover, you can customize the screen to add a personal touch. It may seem complex, but its is very easy even if you are a beginner. It is also not time-consuming, you can build it in your coming week.
Why Build a DIY Patio Screen? (Benefits & Cost Savings)
Keep Bugs and Mosquitoes Out Naturally
You know how annoying bugs can get when you try to relax outside. Building your own patio screen helps you keep mosquitoes and flies away. You do not need to spray chemicals or light citronella candles every night. The screen acts as a barrier, so you can enjoy your patio without worrying about bites or buzzing insects.
Add Privacy to Your Outdoor Space
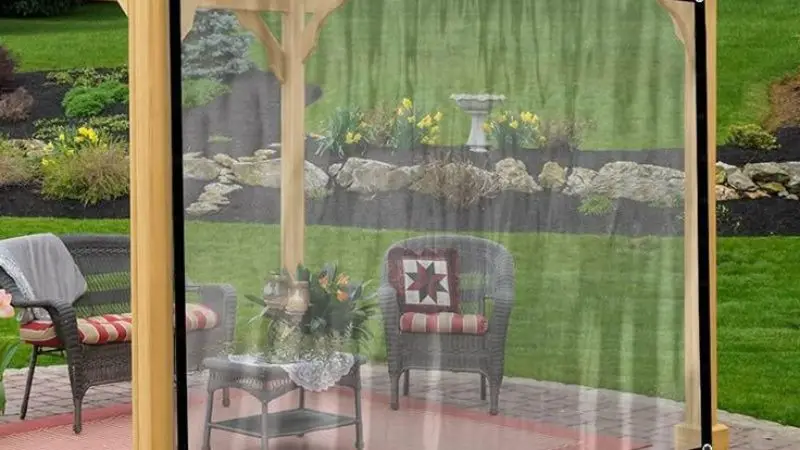
Sometimes you want to sit on your patio without feeling like everyone can see you. A screen gives you outdoor dining privacy. You can read, chat, or just chill without neighbours watching. If you live close to other houses, a patio screen makes your outdoor space feel more like your own.
Improve Outdoor Comfort and Shade
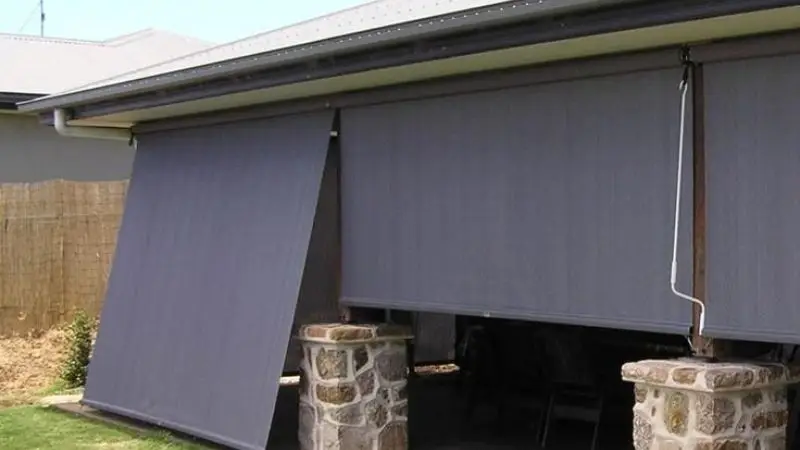
A patio screen does more than block bugs. It also helps you stay cool. The mesh can reduce sunlight and wind. You will notice your patio feels more comfortable, especially on hot days. You can spend more time outside, even in the afternoon, with an outdoor privacy screen.
Save Money Compared to Pre-Made Patio Screens
Buying a pre-made patio screen can be expensive. When you build your own, you save money. You pick the materials and size. You do not pay for installation. Most DIY patio screens cost less than half as much as store-bought ones. You get a custom look and keep your budget in check.
Tools and Materials Needed to Build a Patio Screen
Before you start your DIY patio screen, gather the right tools and materials. Having everything ready will make your project go smoothly. You don’t want to stop halfway to run to the hardware store. Let’s break down what you’ll need.
Essential Tools Checklist
You will need some simple tools. You may be concerned about additional fees, but you do not need to worry. You will have the majority of them in your toolset. However, what you need is:
- Use a tape measure to achieve the correct measurements.
- A saw for cutting wood and other basic building materials.
- Tape measure (for exact measures)
- Saw (a circular saw or hand saw will suffice).
- To make holes, use a power drill with bits.
- Screwdriver to tighten screws.
- Stapler (for attaching the screen).
Materials List
You need the right materials to build a strong and long-lasting patio screen. Here’s what you should pick up:
- Wooden boards: To make the basic structure of the screen. It should be strong enough to carry a large screen.
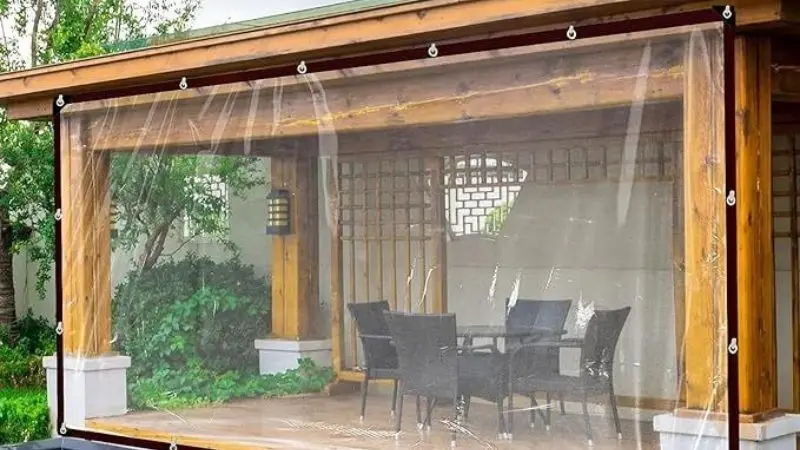
- Screen mesh: It will give privacy while enjoying the outdoor weather. It will also keep bugs and mosquitoes away.
- Wooden screw: They will hold all parts together.
- Corner brackets: Essential for the corners of a rectangular shape.
- Hinges: They allow the panels to move, mostly useful for swinging panels.
- Weatherproof sealant: To fill all the stacks on the wood and gas. It will protect your outdoor screen,
Step-by-Step Guide: How to Build a DIY Patio Screen from Scratch
Step 1 – Measure Your Patio Area Accurately
Start your diy patio screen project by grabbing your tape measure. Measure the length and height of your patio where you want to install the screens. Write down each number. Double-check your measurements. If you miss a space, your screen may not fit. Take your time here because you want to set your project off to a strong start.
Step 2 – Create the Wooden Frame
Now you can assemble the frame for your patio screen. Cut the wooden boards to the measurements you provided. Place them on the ground. Connect the boards using your drill and screws. Add corner brackets to increase strength. Make sure the frame is level and square. This phase offers your project a solid foundation.
Step 3 – Attach the Screen Mesh
Place the screen mesh over your frame. Tighten it up to prevent wrinkles. To secure the mesh to the wood, use a staple gun. Start in one corner and work your way around. Cut off any excess mesh with scissors. This step improves the aesthetics of your patio and keeps bugs out.
Step 4 – Fasten the Screen to Your Patio’s Framework
Place the completed frame for your do-it-yourself patio screen in the desired location. The frame can be fastened to your patio’s walls or posts using screws or brackets. Verify that the screens are stable and straight. Instead, use latches or hooks to transfer.
Step 5 – Complete and Seal the Frame
To complete the job, seal the wood. Apply a weatherproof sealant or external wood stain. This keeps the sun and rain away from your homemade patio screen. Allow your patio to dry before you utilize it. Your screen now lasts longer and looks fantastic.
DIY Patio Screen Design Ideas for Inspiration
Looking for ways to make diy outdoor privacy screen stand out? You have made the basic structure. But whether you want it to be basic or add some more decorations. Its upto you. Here are some backyard privacy ideas that you can opt for to elevate your screen:
Wooden Screen Panels with a Rustic Look
If you want something that looks natural, a wooden panel is an excellent solution. It will give the entire space a classic appearance. You can also paint the panels. Staining will also allow you to change just one pattern. Rustic wood panels provide warmth to your patio.
Design of a Sliding Patio Screen
Do you want to be able to modify your mind? Sliding screens let you open and close your patio space at any time. You may utilize simple tools to create songs. You may adjust the panels to allow in fresh air or keep the wind out. This form is ideal for larger patios.
Removable Patio Screen Panels
Removable panels are a fantastic option if you just need screens for part of the year. When not in use, you can remove and store them. This design allows for easy cleaning and repair. You can use clips or latches to secure the panels in place.
Decorative Lattice + Screen Combo
Looking for something fashionable? Mix lattice and screen mesh to create a unique design. The lattice enhances the surface’s texture and design. The mesh prevents bugs from getting in. You can paint the lattice to match your patio or leave it as-is. If you do everything correctly, no one will believe you produced it.
Conclusion
You just learned how to build a DIY patio screen from scratch. Grab your tools, measure your space, build the frame, attach the mesh, and finish strong. It should be strong enough to withstand harsh outdoor airflow and rain. Why wait? Then let’s make a completely customised screen and amaze your friends.
FAQ
How long does it take to build a patio screen?
You can finish most patio screens in one weekend. If you have all your tools and materials ready, you might work faster. Take your time for the best results.
Can I use metal instead of wood for the frame?
Yes, you can use metal. Aluminium works well and lasts longer outdoors. You need special tools for cutting and joining metal. Wood is easier for beginners.
What type of mesh should I choose?
Pick fibreglass or aluminium mesh made for outdoor use. Look for small holes to keep bugs out. You can find mesh in different colours and strengths.
Do I need a permit to build a patio screen?
Most areas do not require a permit for simple patio screens. Check your local rules before you start. If you plan to attach screens to your house, contact your city office.
How do I fix a torn screen mesh?
You can patch small tears with a screen repair kit. For bigger holes, cut a new piece of mesh and staple it over the damaged area. Keep extra mesh handy for quick fixes.


