| Difficulty | Cost | Duration |
|---|---|---|
| 8.0 0ut of 10 | $5000 | 1 week |
Damascus Steel is famous not only for its unique patterns but also for its functionalities. Damascus blades can be created with various different patterns, and one of the most beautiful patterns is a feather Damascus. These feather patterns can be created in many ways as well; only the sky is the limit. And today, we are going to talk about feather Damascus patterns with the River of Fire.
The feather pattern in Damascus steel comes from stacking and restacking billets in various patterns of straight lines, C’s, and W’s. Then the billets are cut into using a wedge to make the wavy portion of the feather before reattaching the two parts again. We are going to talk about that and give you a step-by-step process of how you can weld and press the steel billets to make your own feather Damascus blade!
Part 1: Understanding the Feather Damascus Pattern
The Basic Information about Feather Damascus
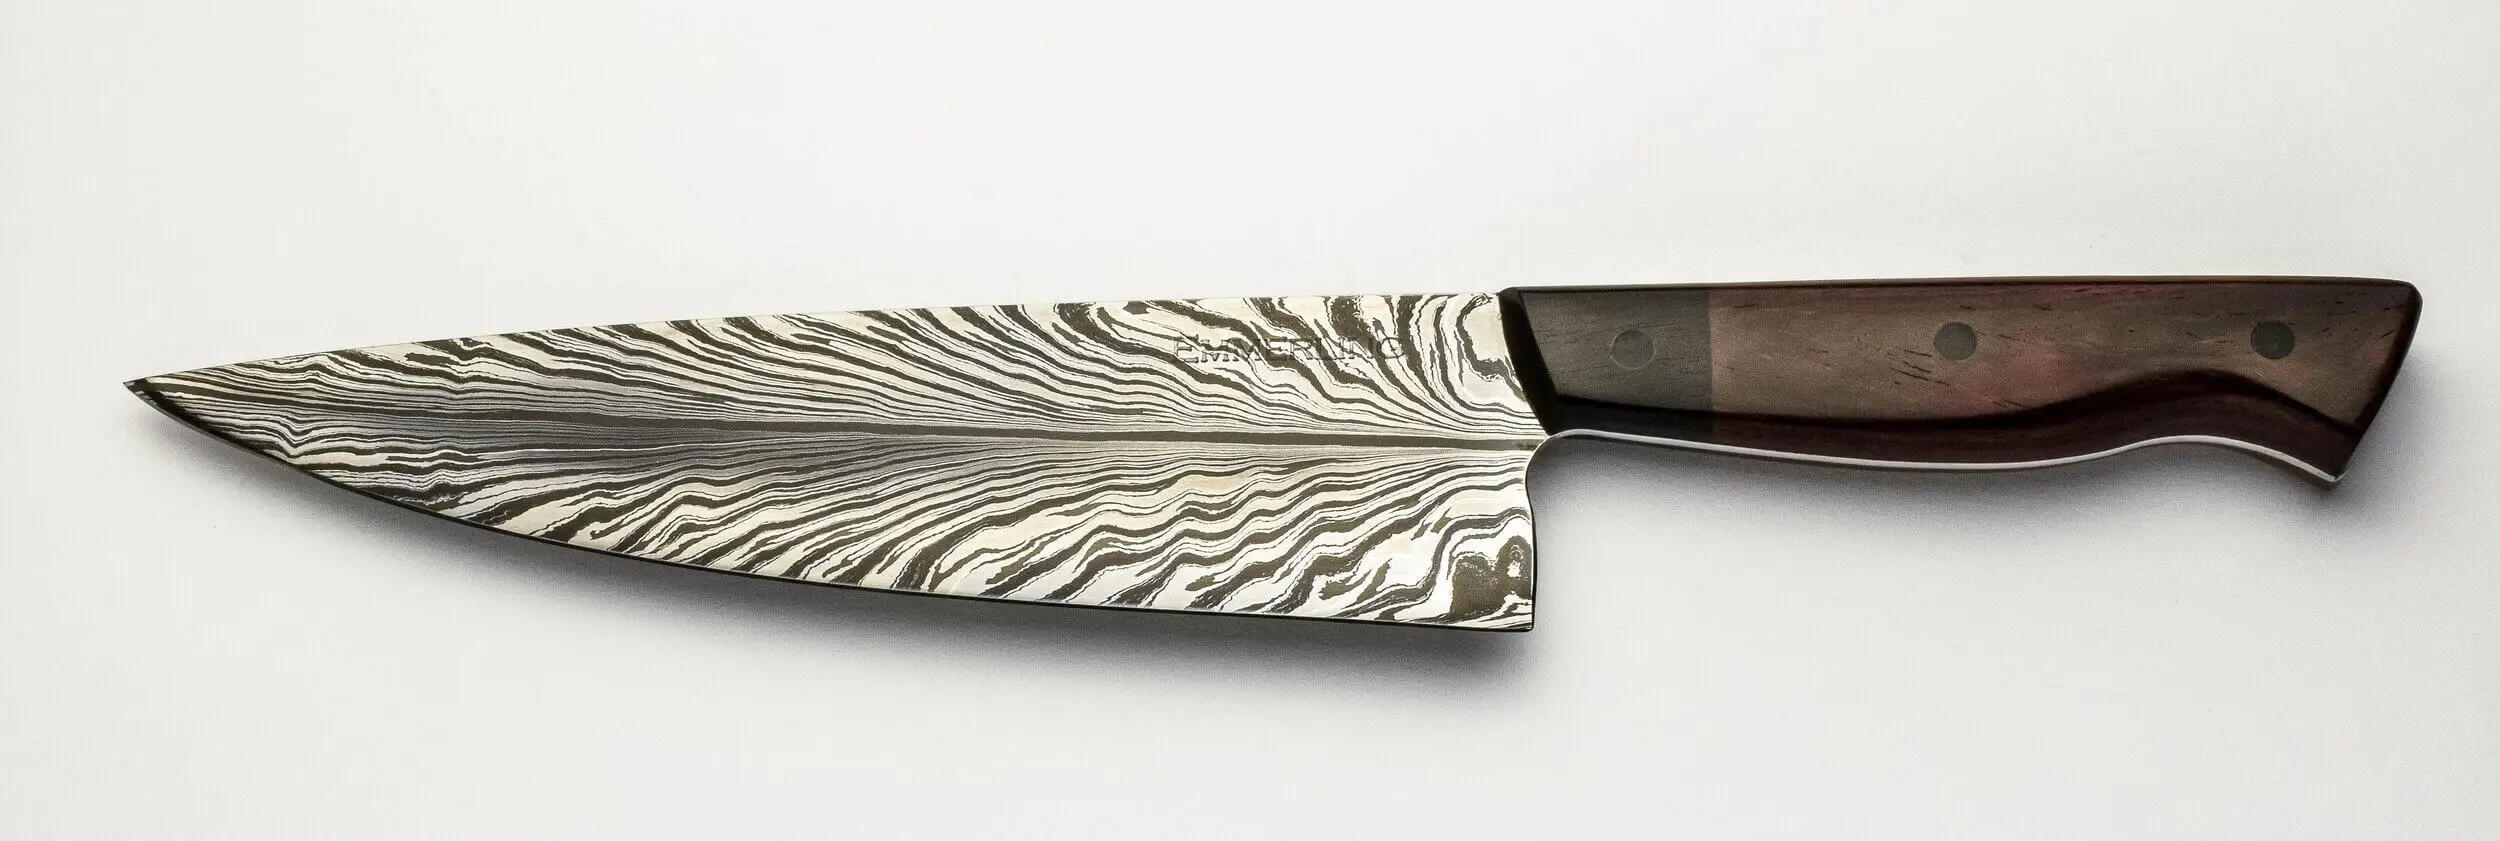
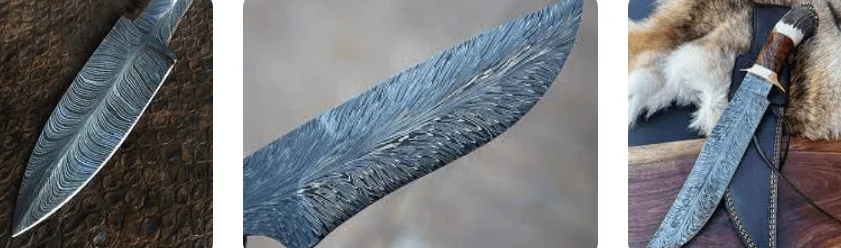
Feather Damascus steel is named as such because of the feather-like pattern on the steel. Just like the feathers of a bird, this pattern has a central vein, and fine designs of parallel lines extend to the edges from the central vein.
Variations of Feather Damascus
There are different types of patterns in a feather Damascus. Based on your creativity and imagination, any stacked billets can be turned into a feather pattern by cutting the stacks vertically and pressing the parts together again. The cutting process makes the layers get bent at the cutting point, creating the beautiful rays of a feather. The rejoining seam becomes the vertical vein of the feather.
Part 2: What is the River of Fire?
1. Concept and Theory of River of Fire
River of Fire was named like this because of the final output of the pattern. The final result looks like a flowing river in the middle of the blade. Like all other types of patterns in Damascus steel, this pattern also comes from strategically stacking and pressing billets per the required design.
How is the River of Fire different?
This pattern looks the best when you use spear-shaped billets. After the initial billets are made, they are then pressed and shaped in a spear-like arrangement diagonally when the billet is still hot and malleable. These create beautiful W-shaped patterns in the feather. After that, new layers of steel are attached on either side to create the river pattern.
After the new plates are added, pressed, and finished, small wedges are cut on the area outside the feather patterns alternately on both sides. These wedges create the waves in the final output and the W’s are created by the spear-shaped billets. The image below would be our final product outlook from today’s DIY.
Challenges You Need to Know About
Before you start making your own River of Fire Damascus knife with the feather pattern, you need to be aware of a few things. This is in no way an easy process, and some issues can arise with it.
● Cutting the wedges in the steel bars need very careful hands.
● You need to plan the design you want beforehand so that the pattern can come out as required.
● No two knives would have the same pattern.
2. Introducing VEVOR Welder
Welding is one of the main parts of metalwork. You need to attach pieces together, repair holes in metal parts, and even make an electric circuit. Different types of welders are available, based on what you want to do. One of them is a TIG welder, and a VEVOR welder is a great machine for TIG welding for your Damascus projects.
Damascus projects completely rely on using multiple layers of steel plates together. These layers are joined by welding. For this reason, you cannot escape using welders, and TIG welding is one of the most efficient types of welding you can use when making Damascus.
Advantages of TIG welding in Damascus projects
TIG stands for Tungsten Inert Gas, meaning it fuses metals together by melting them at the seam and uses Argon gas to complete the fusing process. For creating Damascus patterns, TIG welding is really helpful as
● It welds in a very lightweight process as no mild steel is used
● The process is easier than MIG or Stick welding
● As multiple layers are needed to be welded at each step, it saves time while making the Damascus.
Exploring the features of the VEVOR Welder
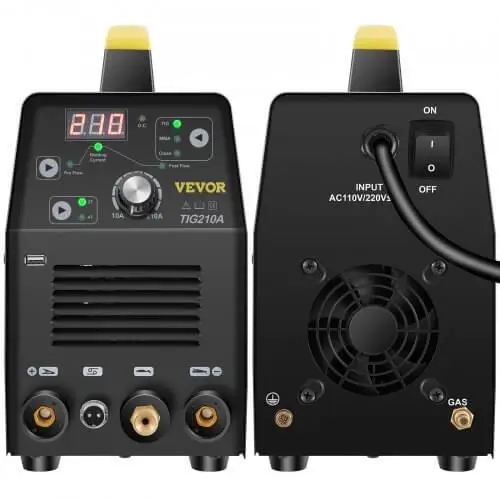
VEVOR welder comes with a highly operable welding torch that can start the process at a high frequency from the get-go. This small machine is the best for you if you are not a master at this craft. Just like a foot pedal, the design of the VEVOR welder torch makes the process easy and smooth.

Welding torch: The torch has a button that you can control to start and end the welding process. Unlike other machines, you do not have to touch the metal with the torch before starting; you do not need to move the torch away to stop welding. You can just use the button.
Argon gas: The machine has a port to insert the gas flow. The gas is used to make the welding finishing process go smoothly.
Ampere dial: There is a dial that controls the electricity. You can set the dial as per your need for the Ampere level.
Ampere monitor: A small monitor shows how much ampere the machine is working on.
3. Operating the VEVOR Welder for TIG Welding
Setting up the VEVOR Welder for TIG welding
This specific VEVOR welder is used as a TIG welder, but there is a separate port that you can use to attach a Stick welding torch. Set the welder at 110 amp and take the pieces of metal you want to weld together. Make sure to use gloves and a hood for your own safety. Place the torch ⅛ of an inch away from the metal and press the button. The button helps you start the process at high frequency and also can control the gas flow.

Advantages of high-frequency start and gas flow control
● The high-frequency start of the welding process eliminates any chances of holes at the beginning of the drawn line.
● The gas flow control makes sure that the job is smooth and without any unevenness.
● As you do not have to remove the torch away from the metal to stop the flame, there are no imperfections at the end either.
Part 3: Crafting the River of Fire Damascus Pattern
1. Starting the Project
To start the project, first, you need stacks of steel plates that you will be using to make the billets. Take a 6-inch length of the rectangular plates and ensure that the width of the plates is more than 1 inch as anything less is difficult to maneuver when pressing the billets. Weld the pieces together at the edges and also at the center, as the pieces are much larger than the usual 4-inch plates used normally.
2. Shaping and Forming the Billet
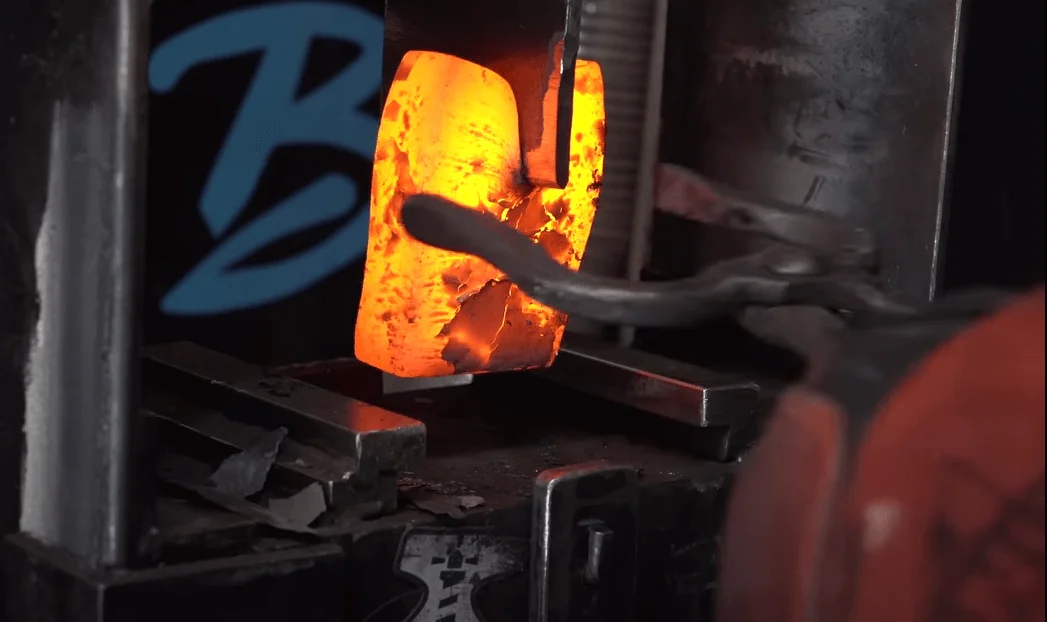
After you have your layers ready, weld them together with the VEVOR TIG welder. Then, insert the heated at the forge and malleable billet in the presser, where continuous up and down motion will press the billet into shape. You need to control the angles of the press. After the initial billet forming is done, use a spear-shaped mold in the pressing machine to create the C’s in the billet.

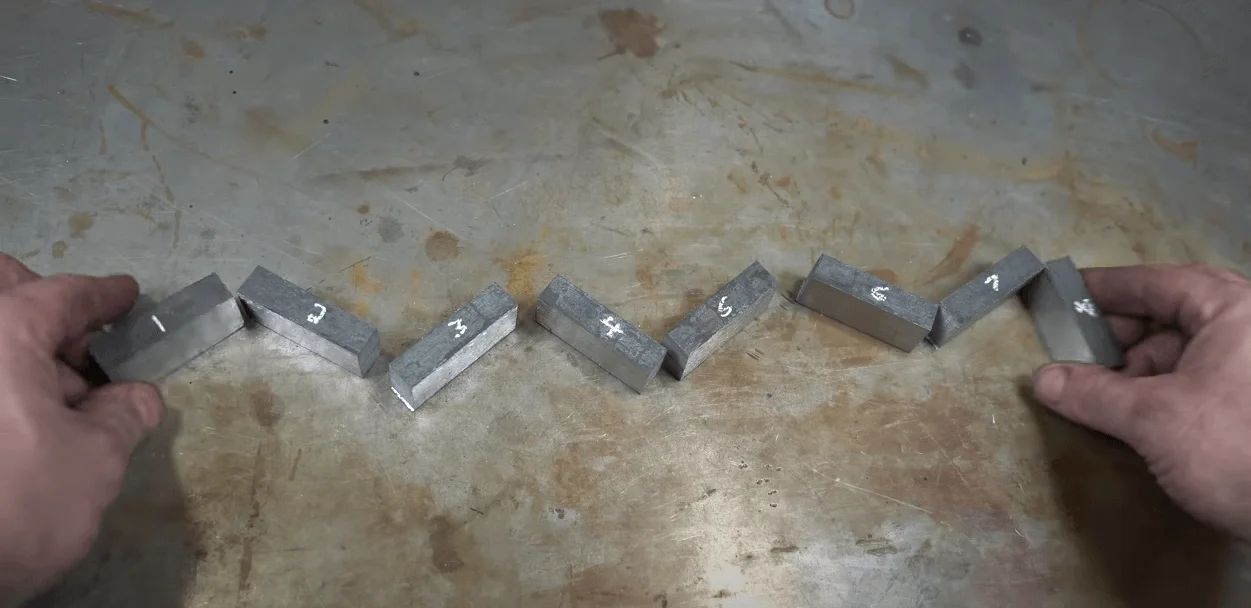
Do the same for all the other billets, and when they are done, you have to stack and restack the billets to get the desired thickness and length of the steel bar. At this point, cut the bar into eight equal pieces and mark them. Then, stack them again, but the pieces need to be facing each other in pairs so that the C’s made in the billet can form W’s. Make sure to use the grinder after each stack is completed.
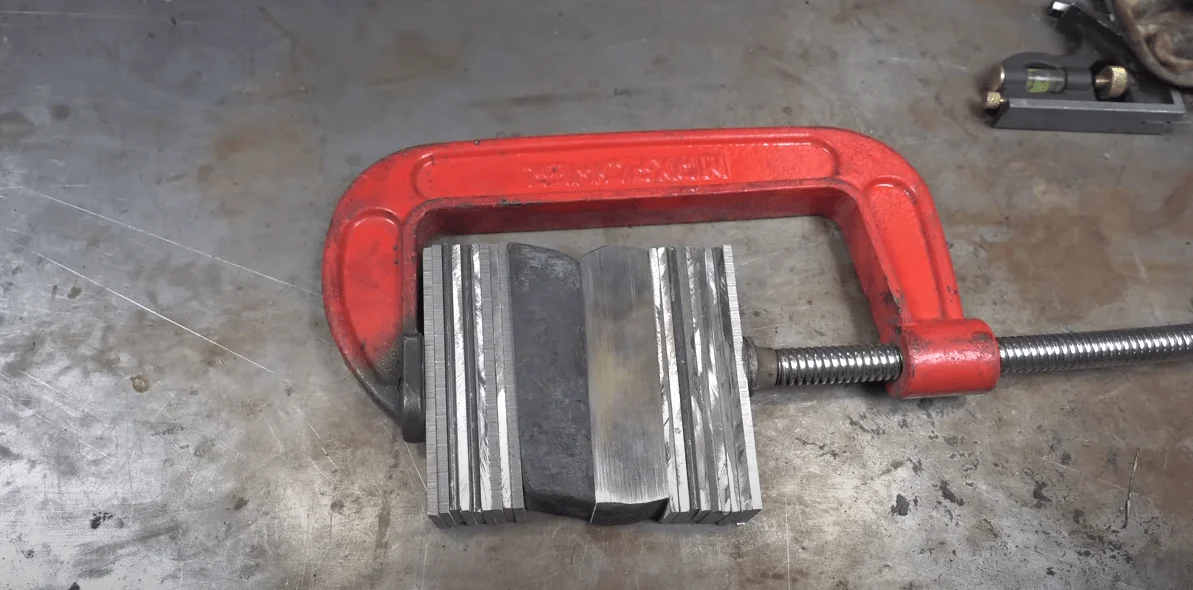
Put the whole thing through all the previous steps to get the final billet. When it is brought to the required shape and size, now comes the part where you need to use a wedge to cut the billet in half. Place the billet vertically and carefully cut through the mid portion. After the whole thing is separated, finish both pieces with the grinder. If one side comes out thicker than the other, this is the point where you bring them both to the same size.
3. Finalizing the River of Fire Pattern
After both cut parts are cooled and finished, we will make the River of Fire! Attach extra steel layers of the same shape on either side of the billet parts. This will also help in smoothly processing the final parts of the Damascus. In the step where you have to stretch the billet lengthwise to increase length and reduce weight, the feather layers tend to break apart. But the added extra steel layers make the process go much easier.
Now, cool and grind the piece. Then, draw some wedged on the bar to be cut out. The design should be on the alternating sides of the billet. Make sure that all the wedges are of the same size so that the design has a certain level of symmetry.
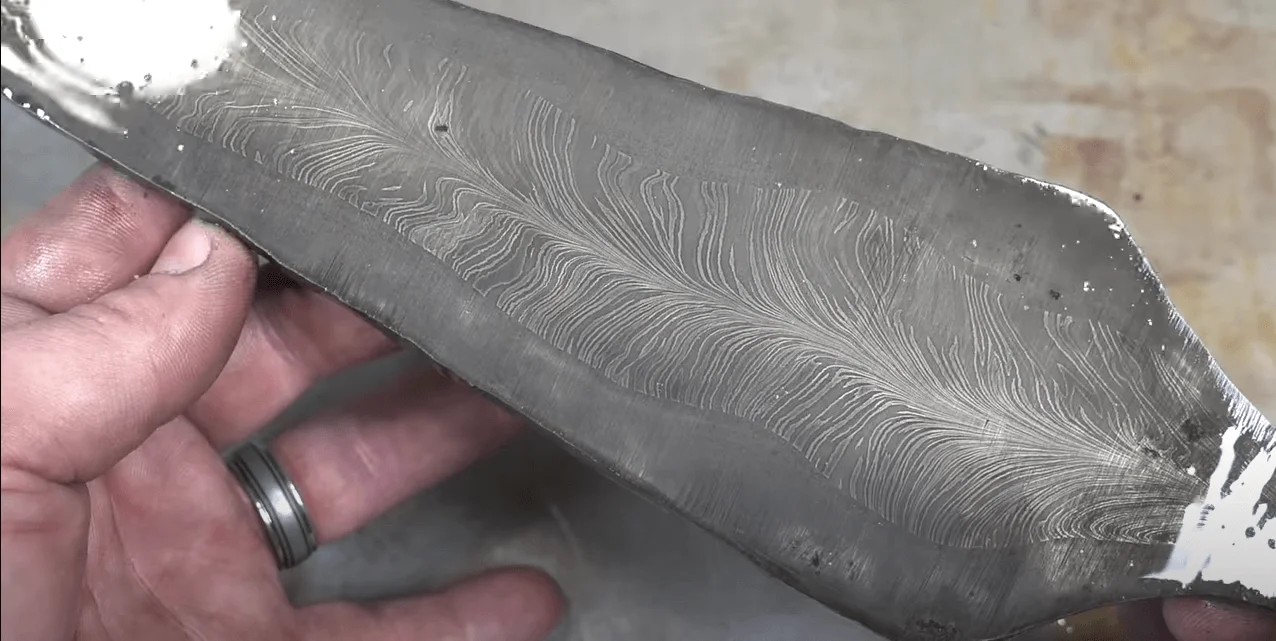
After you cut the wavy wedges, place the billet again in the furnace and then in the presser to get pressed horizontally. The cut wedges will force the central seam of the previously separated billet to get wavy. With gradual pressing, the edges will get smooth again, whereas the central vein of the feather will create waves that look like a river, giving the name of the pattern.
Part 4: Items required for this project
As this project is a large one, a lot of forging equipment and tools are needed. If you have already done some metalwork, some of these tools are very familiar to you. But if you are a beginner and want to forge metals, you must invest large initially.
• VEVOR Welder
• Wen Horizontal Bandsaw
• Horizontal Bandsaw blade
• Wen Drill Press
• Bosch 4.5″ Angle Grinder
• 5″ Vice:
• Kant Twist 2″ Clamp
• Vice for quench plates
• Checkering/Jimping File
• Magnetic Plastic Vise Jaws
• Metal Ruler pack
• Center Drills
• Nicholson 6″ Files
• Propane Torch
• Bolt Jaw + Wolfjaw Tong set
• Offset Knife Tongs
• Stainless Steel double forge burners
• Grinding / Sanding / Finishing 1500 Grit Hamon polish
• Switch
• Valve
• Oil Filter
• Motor
• Reservoir
• Coupler
• Surface Grinder Slide table
FAQ about Creating Feather Damascus Patterns
Q: What is so special about Damascus Steel?
Damascus steel is very popular for the unique patterns that can be seen on the blade of a knife or a sword. These are very painstakingly crafted and forged.
Q: How many layers does a feather Damascus have?
The feather pattern is given with the use of a huge number of layered steel plates welded together. A feather Damascus can have 200 to 300 layers around the central vein of the feather.
Q: Why are Damascus knives so expensive?
Damascus knives are mostly expensive because of the forging process. The crafting takes a long time and involves stacking and restacking multiple layers of billets around 30 to 32 times.
Q: Is Damascus steel stronger than normal steel?
Damascus blades are not necessarily stringer in comparison with ordinary steel blades. But they tend to be flexible and hard to damage.
Conclusion
The whole process of forging a Damascus might feel very complex but trust me, the final result is worth all this effort. Damascus blades are not a simple thing; it has monetary value as well as craft value. If you are patient and careful in stacking and restacking the multiple layers of steel again and again, the output will definitely be wealth it.
A Feather Damascus is one of the most beautiful and sought-after patterns. Adding the River of Fire makes the whole thing even more attractive. If you plan to start making Damascus steel, the initial investment behind the tools and machines is all worth it in the long run.


