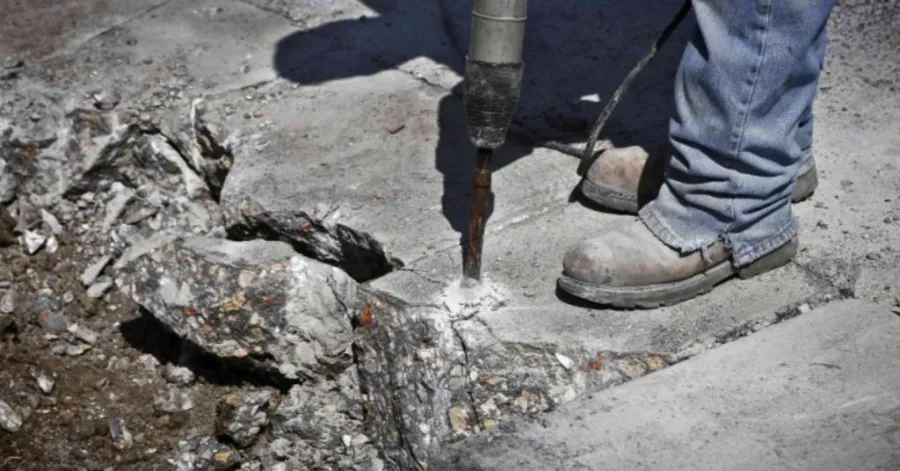
Concrete slabs are strong and durable, but renovations, repairs, landscaping, or demolition projects eventually make removing them necessary. Your approach depends on the concrete thickness, whether it has reinforcement, where it sits, and what equipment you have available. A thin patio might yield to manual tools, whereas deeper pours frequently require a concrete saw, a jackhammer, or a demolition hammer.
This walkthrough covers the entire concrete slab removal process, starting with preliminary prep and ending once the dust is swept away. Inside, you will find out how to pick suitable gear—such as a demolition hammer—score controlled fracture lines, lift out different varieties of slabs, and clear the rubble while staying safe. You can use these steps for a backyard, walkway, patio, or an indoor floor to prevent the whole job from getting out of hand.
Table of Contents
How to Prepare for Concrete Slab Removal
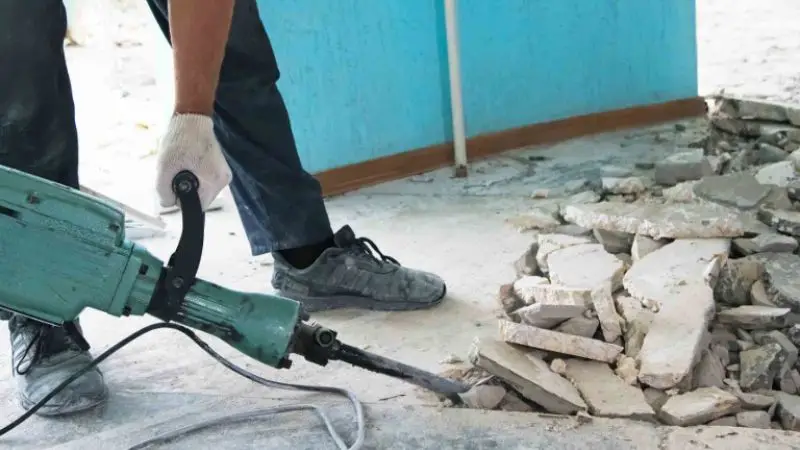
Taking time to prep stops you from breaking things or falling behind schedule. Begin by getting a clear picture of the slab, the ground next to it, and whatever might run beneath.
Running through a couple of checks before picking up a hammer makes the whole project a lot safer. Set aside time to look over the site, put marks on the concrete, clear out the workspace, and get your equipment ready.
Recommended For Your Project
Inspect the Slab and the Work Area
Begin with a thorough look over the entire concrete surface. Take a look at the surrounding ground as well. Keep an eye out for any drains, posts, steps, walls, or expansion joints. Look over the slab for cracks, high or low spots, and anything likely to cause trouble once you start.
See if you can determine the thickness of the slab. The slab’s state will guide what you use, whether that means manual tools, a demolition hammer, or an abrasive saw. Get the workspace completely cleared off before beginning. Clear out any outdoor furniture, potted plants, loose debris, and anything else you might trip over or work around.
Be especially cautious if this is your first time removing a concrete slab. Older slabs can hide internal objects or have spots that have lost their strength. Those weaker spots might not hold up to ordinary hammering.
Check for Underground Services
Look for buried utility runs prior to any cutting or breaking. Inspect the immediate ground beneath the workspace as well as the perimeter. Supply lines for water, gas, electricity, phones, or drainage could be running right beneath the slab or in the surrounding dirt.
Locating these lines before you begin is your single biggest safety priority. Call the relevant utilities or hire a qualified locator to map them out. Taking this step is particularly critical if the property is an older one. You also need to do this whenever you are unsure of the lines’ locations.
Mark the Area for Removal
Draw out the exact section that needs to go. Pick something highly visible to do it, like chalk or bright marking paint. When your lines are sharp, you are far less likely to damage the concrete you plan to keep.
Take your measurements carefully if neat, square edges matter for the finish. Running a concrete saw along the perimeter before you start smashing gives you a controlled cut. Doing that helps the slab fracture right where you drew the line.
Mark off any surrounding yard features you want to keep safe if you are taking out a patio slab. That could mean anything from garden beds and fencing to walls, drainage pipes, and similar fixtures. With the paint or chalk down, you will know exactly where your work starts. It also gives you a clearer sense of the volume of rubble the work will leave behind.
Prepare the Tools and Safety Equipment
Gather all your gear and tools ahead of time so work doesn’t grind to a halt while you search for something. Your basic protection needs to cover hearing protection, work gloves, solid boots, suitable workwear, and either safety glasses or a full face shield. You might also require a dust mask or a properly fitted respirator, depending on your demo or cutting technique and the dust volume it kicks up.
Look over all cords, plugs, blades, chisels, and tool bodies each time before putting them to work. Don’t leave extension cords and hoses where people walk, and maintain an organized work area so nobody trips. Solid prep work is especially critical whenever concrete slab removal involves concrete that is thick, reinforced, or tied into an existing structure.
How to Remove a Concrete Slab Step by Step
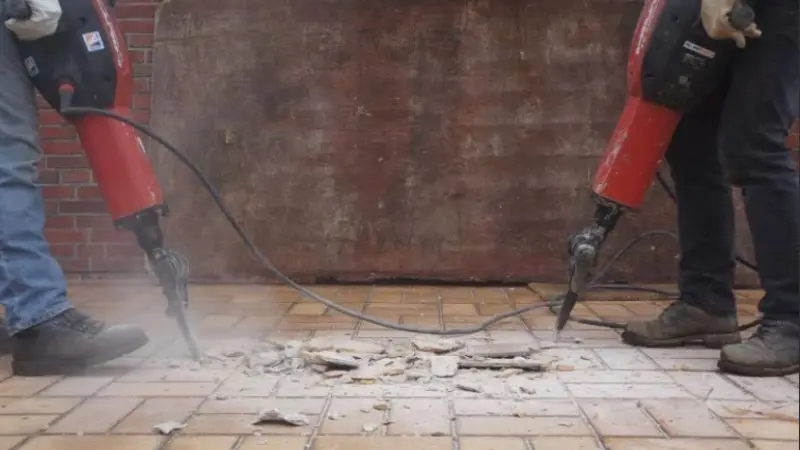
After the work area is ready, the actual demolition can get underway. You’ll get an easier job and better control over where the concrete breaks if you work to a plan.
The process basically goes like this: weaken the slab, break it into sections you can manage, lift the pieces, then clear the debris. What method you use depends on how thick the slab is, whether it’s reinforced, and where it sits. A clear plan also makes concrete slab removal more organized and helps you avoid unnecessary damage to the surrounding area.
Score or Cut the Concrete
Mark the sections slated for removal before anything else. Run a concrete saw along straight lines across the slab to score or cut it, particularly wherever you want the break to land. On a smaller job, a shallow score across the surface may be all that’s needed; you don’t have to cut through the full depth. Cutting is what separates the area you’re removing from the section that stays in place. Eye, hearing, and respiratory protection are all needed during cutting. If you’re running a wet saw, keep the water and the electrical gear under control. For anyone working out how to remove a concrete slab, careful cuts ahead of time make the breaking stage more predictable and cut down on stray damage near the edges.
Drill Relief Holes
Drill relief holes before you start breaking, and thick or stubborn sections will give way more easily. With a rotary hammer and a concrete bit, bore a row of holes along the section you intend to remove. Space the holes evenly and steer clear of any utility lines or structural components you’ve identified. These holes give cracks room to grow and lower the force a demolition hammer or sledgehammer has to deliver. When the concrete is thick and surface breaking alone won’t get through it, this technique pays off. Clear dust and debris from the holes as you go; otherwise, the bit stops cutting efficiently.
Break the Slab Into Smaller Sections
With the scoring and drilling done, start breaking the concrete into pieces you can handle. Work from an exposed edge, a crack already there, or a relief hole, moving gradually toward the centre. Pick a demolition hammer, jackhammer, or hand tool to match the slab and what you have on site. You want pieces you can lift and move safely, not one heavy pile of rubble. If you’re still learning to break a slab into pieces, don’t just attack random spots. Smaller chunks are simpler to pry apart, carry, and load for disposal. Take frequent breaks to shovel debris clear and check your work surface during concrete slab removal.
Pry Up the Broken Concrete
When cracks have freed a section from the rest of the slab, work a heavy pry bar under it and lift. Slide the bar into an existing crack or gap and use steady leverage—don’t try to brute-lift with your back. Break the bigger pieces down further before you try to move them. A pry bar also opens up gaps under the slab, which makes it easier to keep the demolition going. Always wear gloves and sturdy boots—broken concrete cuts. If a piece won’t shift with reasonable force, stop pushing. Switch to whichever tool fits, break the piece down further, and come back to the pry bar afterward. This controlled approach helps keep concrete slab removal manageable as you work through each section.
Remove and Sort the Debris
As you work, haul the broken concrete out rather than letting a big pile build up around your feet. Sort the big chunks of concrete from the smaller bits, dirt, rebar, and other stuff. Loads you can manage go in a wheelbarrow, and a shovel handles the loose bits and dust. Never fill containers past their limit, and don’t try to carry pieces too heavy to handle. When reinforcement is exposed, be careful — cut or broken steel has sharp ends. Before hauling the concrete off, find out what local disposal rules apply — recycling centers, construction-waste sites, and general waste services don’t all operate the same way.
Clean and Prepare the Surface
Once the slab is out, take a look at the ground or surface it was sitting on. A shovel, broom, or other cleanup tool will clear away loose concrete bits, dust, roots, and anything else you don’t want left behind. Look along all the edges for leftover bits of concrete, and take them out with care. If soil, paving, gravel, or another surface is going in next, level and compact the ground to suit that project. This last stage deserves care — don’t rush it as you finish the removal. Starting with a clean surface makes hidden problems easier to spot and gives you solid footing for landscaping, building, drainage, or whatever replacement surface goes down after concrete slab removal.
How to Remove a Concrete Slab Without Heavy Equipment
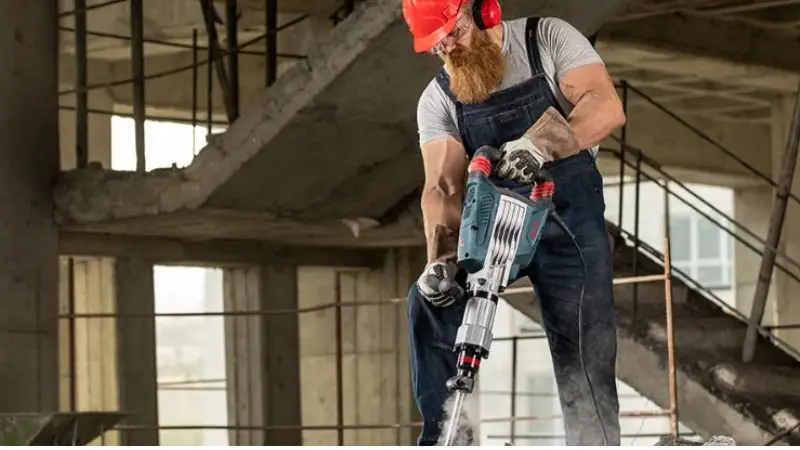
Not every slab calls for heavy demolition machinery. A thin residential slab will sometimes come apart with hand tools plus a few smaller portable power tools.
When the aim is to pull a concrete slab without heavy equipment, crack it first and then take it out in pieces you can actually handle. It works best on a slab that is fairly thin, easy to reach, and not packed with reinforcement.
Use a Sledgehammer for Thin Slabs
When there’s room to swing freely, a sledgehammer handles thin concrete well. Start at an exposed edge, a corner, or an existing crack instead of going straight for the thickest part of the slab. Keep striking the same spot until cracks open, then follow those cracks out toward the next section. Grip the handle with both hands and keep your footing solid the whole time. Step clear of the broken areas before swinging again. This method suits small patios, walkways, and slabs of that kind best. Thick or reinforced concrete will demand far too much from a sledgehammer, and you’ll need a more powerful tool for it.
Use a Rotary Hammer for Controlled Breaking
A rotary hammer hits harder than any hand tool yet stays easy to carry around. Where the model allows it, switch to hammer-only mode, fit the right chisel, and go after existing cracks, edges, and weak points. Don’t park the tool in one spot for long; move it gradually instead. When the tool has a drilling mode, a rotary hammer can also punch relief holes in addition to breaking thinner concrete down into smaller sections. Use suitable protective equipment, and stick to the manufacturer’s operating instructions. In tight spaces, a homeowner gets a middle ground here that sits between hand demolition and hauling in the big machines.
Use a Pry Bar to Lift Broken Sections
When there’s room to swing freely, a sledgehammer handles thin concrete well. Start at an exposed edge, a corner, or an existing crack instead of going straight for the thickest part of the slab. Keep striking the same spot until cracks open, then follow those cracks out toward the next section. Grip the handle with both hands and keep your footing solid the whole time. Step clear of the broken areas before swinging again. This method suits small patios, walkways, and slabs of that kind best. Thick or reinforced concrete will demand far too much from a sledgehammer, and you’ll need a more powerful tool for it.
Work One Small Section at a Time
Taking the slab in sections keeps the work area under control and gives you better command of the demolition. Begin with a single small area, clear out the broken material, then move on to the next. Debris stays clear of the surface you still have to work on. Spotting reinforcement, pipes, drains, or anything unexpected gets easier too, since they surface as you work. Manual demolition runs much slower than heavy equipment, so if your plan is to remove a slab by hand, patience carries the day. Break often, keep clearing debris, and quit if the concrete turns out thicker or harder than your tools can handle.
How to Remove Different Types of Concrete Slabs
No two slabs come out the same way. How thick the slab is, whether it holds reinforcement, where it sits, and how easy it is to reach all decide which tools you need and how much labour the job takes.
Before you start, figure out what kind of slab you have and whether the job calls for hand tools, a breaker hammer, a concrete saw, or some mix of all three. The table below summarises it.
| Slab Type | Suitable Tools | Main Consideration |
| Thin slab | Sledgehammer, pry bar, rotary hammer | Can often be removed manually |
| Thick slab | Jackhammer, demolition hammer, concrete saw | Break into smaller sections |
| Reinforced concrete | Heavy breaker, concrete saw, rebar cutter | Cut or separate steel reinforcement |
| Patio or walkway | Rotary hammer, sledgehammer, pry bar | Protect nearby landscaping |
| Indoor floor | Demolition hammer, rotary hammer, concrete saw | Control dust and protect interiors |
Removing a Thin Concrete Slab
Thin slabs give way more easily since they need less impact force to break. Pick an exposed edge, a corner, or an existing crack as your starting point, then work toward the middle with a sledgehammer or demolition hammer. As soon as cracks open up, slide a pry bar in to lift the loose pieces out. Clear debris often and keep each piece small enough to handle without straining. Small patios, walkways, and garden slabs are the kind of concrete this method suits. Look an old slab over carefully before beginning, since cracks and decay can leave some sections easier to work through than others. Thin doesn’t always mean straightforward, especially where reinforcement is embedded, or utilities run below.
Removing a Thick Concrete Slab
Thick concrete calls for more forethought, since a sledgehammer may not land enough impact to break it efficiently. Cracks open up, and the slab splits into manageable sections once a heavy demolition hammer or jackhammer goes to work on it. A concrete saw is another option: run controlled cuts first, then break the sections apart. With a thick slab, keep working your way through it instead of hammering one spot until you punch through the full depth. Where it helps, drill relief holes to weaken the sections that are putting up a fight. If the slab forms part of a foundation or structural system, find out whether a professional needs to assess it first, since pulling out structural concrete can affect the building around it.
Removing Reinforced Concrete
Steel bars or mesh run through reinforced concrete, and they keep it held together even once it has cracked. So cracking the concrete by itself won’t get you all the way there. Expose the reinforcement with a suitable demolition hammer or breaker, then cut the steel using a tool made for that material. A concrete saw can also carve out defined sections ahead of the demolition. Expect reinforced concrete to take longer to remove than plain concrete. Before you cut or break any reinforcement, check first that it isn’t structurally important. Where the slab ties into a building, foundation, retaining wall, or other load-bearing part, get professional advice before you take it out.
Removing a Concrete Patio or Walkway
You get easier access with a patio or walkway than with an indoor floor, but plants, fences, walls, drainage lines, and landscaping nearby all need shielding. Mark the section for removal first, then locate any utilities running beneath or close to it. Thin concrete yields to a sledgehammer; harder patches need the more controlled impact of a rotary hammer or demolition hammer. Break the slab down into sections and haul the pieces away as you work. If you’re looking into how to remove a concrete slab from a backyard, figure out where the debris is going before you start demolition. Keep plants and surfaces nearby safe from flying fragments, dust, and heavy chunks of concrete.
List the best breaker hammers for breaking concrete floors in France and their pros and cons.
Breaker hammers differ widely in weight, impact energy, vibration control, and the workload they’re built for. For demolition work on concrete floors in France, the right model comes down to slab thickness and whether the job is occasional or intensive. Current French tool comparisons feature models from Bosch, Makita, DeWalt, Hilti, and other makers; SDS-Plus models handle lighter work, while heavier SDS-Max or demolition hammers take on tougher concrete.
Rather than treating one model as universally suitable, compare the specifications with your project.
| Breaker Hammer | General Use | Pros | Cons |
| Bosch GSH 5 CE | Light to medium demolition | Relatively manageable size; suitable for renovation work | Not intended for the heaviest slabs |
| Makita HM0870C | Light to medium breaking | Compact and comparatively light | Limited for heavily reinforced concrete |
| DeWalt D25941K | Heavier demolition | High impact energy; designed for demanding work | Heavier to handle |
| Hilti TE 700-AVR | Professional demolition | Vibration-reduction system; suited to demanding use | Higher professional-tool cost |
| Bosch GSH 16-28 | Heavy demolition | High impact energy for large demolition jobs | Large and less convenient for small indoor work |
These specifications and use categories come from current 2026 comparison sources; they are not a universal performance ranking. The cited French comparisons group the lighter Bosch and Makita models with renovation-oriented work, while the heavier DeWalt, Hilti, and Bosch demolition models are meant for more demanding applications.
Wrap-Up
Taking out a concrete slab comes down to three things: preparing well, having the right tools on hand, and keeping the work under control. Begin with an inspection of the work area, check for underground utilities, mark off the removal zone, and get your safety gear ready. A sledgehammer and pry bar can take care of thin slabs, but thick or reinforced concrete typically calls for heavier demolition tools. Break the slab into smaller sections, and both the lifting and the debris removal get easier. Before any demolition, work out what the slab actually does, especially if it’s a foundation or a structural floor. Pick the right method and take your time, and the job goes faster, with less damage, less strain on your body, and fewer safety risks.
FAQs
What should I consider when buying a jackhammer for home use?
Think about how thick the concrete is, how heavy the hammer is, its impact energy and vibration control, the power source, which chisels fit, and how it feels to run. If you’ll only use it now and then, pick something you can handle that has enough power without extra bulk or fuss.
How do I safely operate and maintain a jackhammer to extend its life?
Put on eye, hearing, hand, and foot protection before you start. Keep a firm grip on the tool and plant your feet steadily. Clear the ventilation openings, check chisels and cords, oil it as the manual says, and swap out worn parts right away.
Which jackhammer is best for heavy demolition vs. light chiseling?
If the work is heavy demolition, you want a heavier jackhammer with high impact energy, built for thick concrete. For light chiseling, a smaller demolition hammer with lower impact energy works better. Your choice should come down to concrete thickness, the size of the project, access, and how comfortable the tool is to handle.
What are the key differences between pneumatic and electric/hydraulic jackhammers, and when should I choose each?
Pneumatic jackhammers need an air compressor and are built for demanding construction work. Electric models make life easier on many residential jobs. Hydraulic breakers give you high power for heavy applications, though they generally need specialized hydraulic equipment and compatible machinery.
Which breaker hammers have the lowest vibration levels, and how do they compare in a top-5 list?
Watch for models that ship with built-in vibration-reduction systems, suspended handles, or anti-vibration technology. Weigh the manufacturer’s stated vibration values against tool weight, impact energy, and operating conditions instead of trusting advertised comfort claims alone.