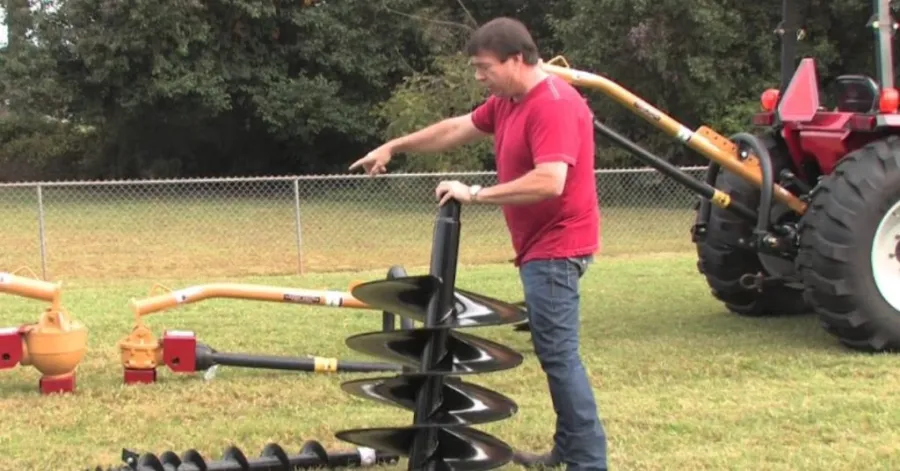
Clearing out deep, even holes with a shovel or manual clamshell digger is hard labor, but an auger takes most of that strain away. Matching the right auger and bit to the job saves both time and hard labor, whether you are fencing, planting trees, framing a deck, or working around a farm. Even so, staying safe and working fast still hinges on using the right equipment and handling it properly. In this guide, you will learn how a post hole auger functions, how to get your ground ready, and the exact steps to operate the drill. We will also explain how to choose the right bit for your specific project and the dirt you are dealing with.
Table of Contents
What Equipment Do You Need to Run a Post Hole Auger?
Get all your gear in one place before you begin digging. The whole job goes much faster and far safer when you have safety equipment, measuring tools, and the right auger fitted with the proper bit size. The ground you are working in and the diameter of the holes will also change what gear you need.
Recommended For Your Project
These tools carry you through the whole process, from cracking the top layer of dirt to drilling the hole and packing up. Picking each tool deliberately spares your back and keeps every hole the same size.
Quick Comparison: What Are the Pros and Cons of Gas vs. Electric Earth Augers?
When it comes to gas vs. electric earth augers, it really depends on what you are digging. Gas augers are the best choice when you need to drill for long periods of time and when extreme power is required. On the other hand, simplicity is the selling point for an electric auger. The average homeowner doesn’t mind a little maintenance every now and then. Cordless, or electric-powered, tools give the user more freedom because there is no need to deal with a power cord or be limited by the amount of fuel a tank can hold. However, long jobs become less enjoyable because you will need to wait for a tool to charge or change batteries. Knowing your soil and the length of time you will need to spend digging should help you determine the right earth auger to use.
| Feature | Gas Augers | Corded Electric Augers | Battery-Powered Augers |
| Power | High power for dense soil and heavy-duty jobs | Moderate power for lighter tasks | Moderate to high, depending on the model |
| Runtime | Runs as long as fuel is available | Continuous with a power source | Limited by battery capacity |
| Mobility | Good, but heavier to carry | Limited by the power cord | Excellent, with no cord or fuel tank |
| Noise | Loud | Quieter | Quietest option |
| Maintenance | More maintenance due to the gas engine | Low maintenance | Low maintenance |
| Starting | Requires engine starting | Quick and simple | Quick and simple |
| Best For | Heavy-duty and extended drilling | Home projects near an outlet | Homeowners who want easy, cordless operation |
| Main Drawback | Heavy, loud, and needs fuel | Cord limits movement | Recharge time can slow larger projects |
Tools for Measuring and Marking
Getting your layout measurements right early on keeps each post where it belongs once digging starts. You can run a tape measure to set post spacing, then use stakes and spray paint to pinpoint where the holes need to go. Check with a level so you know the posts will sit plumb once they are in. On bigger jobs, a measuring wheel speeds up your layout and keeps your gaps uniform over long runs. Locate buried utility lines and stick to local safe-digging rules before you run an auger. Getting prepped properly also helps you figure out how to drill without bunching holes up or dropping them in the wrong spot.
Protective Gear and Workwear
You must have proper safety gear whenever you run a powered post hole auger. Keep dirt, rocks, and airborne trash out of your eyes by putting on safety glasses. A pair of work gloves helps you hold on and keeps your hands safe, and solid boots give you a firmer stance on soft ground. You will definitely want ear protection if you are running a noisy gas machine. Stay away from loose clothes, chains, or anything that might get dragged into moving components. Go through the manual before figuring out how to run an auger, paying close attention to where the controls sit, how the emergency stop works, and how to stand. Make sure bystanders stay clear of the hole, especially if the ground is tough or the machinery has a lot of power.
How to Prepare for Using an Auger Post Hole Drill
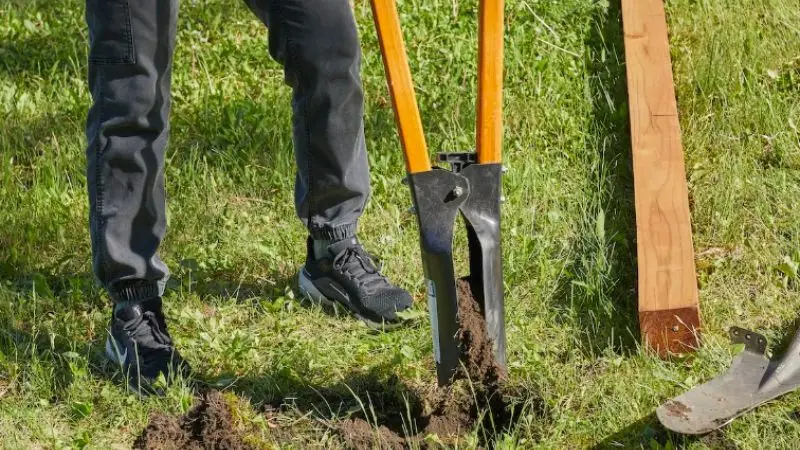
Thorough prep work smooths out the actual dig and saves you from trouble you could have avoided. Make certain the ground, the layout, and the overall spot make sense for drilling before you start the auger.
Taking just a couple of minutes to map out the job helps you place the holes accurately and keep them uniform. Use the steps below to get your site ready before you turn the machine on.
Pick the Right Spot
First, double-check exactly where every post belongs. Look at property lines, building plans, your intended fence line, or any other job specs before putting down any marks. Space the posts properly for what you are building, and make sure both you and the auger have clear access to the spot. Whenever you can, steer clear of spots with standing water, loose earth, heavy roots, or big stones. Double-check your layout before drilling if you are putting in a fence or another permanent build, since having to redo a misaligned hole just makes extra work. Picking good spots gives the machine working room and makes it much easier to end up with a straight, even line of holes.
Look for Buried Utilities
Check for underground utilities every single time before using an auger. Drilling can easily strike and ruin buried electric lines, gas mains, water pipes, comms cables, or drainage runs. Call the right local locate service before you dig, and stick to whatever rules your jurisdiction sets. Never guess where pipes and cables sit, and do not trust surface markers alone. You can strike buried utility lines even with a shallow hole. After the site is marked clear, make sure every hole you plan to drill stays inside that safe perimeter. This is among the most critical things to know when running an auger, since avoiding buried lines is vastly safer than dealing with a broken one.
Mark the Hole Locations
Once you know the area is clear, put down an obvious mark for every hole you plan to drill. Stakes, spray paint, flags, or anything else that stays clear in your sightline while running the machine will work fine. Check the spacing from mark to mark with care so the set posts line up with your plan. With fencing, keeping the intervals even gives the run an orderly look and lets rails or prebuilt panels drop into place properly. Go back over every gate, corner, and angle change one more time before putting the bit down. Moving a paint mark or stake takes seconds; fixing a misdrilled hole once the engine is running is another story. Good markers also give you a reliable target for centering the auger head directly above each spot.
Check Soil and Ground Conditions
Take a close look at the ground beneath you before deciding how you will tackle the job. You might hit light sand or soft yard dirt, or you might run into hard-packed earth, heavy clay, gravel, or stone. Soggy ground tends to give way, but ground that is baked dry or hard-packed will make the drill fight for every inch. Scan the immediate area around every mark for stray rocks, thick roots, junk, or anything else in the way. What you find in the dirt tells you which bit to mount, how much power you need, and what technique will get the job done. When the dirt is tougher than the tool was built to handle, switch to heavier-duty gear instead of trying to muscle the auger down. Knowing how a post hole auger behaves in varying soils helps you judge how fast you can drill and what the tool will actually manage.
Step-by-Step Guide to Using an Auger Post Hole Drill
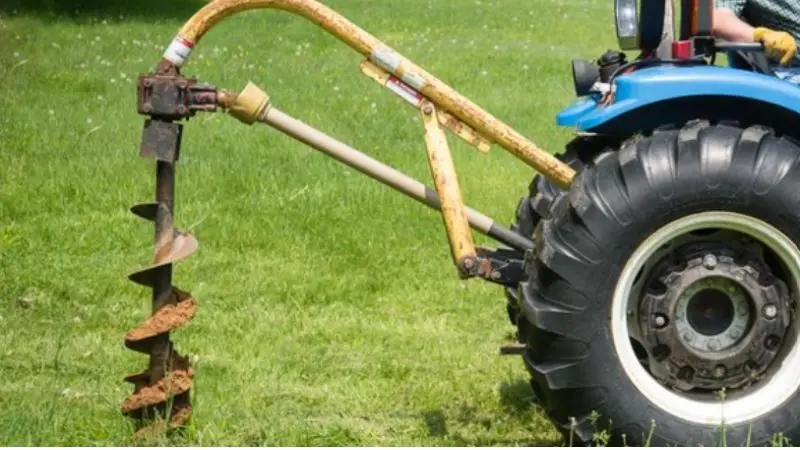
With the site prepped, you are ready to start drilling. Sticking to the same series of steps keeps the machine manageable and ensures your holes match in width and depth.
Because control setups differ from one machine to another, always consult the manufacturer’s directions. The steps that follow lay out how to run a powered earth auger safely and get good results.
Step 1: Align the Auger with Your Mark
Bring the machine over, rolling or carrying it until the cutting tip sits right above your mark. Make sure you have stable ground underfoot and plenty of room to keep a firm grip on the machine. Move people, pets, and any tools you aren’t using away from the spot where you’ll be working. Make sure the bit sits plumb against the soil instead of leaning, and verify that the controls are within easy reach. Taking care with that first placement keeps the bit from drifting away from the spot you marked. Handling is easiest when you’ve positioned things well, especially across those first few seconds in the dirt. Look around your work area one more time before starting the motor.
Step 2: Start the Auger at Low Speed
Follow the manual to start the engine, then gently engage the auger gear. Going slow at first gives the teeth time to cut a clean collar, stopping the machine from kicking or spraying dirt all over the place immediately. Plant your feet securely, and use both hands on the handles if it is a two-handed model. Do not throw your weight onto the bit or shove it into the ground to hurry things along. Just keep the tool steady and let the blades do the actual work of moving the dirt. A slow start makes a massive difference whenever you run into packed soil, stones, or roots. After you get the hang of how it handles, adjust the throttle to suit the ground and whatever the manual recommends.
Step3: Keep the Auger Vertical While Drilling
Your post will only sit plumb if the auger stays straight up and down the whole time. Watch the shaft as it enters the ground, nudging it back upright whenever it wanders off vertical. Going in tilted gives you an out-of-round or slanted hole, and getting a post set into that can turn into a nightmare. Plant your feet firmly rather than twisting your body out of shape to wrestle with the machine. Should the bit snag hard on a heavy root or stone, back off the throttle or disengage the drive per the manual, then get the machine back under control. If you cannot tell by looking down, back away occasionally to check the shaft’s angle from more than one side. A clean, vertical hole prevents frustration later when you seat the post, and it keeps everything else properly lined up.
Step 4: Drill to the Required Depth
Let the auger keep boring until you hit the depth your post and project call for. Post size, the kind of soil you have, load demands, and local building codes all determine how deep you need to go. Stick to what your project plans say rather than taking a guess.
Pause every so often to clear out loose dirt and measure your depth. Never push the auger past the operating limits set by its maker. Do not try to muscle the machine through terrain it was never built to dig. Consult the manual for the proper, safe extraction method if the bit jams. Never yank on it or try to wrench it free with raw strength. Keep every hole dug to an identical depth. Uniform holes make placing the posts simpler and guarantee the final structure sits level.
Step 5: Clear the Soil From the Hole
Once you hit your target depth, scoop out whatever loose dirt remains inside. Even though certain augers lift dirt out while rotating, loose earth can still cling to the sides or settle at the bottom.
Shut the motor off before you reach in to pull dirt out or inspect the opening. Stick to the safety guidelines printed in the manual at all times. Use a slender hand tool to scrape out loose dirt from the bottom if necessary.
Once the hole is cleaned out, measure both how wide and how deep it is. Clearing out surplus soil leaves a tidier footing for the post, simplifying your efforts to line up the height and placement. Do not let your hands anywhere near the bit while it turns.
Step 6: Repeat for the Remaining Holes
If your project calls for additional holes, run through these exact steps at every marked spot. Verify the current hole’s width, depth, and placement before you head over to start the next one.
Hold onto the unit with both hands whenever you walk it from one hole to the next. Consult the manual for the proper way to move and shut down the machine safely. A proper fence depends on all the holes being consistent. The entire run of the fence can suffer if your hole depths or post spacings wander.
Adapt how you drill if you hit different soil. Don’t force the machine to do more than it was built for. Stick to this sequence every time: set the auger in place, turn it on, dig down straight, hit your depth mark, pull out the dirt, and take a look at the finished hole. Doing so cuts down your time and takes the strain out of the job.
Wrap Up
Digging post holes goes much quicker and takes less effort if you have the right auger. Begin by looking over the site, locating any buried utilities, putting markers down for the holes, and seeing what type of soil you’re dealing with.
Match your bit size and how the auger is powered to the diameter you need and the ground you are in. Keep the bit plumb as you drill, and never run the tool past what the maker recommends. Understanding the right way to drill post holes with an auger cuts down on tool wear and helps you steer clear of standard errors.
Pick equipment that matches what you are doing, whether that means a heavy unit for large holes or something light for light, occasional use.
FAQs
Can You Use an Auger in Rocky Soil?
Fitted with an appropriate bit, a heavy-duty auger will usually manage compact earth and small stones. You might need dedicated machinery if you run into heavy boulders or rocks buried deep. Do not ever lean on the auger to force it down.
How Do You Keep a Post Hole Auger from Wandering Off-Center?
Line the tip of the bit up right on your mark. Plant your feet firmly and keep the tool upright as you dig. Pause every few moments to make sure you are still vertical. Straighten the shaft back up the moment you notice a tilt.
Which Earth Augers Dig Deck Post Holes Fastest and to the Right Size?
Factor in the engine or motor output, your ground conditions, and the exact diameter and depth you are digging. Picking a machine that accepts multiple bit sizes leaves you set up for a wider variety of deck builds.
How Safe Are Common Earth Augers, and Which Models Are Best Equipped?
Check for functional shut-off switches, solid grips, shields over moving parts, and clear manual directions. Two-man rigs sometimes feature control setups that make gripping and steadying the unit simpler.
Which Earth Augers Take the Least Maintenance and Work Best for Beginners?
Beginners often have an easier time handling and caring for lightweight electric models, whether corded or battery-run. Gas engines give you extra grunt, but they require fresh fuel, more attention, and routine servicing.