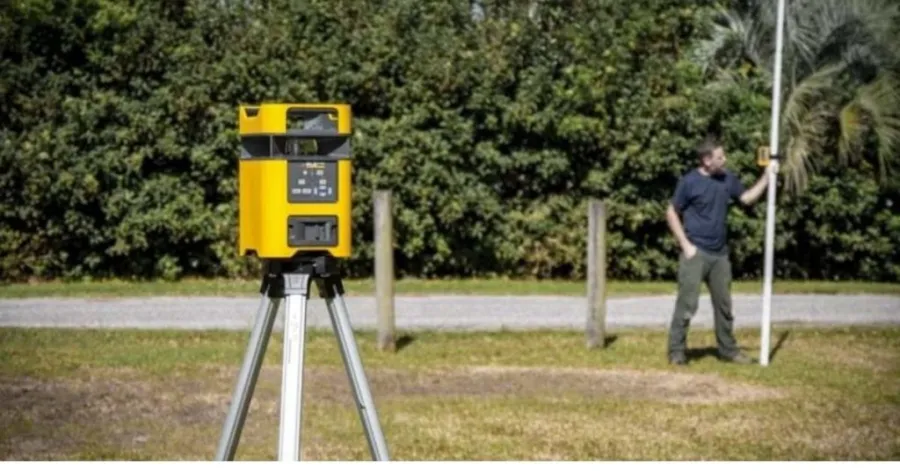
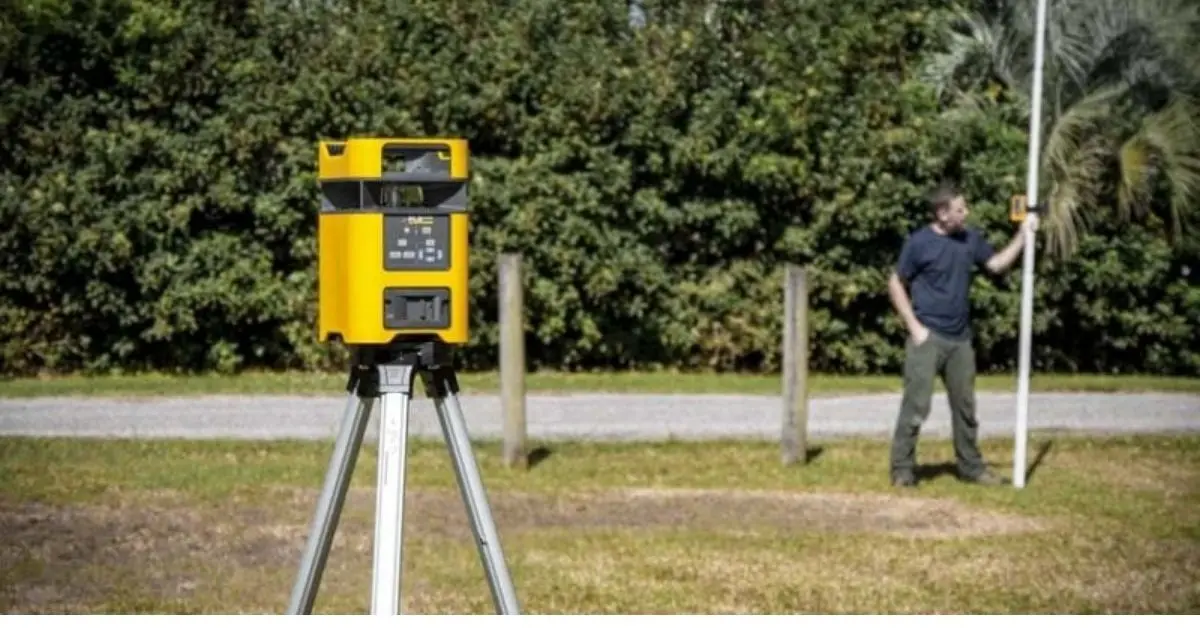
When grading, it is easy to establish a normal slope or create a flat ground surface using a rotating laser level. It makes it much easier to build accurate reference lines, mark grade points, and check elevations. The first step is to mount the laser level on a tripod and position it correctly. You need to turn on the laser first and then use a laser receiver to know the level wherever you are working. Because the procedure is easy and does not require much expertise, it is suitable for first-time users and experienced users who need precise and consistent grading outcomes.
In this article, we’ll show you the use of a rotary laser level for grading and constructing correct slopes for grading jobs. You will learn, step by step, how to set it up, mark reference points, and confidently take accurate elevation readings.
Table of Contents
Why Is Land Grading Important?
Knowing why land grading is important helps you understand why it should never be neglected in building or landscaping projects. A proper rotary laser level for drainage improves drainage, protects your property, and provides a solid base for long-lasting outdoor living spaces.
Recommended For Your Project
Helps Water Drain Away
To regulate the flow of water, the soil must be graded. By constructing a slope, you can direct rainwater away from your property. This helps avoid puddles and flooding. Water can cause erosion and damage to foundations. Proper grading of the soil protects your home and yard.
Makes the Ground Flat
When you have flat terrain, you have safe ground. You can walk on it, drive on it, build on it with no problems. Uneven terrain can be a tripping hazard and make it difficult to operate equipment. High and low spots can be found with a rotary laser level for landscaping projects. You mark these spots and then move the earth to produce a level surface.
-
- Flat ground helps you:
-
- Set up patios and driveways
-
- Install fences and sheds
-
- Plant gardens and lawns
-
- Flat ground helps you:
Get the Land Ready for Building or Landscaping
Grading is the process of preparing land for use in projects. Foundations require flat ground to be constructed. For plants and pathways, landscapers prefer smooth surfaces. You risk uneven settling and poor drainage if you overlook the grading process.
| Project Type | Why Grading Matters |
| House Foundation | Prevents cracks and shifting |
| Lawn Installation | Stops water pooling |
| Patio Construction | Ensures a stable base |
Essential Equipment You Need for Ground Leveling
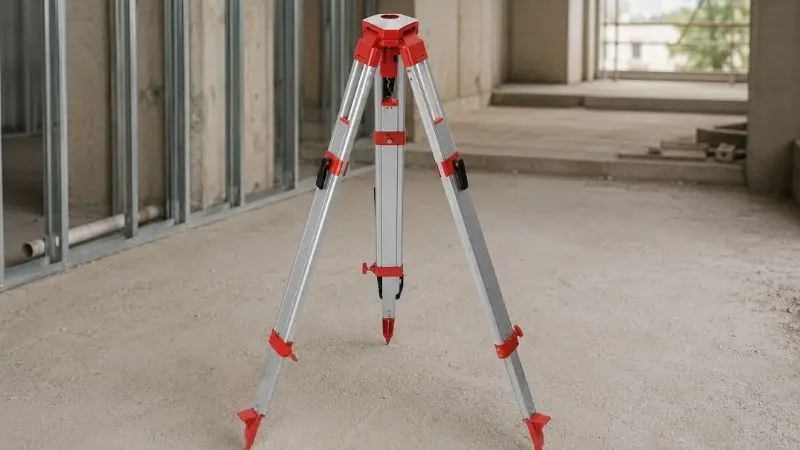
You need the right tools before using a rotary laser level for driveway grading. Each tool helps you measure, mark, and check the ground. When you have everything ready, you can work more quickly and achieve better results.
Rotary Laser Level
The main tool for this job is a rotary laser level for land leveling. You can use it to put a level line across your land. The laser level spins and emits a laser beam to mark the same height all around. This makes it easier to see where the ground is too high or too low. A rotary laser level can be used for grading small yards or big areas. Many individuals prefer this tool as it provides reliable results.
Tripod
For grading, you will require a tripod to hold the rotary laser level. The tripod ensures that the laser level remains stable. You have established it on solid ground. As you work, make sure the tripod does not move.
Laser Receiver
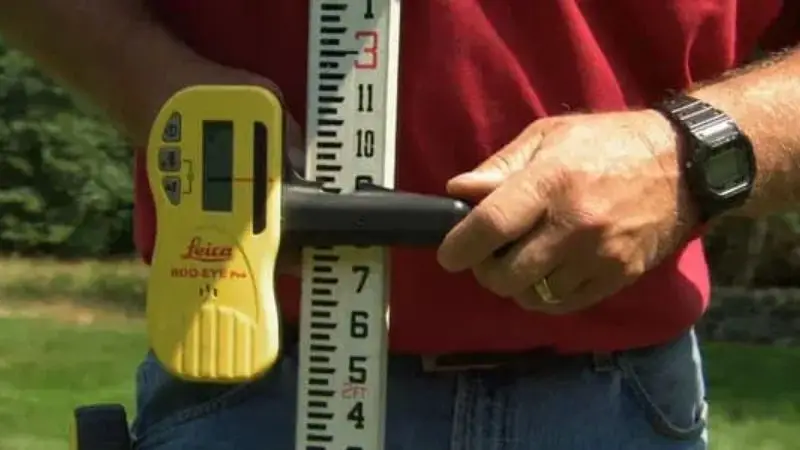
You can determine how much is coming from the rotary laser level for grading with the assistance of a laser receiver. The receiver is fastened to a grade rod in this manner. If the receiver detects the laser level beam, it will either beep or light up. This provides the precise height at each location.
Grade Rod
A long stick that has numbers written on it is called a grade rod. Utilize it in conjunction with the laser receiver. Using the grade rod, you can determine the degree to which the ground is elevated or lowered compared to the laser level line.
Measuring Tape
Using a measuring tape, you can determine the distances between various spots. You can make use of this information to plan your placement of the grade stakes. You can measure the soil to determine how much rotary laser level for excavation projects you need to transport.
Stakes and Marker
When you want to mark areas on the ground, you can use stakes and a marker. Place stakes where you want to check the grade. Write notes or numbers on the stakes. This maintains the clarity of your grading scheme.
Use of Rotary Laser Level for Grading Land
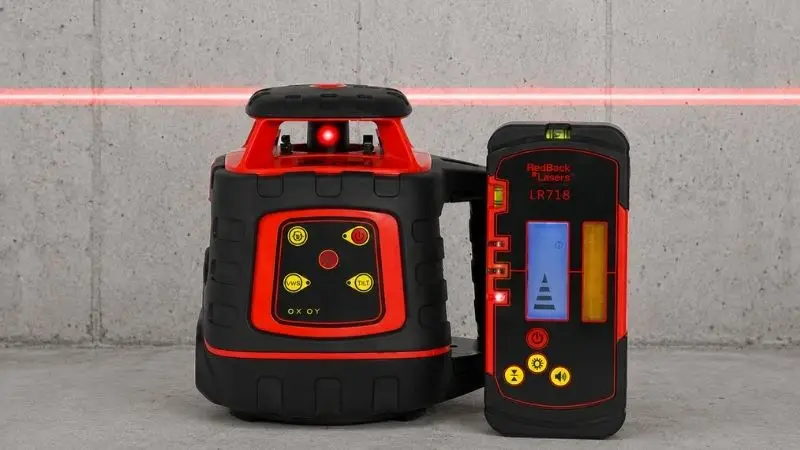
How to use a rotary laser level for grading? With your work area set up, it’s now time to set up and utilize the rotating laser level properly. If each step is taken in the correct order, accurate grade points can be established, consistent elevations maintained, and precise land grading results can be achieved.
Step 1: Set Up the Tripod
Set your tripod on a firm surface. Be sure to maintain its stability. Make sure the base of your laser level is stable. This way you can grade on a level playing field. Adjust the legs so the top of the tripod is flat.
Step 2: Place the Rotary Laser Level on the Tripod
Set the laser level on the tripod. Make sure it is safe to use. Ensure that it is in a straight line. If your rotary laser level for driveway grading features a bubble vial, make sure the bubble is centered in the vial. This step is needed to have a flat surface and correct slope.
Step 3: Turn On the Laser Level
Turn the laser level on. Spin it and let it emit a beam. The beam gives you a level line all around your work area. You can use this line to verify the slope and learn how to set grade for your project.
Step 4: Set Up the Laser Receiver
Attach the laser receiver to your grade stick. Adjust the receiver up and down until it receives the laser level beam. The receiver will beep or light up. That tells you the precise height at each point. This is needed for grading and learning to use a laser level outside.
Step 5: Check the Ground Level
Walk to various areas of your property. Keep the grade rod straight up. Check that the ground is the same as the rotary laser level for landscaping projects, lined up with the laser receiver. If the receiver is high or low, you know you have to grade the ground. That’ll help you find where to put a grade or a slope.
Step 6: Mark High and Low Areas
You can use stakes and a marker to define high and low locations. A remark or a number must be written on the stakes. This preserves the clarity of your rotary laser level for excavation projects and grading schemes. You can see where you need to add soil or remove soil to get the slope you want.
Step 7: Move Soil to Get the Right Grade
Start to move dirt from the high locations to the low spots. Use a shovel, rake, or machine. Continuously monitor your stakes and rotary laser level for land leveling. This shows how to set grade and keep a constant slope so water will drain.
Step 8: Check the Ground Again
Read your work again. Go back. At each stake, use the rotary laser level for drainage and receiver. Check that the floor is level or correctly sloped. If you need to correct any places, repeat steps. How to Use a Laser Level Outdoors for Grading.
Expert Tips for Better Pool Ground Leveling Results

A few simple best practices go a long way toward the correctness of your grading project. How to use a rotary laser level for grading? By using your rotary laser level properly and avoiding common mistakes, you’ll get better measurements and a smoother grading process.
Put the Tripod on Firm Ground
You need a good base for your laser level. Set the tripod on firm ground. The tripod could move if the ground is soft or loose. If the tripod is moved, you will not get an accurate slope. You want the tripod to remain where you put it while you check the slope. This gives you the right slope for grading.
Check the Laser Before You Start
Always check your laser level before you start: Switch it on and check that the beam turns easily. If the laser level isn’t functioning properly, your slope will be off. When you are setting the slope for your project, you want to trust your tool. A short check will save time and trouble down the line.
Measure More Than Once
Measure the slope at various points. Use the laser level to walk around your site and check the slope in many places. Sometimes the ground shifts and you miss a high or low place. Locate all the places that need a rotary laser level for excavation projects and grading with multiple measurements. You want the same slope throughout.
Keep the Equipment Clean
Dirt and dust might obstruct the laser level beam. Clean your rotary laser level for landscaping projects after every use. Use a soft cloth to wipe the lens and body. You obtain a better slope with a clear beam. Clean tools will last longer and give you better grading results.
| Equipment | How to Clean |
| Laser Level | Wipe lens and body |
| Tripod | Brush off dirt |
| Receiver | Check for dust |
You want your rotary laser level for drainage to work well every time you set a slope. Clean tools help you finish grading faster and with fewer mistakes.
Common Mistakes to Avoid When Leveling Pool Ground
These mistakes can make the slope uneven or mess up your project. Here are the primary issues to look out for:
Not Leveling the Tripod
You must set your tripod on solid ground. If you skip this step, your rotary laser level for land leveling will not give you a true slope. The tripod needs to stay steady. If it tilts, your slope will not match your plan. Always check the bubble vial on your laser level before you start. This helps you keep your grading accurate.
Skipping the Calibration Check
You need to check your rotary laser level for driveway grading before every grading job. If you skip calibration, your slope may be off. A laser level that is not calibrated can give you wrong readings. This mistake can ruin your slope and waste your time. Always follow the instructions for your laser level. Calibration helps you trust your slope measurements.
Taking Wrong Measurements
How to use a rotary laser level for grading? You must use the laser level and grade rod correctly. If you hold the rod at an angle, your slope will not be correct. Wrong done with uneven grading. Always keep the rod straight and the receiver at the right height. Double-check your slope at each point.
Forgetting to Check the Grade Again
After moving the soil, you will need to recheck your slope. Many folks skip this step. If you don’t check it, you may not grade according to your plan. Check the slope at each stake with your laser level. This can enable you to locate any areas that need additional attention.
| Mistake | What Happens |
| Tripod not level | Slope is not accurate |
| No calibration | Wrong slope readings |
| Wrong measurements | Uneven grading |
| No final check | Missed slope problems |
Conclusion
A rotary laser level for grading makes it possible to quickly calibrate the ground beneath you. This can be done with the laser level. First, you will need to make sure that your laser device and tripod are configured properly. The stakes are used to determine the high and low points. If required, the soil should be changed, and then you should check your work again. Reliable findings are possible if the system is set up carefully and the user performs thorough verification consistently.
FAQ
How do you know if your rotary laser level is accurate?
You should check the bubble vial and test the laser on a flat surface. If the beam stays level all around, your tool works well. Always follow the instructions in your manual.
Can you use a rotary laser level in sunlight?
Yes, you can use it outside. The laser receiver helps you find the beam, even in bright light. Wear safety glasses to protect your eyes from glare.
What should you do if the laser beam is hard to see?
-
- Use the laser receiver to detect the beam.
-
- Clean the laser lens.
-
- Try working early in the morning or late in the day.
How often should you calibrate your rotary laser level?
| Frequency | When to Calibrate |
| Before each job | Always check calibration |
| After a drop | Calibrate right away |
You should check calibration often to keep your measurements correct.