
Want a shady area to sit and chill in your backyard? You can cover your outdoor space yourself. Some people always have intrusive thoughts of what if I cannot do that? You just need to be confident and follow this guide. You don’t need to be an expert in DIY; if you follow all the instructions explained in this blog, you will get the best results. For extra help, you can also watch videos on DIY patio covers or look up instructions for building one online. You can start here with the right tools for a DIY Patio Cover.
Types of DIY Patio Covers You Can Build
When you start your patio cover project, you get to pick a style that fits your home and your needs. Each type has its own look, benefits, and challenges. You can choose the best BBQ pergola ideas. Let’s break down your main options.
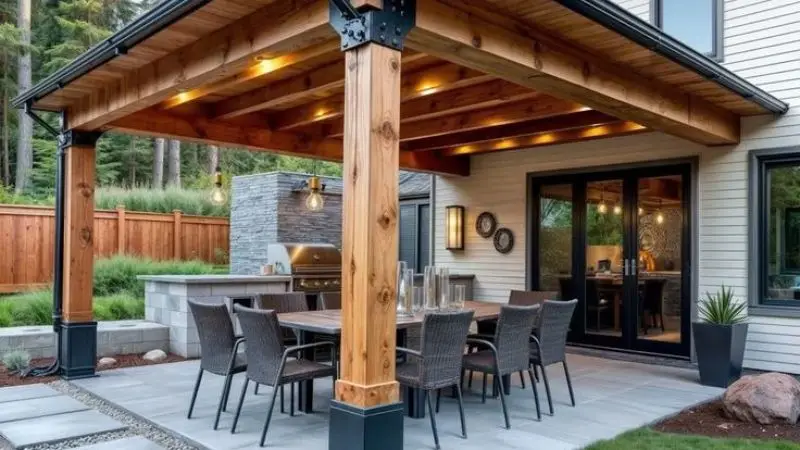
Wood Patio Cover (Traditional & Rustic Look)
Wood is one of the most used materials for covering. It gives your patio a classic look. Wood is also essential for a natural vibe. Lights and plants also complement the woody area well. But the proper maintenance is also indispensable. You have to cover it annually to keep the wood in good condition. You can also build a BBQ area with a pergola to enhance the whole space.
Aluminum Patio Cover (Low Maintenance Option)
Aluminum also works great for outdoor areas. It requires less maintenance as it is rust-proof. It is a great choice for you if you are too busy to paint often. No paint doesn’t mean you can’t personalize aluminum. It is available in different styles and colors. It also gives your garden a sleek look.
Pergola-Style Patio Cover (Open-Air Design)
Pergolas in the BBQ area provide shade while still allowing some sunlight through. They use beams or slats instead of a solid roof. You can grow vines or hang lights for a pretty effect. Pergolas work well if you want an airy, open space.
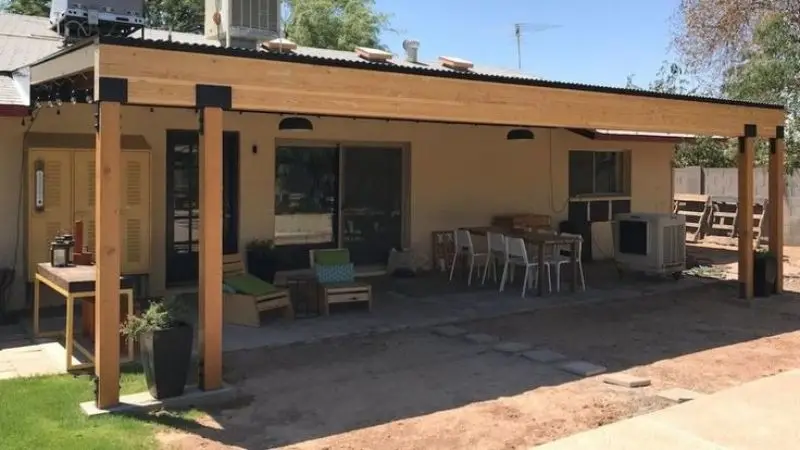
Attached vs. Freestanding Patio Covers
You can attach your patio cover to your house or build it as a freestanding structure. Attached covers use your home for support. They often cost less and feel like part of your house. They are the best choice if you have a small patio area. You can stand them when you need a seating area; otherwise, put them anywhere else. It is also available in various designs, so you can choose one that suits your taste.
Tools and Materials Needed to Build a DIY Patio Cover
Before you start building, you need the right tools and materials. Having everything ready makes your project smoother and less stressful. Let’s break down what you’ll need.
Essential Tools Checklist
The patio cover making might seem very complex and require a lot of tools. But in real you only need a few basic tools, some of which are available in your home. But if you don’t have any of them, you can simply borrow them from hardware stores. But the question is, what do I need? Here are some required tools:
- Measuring tape – Essential for making measurements. It will help you to get the right length and width you want.
- Hammer – For joining all the parts together. But keep in mind to use it carefully.
- Circular saw, or hand saw – For metal parts, you may need a circular saw. But for wood, a hand saw would be more helpful.
- Drill with bits – For making holes and driving screws.
- Level – To keep your patio cover straight and sturdy.
- Ladder – Of course, you need a ladder for cover. It should be well-supported. Never use ay defected ladder. It can cause severe injuries.
- Safety gear – Gloves, safety glasses, and ear protection. These are necessary for all DIYs. They must be in your home.
Materials List
The materials you need depend on the type of patio cover you choose. Here’s a basic list for a simple wood or aluminum cover. You can adjust the sizes and amounts to fit your space.
| Material | Purpose |
| Posts (wood or metal) | Main supports for the structure |
| Beams | Hold up the roof |
| Rafters | Support the roofing material |
| Roofing panels | Provide shade and cover |
| Concrete mix | Secure posts in the ground |
| Screws and nails | Hold everything together |
| Post anchors | Keep posts steady |
| Paint or sealant | Protects wood from the weather |
Step-by-Step Guide: How to Build a DIY Patio Cover
Ready to start your diy covered patio? The following are some steps to follow. These steps will make you a pro in each step. Let’s get your patio cover project off the ground!
Step 1 – Check Local Building Codes and Permits
Before you grab your tools, check your city’s building codes. Some jurisdictions require permits for a DIY patio cover. For this, you may need permission via the local building office, or you can also check online. This step will make you more confident in your task.
Step 2 – Measure and Plan Your Patio Cover Design
Measuring is an important step; it will help you determine the correct amount of material. For this process, you may need a measuring tape. Measure the space of your backyard that you want to cover. You can also sketch the design you want to make. It will help you to avoid mistakes during the process.
Step 3 – Install Support Posts
The next step is to mark the posts’ attachment. You need to drill holes in each post, fill them with concrete, and then set the posts. Keep the posts straight by using a level. Never move to the next step immediately; the concrete should be dry first.
Step 4 – Attach Beams and Frame Structure
After the concrete has dried, the next step is to place beams on posts. Don’t forget to fix them with screws or bolts. Now the basic frame is ready. Keep in mind, this frame will support the roof, so it should be sturdy.
Step 5 – Install Rafters and Roofing Material
Lay rafters across the beams. Space them evenly. Attach your roofing panels or slats. After this step, you will have a perfect DIY covered patio. You can stop the process and enjoy a shady, protected space.
Step 6 – Finishing Touches
This step is completely optional; you can skip this if you have a tight budget. But it wil enhance the whole game of the area. You can add paint, curtains, and plants. Lights are necessary for making the space worth sitting in at night. Moreover, you can also add fairy lights for a good vibe. This step will level up the whole game of your patio.
Conclusion
You did it! You have learnt how to create a shady space for summer and a cozy space for winter in your backyard. Covering your patio always seems to be very difficult. But with this guide, you can easily personalize your patio in just a few steps. Despite this guide, if you get stuck at any point while DIY, there are videos online that describe each step; you can simply watch them. Have a well-covered area save your outdoor furniture from harsh weather!
!
FAQ
How long does it take to build a DIY patio cover?
Most people finish in one weekend. If you work slowly or have a big patio, you might need two weekends. Take your time and enjoy the process.
Do I need special skills to build a patio cover?
You don’t need to be an expert. If you can use a saw, drill, and measuring tape, you can do this project. Watch a few videos if you feel unsure.
Can I build a patio cover by myself?
You can do most steps alone. For lifting beams or roofing, ask a friend for help. Working with someone makes the job safer and more fun.
What type of wood should I use for outdoor patio covers?
Cedar and redwood last longer outside. They resist bugs and rot. Pine works too, but you need to seal it well.


