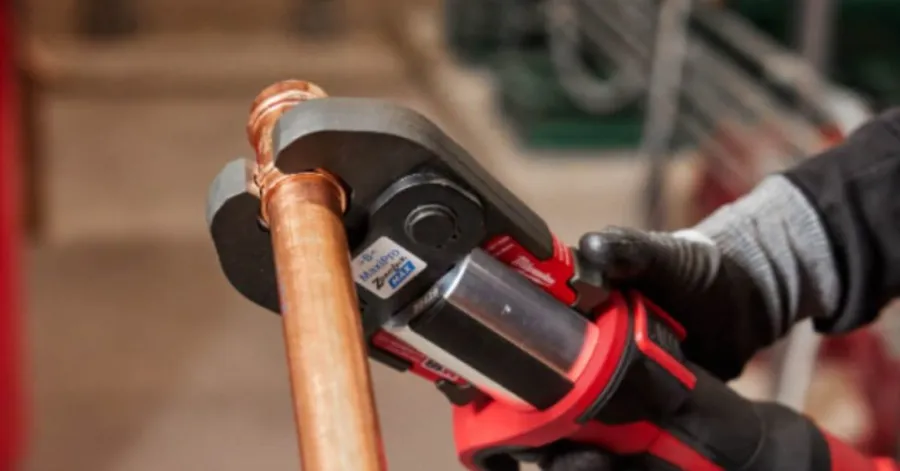
To keep refrigerant lines sealed and running properly, refrigeration systems rely on durable joints. Instead of brazing joints the traditional way, you can use refrigeration press fittings. A specialized naciśnij narzędzie crimps the fitting tightly over the matching tubing. You have to pay close attention when selecting and putting in these fittings. Before moving forward, verify the tube dimensions, tubing material, refrigerant type, pressure limits, and your press tool. This guide walks through what złączki zaciskowe chłodnicze are, their mechanics, common varieties, the required tools, and the primary steps for installing them. It includes safety considerations as well, so you can handle the fittings properly.
What Are the Main Types of Refrigeration Press Fittings?
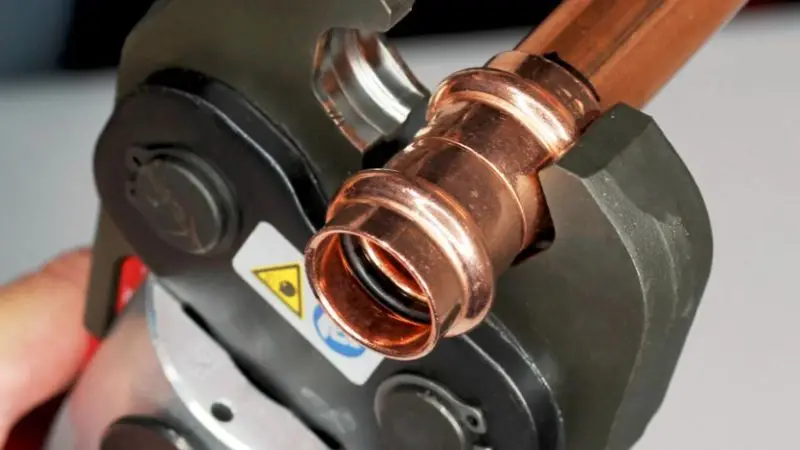
Depending on whether you need to connect runs, alter flow direction, tap a branch, or adapt across dimensions, refrigeration systems employ several fitting profiles. How the piping is laid out determines the role each fitting type has to play. Understanding what refrigeration press fittings are makes it much simpler to pick the correct part for your application. Every fitting has to correspond directly to the tubing material, diameter, refrigerant in the loop, operating pressure, and temperature limits.
Polecane dla Twojego projektu
Straight-Line Refrigeration Press Fittings
Two compatible lengths of tubing can be linked end-to-end in a straight line using straight refrigeration press fittings. They come in handy whenever you have to lengthen a line or cut out a bad piece of tubing. You can also use them to connect two pipe ends straight through.
Before inserting the tube into the fitting, cut it to size and clean it up. Next, crimp the fitting down over the tube using a matching elektryczna prasa to seal the joint. Before picking a straight fitting, verify the tube dimensions, the metal alloy, the operating pressure, and the specific refrigerant. Understanding the mechanics behind refrigeration press fittings will also make selection and installation much easier.
Elbow Press Fittings
When a refrigeration run has to turn, installers turn to elbow press fittings. The standard options are usually 45-degree and 90-degree angles. What options are open to you depends on the particular fitting system you are using.
Installers use them to steer pipe runs around machinery, structural walls, and tight corners. Using them also means you can avoid putting tight manual bends in the tubing. To install one, prep both pipe ends thoroughly and push them into the elbow sockets. After that, complete the joint with the appropriate pressing tool. Before fitting anything, always verify the size, rated pressure, and temperature limits.
Tee Press Fittings
A tee press fitting features three separate ports. Installers reach for them whenever a refrigeration circuit needs to split off.
Depending on how the system is laid out, a tee can tie a branch line into a main line. On some tees, all three ports are the same size. On others, the branch port is smaller. Cut and prep every tube properly before you install it. Insert every tube all the way to its marked depth before you press. Verify, too, that the fitting is rated for that specific refrigerant and the operating conditions.
Reducer Press Fittings
Press reducers are designed to join refrigeration lines of differing diameters. They come in handy whenever a line steps down from a larger diameter to a smaller one.
The two ends of a reducer are sized differently. That difference simplifies joining lines of unequal thickness. Verify the size of both lines before putting one in. Verify that the fitting carries approval for the refrigeration setup in question. Review the pressure limits, temperature thresholds, tubing metal, and the refrigerant being used, too. Picking the correct reducer keeps the job of linking mismatched tube sizes straightforward.
Złącza i adaptery
In refrigeration circuits, couplings and adapters perform distinct roles. Two matching runs of tubing are tied together with a coupling. Adapters either bridge a tube to a component or switch from one style of connection to a different one.
You will find uses for these fittings whether you are assembling a new setup, fixing an existing one, or modifying a system. Every fitting has to correspond directly to the tubing’s specific diameter and material. Compatibility with the system’s operating pressure and the refrigerant itself is equally required. Make sure every time that the fitting is explicitly rated for refrigeration service. That distinction matters whenever you look into what press fittings actually do in refrigeration. Press fittings built for other trades might fail to hold up safely in a refrigeration loop.
| Typ mocowania | Główny cel | Wspólne zastosowanie |
| Proste | Joins tubes in a straight line | Extensions and repairs |
| Łokieć | Changes tube direction | Routing around corners |
| Trójnik | Creates a branch | Połączenia rozgałęzione |
| Reduktor | Joins different tube sizes | Zmiany rozmiaru |
| Sprzęgło | Joins compatible tubes | Tube-to-tube connections |
| Zasilacz | Changes the connection type | Connecting tubes to parts |
Which Tools Do Refrigeration Press Fittings Require?
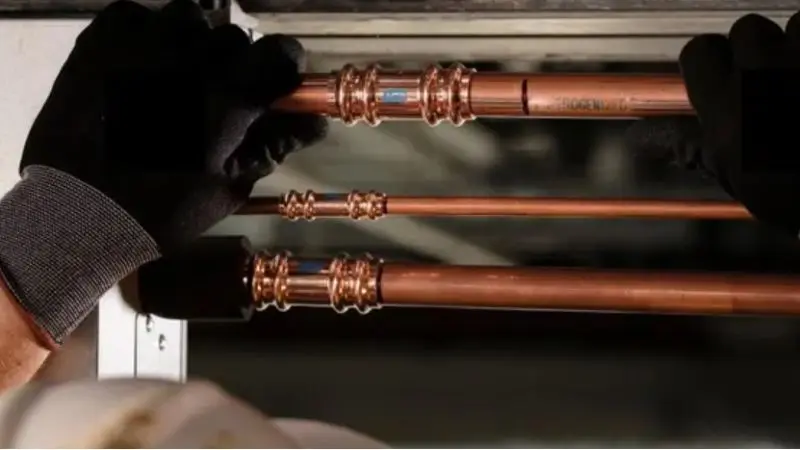
Putting in refrigeration press fittings calls for several items beyond the bare fitting and the narzędzie do prasy hydraulicznej itself. The job also requires dedicated tools to cut, deburr and clean, measure, mark the depth, and inspect the pressed joint.
The required tool lineup shifts depending on the system design and the specific fitting manufacturer. Always consult the instructions provided by the makers of the fitting and the tool prior to starting.
Refrigeration Press Tools
Te press fitting tools supply the mechanical force that crimps a compatible fitting onto the tubing. Cordless models run on batteries, which often makes them handy out on a job site. You do not have to keep them plugged into a wall outlet to run them.
Models vary across several factors: output force, jaw style, tube capacity, and operating range. Whichever fitting system you are installing, the tool itself has to be officially approved for it. Slide the tube all the way in until it reaches the specified insertion depth prior to crimping. Every single component—the tubing, the fitting, the jaw, and the tool—must match and function as a unit. Grasping this compatibility requirement is central to understanding how refrigeration press connections actually function.
Jaws and Dies for Press Tools
The jaws and dies are what direct the tool’s raw mechanical pressure straight onto the fitting. What shape and size jaw you need hinges on the specific fitting line and pipe diameter you have.
Only install dies and jaws that the fitting producer has cleared for use. Just because a jaw creates a press doesn’t mean its contour matches every fitting profile. Prior to cycling the tool, confirm the jaw is properly matched to both the press unit and the fitting. Inspect the jaw faces carefully for signs of debris, metal fatigue, or physical damage. Keeping the jaws clean and properly serviced helps ensure the crimp closes evenly all the way around.
Narzędzia do cięcia i gratowania rur
You use tube cutters and deburring tools to get the tubing ready before sliding it into the fitting. Using a tube cutter gives you a cleaner cut. The deburring tool takes off any sharp edges the cut left behind.
Prepping the tube properly matters. If the end of the tube is rough, damaged, or out of square, seating it properly becomes difficult. The completed joint can suffer from it as well. Be careful not to pinch or bend the tubing as you cut through it. Once it is cut, inspect the tube to confirm it is clean and undamaged. Preparation specs vary, so always stick to the fitting manufacturer’s guidelines.
Narzędzia do pomiaru i znakowania
You rely on measuring and marking tools to get your cuts to the exact length. They give you a way to verify insertion depth, too.
A standard tape measure works well for sizing the tube. Use a marker to indicate the exact depth the tube needs to go. Once the tube is seated, look at your mark to confirm it went all the way in. Measuring carefully keeps you from scrapping as much tubing. They also make it easier to keep your pipe runs tidy. Stick strictly to the manufacturer’s specified dimensions and depths for each fitting.
Tools for Inspection and Leak Testing
Once the press joints are made, you bring out the inspection and leak-testing gear. A simple visual inspection catches the obvious defects. These may include poor pressing, damaged tubes, or a fitting that is not in the right place.
Certain setups will call for pressure-test gear or an approved leak detector as well. Testing requirements vary by refrigeration system, refrigerant type, manufacturer directions, and local codes. Even if a joint looks right to the eye, it still needs to be tested. Thorough checking confirms the joint is actually sound enough to move on.
Step-by-Step Guide to Installing Refrigeration Press Fittings
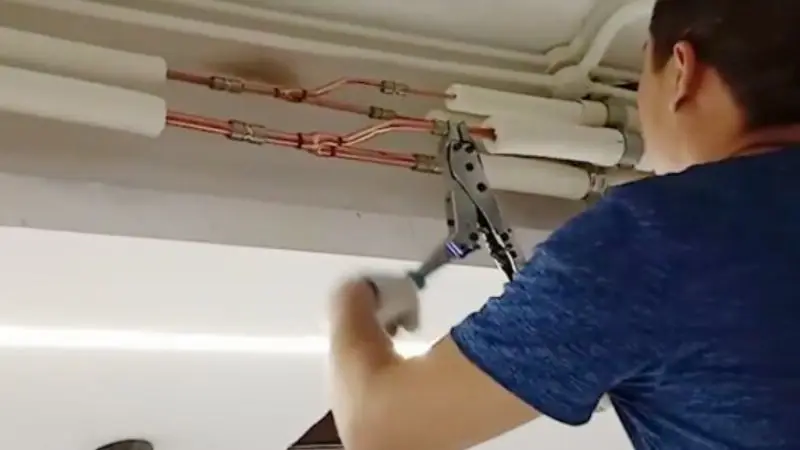
Once you have matched the right fitting, tube, and tooling, the installation can start. Follow the fitting maker’s manual for every single step.
Different fitting brands have their own rules for prep, insertion depth, and the pressing sequence itself. Getting the preparation right matters a great deal before that narzędzie do zaciskania rur touches the joint.
Cut the Refrigeration Tube
First, take the measurement on your refrigeration tube. Put a mark where the cut needs to go. Get a clean, square cut by using an appropriate tube cutter. Do not cut it in a way that risks crushing or flattening the tubing. Once it is cut, inspect the end of the tube. There should be no significant dents or visible damage on it.
Before taking the next step, confirm the tube and fitting are the same size. Stick to the manufacturer’s directions for preparing and cutting the tube.
Clean and Deburr the Tube
Once the cut is made, wipe down the end and remove any sharp edges or burrs. Use the right deburring tool to get this done. Inspect the tube for any signs of dents, scratches, grit, or other flaws. Prior to inserting it into the fitting, the tube has to be clean. Never clean it using a method that could scratch the tube or leave it dirty. Understanding how refrigeration press fittings work relies heavily on proper cleaning and deburring. The prepared tube has to seat properly inside the fitting.
Zaznacz głębokość włożenia
Find the manufacturer’s specified insertion depth before sliding the tube in. Draw a clear line at this exact measurement on the tube. That line lets you confirm at a glance that the tube has gone all the way home. Pick a marker that will not rub off while you work. Never estimate how far it goes in. The required depth varies with the fitting style and pipe diameter. Once the tube is in place, look at the mark one more time.
Insert the Tube Into the Fitting
Slide the prepped tube straight into the fitting until it hits the specified depth. Do not muscle it in. Verify that your line sits right where it should against the fitting edge. Pull the tube back out and inspect both pieces if it fails to slide in smoothly. Never try to force parts together if they do not slide in cleanly. Confirm that the tube and fitting match the intended pipe run before starting the crimp.
Line up the tool and jaw
Pick the right jaw or die to match the fitting. Mount it into a compatible press tool, following the manufacturer’s guidelines. Fit the jaw over the designated section of the fitting. Maintain alignment between the tube and fitting as you do this. The jaw must rest in the exact position intended. Never clamp it onto an arbitrary spot on the fitting. Make sure the tool is fully seated before you press.
Complete the Press Connection
Uruchom narzędzie do zaciskania rur hydraulicznych only after the fitting, tube, jaw, and tool are correctly aligned. Carry out the entire pressing cycle according to the tool maker’s directions. Unless the manufacturer says otherwise, allow the tool to run through its full cycle. While the tool is running, ensure your hands remain clear of any moving components.
Take the tool off with care once the cycle finishes. Unless the manufacturer explicitly permits it, never attempt to adjust the completed joint by hand. The completed crimp should match its intended profile. When a system is approved for them, refrigeration press fittings offer the benefit of producing consistent joints without traditional brazing.
Sprawdź i przetestuj połączenie
Give the connection a close visual check once the press is complete. Verify where the fitting sits, confirm the depth mark, and inspect the profile of the completed crimp. Check for an incomplete press, damaged copper, or any other defects. Adhere to the manufacturer’s directions for the inspection.
Next, test the system using the specified equipment and procedure. A joint can look completely sound on the outside and still leak, which is why testing for leaks matters. Carry out all pressure and leak checks specified for that particular system. Leave the system out of regular service until every required check is finished.
How Do Refrigeration Press Tools Work?
These tools apply calibrated mechanical force to compress an approved fitting over compatible pipe. That action forms the intended joint, doing away with the need for standard brazing. Every component must match: the PEX pipe press tool, the jaw, the fitting, and the pipe itself. Selecting the correct setup also hinges on pipe diameter and the directions from the fitting’s maker.
How the Press Action Seals the Joint
A narzędzie do prasy chłodniczej exerts force onto a compatible fitting seated over the prepared tube. Both the fitting and its internal sealing elements are engineered around that specific press process. Once the tool finishes its cycle, it leaves the fitting deformed around the tube exactly as intended. Between different fitting systems, the specific mechanics can vary. That is the basic working principle behind refrigeration press fittings. It likewise makes clear why having the proper tool, jaw, fitting, and tube prep matters.
Selecting the Right Press Jaw
You have to match the press jaw to the specific fitting brand, its size, and an approved naciśnij narzędzie. Manufacturers do not all rely on the same press profile. Even if another jaw looks identical, it might be unsafe or entirely wrong for that fitting. Always review the fitting manufacturer’s guidelines prior to use.
Keep the jaw clean, too, and ensure it shows no signs of heavy wear or damage. An incorrect jaw can prevent the fitting from crimping down to its intended finished shape. On refrigeration lines, every part—the tool, jaw, fitting, and tubing—must be part of an approved system. That consistency helps guarantee that the joint has been pressed properly.
Corded Versus Cordless Refrigeration Press Tools
Both corded and cordless press tools deliver enough force to make the press. Each has its own advantages, though. Corded models have to be plugged into a power socket. That can turn into a hassle if you are working in cramped spots or off the beaten track.
Cordless models run on battery power. With no cord, you can move around much more easily on the job. Even so, your working time will depend on how long the charge lasts and whether you have fresh batteries on hand. Beyond the power source, weigh up the weight, what sizes of tube it takes, available jaws, upkeep demands, and manufacturer approval.
Manual or Powered Press Tools
Manual press tools rely entirely on your own arm and hand strength. A powered press tool uses a motor or separate drive unit to finish the press. Manual options tend to be compact and uncomplicated. For appropriate small-bore joints, they can do the job nicely. If you move up to bigger fittings or have to make press after press, it takes far more muscle.
A powered tool takes a lot of that strain off your hands. Used properly, they also tend to crimp with greater consistency throughout the stroke. Check the tube size, joint count, job site space, how easily the tool carries, and how much force it takes before picking one. Always use the tool type approved for the fitting system.
Which Electric Press Tools Deliver Reliable Force, and Are They Actually Worth the Money?
Going electric saves strain on your hands while keeping the press stroke smooth and regulated. Weigh each model by looking directly at what it can do and which systems it is rated to crimp.
Things to keep in mind include crimping force, compatible tube sizes, jaw profiles, power supply (battery or cord), speed per press, total heft, and repair options. Spending more often gets you practical perks that pay off if you are crimping all day for a living.
Provided the fitting maker signs off on it, a stripped-down tool will do just fine for the odd job here and there. On refrigeration lines, whether a tool matches the fittings matters far more than low cost or fancy add-ons.
Electric vs. Manual Press Tools for High-Tolerance Work: How Do They Stack Up, and What Should You Buy?
The real dividing line between electric and manual narzędzia do zaciskania rur comes down to how the crimping power gets generated. Powered tools spare your wrists and can take a lot of the drag out of repetitive crimping runs. Manual press tools stay simple and get the job done cleanly when matched to the right kind of work. A sound joint starts with grabbing the exact tool body and jaw profile specified for that fitting.
They also hinge on clean cuts, thorough deburring, checking that the pipe is bottomed out, and finishing a complete stroke. Weigh each candidate by looking at fitting approvals, compatible pipe gauges, upkeep schedules, and how balanced it feels in the hand.
Wniosek
Provided both the equipment manufacturer and fitting brand permit it, refrigeration press fittings let you join compatible lines without having to braze them. Options include fittings for runs in a straight line, turns, branch tees, and transitions between tube sizes. A sound joint starts with thorough tube prep. Make a clean cut, deburr the edge, mark how deep the tube must slide in, and match the jaw to the fitting.
You must also verify the refrigerant type, the pipe metal, operating pressures, and service temperatures. Wondering whether press fittings work for refrigeration? It comes down to whether the fitting carries an approval for your exact system and gas. On approved jobs, these fittings can mean simpler installs, less hot work, and noticeably quicker jointing times. Make sure you follow the manufacturer’s directions to the letter, completing all required checks and leak testing before turning the system on.
FAQS
What Is the Process for Fitting Refrigeration Press Connections?
First, square and deburr the pipe, wipe it down, and gauge the insertion mark on the outside. Push the tube in, fit the proper jaw, run the full pressing cycle, and finish by checking and leak-testing the joint.
What are the most straightforward press tools for a beginner, and what features make them easy to run?
Tools suited for newcomers usually feature straightforward controls, an auto-retract function, easy-to-read battery gauges, quick jaw swaps, and ergonomic grips. Pick a unit certified for the specific fitting brand and pipe dimensions you have.
Hydraulic vs. Arbor Press for Garage Work: Trade-Offs, Strengths, and Leading Models.
A hydraulic press delivers heavy tonnage while keeping stroke speed under control. An arbor press keeps things straightforward and handles lighter tasks without trouble. For refrigeration, stick exclusively to a press tool the fitting maker has approved.
Which Portable Press Tools Work Best for Field Repairs and Emergencies?
Field-ready press tools need to be compact, run on batteries, pack enough power, and transport easily. Aim for fast jaw swaps, a battery charge gauge, an automatic return stroke, and a proper storage box. Make sure it is certified for refrigeration work every time.
Manual or Pneumatic Press Tools for Auto Repair: How Do They Compare, and Which Models Stand Out?
Manual options travel anywhere since they do not rely on an air line. Air-powered tools save your hands on repetitive, high-volume pressing. For refrigeration piping, select equipment rated for that specific fitting, pipe diameter, and pressing tonnage.
Which Press Tools Earn the Highest Reliability Ratings from US Customers — Top Models?
Feedback scores vary depending on the retailer, the specific model, and when the review went up. Weigh user feedback across tool durability, crimp consistency, runtime, customer support, and handling comfort. Refrigeration compatibility should always be the very first thing you check.