
Når du bygger huset ditt, kan du sage ditt eget treverk. Dette vil gi deg kontroll over materialene dine. Når du bygger et hus, kan du få tak i godt treverk og sage det til ønsket størrelse når du sager tre. motorsag kan være veldig nyttig for å kutte tømmerstokker i håndterbare biter før fresing, spesielt i et gjør-det-selv-oppsett. Det er enkelt og hyggelig med et gjør-det-selv sagbruksoppsett. Med riktig planlegging kan du bli kjent med alle detaljene ved tømmerskjæring for husbygging. Fresing vil ikke bare spare deg penger, men også gjøre deg stolt av det du har gjort.
Verktøy og utstyr for sikker og nøyaktig treskjæring
Det er også nødvendig å klargjøre riktig verktøy og utstyr før man starter treskjæringsarbeid. Riktig forberedelse vil bidra til å gjøre prosessen tryggere, raskere og mer nøyaktig. Det bidrar også til å minimere feil ved håndtering av tunge tømmerstokker og forbedrer kontrollen under saging. I forbindelse med husbyggingsprosjekter avhenger kvalitetsresultatene av riktig oppsett. Et riktig strukturert arbeidsmiljø legger også til rette for en enklere arbeidsprosess og forbedrer sikkerhetsforholdene.
Grunnleggende skjære- og måleverktøy for tømmerarbeid
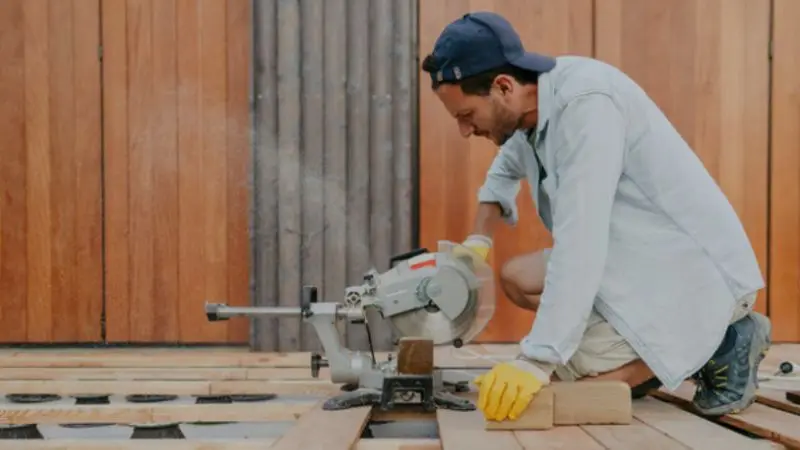
For å bearbeide tre effektivt trenger du noen få verktøy for å sagere, måle og håndtere tømmerstokker. En motorsag er egnet for små oppgaver, mens et bærbart sagbruk er å foretrekke for store, presise kutt. Målebånd og merkeinstrumenter garanterer rette og korrekte linjer som skal sages. Bevegelsen blir enklere og tryggere med tømmerhåndteringsverktøy.
Viktige verktøy inkluderer:
- Motorsag/bærbart sagbruk for å saging av tømmerstokker.
- Bruk et målebånd for å måle riktig.
- Verktøy for å markere rette kuttlinjer.
- Får ikke hektet eller travelt med å rulle tømmerstokker.
- Bladpinne, kiler og klubbe.
Disse verktøyene støtter treskjæring for husbygging ved å forbedre kontroll og presisjon. De bidrar også til å oppnå de beste verktøyene for treskjæring i gjør-det-selv-husbygging, noe som resulterer i renere og mer stabile kutt.
Sikkerhetsutstyr for kontrollert og risikofri kutting
Når du håndterer skarpe verktøy og tungt treverk, er sikkerhetsutstyr avgjørende. Det beskytter deg mot skader, støv og støy under saging. Alle disse trinnene er tryggere når de er godt beskyttet, spesielt i et aktivt byggemiljø der risikoen er større.
Det viktigste sikkerhetsutstyret består av:
- Vernebriller for å forhindre øyeskader fra støv og flis.
- Hørselvern som øreklokker eller ørepropper.
- Arbeidshansker for grep og sikkerhet på hendene.
- Ståltåsko for å unngå skader på tunge tømmerstokker.
- Støvmaske for å unngå å puste inn sagflis
Det er viktig å bruke dette utstyret når man skal lære å sagere trelast til byggeprosjekter på en sikker måte. Det garanterer forbedret kontroll, minimerer ulykker og legger til rette for sømløse arbeidsforhold under sagingsprosessen.
Ekstra verktøy for bedre stabilitet og presisjonsskjæring
De er ikke nødvendigvis nødvendige, men valgfrie verktøy er svært nyttige for å forbedre komfort, stabilitet og presisjon i prosessen med treskjæring. De hjelper med å håndtere tunge tømmerstokker og vedlikeholde materialer under arbeid. Dette resulterer i renere kutt og resultater under byggearbeid.
Eksempler på nyttige valgfrie verktøy er:
- En jekk eller tømmerløfter for å heise tømmerstokker.
- Sagbukker eller stativ for stabilitet.
- Rengjøringsbørste eller kost.
- Verktøy for sliping av blad.
Disse verktøyene støtter nøyaktige treskjæringsteknikker for byggearbeid ved å forbedre presisjonen og redusere bevegelse under saging. De er også nyttige når du følger en trinnvis veiledning for saging av tre til huskonstruksjon, noe som gjør hvert kutt jevnere og mer kontrollert.
Hvordan velge og klargjøre tømmerstokker for tømmersaging
En av de viktigste aktivitetene før man begynner å sagbruke tre er valg og forberedelse av tømmerstokker. Godt konstruerte tømmerstokker er sterkere og sunnere; derfor får du bedre planker til å bygge noe og mindre avfall ved sagingen. Riktig forberedelse bidrar også til å unngå fremtidige problemer som sprekker eller vridning. Når du gjør dette trinnet riktig, vil de andre trinnene i prosessen være enklere og mer forutsigbare å bruke i konstruksjonen.
Slik velger du sterke tømmerstokker til bruk i hjemmet
Det første steget mot å produsere kvalitetstømmer er å velge riktige tømmerstokker. Hardvedarter bør alltid velges, da disse har styrke og holdbarhet i byggearbeid. De nye tømmerstokkene er også enklere å håndtere og gir bedre resultater enn de gamle tømmerstokkene, som er skadet.
De viktigste hensynene du må ta når du velger tømmerstokker:
- Bruk hardtre som eik, lønn eller ask.
- Kilde fra land, tre eller tømmerhage.
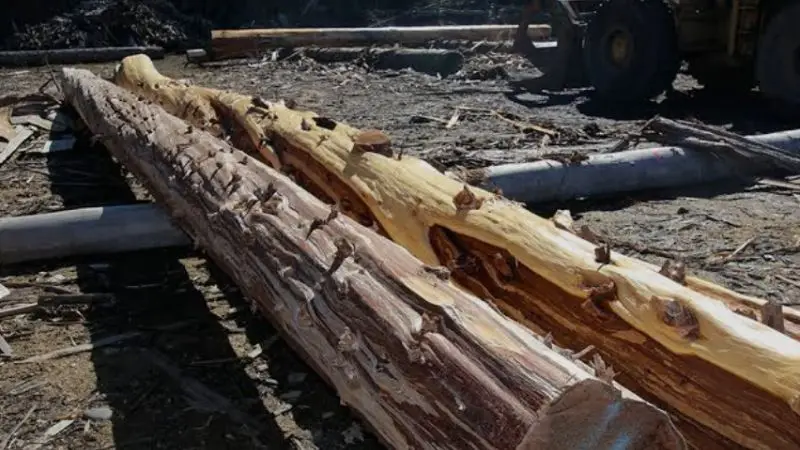
- Undersøk om vedstokkene er nykappet (grønne vedstokker).
- Unngå at tømmerstokker ligger på bakken over lengre tid
- Ha rette og uskadede tømmerstokker.
Et godt utvalg støtter tømmersaging for husbygging ved å sikre sterkt materiale fra starten av. Det forbedrer også nøyaktige tømmersagingsteknikker for byggearbeid siden bedre rå tømmerstokker fører til mer presise og stabile bord.
Inspeksjon av logger for skader og skjulte feil
Før saging av tømmerstokkene bør hver tømmerstokk undersøkes grundig både innvendig og utvendig. Ubemerket skade kan redusere styrken og forårsake problemer i konstruksjonen. Du kan forhindre dårlig trelast med en skikkelig inspeksjon, og arbeidsforholdene blir tryggere.
Noen av de viktigste inspeksjonsprosedyrene er:
- Se på sprekker, kutt og dype linjer.
- Let etter insekthull eller tegn på sopp.
- Skrell barken og sjekk steder der den er myk.
- Bank på stokken og lytt etter hule lyder
- Mørke eller uklare områder som skal brukes med lommelykt.
Unngå tømmerstokker med store defekter som dype sprekker, store kvist eller svampete seksjoner. Dette trinnet er viktig når du skal følge hvordan du sager tømmer til boligbyggeprosjekter på en sikker måte, fordi det reduserer risikoen for svake bord og forbedrer den generelle byggekvaliteten.
Riktig akklimatisering av stokken før sagingen starter
Akklimatiseringen av tømmerstokker hjelper dem med å tilpasse seg lokale temperatur- og fuktighetsforhold før tilpasning. Dette vil eliminere spenninger i treverket og unngå sprekkdannelser eller vridning av treverket i fremtiden. Det forbedrer også sluttproduktet av tømmeret i byggearbeid.
Fremgangsmåte for riktig akklimatisering:
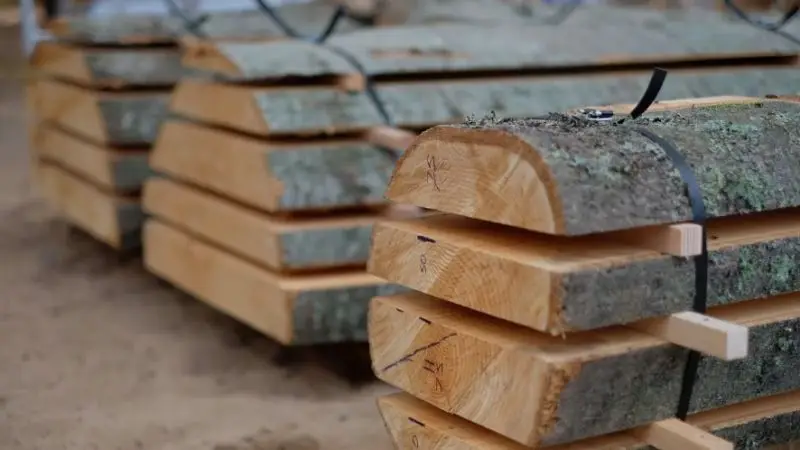
- Tømmerstokker bør festes til forhøyede støtter.
- Avstand mellom stokkene for å tillate luftstrøm.
- Bruk en presenning til å dekke bare toppen.
- Hold siden åpen for å lufte ut.
- Gradvis tørketid er viktig.
Denne metoden støtter en trinnvis veiledning for å saging av tre til huskonstruksjon ved å forberede stabilt materiale for saging. Den bidrar også til å oppnå de beste verktøyene for saging av trelast i gjør-det-selv-husbygging, ettersom riktig forberedte tømmerstokker fungerer bedre med utstyr og produserer glattere og mer pålitelige planker.
Steg-for-steg freseprosess for sterke konstruksjonsplater
Tømmerstokker kan gjøres om til nyttige planker med noen enkle prosedyrer. Hvert trinn forbedrer presisjon og holdbarhet, slik at treverket kan brukes trygt i byggingen av boliger. Når de er riktig installert, er plankene stabile, passer godt i rammeverket, og avfall minimeres. Det er mer effektivt å bruke litt tid på hvert trinn og forhindre feil under byggingen.
Lag en flat side for en sterk base
Dette gjøres ved først å lage en flat overflate på den ene siden av tømmerstokken eller planken. Tømmeret legges på en stabil overflate og høvles gradvis med et sagbruk eller en høvel. Tanken er å sage høye og ujevne områder til de blir glatte og flate. Dette er en veldig viktig flat side, da den styrer eventuelle fremtidige kutt. Du bør måle den ofte med en rettetang for å sikre at den er rett. Eventuelle ujevnheter eller fordypninger bør elimineres, og deretter fortsette. Dette trinnet støtter tømmersaging for husbygging ved å skape et sterkt grunnlag for nøyaktighet. Det forbedrer også nøyaktige tømmersagingsteknikker for byggearbeid, og hjelper hvert neste kutt å holde seg presist og kontrollert.
Klipp en rett kant for riktig justering
Når den ene siden er flatet ut, er det andre å gjøre å lage den ene kanten rett. Bordet legges på et gjerde og merkes til lengden. Dette eliminerer klumpete områder og produserer en rett linje. Denne kanten skal tilsvare den flate siden for å få alt på linje. Se på eventuelle hull eller ujevne flekker og gjenta kuttet om nødvendig. Dette er den rette linjen som alt påfølgende arbeid er basert på. En trinnvis veiledning for å kutte tre til huskonstruksjon er viktig fordi den garanterer riktig justering for konstruksjon. Det er også nyttig å vite hvordan man kutter trelast (når man gjør husbyggingsprosjekter) på en trygg måte, siden riktig justering minimerer kuttefeil og forbedrer sikkerheten ved håndtering.
Gjør begge sider glatte og jevne
De to sidene av platen er nå glattet og jevne. Platen høvles gjennom en høvel, der fine tretråder skjæres bort. Den dreies og dreies til begge sidene vender mot hverandre. Dette vil sikre at vridning, bøying eller skjevhet unngås i fremtiden. Det er viktig å sagere gradvis for å opprettholde ensartet overflate. Treverket blir sterkere og lettere å jobbe med i konstruksjonen gjennom glatte og parallelle sider. Dette tiltaket ligger til grunn for de mest passende verktøyene i tresagging i gjør-det-selv-boligbygging, da det forbedrer kvaliteten på plankene. Det forsterker også riktige tresaggingsmetoder i byggearbeid, og sikrer at hvert bord er stødig og i posisjon til å rammes inn.
Skjær den siste kanten for å fullføre brettformen
Når to flate sider og én rett kant er forberedt, kuttes den siste kanten. Den rette siden holdes mot saggjerdet, og resten av grovkuttet kuttes bort. Dette fyller opp den rektangulære omrisset av platen. Alle sider skal være firkantede, og dette er veldig viktig. Du kan sjekke med en målevinkel. Dette gjør at plankene passer godt når du konstruerer. Dette er et av de viktigste trinnene i en trinnvis veiledning for å kutte tre for å ramme inn et hus, da det hjelper en med å lage ensartede planker. Det favoriserer også trelast, og kutter for å lage hus, slik at hvert plank er klart til å brukes i en konstruksjon.
Oppbevar kuttebrett for å holde dem sterke
Plankene bør håndteres riktig etter kapping for å sikre at kvaliteten opprettholdes. De skal stables med små treskillevegger mellom lagene for å la luften sirkulere. Bunken må oppbevares på et skyggefullt og tørt sted. Bare toppen trenger å dekkes for å holde regn ute, men ikke sidene, som må være åpne for å tillate ventilasjon. Riktig oppbevaring eliminerer fuktighet, vridning og sprekker. Dette gjøres for å sikre at treverket er sterkt og stabilt for fremtidig bruk. Det bidrar også til sikkerheten ved kapping av trelast til bruk i byggeprosjekter, siden riktig lagrede planker er enklere og tryggere å jobbe med. Riktig oppbevaring vil sikre at sluttvirket holdes klart til bruk i konstruksjonen.
Enkel guide til tømmersagingsmetoder for husbygging
Ulike kappemetoder bør være kjent før man begynner å sage tre for å bygge hus. Begge metodene endrer treets styrke, stabilitet og nytteverdi. Dette er fordi ved å velge riktig metode kan du spare tid, minimere avfall og oppnå overlegen byggearbeid. Dette er metodene som bestemmer utseendet til de endelige bordene og deres ytelse i faktiske byggeprosjekter.
Vanlig kuttmetode for rask plateproduksjon
Den enkleste metoden for å gjøre tømmerstokker om til planker er vanlig saging, som er den raskeste metoden. Den sager rett langs stokkens lengde uten å vri den. Dette produserer store planker med buet trestruktur og høy ytelse. Den er generelt anvendelig når det gjelder generell konstruksjon fordi den sparer tid og krefter.
Viktige punkter:
- Ekstremt rask skjæreprosess.
- Høyt antall brett
- Buet «katedral»-kornutseende
- Egnet for enkelt byggearbeid.
Denne teknikken favoriserer trinnvis instruksjon for innramming av tømmer hjemme, siden den genererer materiale på kort tid. Den hjelper også med sikker saging av tømmer til husbyggingsprosjekter, siden aktiviteten ikke er komplisert og enkel å håndtere.
Live Cut-metoden for maksimal trebruk
Løfting – Dette er en skjæremetode der tømmerstokken ikke vendes. Den skjæres i plater i samme posisjon. Dette kan brukes til å utnytte så mye av treverket som mulig og minimere svinn. Trestrukturen er blandet og er generelt effektiv å bruke.
Viktige punkter:
- Ingen av stokkene måtte roteres.
- Enkel skjæreprosess
- Blandet kornutseende
- Høyt treforbruk
I denne tilnærmingen oppfordres det til tømmersaging ved bygging av hus, ved bruk av hele tømmerstokker. Det er også veldig kompatibelt med de beste verktøyene man kan bruke når man sager tømmer i et gjør-det-selv-hus, ettersom det kan brukes med enkelt utstyr og enkel installasjon.
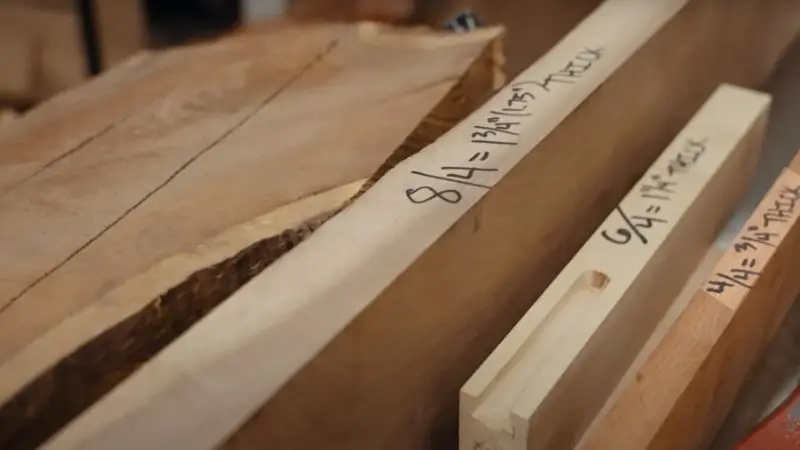
Kvartskjæringsmetode for sterkt og stabilt treverk
Kvartskjæring tar lengre tid, men gir bedre planker som er mer stabile. Stokken deles inn i fire deler, og deretter kuttes hver av disse delene. Resultatet er et treverk med rett trestruktur som ikke lett bøyes og vris.
Viktige punkter:
- Del stokken i fire deler.
- Rett kornstruktur
- Stor styrke og stabilitet.
- Middels vedproduksjon
Denne prosessen forbedrer riktig praksis for saging av trelast i byggevirksomhet siden den er mer presis. Den kan også brukes som en trinnvis manual for å saging av treverk i huskonstruksjoner, spesielt trinnvis, noe som er et krav for sterke og slitesterke bord.
Rift Cut-metoden for høykvalitetsplater
Den mest nøyaktige metoden er riftkutting. Stokken kuttes i en vinkel som ikke er parallell med treets årer, noe som resulterer i svært rette og rene planker. Dette gir mest avfall, men samtidig optimal stabilitet og utseende.
Viktige punkter:
- Vinklet skjæreteknikk
- Ekstremt rette kornlinjer.
- Høyeste stabilitetsnivå
- Lavt treutbytte
Denne tilnærmingen hjelper prosessen med å saging av trelast i boligbyggeprosjekter på en sikker måte når det er viktig å være nøyaktig. Den forbedrer også optimalt utstyr for saging av trelast i gjør-det-selv-husbygging, spesielt i fint treverk, samt høykvalitets etterbehandlingsarbeid.
Velge den beste skjæremetoden for prosjektet ditt
Skjæremetodene tjener forskjellige formål. Vanlig og direkte skjæring er mest egnet for raskt strukturelt arbeid. Sterkere deler, som gulv og dører, skjæres i fire deler. Riftskjæring er egnet for fin og høykvalitets etterbehandling.
Enkel guide:
- Vanlig eller levende kutt til rammeverket.
- Sterke strukturelle deler kutter av kvartalet.
- Riftkutt til eksklusiv finish.
Dette valget forbedrer tømmersaging for bygging av hus ved å balansere hastighet, styrke og kvalitet. Det hjelper også med riktige tømmersagingsmetoder i byggearbeid, noe som resulterer i bedre arbeid med mindre avfall og større kontroll.
Smarte tips og vanlige feil i trelastsaging
Det er mye enklere å jobbe med tømmerstokker når du har et par kloke vaner og unngår fallgruver. Dette er små tillegg som gjør at du kan kutte mer nyttig trevirke og få mindre avfall, og lage bedre bord. Håndtering av tømmer gjør også tømmeret stabilt og sterkt slik at det kan brukes i konstruksjon.
Få mer brukbart trevirke fra hver tømmerstokk
Planlegging er den viktigste prosessen før saging for å forbedre effektiviteten. Ved å merke og måle minimerer du feil og maksimerer det brukbare resultatet. Nøye saging vil også gjøre det mulig for deg å spare på svinn av godt tre som sitter fast i tømmerstokken.
Viktige fremgangsmåter:
- Planlegg kutt før arbeidet starter.
- Marks loggbøker skrives med kritt eller tusj.
- Ingen knuter og ødelagte steder.
- Skjær tilnærmet den endelige brettstørrelsen
- Avfallsstykker til små formål.
Skarpe verktøy er også svært viktige for å øke utbyttet. Sløve blader resulterer i grove kutt og svinn. Dette bidrar direkte til tømmersaging for å bygge boliger, siden riktig planlegging forbedrer produksjonen. Det forbedrer også riktige tømmersagingsmetoder i byggearbeid, da det bidrar til at hvert kutt forblir rent og nøyaktig.
Forhindre vridning og sprekker i bord.
Vridning er svært vanlig og kan ødelegge godt treverk hvis det ikke håndteres riktig. Det skjer vanligvis når treverket tørker for mye eller ujevnt. Trikset for rette og sterke bord er kontrollert tørking.
Viktige fremgangsmåter:
- Stablebrett og avstandsstykker (klistremerker).
- Tillat luftsirkulasjon mellom lagene.
- Oppbevar stabler i skyggefulle områder
- Dekk bare toppen, ikke sidene.
- Sjekk fuktigheten regelmessig
Jevn og langsom tørking vil eliminere sprekker og vridning. Av og til hjelper det også å snu bord med å balansere fuktighetsnivået. Dette er en trinnvis veiledning for å skjære tre til bruk i huskonstruksjon, for eksempel stallbord. Det forbedrer også metoden for å skjære treverket trygt til bruk i husbyggingsprosjekter ved å minimere materialsvikt når det brukes.
Hold verktøyene dine rene og skarpe
Riktig vedlikehold av verktøy forbedrer sikkerhet, presisjon og ytelse. Rengjør verktøy som motorsag er også mer effektive og holdbare, spesielt i situasjoner med mye tre. Regelmessig vedlikehold minimerer også hendelser som følge av defekt utstyr.
Viktige vedlikeholdsvaner:
- Rengjør sagflis og sevje.
- Flytter olje for å beskytte mot rust.
- Oppbevar verktøy på et tørt sted.
- Slip bladene regelmessig
- Sjekk utstyret før bruk.
- Grunnleggende vedlikeholdsplan:
- Sagblad: slipes etter hver 5–10 tømmerstokk.
- Høvelkniver: sjekk månedlig
- Motorsag: tørk av og tørk av med olje etter hver bruk.
Dette vil gjøre det mulig for oss å finne de beste verktøyene for å sagere tre i husbygging (DIY), og vil sikre at de riktige verktøyene brukes effektivt i prosessen. Det forbedrer også riktige metoder for saging av trelast i byggearbeid, ettersom skarpe, rene verktøy alltid er mer effektive og tryggere å bruke.
Wrap Up
Det blir veldig enkelt å bygge et hus når du gjør det riktige i hvert trinn når det gjelder saging av tømmer. Enten du velger gode tømmerstokker eller riktig sagteknikk, påvirker hvert trinn sluttresultatet av det som blir bordene dine. Planlegging, verktøy og trygge arbeidspraksiser kan hjelpe deg med å gjøre færre feil og redusere avfall. Med den ekstra oppmerksomheten du gir til riktig tørking og lagring av tømmer, får du rette og holdbare bord. Gjennom øvelse og oppmerksomhet på detaljer kan du lage sterkt og pålitelig treverk som kan brukes til innramming, gulv og etterbehandling i ethvert byggeprosjekt av et hus.
FAQ
Hvor lang tid bruker sagbrukt trelast på å lufttørke?
Treverket bør lufttørkes omtrent ett år for hver tomme tykkelse. Plasser bordene på et skyggefullt og luftig sted. Sett på klistremerker mellom treverket slik at det tørker jevnt.
Vil du lage tømmer av hvilket som helst tre?
De fleste trær kan sages. Eik og lønn er løvtre som kan brukes til bygging. Foretrekk trær som ikke er syke, råtne eller hardt angrepet av insekter. Planker laget av sunne tømmerstokker gjør deg sterkere.
Hvor mye vann bør man bruke til å bygge med?
Streb etter et fuktighetsinnhold på 6–8 % i treverket i huset ditt. Bruk en fuktighetsmåler for å sjekke bordene. Tørt treverk kan også brukes til å forhindre vridning og krymping når du bygger.
Krever man noen spesiell opplæring for å sagbruke trelast?
Ingen spesiell opplæring er nødvendig, men du bør lære noen grunnleggende sikkerhets- og freseprosedyrer. Les instruksjoner, se videoer eller følg et kurs. Øvelse hjelper deg med å forbedre ferdighetene dine.
Hvordan kvitte seg med gammelt sagflis og avkapp?
Sagflis kan brukes som mulch eller kompost. Små prosjekter eller ved er bra med avskjær. Oppbevar dem trygt sammen med hoveddelen.


