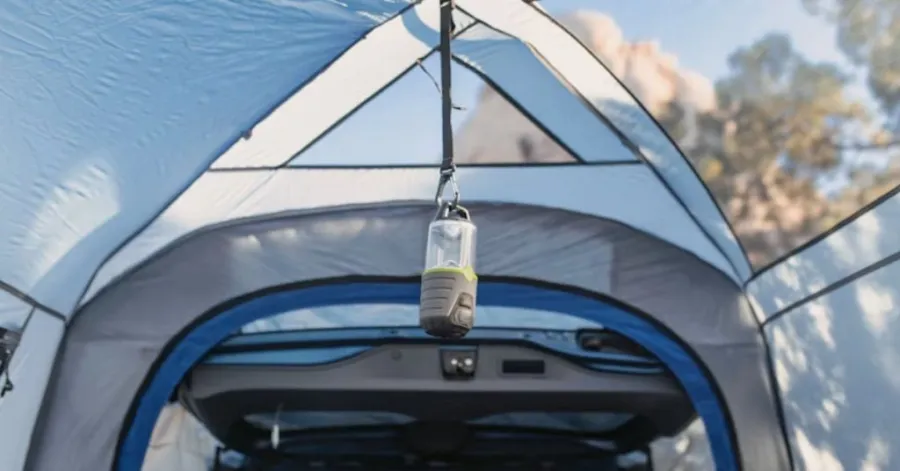
Yes, you can build a DIY cabina di verniciatura at home in your garage. Setting up a Car Paint Tent in Your Garage comes down to three key pillars: proper ventilation, fire safety, and careful surface preparation. Each protects your health, your property, and your finish quality. Skipping safety steps can cause fire, explosion, or serious health hazards.
How to set up a car paint tent? Painting a car at home rewards patience and discipline. Setting up a Car Paint Tent in Your Garage means controlling airflow, removing ignition sources, and cleaning every surface before you spray. A garage offers space and shelter, but it also traps fumes and dust. Treat every step as required. With good habits, your home cabina di verniciatura can deliver results as good as a professional shop.
Cosa ti serve per configurare un Car Paint Tent
Three basic components are required before spraying: a booth structure, an Air-Moving setup, and Filtration. All pieces are compatible. Any weakness in any of them can spoil your finish or endanger your life.
Consigliato per il tuo progetto
Car Paint Tent or Portable Paint Booth
Your booth should fit in your car and leave ample room to walk around. The minimum size for a full-sized sedan and/or crossover is 26 ft L x 15 ft W x 9 ft H. Trucks and large SUVs require a 33 ft class booth. Include a minimum of 3′ of walking space around. The roof also needs to be high enough for easy spraying. You have three alternatives. How to make a car paint booth tent? The best option for full vehicles is an inflatable spray booth tent with integrated fans and filters. A pop-up tent suits parts and small projects. The cheapest diy paint booth is constructed from PVC and plastic. The last one depends on your airflow, filtration, and lighting. Portable booths almost always use cross-draft airflow. Spray in the direction of the airflow.
| Cosa stai dipingendo | Dimensioni minime della cabina (L x P x A) | Comoda cabina |
| Parti, ruote, piccoli mobili | 5 x 5 x 6 piedi | 6 x 6 x 7 piedi |
| Motocicletta / mobili di grandi dimensioni | 13 x 8 x 7 piedi | 16 x 9 x 8 piedi |
| Auto compatta | 23 x 13 x 8 piedi | 26 x 15 x 9 piedi |
| Berlina/crossover di grandi dimensioni | 26 x 15 x 9 piedi | 30 x 16 x 9 piedi |
| Camion / SUV di grandi dimensioni | 30 x 16 x 9 piedi | 33 x 17 x 10 piedi |
Air Filters and Ventilation Equipment
During spraying and cleanup, your ventilation system needs continuous air movement. Use 100 CFM per square foot of face opening for a cross-draft or open-faced booth. This rate keeps flammable paint fume concentrations below 25% LEL, as required by NFPA 33. Pre-circulate the airflow before starting spraying. Operate throughout the work.
How to use a car paint tent? Use both intake and exhaust filters. Intake filters prevent dust from entering. Exhaust filters catch paint particles before they leave the booth. Use a single-stage, multi-layer, overspray-holding polyester or fibreglass media for exhaust. In cross-draft applications, use polyester panel filters, with a MERV rating of 6 to 8. A downdraft booth requires at least a MERV 10 diffusion media pad. For paint booths in general, use filters with a MERV rating of 11 to 16. HEPA filters benefit automotive spray booths that require particle-free air. For heavy overspray jobs, use high-capacity dust filters to reduce how often you change them. Keep extra filters on hand and change them regularly. A complete filters/exhaust system will protect your finish and health.
Illuminazione corretta
Ensure all parts are well lit and visible while spraying. The light should be bright and evenly distributed throughout the booth. Dark areas impede visibility of wet areas, runs, dry spray, and unevenness. When choosing the perfect portable car paint tent, select one that lets you position the lighting for better visibility.
Wherever possible, keep lighting devices out of the direct spray area. Do not apply paint mist to fixtures, and avoid placing fixtures where paint fumes can accumulate. Avoid equipment that can produce sparks in the spraying area. Proper lighting lets you spot issues before the paint dries.
Plastic Sheeting and Floor Covering
Plastic sheeting keeps overspray from reaching walls, shelves, and other garage equipment. Cover anything you can’t get out of the work area. If you plan to build a paint tent for your car, secure the plastic with tape so it won’t shift while the air ventilation system runs.
Lay down the floor covering before mounting the booth. Use heavy plastic or other appropriate floor coverings that won’t tear when you walk or move equipment. Tape edges to seal. A protected floor speeds cleanup and keeps dust and overspray out of your next painting project.
Equipaggiamento per la protezione personale
You must wear protective equipment before entering the paint booth. Use the respirator, gloves, coveralls, and eye protection needed for the coating you will use. Before selecting equipment for a car paint booth tent, refer to the paint safety data sheet to review its safety information.
Keep protective equipment clean and ready before each job. Change damaged gloves/filters or other worn equipment. PPE should not replace ventilation; it provides additional protection while working around paint fumes and overspray.
Cleaning and Painting Supplies
Have all cleaning and painting materials ready before you begin spraying. You may need a greaser, clean cloths, masking tape, masking paper, paint strainers, mixing containers, and spray equipment for your coating. These supplies make painting a car in a paint tent easy and let you work without disruption.
Keep the area outside the spray zone tidy. Please do not have unnecessary items in the booth. This minimises dust and prevents walking in and out as the paint dries.
Come preparare il tuo garage per un Car Paint Tent
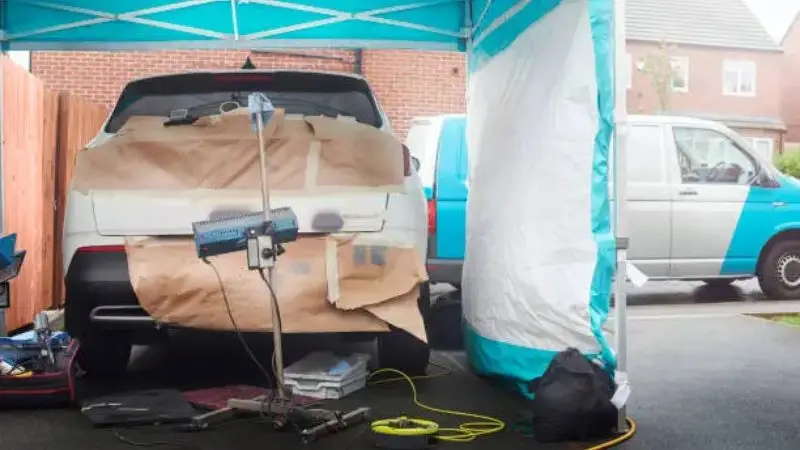
Clear and Clean the Garage
Clean Workspace = Clean Finish. The first step in building a car paint booth tent is to clear the area. Park in the outside parking lot. Relocate tools, bikes, boxes & other lawn equipment to another room. Keep a clear path around the vehicle. This step also eliminates items that might catch fire.
Then wash all surfaces. Wipe down walls and sweep the floor. Wet paint attracts dust and blurs the surface. A shop vacuum with a fine filter is better than a broom. A broom tends to raise dust instead of removing it. Use a mild cleaning solution to mop the floor, then let it air-dry. Cover any open shelves with plastic sheeting. This simple technique keeps dust from falling while you spray.
Scegli la giusta posizione
Choose a location with optimal airflow and as few ignition sources as possible. Keep the tent away from water heaters, furnaces, and electrical panels. These can ignite paint fumes. Route exhaust through a corner with a window or door. This gives the fumes a straight path out.
There should be room to work in too. Keep a 3′ space clear on all sides of the tent. This clearance lets you walk around the car and access all panels. Don’t forget to check the ceiling height, too. You need enough space to spray the roof without hitting the frame. If the garage is small, consider a smaller car, one with a low ceiling, or a lower booth. How to build a car paint tent? Creating a paint booth in a small area limits your airflow options. Before you purchase anything, take time to plan the layout.
Check the Garage Size and Ceiling Height
Before you purchase the tent, measure your garage. When painting a car in a paint tent, consider the interior size rather than the garage’s exterior dimensions. Space may be lost due to doors, support posts, storage space, etc.
You also need enough space to work around the car’s roof. Spraying is harder, and a low ceiling limits ventilation options. Before ordering, check the tent size and compare it with your measurements.
Protect the Floor and Walls
Cover the garage floor and nearby walls before installing the best portable car paint tent. Overspray may spread outside the booth and accumulate on random surfaces. Plastic sheeting provides extra protection.
Secure the covering with tape, and double-check before you start spraying. Change soiled/damaged sheeting between jobs. This simple prep will minimise cleanup and keep dust from old paint from floating in the air when you work on another project.
Keep Flammable Items Away
Clear the work area of gasoline, solvents, oily rags, cardboard, paper and other flammable materials. Keep them away from paint fumes and potential ignition sources. This is a crucial step in learning how to use a car paint tent safely.
Avoid storing in the garage during the spray application. Before bringing paint or equipment into the area around the booth, clear it of other objects. A clean work area gives you more room to work without creating unnecessary fire hazards.
Come impostare un Car Paint Tent nel tuo garage
First, measure the available space, then assemble the frame and cover according to the manufacturer’s instructions. Ensure adequate air filtration, ventilation, and lighting for the painting environment. Seal gaps and check airflow to help control dust and paint overspray. Finally, test the tutta la configurazione before painting to make sure the tent is secure, ventilation is correct, and all vehicle panels are easily accessible.
Step 1: Measure Your Garage Space
Use a tape measure to measure the length, width and height of your garage. Write these numbers as they are. Measure the exact ceiling height to ensure the tent fits. Also measure the smallest space between the walls. Common space-reducing features include garage doors, support posts, and water heaters. When planning a car painting in a paint tent, correct measurements are crucial.
Allow for at least 3 ft of walking space on all sides. La tenda needs about 14 ft of space in a 20 ft-wide garage. Compare that figure to the booth sizes you took notes on earlier! If you don’t have enough space, try painting the car in sections, or rent a larger space if available. A large booth can’t fit in a small garage. If you are considering buying a DIY paint booth, measure twice before you purchase.
Step 2: Assemble the Paint Tent Frame
Remove the frame and lay out all the poles on the floor. Arrange the pieces by length. Most kits identify each section with a number or letter. If you’re building a car paint booth tent, read the manual before inserting anything into the pole; otherwise, you’ll have to dismantle the whole thing.
Construct the bottom first, then add up. The job is much quicker with two people. Slide the cover over the frame when the structure is up. Stretch the material on all edges. Airborne loose materials billow in the wind and raise dust. Tape around the floor edges. This will prevent overspray from getting into the rest of your garage.
Step 3: Attach the Tent Cover
When the frame is set up, install the tent cover following the manufacturer’s directions. Stretch the cloth over the frame, attach each piece, and move to the next. Properly securing the cover is an important step when painting a car in a paint tent.
Secure the cover, then inspect the doors, windows, and ventilation openings. Airflow can carry loose material and collect dust. Ensure that no intake/exhaust opening is covered.
Step 4: Install Air Filters and Ventilation
When setting up a car paint booth tent, place the intake and exhaust filters in the correct positions. Confirm the airflow direction before switching on the system. Use intake filters to keep outside dust out, and use exhaust filters to capture paint particles before they leave the booth.
Start the ventilation system before spraying. Make sure air is flowing out of the booth and across the booth. Follow the equipment instructions to replace or clean filters. Don’t consider ventilation as optional.
Step 5: Add Proper Lighting
To install a car paint tent, set up the lighting first, then bring the car into its final painting position. Position lights to prevent dark spots from blocking your view of the vehicle’s sides, roof, front, and rear.
If possible, avoid using electrical equipment in the spray zone—use equipment appropriate to the environment and manufacturer’s directions. With good lighting, you can identify coverage issues before you paint.
Step 6: Seal Gaps and Check Airflow
Walk around the entire tent to check for open seams or gaps. Tape or seal any loose edges with appropriate tape or plastic sheeting. Inspect doors, floor edges, filter openings, and exhaust connections. These checks are critical to effective car paint tent use.
Turn on the ventilation and observe the tent’s behaviour. The booth should be designed with inward airflow and minimal leakage in the desired direction. Seal any holes before painting. A controlled airflow will keep your finish and breathing zone protected.
Step 7: Test the Paint Tent Before Painting
Test it all before you begin painting. Turning on the booth air circulation system, checking the lights, inspecting the filters, and ensuring the tent stays in place are all part of setting up a car paint booth tent. Walk around the vehicle and make sure you can easily access all panels.
Run this test to detect issues in the booth without anyone inside. Look for loose plastic, poor air circulation, obstructions and equipment that requires moving. A dry run takes a few minutes and can prevent problems during the actual paint job.
Safety Tips for Using a Garage Car Paint Tent
Use proper protection, appropriate respiratory protection, and safe handling of paints and chemicals to use a garage car paint tent safely. Eliminate ignition sources, ensure adequate ventilation and ground equipment as needed to minimise fire hazards. Do not allow children or pets into the painting area until you complete all painting, cleanup, and ventilation. Lastly, follow all manufacturer instructions and local fire, building, and ventilation codes before starting.
Indossare l'equipaggiamento protettivo giusto
You are most likely to be affected when you spray paint a car. The right respirator depends on the type of paint you are using. Before purchasing a mask, please check this table. Avoid using a plain N95 or cloth mask. These catch the mist but let solvent vapour pass straight through—a YAnOV-only cartridge won’t protect you (one without a pre-filter for particles). The OSHA standard for isocyanate paints is positive-pressure air-line respirators. A full facepiece protects your eyes from irritation and sensitisation.
Don’t forget to protect your skin, too. Use disposable full-body coveralls, seamed nitrile gloves, and safety goggles. Chemical-resistant, non-static boots minimise slips and static ignition. Put clothing legs over the boots.
| Paint / Coating Type | Required Respirator | NIOSH Cartridge Adequate? |
| Single-component solvent/aerosol/latex | Half- or full-face elastomeric with combination OV/P100 cartridges (full-face preferred) | Yes (OV/P100) |
| Two-part 2K, polyurethane, epoxy, automotive basecoat/clearcoat (isocyanates) | Supplied-air respirator: positive-pressure, full-facepiece air-line (Type-C) or SCBA | No — no air-purifying cartridge is adequate |
Avoid Sparks and Open Flames
Fire safety is a top priority when creating a car paint booth tent, as paint fumes can ignite with sparks or flames. Clear all ignition sources before spraying, and comply with relevant safety regulations such as OSHA standard 29 CFR 1910.107(c)(8), which restricts the use of portable electric lamps in spraying areas during spraying activities. Keep spark-producing equipment away from the booth and use appropriate protective barriers, as needed.
- Uncovered lamps
- Spark-producing grinders
- Unità di saldatura
- Power strips and most plug-in tools.
Keep your exhaust fan operating at all times. This helps to disperse paint particles and fumes away from the area and to keep levels low. Good ventilation also prevents static build-up. Plug in your booth frame and keep a chemical fire extinguisher on hand. These safety measures are just part of a good diy paint booth design.
Use Paint and Equipment as Directed
Follow all instructions for all paints, thinners, cleaners, spray guns, fans, filters, and respirators you use. When learning to paint a car in a paint tent, remember that different coatings require different handling procedures and protective equipment. Never mix products without consultation from the manufacturer.
Close containers when not in use. Use the recommended mixing, application, drying and cleanup procedures. Your safety plan includes the equipment instructions.
Follow Local Fire and Ventilation Rules
Follow local fire, building, and ventilation codes before installing a car paint tent. Rules vary by location, coating type, and operation size.
Don’t assume a home garage is suitable for automotive spraying. Local requirements may require ventilation, electrical, storage, waste, and fire protection. Review and abide by relevant guidelines before the project; do not start the project without doing this.
Common Mistakes When Setting Up a Car Paint Tent
Per evitare comune car paint tent setup mistakes, choose a tent that fits your car and leaves enough room to manoeuvre safely. Ensure proper ventilation, appropriate lighting, and the right electrical equipment, and keep the garage clean of dust and dirt to protect your paint finish. Always wear appropriate protective clothing and do a test run to identify loose covers, clogged filters, or airflow problems. Lastly, follow fire safety guidelines and local ordinances for a safer painting experience.
Using a Tent That Is Too Small
A small tent might seem like a good deal until you start spraying. To choose the best portable car paint tent, pick a size that lets you move around the car easily, without bending over panels or dragging your hose across wet paint. If it is too small, overspray can land on the finish, requiring you to redo panels.
Measure the car’s length and width, then give yourself 3 ft of walking room around it. A full-size sedan requires a booth about 26 ft long, 15 ft wide, and 9 ft high. The trucks or large SUVs require a 33 ft class booth. If your garage doesn’t have enough room, paint the car in sections or rent a larger area. A large car in a small do-it-yourself cabina di verniciatura also limits airflow. Overspray fumes get trapped in a confined space, increasing your exposure.
Scarsa ventilazione
The worst thing you can do is have weak ventilation. How to use a car paint tent? Closed spaces can cause illness from paint fume exposure. Symptoms range from irritation to fatigue, nausea, and difficulty concentrating. Exposure severity depends on fume levels and duration, and symptoms may persist after leaving the area. Fumes can linger for days in poorly ventilated garages. Although the odour may have subsided, VOCs can still be present in the air. People with breathing issues, pregnant women, older individuals, and children may be more sensitive at lower exposure levels.
| Durata dell'esposizione | Associated Health Effects |
| Breve termine | Eye, nose, and throat irritation; headaches; loss of coordination; nausea; dizziness; fatigue; allergic skin reactions; breathing difficulty |
| di un noleggio | Damage to liver, kidneys, and central nervous system; some organic compounds are suspected or known human carcinogens |
Ignoring Dust and Dirt
One of the easiest ways to destroy a new paint job is by dust. Keep in mind that the dirt on the floor, walls, shelves, or vehicle can be airborne when you turn on the ventilation system while you are learning how to make a car paint booth tent. It can then settle on wet paint.
When setting up the final configuration, clean the garage. Use a vacuum, not sweeping and clear away unnecessary objects from the work area when possible. Maintain booth cleanliness throughout the job.
Using the Wrong Lighting or Electrical Equipment
Poor lighting and surface defects are harder to see in poorly lit areas. Correct lighting and safe electrical equipment are crucial when learning to paint a car in a paint tent. Electrical equipment can also ignite paint fumes.
Choose equipment appropriate for the setting and follow the manufacturer’s instructions. Avoid placing unnecessary electrical equipment near the spray area. Design lighting before beginning the job, not during the painting process.
Skipping a Test Run
A test run will catch problems before you run out of paint. If you’re learning to build a car paint tent, make sure it has a free-fitting cover, a clogged filter, airflow issues, and limited access around the car before you spray.
Operate the booth with the car in place and the ventilation running. Before mixing your paint, inspect all system components. It’s easier to make a small repair before a dry run than to fix a contaminated finish.
Final Tips for a Safe and Smooth Car Paint Job
You now know how to install a car paint tent in your garage. Three factors affect your results: ventilation, fire safety, and surface prep. Before you start, check your area’s fire codes and zoning regulations. Don’t skimp on the dry run or PPE!
Operate exhaust fans before spraying. Stay away from sparks in a Cabina di verniciatura fai da te. Wipe all surfaces until “clean”. Good ventilation helps your lungs and improves the finish. With patience and discipline, you get a professional finish. Slow down, go through each step and your car will show you.
Incartare
Creazione di un car paint tent in your garage takes planning, equipment, and a focus on safety. How to set up a car paint tent? First, measure your garage, then choose a tent that lets you move around your car. Clear the area, remove dust, and protect the floor and walls. Improve workspace by installing proper ventilation, air filtering and lighting. Always use protective equipment as needed for the paint, and use it as directed by the manufacturer.
Inspect airflow, seal gaps, and test the entire system before spraying. Above all, follow local fire and ventilation codes; a home garage may not be suitable for automotive painting services. By following these steps and taking the right safety measures, you can achieve a smooth, high-quality paint finish.
DOMANDE FREQUENTI
Which inflatable paint booths will work best for painting cars in a home garage?
Scegli un inflatable paint booth that fits your car, has strong ventilation, replaceable filters, and is made of durable material. Select a machine specifically for painting cars.
What are the advantages and disadvantages of inflatable paint booths versus metal paint booths?
Inflatable booths are quite cheap, portable, and easy to store. But they can be less durable and may not insulate or circulate air well. Proper ventilation is still crucial.
What is the easiest inflatable paint booth to quickly assemble/disassemble for mobility?
Use lightweight blow-up booths with quick-inflating blowers, easy-to-assemble frames, carrying bags, and detachable filters. These features make it easier to transport, set up, and store for mobile painters.
What kind of inflatable paint booths are the most well-ventilated and filtered?
The best choices have powerful exhaust systems, separate intake filters, and replaceable overspray filters. Check airflow ratings and filter availability to keep the air clean and improve painting performance.
What are the best inflatable paint booths for a small garage, and what are the differences?
Single-car inflatable stalls are designed for small garages. Compare lengths, widths, heights and blower requirements. Smaller ones require less working space but take up less room.
What inflatable paint booths offer the most dust control and a clean paint finish for automotive painting?
Look for booths with sealed fabric, filtered air intake, good exhaust filters, and smooth interior surfaces. Regularly clean the garage and change filters to minimise dust contamination.