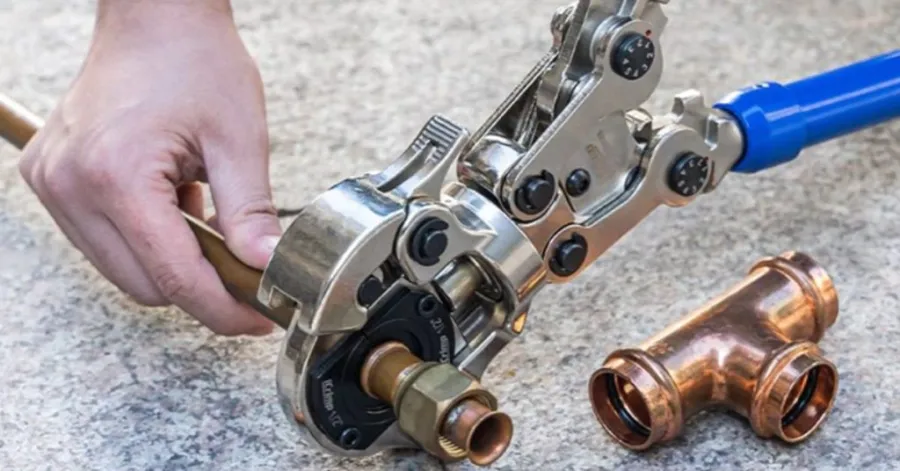
Yksi yksinkertaisimmista ja luotettavimmista tavoista liittää kupariputkia ilman juottamista on kupariputkien puristaminen. Kupariputkien puristamisen oppiminen voi auttaa sinua luomaan vuotamattomat ja vahvat liitokset lyhyessä ajassa, olitpa sitten asentamassa uutta putkistoa tai vaihtamassa vaurioituneita osia. Käyttämällä korkealaatuista putken puristustyökalu tekee prosessista nopeamman, tarkemman ja helpomman sekä aloittelijoille että kokeneille putkimiehille. Tämä edellyttää oikeiden työkalujen käyttöä, putkien oikeaa valmistelua ja puristustekniikoiden käyttöä kestävän suorituskyvyn varmistamiseksi.
Oikealla putken puristustyökalu, voit saavuttaa yhdenmukaiset ja turvalliset liitokset jokaisessa projektissa. Tämä opas selittää, miten kupariputkien puristusliitos toimii, mitä laitteita tarvitset, vaiheittaiset asennusohjeet ja mikä voi mennä pieleen. Näiden ohjeiden avulla pystyt suorittamaan putkityöprojektit luottavaisin mielin ja saavuttamaan ammattimaista laatua.
Sisällysluettelo
Kerää oikeat työkalut ja materiaalit ennen aloittamista
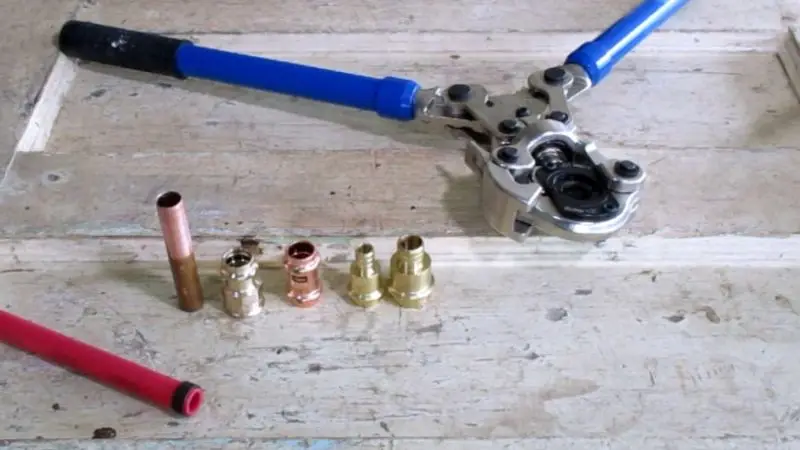
Kupariputkien tehokas puristus vaatii oikean työkalut ja materiaaleja. Oikeat laitteet auttavat sinua tekemään turvallisia ja vuotamattomia liitoksia sekä yksinkertaistavat ja nopeuttavat asennusprosessia. Olipa kyseessä sitten uusi putkityöprojekti tai vanhojen putkiosien korjaus, asianmukainen valmistelu parantaa turvallisuutta ja tarkkuutta.
Käytettyjen työkalujen laatu vaikuttaa myös lopputulokseen. Hyviin laitteisiin investoiminen auttaa sinua tekemään jokaisen puristuksen oikein ja minimoimaan liittimien vaurioitumisen tai huonon liitoksen riskin. Valmistelu: Ennen kuin opit puristamaan kupariputkea, hanki kaikki tarvittava sen helppoa asentamista varten.
Suositellaan projektiisi
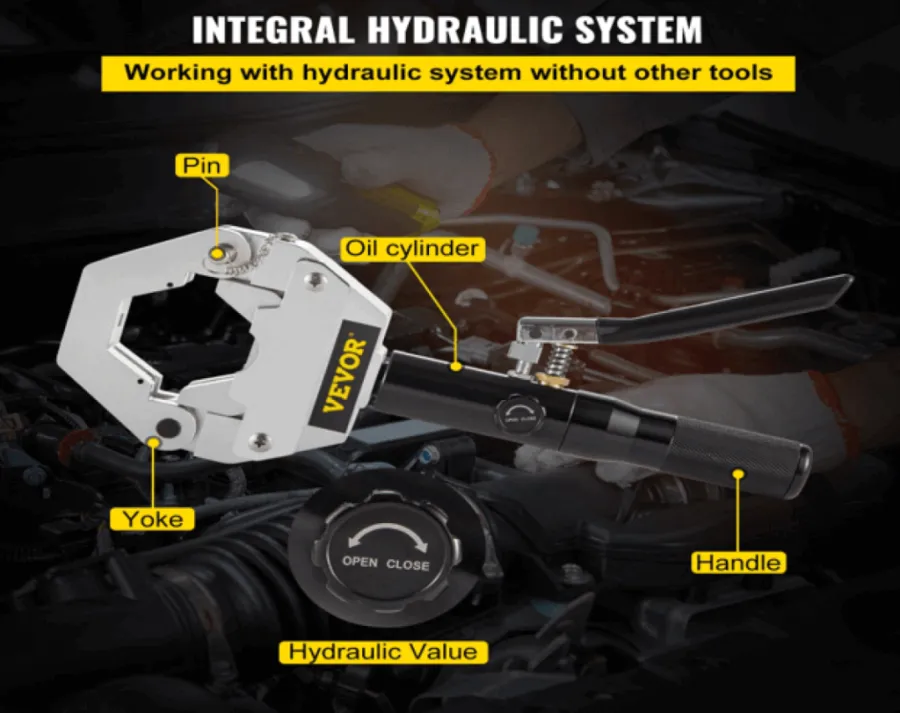
Kupariputken puristustyökalu
Korkealaatuinen puristustuoli on tämän työn tärkein laite. Jos olet oppimassa käyttämään kupariputkien puristustyökalua, valitse sellainen asennettavan putken koon mukaan. Useimmissa on vaihdettavat leuat, jotka sopivat vakiokokoisiin putkiin, joten ne soveltuvat erilaisiin LVI-projekteihin.
Oikein kalibroidun työkalun puristuspaine puristusrenkaan ympärillä on tasainen, mikä luo ilmatiiviin tiivisteen. Monissa ammattilaistason malleissa on mukavat kahvat, jotka minimoivat käsien väsymisen pitkissä asennuksissa. Tarkista aina ennen jokaista projektia, että leuat ovat puhtaat eivätkä kuluneet tai vaurioituneet. Tarkkuutta parannetaan käyttämällä asianmukaisesti huollettua työkalua. puristustuoli, ja kupariputkien puristus on nopeampaa ja luotettavampaa.
Kupariset puristusrenkaat ja liittimet
Puristusrenkaiden ja -liittimien valinta on yhtä tärkeää kuin oikean työkalun valintaLiittimien on oltava oikean kokoisia, jotta ne sopivat täydellisesti putkeen ja muodostavat turvallisen ja luotettavan liitoksen. Hyvät kupariset puristusrenkaat varmistavat tasaisen paineen liittimeen ja vähentävät vuotojen riskiä pitkällä aikavälillä.
Kun opettelet puristamaan kupariputkiliittimiä, muista tarkistaa jokainen rengas ja liitin ennen asennusta. Tarkista kolhut, halkeamat, korroosio tai valmistusvirheet, jotka voivat vaikuttaa tiivistykseen. Tämä auttaa myös varmistamaan paremman yhteensopivuuden ja pitkäikäisyyden, koska käytät luotettavien valmistajien komponentteja. Laadukkaat liittimet helpottavat kupariputkien asianmukaista puristamista ja pidentävät putkistojärjestelmän käyttöikää.
Putkenleikkuri ja purseenpoistotyökalu
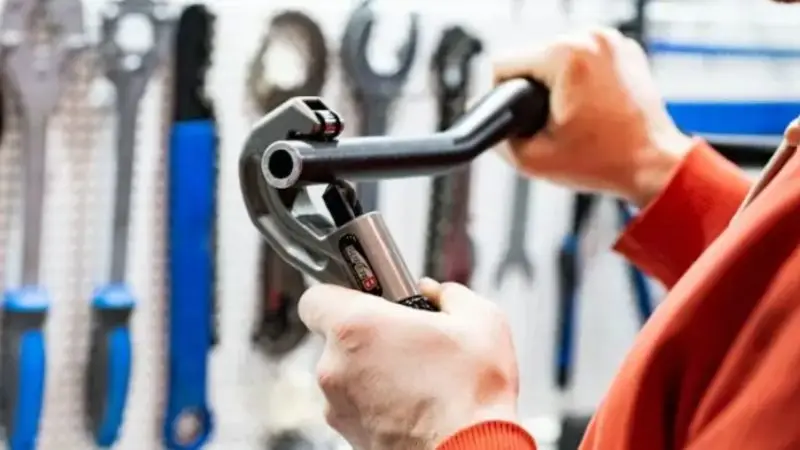
Puristusliitos vaatii putken siistin leikkauksen. Asiantunteva putkileikkuri tekee siistin, suoran ja tasaisen leikkauksen litistämättä tai taivuttamatta putkea. Epätasaiset leikkaukset voivat aiheuttaa liittimen väärän sijoittumisen, joten on erittäin todennäköistä, että liitin vuotaa asennuksen jälkeen.
Kun putki on leikattu, poista siitä purseet sekä sisä- että ulkopuolelta purseenpoistotyökalulla. Purseet voivat tuhota liittimiä, estää veden virtauksen ja aiheuttaa myös virheellisen tiivistyksen. Tämä on näppärä kikka valmistelussa, jonka avulla liitin voidaan asettaa ilman puristamista. Olitpa sitten koskaan puristanut kupariputkia tai olet tehnyt sitä vuosia, putken asianmukainen valmistelu johtaa vakaampiin ja kestävämpiin liitoksiin.
Go/No-Go-mittari ja turvavarusteet
Puristusliitosten mittauslaite (Go/No-Go) määrittää, onko puristusliitos valmistajan vaatimusten mukainen. Kun jokainen liitos on tehty, on tärkeää tarkistaa puristusrengas mittauslaitteella, ettei puristus ole liian löysä tai liian tiukka. Tämä lyhyt tarkistus auttaa havaitsemaan epäsäännölliset puristukset ennen putkiston paineistamista.
Myös asennusprosessin aikana käytettävät turvavarusteet ovat ratkaisevan tärkeitä. Käytä käsineitä otteen parantamiseksi ja käsien suojaamiseksi putkien teräviltä reunoilta. Käytä suojalaseja suojataksesi silmiäsi pieniltä metallilastuilta, joita muodostuu leikkaamisen ja purseenpoiston aikana. Asianmukaisten turvatoimenpiteiden ja laadunvalvontalaitteiden yhdistelmä varmistaa, että puristat kupariputket asianmukaisesti ja turvallisessa ja tehokkaassa työpaikassa.
Valmistele kupariputket oikein ennen puristamista
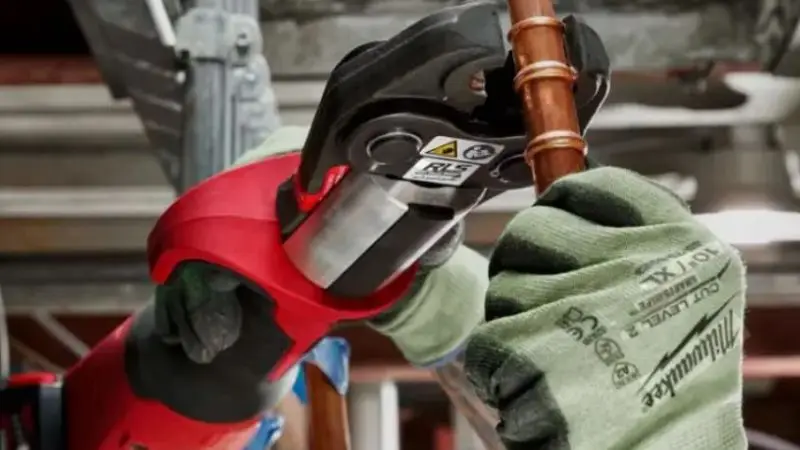
Yksi tärkeimmistä vaiheista kestävän putkiliitännän aikaansaamiseksi on putken valmistelu. Ei puristustuoli, olipa se kuinka hyvä tahansa, voi voittaa putkien huonon katkaisun tai huonon puhdistuksen. Kannattaa käyttää muutama ylimääräinen minuutti jokaisen osan kokoamiseen, jotta varmistetaan liitoksen tarkka ja tiivistys.
Oletko koskaan ihmetellyt miten kupariputken puristus toimiiEnsimmäinen vaihe on valmistella se oikein. Puristusrengas puristuu muodostaen tiiviin ja vuotamattoman liitoksen liitoksen ympärille käyttäen puhtaita, sileitä ja tarkasti mitattuja putkia.
Mittaa ja leikkaa putki oikein
Oikein tehdyt mittaukset estävät materiaalien hukkaan heittämistä ja varmistavat, että kaikki liittimet sijoitetaan oikein. Tarvittavan putken pituus tulee mitata ja leikkauskohta merkitä permanenttitussilla ennen leikkausta. Mittaa kahdesti, jotta säätöjen tarve vähenee.
Leikkaa putki laadukkaalla putkileikkurilla suoraan ja siististi litistämättä putkea. Anna leikkurin pyöriä hitaasti ja purista sitä tiukasti jokaisen täyden kierroksen jälkeen, kunnes putki irtoaa. Älä käytä työkaluja, jotka jättävät karkeita tai epätasaisia reunoja. Oikeat mitat ja tarkat leikkaukset helpottavat kupariputkien puristamista hieman ja auttavat varmistamaan, että kaikki liittimet ovat paikoillaan ennen puristamista.
Poista purseet ja puhdista putki
Tarkista putki katkaisun jälkeen varmistaaksesi, ettei siinä ole purseita tai karheita reunoja. Näiden virheiden poistaminen purseenpoistotyökalulla mahdollistaa liittimen helpon sovittamisen putkeen vahingoittamatta tiivisteitä tai jättämättä heikkoja kohtia. Tämä toimenpide parantaa myös veden kiertoa ja poistaa pieniä esteitä putkesta.
Puhdista sitten putken ulkopinta ja liittimen sisäpuoli puhtaalla liinalla. Poista lika, pöly, rasva ja metallihiukkaset, jotka voivat häiritä liitosta. Asianmukainen puhdistus on kupariputkien puristamisen kannalta kriittinen osa, sillä se auttaa puristusrengasta murskaantumaan ryppyjä aiheuttamatta ja muodostamaan luotettavan, vuotamattoman liitoksen.
Aseta puristusrengas ja sovita se oikein
Työnnä liitin kokonaan valmisteltuun putkeen sisäpysäyttimeen asti. Valmistajan ohjeiden mukaisesti liu'uta puristusrengas putken ympärille ja aseta se noin 3–6 mm putken pään päälle. Oikea asento mahdollistaa puristustuoli puristaaksesi rengasta, jotta se sopii tasaisesti liitoksen ympärille.
Ennen puristuksen tekemistä varmista, että sekä liitin että rengas ovat oikeassa asennossa. Kun kaikki on paikoillaan, paina tasaisesti ja tukevasti. puristustuoliOikea kytkentä on elintärkeää kupariputkiliitosten puristamiseksi ja vankan, vedenpitävän liitoksen luomiseksi, joka palvelee luotettavasti vuosia.
Kupariputkien puristustekniikka askel askeleelta
Kun putket ja liittimet ovat hyvin valmisteltuja, voit aloittaa puristusliitoksen. Vaiheittainen eteneminen takaa turvallisen ja vedenpitävän liitoksen, joka kestää vuosia. Vaikka oletkin uusi putkialan ammattilais, voit käyttää rauhassa oikeaa tekniikkaa, ja tuloksesi ovat parempia.
Kupariputkien puristamisesta oppiminen voi myös säästää sinut tyypillisiltä asennusongelmilta. Puristusrengas puristuu liittimen ympärille ja kiinnittää sen tiukasti putkeen muodostaen turvallisen tiivisteen ilman juottamista.
Aseta puristustyökalu oikein
Tehokkaan puristuksen perusta on työkalun oikea sijoittelu. Aseta puristimen leuat puristustuoli puristusrenkaan reunojen väliin ja varmista, että ne sopivat suoraan puristusrenkaan keskelle. Leukojen on ympäröitävä rengas kokonaan koskettamatta liitintä tai työntymättä renkaan ulkopuolelle. Epäsopivat leuat voivat tuottaa epätasaisen voiman ja johtaa vahvan sidoksen epäonnistumiseen.
Kun opettelet käyttämään kupariputkea puristustuolimuista pitää työkalua suorassa ja tukevasti. Varmista, että putki ja liitos ovat kunnolla paikallaan, ja purista sitten kahvoja. Oikea asento mahdollistaa työkalun tasaisen puristuksen renkaaseen, mikä varmistaa tarkemman kupariputken puristuksen ja vahvemman, vuotamattoman liitoksen.
Purista liitos yhdellä sujuvalla liikkeellä
Kun työkalu on oikein asennettu, paina kahvoja yhteen yhdellä liikkeellä, kunnes työkalu on tehnyt puristuksen. On myös suositeltavaa olla pysähtymättä puoliväliin tai painamatta tiivistettä toistuvasti, koska tämä johtaa epätasaiseen tiivisteeseen. Useimmat hyvät puristustyökalut vapauta, kun sopiva puristusaste on saavutettu.
Pidä puristuspaine tasaisena vääntämättä tai siirtämättä työkalua puristaessasi. Tarkista rengas asennuksen jälkeen varmistaaksesi, että se on puristettu tasaisesti liitoksen ympärille. Tämän toimenpiteen jälkeen on tärkeää tietää, miten kupariputki puristetaan oikein, sillä tasainen puristus johtaa vahvempaan liitokseen, joka kestää päivittäistä vedenpainetta useiden vuosien ajan.
Tarkista puristussuhde Go/No-Go-mittarilla
Kun jokainen puristus on tehty, tarkista liitos Go/No-Go-tulkilla. Asenna tulkki puristusrenkaaseen valmistajan suositusten mukaisesti. Go-puolen on oltava oikein asennettu, kun taas No-Go-puolen ei. Tällainen pintapuolinen tarkistus varmistaisi, että rengas on puristettu asiaankuuluvien spesifikaatioiden mukaisesti.
Testaa kaikki liitokset ongelmakohtien havaitsemiseksi ennen putkiston käyttöönottoa. Jos puristusliitos ei läpäise mittaustestiä, irrota liitos ja käytä uusia osia sen sijaan, että yrittäisit korjata puristusliitosta. Tämä helppo tarkistusmenetelmä parantaa kupariputken puristamisen yleistä laatua ja minimoi vuotojen riskin tulevaisuudessa.
Testaa liitäntä vuotojen varalta
Viimeinen vaihe on valmiin putkiston painekoe. Kaada vettä vähitellen putkiin ja testaa kaikki puristusliitokset nähdäksesi, ovatko ne märkiä vai kuivia. Anna järjestelmän paineen alaisena olla muutama minuutti, jotta mahdolliset piilovuodot tulevat esiin ennen asennuksen valmistumista.
Jos huomaat pienen vuodon, sulje vesihana ja vaihda vain kyseinen liitin sen sijaan, että yrittäisit kiristää puristusliitosta. Kun puristusliitos on murtunut, sitä ei voi enää säätää. Tämän testaaminen vie hieman aikaa, mutta se varmistaa, että kupariputken puristusliitos on valmis ja antaa varmuuden siitä, että putkisto on käyttövalmis normaalisti.
Vältä yleisiä kupariputkien puristusvirheitä
Kokeneellakin putkimiehellä voi olla tapana tehdä virheitä kiireessä asennuksen tekemisessä. Kun olet hyvin valmistautunut, tarkastettu ja varustettu oikeilla varusteilla, työkalutuseimmat puristusongelmat voidaan estää. Näiden tyypillisten virheiden tunteminen auttaa sinua luomaan vahvempia ja kestävämpiä putkiliitoksia.
Sinun ei tarvitse huolehtia uuden vesijohdon asentamisesta tai liittimen vaihtamisesta; sinun tulee olla tarkkaavainen jokaiseen yksityiskohtaan parantaaksesi kupariputken puristamisen onnistumista. Näitä virheitä voidaan välttää, mikä säästää aikaa, minimoi materiaalihukkaa ja vähentää kalliita korjauksia tulevaisuudessa.
Väärän työkalun tai sormuskoon käyttäminen
Yleisin virhe on käyttää ns. puristustuoli Tai puristusrengas, joka ei ole putkelle sopivan kokoinen. Kunkin putken halkaisijan mukaisen puristusvoiman aikaansaamiseksi on käytettävä oikean kokoisia renkaita ja puristusleukoja. Komponenttien välinen epäsuhta voi helposti johtaa löystyneisiin tai rikkoutuneisiin liitoksiin, jotka voivat vuotaa paineen alaisena.
Ennen minkään projektin aloittamista varmista, että työkalusi, renkaat, liittimet ja putki ovat yhteensopivia. Kun opettelet puristamaan kupariputkiliittimiä, sinun on noudatettava valmistajan kokosuosituksia. Asennustarkkuutta parannetaan varmistamalla oikein sovitetut osat, mikä auttaa jokaista puristusliitosta toimimaan tarkoitetulla tavalla.
Putken virheellinen valmistelu
Putkien valmistelun laiminlyönti voi johtaa riittämättömään tiiviyteen ja epävakaisiin liitoksiin. Karkeat leikkaukset, purseet, lika ja rasva putkissa voivat johtaa siihen, että liitos ei istu täysin putkeen. Pienikin virhe voi heikentää valmiin puristuksen lujuutta ja lisätä vuotojen riskiä.
Ole aina varovainen mitatessasi, tee siistit leikkaukset, poista purseet ja pyyhi putki ennen asennusta. Nämä valmistelumenetelmät auttavat yksinkertaistamaan kupariputkiliittimien puristamisen oppimista ja parantamaan koko asennuksen laatua. Ylimääräisen ajan käyttäminen ennen puristamista voi säästää paljon rahaa LVI-korjauksissa tulevaisuudessa.
Puristusrenkaan väärä sijoitus
Renkaan puristaminen liian syvälle putken päähän tai liian korkealle liitoksen yläpuolelle voi heikentää liitosta. Rengas on sijoitettava siten, että se täyttää valmistajan vaatimukset, jotka ovat yleensä 1/8 - 1/4 tuumaa putken päästä. Oikein sijoitettuna puristustuoli puristaa renkaan liitoksen ympärille tasaisesti.
Tarkista, että liitin on kokonaan paikallaan eikä rengas ole liikkunut ennen puristamista. Kupariputken asianmukainen puristaminen on yksi tärkeimmistä osa-alueista kupariputken oikeassa puristamisessa, sillä se varmistaa, että liitos on vahva eikä vuoda putkiston käyttöiän aikana.
Tarkastuksen ja painekokeen ohittaminen
Jotkut asentajat ajattelevat, että puristusliitokset on tehty, eivätkä he tee tätä viimeistä tarkistusta. Jokaisen liitoksen tarkistamatta jättäminen lisää kuitenkin havaitsemattomien vuotojen riskiä, jotka voivat tulla esiin vasta putkiston ollessa käytössä. Nopea tarkistus voi välttää vesivahingot ja kalliit korjaukset.
Testaa aina jokainen puristusliitos Go/No-Go-painemittarilla ja tee sitten järjestelmälle painekoe. Paineista sitten putket vähitellen ja tarkista jokainen liitos vuotojen varalta. Painekoe ja työn silmämääräinen tarkastus varmistavat kupariputkien puristusliitoksen asianmukaisen suorittamisen ja tarjoavat koko putkistojärjestelmän turvallisuuden ja luotettavuuden.
Paketoida
Kupariputken puristaminen on tärkeä tehtävä, joka tulisi oppia turvallisten ja tehokkaiden putkiliitosten tekemiseksi. Vuotoja voidaan välttää ja putkistojärjestelmän käyttöikää pidentää valitsemalla hyvät työkalut, asettamalla putki oikealla tavalla, asettamalla puristusrengas oikein ja testaamalla kaikki liitokset. Tietoa kupariputken käytöstä puristustuoli parantaa myös asennusprosessin nopeutta ja tarjoaa yhdenmukaisen lopputuloksen. Olipa kyseessä sitten yksinkertainen korjaus tai koko LVI-asennus, kupariputkien asianmukainen puristaminen takaa hyvän suorituskyvyn, säästää aikaa ja antaa sinulle luottamusta jokaiseen valmiiseen liitäntään.
UKK
Mitä on kupariputkien puristus?
Kupariputkien puristus on putkityötekniikka, jossa kupariputket yhdistetään puristusrenkailla, liittimillä ja puristustyökalulla. Se tuottaa turvallisen ja vuotamattoman liitoksen ilman juottamista tai hitsausta.
Miten kupariputkea puristetaan?
Puristaaksesi kupariputken oikein, leikkaa ja puhdista kupariputki, asenna liitos, aseta puristusrengas oikeaan paikkaan, purista sopivalla työkalulla ja tarkista onnistumismitalla.
Mikä on kupariputkien puristusprosessi?
Kun kysyt itseltäsi, miten kupariputkien puristus toimii, puristustyökalu on metallirengas, joka puristetaan putken ja liittimen ympärille luoden tiiviin mekaanisen tiivisteen, joka ei vuoda.
Voiko kupariliittimiä käyttää sekä kylmässä että kuumassa vedessä?
Kyllä. Kun käytetään valmistajan ohjeiden mukaisia materiaaleja, oikein asennettujen kupariputkiliittimien puristus mahdollistaa liitokset sekä kuuman että kylmän veden syöttölinjoille.
Miksi puristetuille kupariputkille tehdään painekoe?
Ennen normaalia käyttöä tehdään painekoe sen varmistamiseksi, että kaikki puristusliitokset eivät vuoda. Se auttaa havaitsemaan asennusvirheet ennen kuin ne aiheuttavat vesivahinkoja, varmistaen, että putkistosi asennetaan turvallisesti ja tehokkaasti.