
Σας έχει τύχει ποτέ να σταθείτε στο σαλόνι σας και να ελπίζατε ότι ο ογκώδης, φέρων τοίχος απλώς θα εξαφανιζόταν; Το να ανοίξετε το σπίτι σας προσφέρει μια πανέμορφη, μοντέρνα ατμόσφαιρα, αλλά απαιτεί μια ισχυρή ραχοκοκαλιά. Η εξειδίκευση στην εγκατάσταση χαλύβδινων δοκών είναι το κλειδί για να μετατρέψετε ένα γεμάτο σπίτι σε μια ευάερη ομορφιά χωρίς να καταρρεύσει η στέγη πάνω σας.
Δεν πρόκειται για κατεδάφιση πραγμάτων, πρόκειται για την εκτέλεση μηχανικών εργασιών υψηλού κινδύνου που μπορείτε να κάνετε μόνοι σας. Αν έχετε ένα σχέδιο και ένα χειροκίνητο ανυψωτικό αλυσίδας που μπορείτε να εμπιστευτείτε ότι μπορείτε να σηκώσετε το βάρος από τους ώμους σας και να αντικαταστήσετε τα παλιά στηρίγματα με μια δοκό. Η δοκός θα είναι κάτι που θα διαρκέσει περισσότερο από το σπίτι. Ας δούμε λοιπόν τον οδηγό εγκατάστασης χαλύβδινων δοκών
Βασικός σχεδιασμός για την εγκατάσταση χαλύβδινων δοκών
Πριν χτυπήσετε το σφυρί, θα χρειαστείτε μια στρατηγική τόσο ισχυρή όσο το σίδερο που πρόκειται να εγκαταστήσετε. Η εγκατάσταση χαλύβδινων δοκών είναι μια εργασία τύπου «μέτρα δέκα φορές, κόψε μία φορά». Αν βιαστείτε με τις προετοιμασίες, το σπίτι σας θα σας ενημερώσει.
Κατανόηση των τύπων δοκών
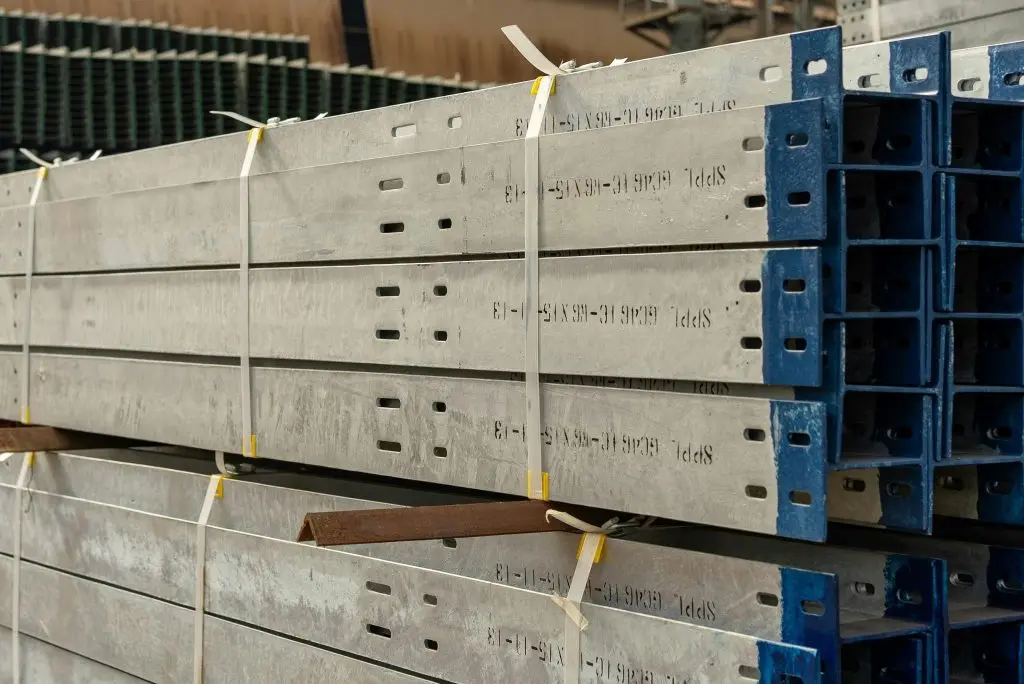
Ο χάλυβας δεν είναι πάντα ίδιος. Όταν επιλέγετε ένα χαλύβδινο προφίλ, πρέπει να σκεφτείτε τι λέει ο μηχανικός σας και πόσο χώρο έχετε στην οροφή σας. Υπάρχουν είδη χάλυβα που συναντούν οι άνθρωποι στην εγκατάσταση χαλύβδινων δοκών σε κατοικίες:
- Δοκοί γενικής χρήσης (Δοκοί I): Το τυπικό σχήμα «Ι», ιδανικό για τη μεταφορά βαρέων κάθετων φορτίων.
- Καθολικές κολώνες (δοκοί H): Πιο παχύ και τετράγωνο, χρησιμοποιείται συχνά όταν η κάθετη στήριξη είναι τόσο κρίσιμη όσο το άνοιγμα.
- Παράλληλα κανάλια φλάντζας (PFC): Μια δοκός σχήματος "C" που χρησιμοποιείται συχνά για την υποστήριξη τοιχοποιίας ή ως περιμετρική δοκός.
- Δοκοί με κωνική φλάντζα (RSJ): Η κλασική «κυλινδρική δοκός από χάλυβα» με κωνικές άκρες, συνηθισμένη σε παλαιότερες ανακαινίσεις σπιτιών.
Κατανόηση του κατασκευή χάλυβα σας βοηθά να εκτιμήσετε γιατί αυτά τα συγκεκριμένα σχήματα είναι τόσο ζωτικής σημασίας για την ασφάλεια του σπιτιού σας.
Υπολογισμός Δομικού Φορτίου
Δεν μπορείτε πραγματικά να κάνετε εικασίες όσον αφορά το βάρος της στέγης σας ή των ανώτερων ορόφων του κτιρίου σας. Οι άνθρωποι που σχεδιάζουν κτίρια, γνωστοί ως μηχανικοί, πρέπει να υπολογίσουν το βάρος του κτιρίου όταν είναι άδειο και όταν χρησιμοποιείται. Αυτοί οι υπολογισμοί θα σας πουν πόσο πάχος πρέπει να έχει ο χάλυβας και πόσο θα ζυγίζει για την απόσταση μεταξύ των στηριγμάτων της στέγης ή των ανώτερων ορόφων σας. Ο χάλυβας που απαιτείται για το άνοιγμα σας υπολογίζεται από αυτήν την αριθμομηχανή για να σας δώσει το σωστό πάχος και βάρος του χάλυβα.
1. Υπολογίστε την περιοχή του παραποτάμου
Η δοκός δεν φέρει ολόκληρο το σπίτι. φέρει ένα συγκεκριμένο «ορθογώνιο» δαπέδου ή χώρου στην οροφή.
- Φόρμουλα: $Εμβαδόν = Μήκος x (Πλάτος / 2)
- Εάν η δοκός σας έχει μήκος 20 πόδια και οι δοκοί δαπέδου που στηρίζει έχουν μήκος 14 πόδια, το πλάτος του παραπόταμου είναι 7 πόδια (το μισό του ανοίγματος των δοκών).
- Παράδειγμα: 20 πόδια x 7 πόδια = 140 τετραγωνικά πόδια
2. Προσδιορίστε τα νεκρά και τα κινητά φορτία
Στην εγκατάσταση χαλύβδινων δοκών σε κατοικίες, τα φορτία μετρώνται σε λίβρες ανά τετραγωνικό πόδι (PSF).
- Μόνιμο φορτίο (DL): Το βάρος των μόνιμων υλικών (ξυλεία, γυψοσανίδα, δάπεδα). Συνήθως 10–20 PSF.
- Ωφέλιμο φορτίο (LL): Το βάρος των ανθρώπων, των επίπλων και του χιονιού. Συνήθως 30–40 PSF για δάπεδα.
- Συνολικό φορτίο: DL + LL = συνήθως 50 έως 60 PSF.
3. Υπολογισμός Συνολικού Γραμμικού Φορτίου
Τώρα, μετατρέψτε αυτό το τετραγωνικό βάρος ποδιού σε "Γραμμικό Φορτίο" (βάρος ανά πόδι της δοκού).
- Φόρμουλα: w = Συνολικό Φορτίο (PSF) x Πλάτος Παραπόταμου (ft)
- Παράδειγμα: 60 (PSF) x 7 (ft) = 420 lbs ανά γραμμικό πόδι
4. Προσδιορίστε τη μέγιστη ροπή κάμψης
Αυτός ο υπολογισμός βοηθά τον μηχανικό να επιλέξει μια δοκό που δεν θα σπάσει ή δεν θα καμπυλώσει (εκτραπεί). Για μια απλή δοκό με ομοιόμορφο φορτίο, ο τύπος είναι:
M = wx {L(Τετράγωνο)} / 8
- w = Φορτίο ανά πόδι (420 λίβρες)
- L = Μήκος της δοκού (20 πόδια)
- Παράδειγμα: (420 x 400) / 8 = 21,000 πόδια-λίβρες
5. Επαληθεύστε τα όρια εκτροπής
Ακόμα κι αν η δοκός είναι αρκετά ισχυρή ώστε να μην σπάσει, μπορεί να «αναπηδήσει» πολύ, προκαλώντας ρωγμές στη γυψοσανίδα σας. Οι περισσότεροι κανονισμοί απαιτούν όριο παραμόρφωσης L / 360.
- Για μια δοκό 20 ποδιών (240 ίντσες), το κέντρο δεν πρέπει να λυγίζει περισσότερο από 0.66 ίντσες υπό πλήρες φορτίο.
Παρέχοντας αυτούς τους αριθμούς στον μηχανικό σας, μπορεί να επιλέξει μια δοκό από ένα τυπικό εγχειρίδιο εγκατάστασης χαλύβδινων δοκών που πληροί τις απαιτούμενες προδιαγραφές. Μέτρο διατομής (S) και Ροπή αδράνειας (I)Αυτό διασφαλίζει ότι η εγκατάσταση χαλύβδινων δοκών σας δεν είναι απλώς μια εικασία, αλλά μια μαθηματικά ορθή κατασκευή.
Εξοπλισμός και εξοπλισμός ασφαλείας
Η εργασία με χάλυβα είναι πραγματικά δύσκολη. Πρέπει να φοράτε μπότες με ατσάλινη μύτη, καπέλο και χοντρά δερμάτινα γάντια. Επιπλέον, εκτός από αυτά τα εργαλεία, χρειάζεστε πολλά πράγματα για να διατηρείτε τους εργαζόμενους ασφαλείς όταν εργάζονται με χάλυβα στο εργοτάξιο. Ακολουθεί η λίστα με τα εργαλεία που χρειάζεστε για την εγκατάσταση χαλύβδινων δοκών:
- Αρση: A Χειροκίνητο μπλοκ αλυσίδας 3 τόνων ή γερανογέφυρα για την ανύψωση βαρέων αντικειμένων.
- Ευθυγραμμία: A πράσινος οδηγός περιστροφικού λέιζερ δέσμης για να διασφαλιστεί ότι η δοκός είναι τέλεια επίπεδη σε όλο το άνοιγμα.
- Γεώτρηση: A ασύρματο τρυπάνι γεμιστήρα για τη δημιουργία ακριβών οπών για μπουλόνια σε χοντρό χάλυβα.
- Στερέωση: A Κιτ εργαλείων καστάνιας 90 τεμαχίων για τη σύσφιξη δομικών στηριγμάτων και πλακών.
- Τομή: A μαγνητικό τρυπάνι υψηλής ταχύτητας ή μεταλλικό πριόνι για επιτόπιες ρυθμίσεις.
Μέθοδος εγκατάστασης χαλύβδινων δοκών σε οικιακή χρήση
Τώρα που ο παλιός τοίχος δεν υπάρχει πια, μπορούν να ξεκινήσουν τα σοβαρά πράγματα. Η μέθοδος εγκατάστασης χαλύβδινων δοκών θα αφορά τη διαχείριση του βάρους της δοκού σε κάθε χρονική στιγμή. Όλα πρέπει να συμβαίνουν ομαλά και χωρίς απότομες αλλαγές.
Προσωρινά Συστήματα Υποστήριξης
Είναι επιτακτική ανάγκη να τοποθετήσετε προσωρινά στηρίγματα βελονιάς πριν έρθετε σε επαφή με τον τοίχο με τις δοκούς. Αυτό θα σας βοηθήσει να στηρίξετε την οροφή, ειδικά αφού έχετε κατεδαφίσει τον υπάρχοντα τοίχο. Πρέπει να τα τοποθετήσετε περίπου δύο πόδια μακριά από το άνοιγμα για να διασφαλίσετε ότι έχετε άφθονο χώρο.
Αυτά τα στηρίγματα πρέπει να τοποθετηθούν σε μια σταθερή επιφάνεια. Αυτό είναι ιδιαίτερα σημαντικό σε περίπτωση που εργάζεστε στο υπόγειο, καθώς το τσιμεντένιο δάπεδο προσφέρει τη σωστή στήριξη για αυτά τα στηρίγματα.
Δημιουργώντας την τσέπη
Η δοκός απαιτεί ένα σταθερό σημείο όπου θα τοποθετηθεί. Όταν χρησιμοποιείτε τοίχο από τοιχοποιία, αυτό θα απαιτούσε την αφαίρεση μερικών από τα τούβλα για να του δώσετε μια επίπεδη επιφάνεια. Εάν έχετε ξύλινο σκελετό, πρέπει να στοιβάζετε ένα king-size δοκάρι που θα αντέξει μια τόσο τεράστια δύναμη βαρύτητας.
Η θήκη πρέπει να είναι καθαρή και απαλλαγμένη από οτιδήποτε, όπως καρφιά ή κονίαμα. Τέτοια υπολείμματα θα μπορούσαν να δυσκολέψουν την ομοιόμορφη τοποθέτηση της δοκού. Ένα καθαρό σημείο προσγείωσης εξασφαλίζει ομαλή πλεύση κατά τη διάρκεια της διαδικασίας εγκατάστασης στο επόμενο βήμα.
Ανύψωση και τοποθέτηση
Η άρση βαρών είναι το πιο έντονο μέρος της ημέρας. Χρησιμοποιώντας ένα γερανός βαρέως τύπου, ανυψώστε αργά τη δοκό στην κοιλότητα της οροφής. Διατηρήστε την επίπεδη ανά πάσα στιγμή για να μην γλιστρήσει από τον εξοπλισμό ανύψωσης.
Σύρετε πρώτα το ένα άκρο στην βαθύτερη τσέπη και, στη συνέχεια, βάλτε την άλλη πλευρά στη θέση της. Συνήθως εφαρμόζει πολύ σφιχτά. Μπορεί να χρειαστεί να χρησιμοποιήσετε ένα βαρύ σφυρί για να σπρώξετε τη δοκό στην τελική, κεντρική της θέση.
Καθίσματα και στεγανοποιήσεις
Είναι σπάνιο μια δοκός να κάθεται τέλεια στο ίδιο επίπεδο με την πρώτη προσπάθεια. Πιθανότατα θα έχετε μικρά κενά μεταξύ του χάλυβα και των δοκών από πάνω. Χρησιμοποιήστε χαλύβδινα παρεμβύσματα για να γεμίσετε αυτά τα κενά — ποτέ μην χρησιμοποιείτε ξύλο, καθώς θα συμπιεστεί με την πάροδο του χρόνου.
Ελέγξτε την στάθμη σε ολόκληρο το άνοιγμα. Αν το ένα άκρο είναι έστω και λίγο χαμηλό, τα από πάνω πατώματα μπορεί να είναι ελαστικά. Μόλις οι στεφάνες σφίξουν, η δοκός θα πρέπει να έχει ενσωματωθεί πλήρως στον σκελετό του σπιτιού πριν προχωρήσετε.
Εγχειρίδιο εγκατάστασης χαλύβδινων δοκών: βήμα προς βήμα
Σκεφτείτε το ως το εγχειρίδιο εγκατάστασης χαλύβδινων δοκών που είναι έτοιμο για χρήση στο πεδίο. Η τήρηση αυτών των βημάτων με τη σειρά αποτρέπει δαπανηρά λάθη. Μια συστηματική προσέγγιση διατηρεί το εργοτάξιο ασφαλές και διασφαλίζει ότι η δομική ακεραιότητα του σπιτιού σας παραμένει άθικτη.
Προετοιμάστε τον ιστότοπο
Εκκενώστε το κτίριο και τυλίξτε όλα τα έπιπλα με πλαστικά σεντόνια. Το κόψιμο του παλιού τοίχου θα παράγει απίστευτη ποσότητα σκόνης. Βεβαιωθείτε ότι η γραμμή κοπής είναι ευδιάκριτα σημειωμένη με κιμωλία τόσο στην οροφή όσο και στο πάτωμα.
Ελέγξτε ξανά τις διαστάσεις σας. Είναι πολύ πιο εύκολο να κόψετε το ξύλινο τσεπάκι σας παρά να κόψετε μια χαλύβδινη δοκό στο χωράφι. Βεβαιωθείτε ότι δεν υπάρχουν εμπόδια στη διαδρομή του φορτηγού παράδοσης προς τον χώρο εργασίας σας.
Η διαδικασία εγκατάστασης
Ακολουθήστε αυτήν τη συστηματική ακολουθία για να εξασφαλίσετε μια ασφαλή και ακριβή εγκατάσταση χαλύβδινων δοκών:
- Οριστικοποίηση τσεπών στήριξης: Απομακρύνετε όλα τα υπολείμματα από τις θήκες του φέροντος τοίχου. Βεβαιωθείτε ότι η επιφάνεια στήριξης είναι τέλεια επίπεδη χρησιμοποιώντας ένα πράσινος οδηγός περιστροφικού λέιζερ δέσμης για να αποτρέψετε την ταλάντωση της δοκού.
- Επίδειξη Φέροντων Μελών: Αφού στερεώσετε τα προσωρινά στηρίγματα βελονιάς, αφαιρέστε προσεκτικά τα υπάρχοντα στηρίγματα ή την τοιχοποιία. Ελέγξτε ξανά ότι η οροφή δεν χαλαρώνει πριν μετακινήσετε το χάλυβα στη θέση του.
- Σταδιοποίηση του χάλυβα: Τυλίξτε τη δοκό στο κέντρο του ανοίγματος χρησιμοποιώντας βαρέως τύπου καρότσια. Συνδέστε το Χειροκίνητο μπλοκ αλυσίδας 3 τόνων σε ένα ασφαλές σημείο αγκύρωσης ή πλαίσιο ατσάλινης δοκού.
- Ελεγχόμενη ανύψωση: Σηκώστε τη δοκό τρεις ίντσες τη φορά και αφιερώστε λίγο χρόνο για να επαληθεύετε την σωστή ευθυγράμμιση κάθε φορά. Ένας βοηθός είναι απαραίτητος για να βοηθήσει τη δοκό να παραμείνει ευθεία κατά την τοποθέτησή της στις τσέπες του τοίχου.
- Καθίσματα και επένδυση: Μόλις η δοκός έρθει σε επαφή με τις δοκούς, τοποθετήστε μόνιμα χαλύβδινες ροδέλες σε τυχόν κενά. Η δοκός πρέπει να εφάπτεται πλήρως σε κάθε δοκό, προκειμένου να αποφευχθεί η «αναπήδηση» στο μέλλον.
- Μηχανική στερέωση: Στερεώστε τη δοκό στις δοκούς ή τις κολώνες. Για δομικές συνδέσεις υψηλής ροπής, χρησιμοποιήστε ένα Σετ καρυδάκια κρούσης 65 τεμαχίων για να διασφαλιστεί ότι τα μπουλόνια πληρούν τις προδιαγραφές ροπής στρέψης του μηχανικού.
- Αποστήθιση: Μόνο αφού σφίξετε κάθε μπουλόνι και ο μηχανικός (ή ο επιθεωρητής κτιρίων) έχει επαληθεύσει τις έδρες, θα πρέπει να τυλίγετε αργά τα προσωρινά στηρίγματα για να μεταφέρετε το βάρος στον νέο χάλυβα.
Συνδέστε χάλυβα με χάλυβα
Εάν μια δοκός δεν μπορεί να διασχίσει την απόσταση μεταξύ των στηριγμάτων, πρέπει να ενωθούν δύο κομμάτια για να δημιουργηθεί ένα. Αυτό απαιτεί πλάκες ψαριού ή ισχυρές αρθρώσεις, οι οποίες πρέπει να είναι τόσο ισχυρές όσο η ίδια η δοκός, διαφορετικά ο πιο αδύναμος κρίκος θα προκαλέσει προβλήματα.
Μπορείτε να χρησιμοποιήσετε ένα Σετ καρυδάκια κρούσης 65 τεμαχίων για να σφίξετε τα μπουλόνια. Οι συνδέσεις υψηλής ροπής είναι πολύ σημαντικές. Διαφορετικά, τα χαλαρά μπουλόνια μπορεί να προκαλέσουν κίνηση των δοκών και να κάνουν τριξίματα.
Πυράντοχο και προσθέστε πινελιές τελευταίας τεχνολογίας
Ο χάλυβας εξασθενεί πολύ γρήγορα όταν εκτίθεται σε υψηλές θερμοκρασίες. Στις περισσότερες περιπτώσεις, οι οικοδομικοί κανονισμοί ορίζουν ότι η δοκός πρέπει να περιβάλλεται με πυρίμαχη γυψοσανίδα. Αυτό παρέχει αρκετό χρόνο στα άτομα να εκκενώσουν το κτίριο σε περίπτωση έκτακτης ανάγκης.
Περιφράξτε τη δοκό χρησιμοποιώντας δύο στρώσεις γυψοσανίδας τύπου X πάχους 5/8 ιντσών. Αφού τοποθετήσετε την δοκό σε εγκιβωτισμό, μπορείτε να ξεκινήσετε την τοποθέτηση ταινίας, την λάσπη και το βάψιμο της περιοχής. Στο τέλος, η μεγάλη δοκός βιομηχανικής εμφάνισης θα γίνει ένα κομψό στοιχείο της οροφής σας.
Επιθεωρήσεις μετά την εγκατάσταση
- Έλεγχος γυψοσανίδας: Αναζητήστε μικρές ρωγμές κοντά στις γωνίες των θυρών ή των παραθύρων.
- Δοκιμή πόρτας: Βεβαιωθείτε ότι κάθε πόρτα στην περιοχή εξακολουθεί να κινείται και να κλειδώνει ομαλά.
- Αναθεώρηση ρουλεμάν: Ελέγξτε ότι το ατσάλι δεν έχει μετακινηθεί στις τσέπες του.
- Έλεγχος μπουλονιών: Επιστρέψτε μετά από μια εβδομάδα και σφίξτε ξανά τα πάντα για να λάβετε υπόψη την αρχική καθίζηση.
Αν χρειαστεί να μπείτε βαθιά μέσα σε μια κοιλότητα για να σφίξετε μια βίδα, ένα Σετ βαθιών υποδοχών 19 τεμαχίων είτε για Σετ μετρικού βάθους 26 τεμαχίων είναι σωτήριο. Αυτά τα εργαλεία διασφαλίζουν ότι μπορείτε να ολοκληρώσετε την εργασία χωρίς να αφαιρέσετε τα παξιμάδια από δυσπρόσιτα σημεία.
Συχνές Ερωτήσεις
Πόσο κοστίζει η εγκατάσταση μιας μεταλλικής δοκού σε ένα σπίτι;
Το κόστος κυμαίνεται μεταξύ 1,500 και 5,000 δολαρίων για οικιακές εργασίες. Αυτό το κόστος περιλαμβάνει το κόστος της δοκού (300-1,000 δολάρια), το κόστος του δομικού μηχανικού (400-800 δολάρια), καθώς και το κόστος εργασίας ή ενοικίασης εξοπλισμού. Η ενοικίαση του δικού σας εξοπλισμού θα μειώσει δραματικά το κόστος σας.
Χρειάζεται να βιδωθεί μια χαλύβδινη δοκός στο δάπεδο;
Εάν η δοκός λειτουργεί ως κεφαλή σε έναν τοίχο, κάθεται σε θήκες. Ωστόσο, εάν υποστηρίζεται από χαλύβδινες κολώνες (στύλους), η βάση αυτών των κολόνων πρέπει να βιδωθεί στο δάπεδο από σκυρόδεμα.
Πόσο μακριά μπορεί να εκτείνεται μια χαλύβδινη δοκός χωρίς στήριξη;
Μια τυπική χαλύβδινη δοκός για κατοικία μπορεί συνήθως να εκτείνεται από 15 έως 22 πόδια χωρίς μεσαίες κολώνες στήριξης. Η ακριβής απόσταση εξαρτάται από το βάρος που φέρει από πάνω. Να συμβουλεύεστε πάντα την έκθεση του μηχανικού σας για το μέγιστο επιτρεπόμενο άνοιγμα για τον συγκεκριμένο τύπο δοκού σας.
Τι μέγεθος χαλύβδινης δοκού χρειάζομαι για άνοιγμα 20 ποδιών;
Για ένα άνοιγμα 20 ποδιών με τυπική φόρτιση δαπέδου, απαιτείται δοκός βάθους 8 έως 10 ιντσών. Ωστόσο, μια εκτίμηση με βάση τον «εμπειρικό κανόνα» μπορεί να είναι επικίνδυνη. Μεταβλητές όπως η φόρτιση χιονιού και η κλίση της στέγης αλλοιώνουν τους υπολογισμούς, επομένως συνιστάται να χρησιμοποιείτε μόνο ένα βάθος δοκού που καθορίζεται από τον μηχανικό.
Συμπέρασμα
Η εγκατάσταση χαλύβδινων δοκών θα είναι μια από τις μεγαλύτερες προκλήσεις που θα αντιμετωπίσετε ως ερασιτέχνης μάστορας. Αυτή είναι η στιγμή που θα περάσετε από τις απλές επισκευές και θα ξεκινήσετε το ταξίδι της ανοικοδόμησης του μέλλοντος του σπιτιού σας. Με υπομονή και σεβασμό για το φορτίο, θα έχετε αποτελέσματα εφάμιλλα με αυτά των επαγγελματιών.
Το κύριο σημείο εδώ είναι ότι όλα πρέπει να προγραμματιστούν εκ των προτέρων και τα κατάλληλα εργαλεία πρέπει να είναι έτοιμα. Καταφέρατε να αξιοποιήσετε στο έπακρο μια κλειστοφοβική διάταξη - τώρα μπορείτε να απολαύσετε τη σκληρή δουλειά σας.




