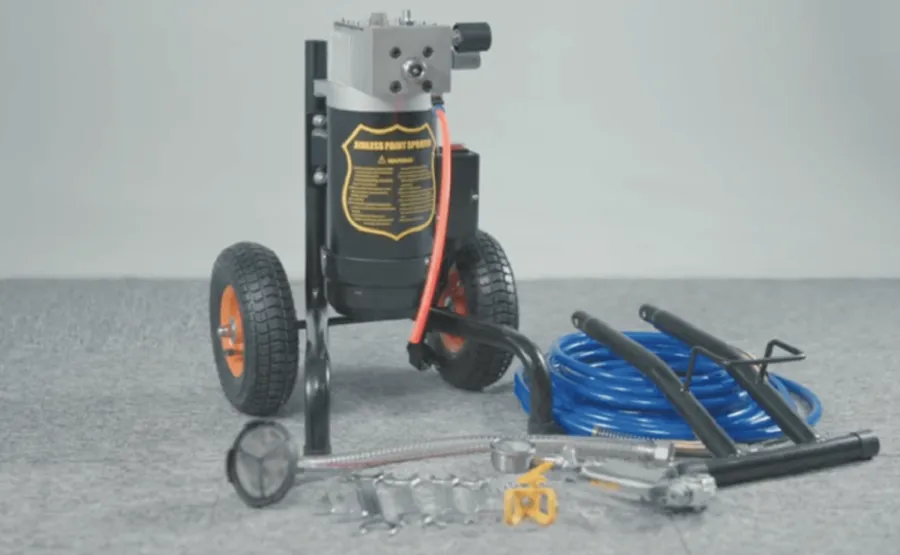
Paint sprayers can paint a fence up to ten times faster than regular brushes or rollers. This non-air sprayer will give your wooden fence an even coat in no time. Never start a painting endeavor without safety goggles, appropriate gear, and a breathing mask. Work on clear days, between 50°F and 90°F, with little breeze. Before applying the wood stain, prepare the wood thoroughly. Clean the fence thoroughly and mend any broken planks. Test the spray pattern on a piece of scrap wood before you start. Adjust the sprayer settings to achieve uniform stain coverage. Work the stain well into the wood grain, then work it back in again.
Σε αυτό το άρθρο, θα μάθετε staining fence with paint sprayer. We’ll cover safety considerations, weather conditions, fence prep, spray-pattern testing, and optimal sprayer settings.
Πίνακας περιεχομένων
What You Need for Staining Fence With Paint Sprayer

Make sure you have the right tools before you start spraying your fence. The following section describes the essential sprayer features and accessories that help you achieve smooth, even coverage while making the process faster and easier.
Συνιστάται για το έργο σας
Ψεκαστήρας βαφής
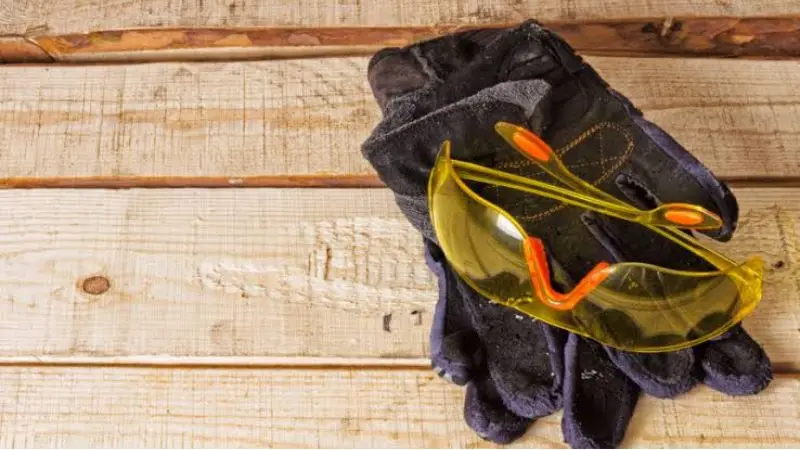
You need special tools to paint a wood fence. How to use a paint sprayer to stain a fence? Airless sprayers use large liquid buckets to increase productivity—useful for HVLP sprayers for touchups and short fences. Adjustable-pressure sprayers let you control flow. Keep spray pressure low to avoid contaminating yard items. Long, flexible hoses make it easier to move along fence lines. Keep the spray nozzle tip clean. Use your fence safety equipment. Goggles safeguard eyes from small liquid droplets. A tight mask protects your lungs. Thick rubber gloves prevent chemical exposure. Cover garden plants during staining. Good equipment setup helps you manage and finish the job.
Fence Stain
πώς να spray stain on a wood fence? The right stain will affect how good your finished fence looks. Clear stain shows the natural lines in your wooden fence boards. Semi-transparent stain offers a soft pop of color while letting the wood grain show through. Solid stain covers the entire surface with color, giving aging fence planks a new look. Water-based stain dries fast and cleans up easily with soap and water. Oil-based dye penetrates deep into your fence’s wood fibers. This deep soaking helps protect your exterior fence from rain and bright sunlight. Make sure the stain flows well so it doesn’t clog the sprayer tip. Strain the material first, or thick liquid stain can clog filters.
How to Prepare a Fence for Staining
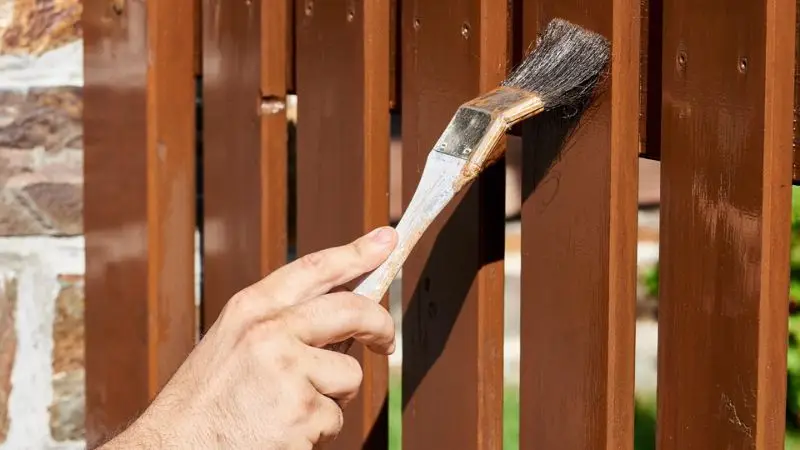
Τι type of sprayer is best for fence stain? The most important part of any endeavor is getting your wood ready. Before you apply any stain, clean all timber boards thoroughly. Washing wood is important for good adhesion, or the topcoat may peel too soon.
Clean the Fence
Can you stain a fence with a paint sprayer? First, remove any loose dirt, moss, or green mold from the wood. Apply liquid cleanser evenly to each fence panel. Let the mixture sit for 10 minutes to break up caked-on dirt. Scrub stubborn stains with a stiff brush. Rinse the entire wooden construction down with fresh water using your yard hose. After washing, let the wood dry out completely before applying any stain. Deep water trapped in your boards will cause that fresh coat to bubble up later. Expect to wait one or two days after washing your fence line. Check the surface to ensure all areas of the wood are thoroughly dry.
Repair Damaged Boards
Thoroughly inspect all section panels for cracked parts and loose metal hardware. Broken timber ruins the overall structure and looks bad beneath the fresh stain. Replace twisted, split, or soft boards with new clean pieces of wood. How to spray fence stain evenly? If any nails or screws protrude, hammer them flat with the face of the boards. Smooth down rough sections so your sprayer distributes stain evenly. Finally, protect your surroundings before you start staining. Use plastic tarp sheets to cover surrounding bushes, green grass, and stone pathways. Secure the outside edges with large rocks or sticky tape.
How to Use a Paint Sprayer to Stain a Fence

How to stain a fence with a paint sprayer? If you do it right, you can stain a fence quickly and effectively with a paint sprayer. If you follow each step carefully, the stain will soak into the wood evenly, giving you a smoother, more consistent finish. Follow the steps below to properly stain your project, starting with choosing the best weather.
Step 1: Choose the Right Day
To build a barrier, check local weather forecasts. What paint sprayer is best for staining a fence? Fine liquid droplets are blown by high winds onto the property of your neighbors. In colder temperatures, wood fibers absorb less liquid. Temperatures 50° to 90° F. Use dye for even drying. All timber fence panels dry very quickly in low humidity. Working in the morning before staining is a good idea. Don’t use solar heat—it cooks the surface layers too quickly. Wood fences can develop ugly lap lines and streaky unevenness from quick drying.
Step 2: Prepare the Paint Sprayer
Μπορείτε να χρησιμοποιήσετε α paint sprayer for fence stain? Strain the fence stain and fill your first container. Strainers remove small dirt particles that can quickly clog the tips. Fit the correct sprayer tip. Attach the hose to the sprayer pump. Reduce the pressure on your paint sprayer. Test the sprayer output on scrap cardboard before you attack the wooden fence. Adjust the pressure knob to balance the sprayer fan. Low pressure breaks up drops; high pressure over-sprays. The sprayer tip should be 12 away from the wood stain target. Use a straight angle to stain fence boards evenly.
Step 3: Prepare the Fence
How to spray stain on a wood fence? Clean the fence thoroughly before spraying to remove dirt, dust, mildew, and loose material. Make sure the wood is dry before applying stain. Inspect each section for damaged, loose, or broken boards and repair as needed. To protect nearby plants, furniture, walls, and other surfaces from overspray, use drop cloths or plastic sheeting. Make sure the fence surface is clean and dry so the stain soaks in evenly and gives a uniform finish.
Step 4: Start Spraying
πώς να spray stain on a fence without dripping? Work in manageable sections, starting at one end of the fence. Move evenly from side to side, keeping the sprayer at a steady distance. Overlap the passes slightly so you don’t miss any spots and get even coverage. Don’t go halfway down a board; if you do, it can leave dark imprints. Keep pushing the trigger and adjust the sprayer for an even coat.
Step 5: Work the Stain Into the Wood
How to stain a fence with a paint sprayer? Spray one area, then spot-stain with a clean brush or roller as needed. Look for cracks, corners, edges, and areas that receive more stain. Brushing back helps spread excess pigment and minimize streaks. Let the stain sit for the manufacturer-recommended time, then apply a second coat.
Step 6: Apply a Second Coat
πώς να χρησιμοποιήστε ένα πιστόλι βαφής to stain a fence? When the first coat is completely dry, inspect the fence for thin spots or patches. If the stain manufacturer suggests a second layer, apply one. Use the same spray method and keep a similar distance from the surface. Don’t apply too much stain. Too much build-up might create leaks, tackiness, or uneven drying.
Βήμα 7: Καθαρίστε τον ψεκαστήρα
Καθάρισε το paint sprayer right after you finish with the project. How to spray fence stain evenly? The manufacturer recommends cleaning the pump, hose, and spray tip according to its requirements. Clean the filters and nozzle thoroughly, and remove any stain residue from the container. Clean the sprayer thoroughly so it is ready for future projects and to prevent dried stain from clogging the equipment.
Step 8: Allow the Fence to Dry
Allow the dyed fence to dry as the manufacturer recommends. Keep people, dogs, and outdoor furniture off the treated area for this time. Do not expose it to rain or disturb it until the stain is completely dry. Allow the fence to dry. Check the final finish and touch up any missed sections as needed.
How to Get an Even Finish When Spraying Fence Stain
Can you use a paint sprayer for fence stain? When spraying fence stain, the secret to an even finish is staying consistent throughout the project. These instructions will help you regulate the sprayer, prevent missing spots, and apply the stain evenly across each fence board for a clean, professional finish.
Keep the Sprayer at the Right Distance
Keep a uniform distance from the sprayer to get an even coat on each board. Can you stain a fence with a paint sprayer? Keep the sprayer tip precisely twelve inches from the wood surface. Too close and you get dark puddles; too distant and you get wasteful overspray. Don’t swing your wrist. Swing your whole arm down the barrier. Your airless sprayer lets you apply fence stain evenly. As you swing your arm, the distance between the sprayer tip and the board changes. This gives thin margins and a large stain in the middle. Walk the fence line and keep your hand steady.
Use Consistent Spray Strokes
How to stain a fence with a paint sprayer? Half-stroke overlap removes light wood streaks. Before you pull the edge trigger on the panel, move your arm. When your stroke touches the fence, release the trigger. This smooth motion prevents stains at the fence-border. A decent paint sprayer makes this rhythm simple. Keep the sprayer vertical while the tip skims across the boards. If you get a thin mist, adjust the pressure knob for a continuous spray fan. Spray wood on and on. Immediately moisten the stain so it will soak into the wood. Brushing the stain into tight cracks helps protect the wood from rain and sun.
Συμπέρασμα
Achieve amazing results with a complete workflow. Prepare the surface properly before applying any wood stain. Control liquid flow with scrap material, and adjust your sprayer settings. Backbrushing forces the pigment into the wood. Clean the sprayer pump after use to prevent blockage. Proper use, including back-brushing, will extend the life of the wood. This stain application will improve your curb appeal and protect your fence’s structure. Proper staining fence with paint sprayer can protect your wood fence from the ravages of the weather. Check your fence annually for the first signs of surface deterioration. To get the best weather protection, apply each coat of stain as heavily as you can.
Συχνές Ερωτήσεις
Do you need to thin oil-based stain before putting it in a sprayer?
Thin thick liquid stain if your airless sprayer tip clogs during use. Straining the oil-based stain removes small clumps from the liquid stain. Check the sprayer output on scrap wood before you apply stain to your timber structure.
Can you use a handheld HVLP sprayer to apply fence stain?
Ναι, α handheld HVLP sprayer works well for small fence stain projects or quick touch-ups. This sprayer applies thin stain evenly across short wooden fence panels. Adjust the pressure settings to prevent messy stain overspray on your property.
Why should you back-brush wood stain after using a sprayer?
Back-brushing pushes wet stain deep into natural wood fibers right away. This extra step removes excess stain drips from each fence board. Manual brushing helps your fresh stain coat absorb properly so it shields your fence from weather damage.
How many coats of wood stain should you spray on a fence?
Spray two thin coats of wood stain for maximum protection. Thin layers absorb better than one thick stain coat. Let the first stain layer dry completely before applying the second coat. Clean your paint sprayer pump completely after applying the final coat of stain.