
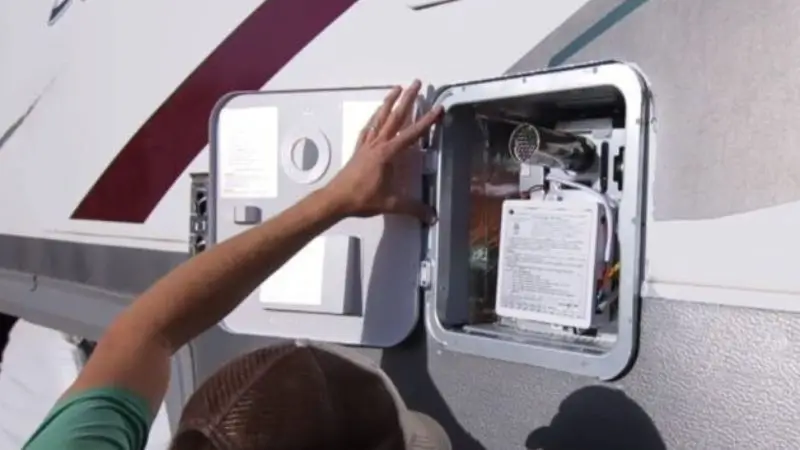
Regular RV water heater maintenance is the first step in keeping your RV’s hot water flowing. You take care of your RV water heater every season, clean the tank, and check it frequently. This saves energy and keeps you safe. You can always have hot water in your RV with easy maintenance that prolongs the life of your water heater. You don’t require any particular abilities. Anyone can maintain their RV heater in excellent condition by following simple instructions.
Why RV Water Heater Maintenance Matters
Benefits of Maintenance
Every time you need your RV water heater, you want it to function. You can get dependable hot water in your RV with routine maintenance for your water heater. You can keep your RV water heater operating efficiently by adhering to a regular maintenance schedule. Regular inspections and clean parts reduce your water heater’s energy consumption. You save money on electricity or fuel as a result. Additionally, you shield your RV from rust and leak damage.
The following are some main advantages of maintaining an RV water heater:
- Improved Outcome: You have consistent hot water for cleaning, showering, and washing dishes.
- Extended Lifespan: When you take care of your RV water heater, it will last longer.
- Reduced Costs: You save money on energy bills and steer clear of costly repairs.
- Safety: You lessen the possibility of fires, leaks, and other dangers.
Risks of Neglect
If you skip RV water heater maintenance, you may face problems that ruin your trip. Dirt, rust, and mineral buildup can block the tank or pipes. This makes your RV water heater work harder and use more energy. You might notice weak water flow or no hot water at all. Leaks can damage your RV and cause mold or mildew. Common issues from neglect include:
- No Hot Water: Mineral deposits block the heating element.
- Leaks: Cracks or rust form in the tank.
- Bad Smells: Bacteria grow in dirty water tanks.
- Fire Risk: Faulty parts or gas leaks can cause danger.
RV Water Heater Maintenance Schedule

How often should I service my RV water heater? To keep your RV water heater working well, follow a set schedule. Doing regular checks helps you avoid problems and keeps hot water ready. Use this easy guide to know what to do and when.
Monthly Tasks
Check your RV water heater once a month. Look for leaks near the tank and pipes. Keep the area clean and remove any dust. Test the water temperature to make sure it is hot.
Monthly RV water heater maintenance checklist:
- Look for leaks
- Wipe the tank outside
- Listen for odd sounds or smells
- Check the water temperature
Seasonal Tasks
Give your RV water heater extra care at the start of each season. Flush the tank to get rid of minerals. Clean the vents and check the pressure relief valve. These steps help your water heater stay safe and work well.
Seasonal Checklist:
- Flush the tank with water
- Clean the air vents and exhaust
- Test the pressure relief valve
- Look for rust or corrosion
Annual Tasks
Yearly care helps your RV water heater last longer. Change the anode rod if it looks worn. Have a professional check the system for hidden problems. This keeps you safe and protects your RV’s hot water system.
Annual Maintenance Checklist:
- Change the anode rod
- Get a professional inspection
- Deep-clean the tank
Checks As Needed
You might occasionally notice changes in your heater or water. Check your RV water heater immediately if you notice leaks, hear odd noises, or smell something off. Bigger problems can be avoided by acting quickly.
As-Needed Checklist:
- Look for drips or leaks.
- Fix the low flow of hot water.
- Deal with strange noises or smells
Essential RV Water Heater Maintenance Tasks
Maintaining your RV heater helps you stay trouble-free while traveling and keeps your hot water flowing. To keep your RV secure and cozy, you must adhere to these critical water heater maintenance procedures. Before beginning any work, always turn off the water and the electricity. This keeps you safe from burns and electric shock. Use this guide to clean your RV water heater:
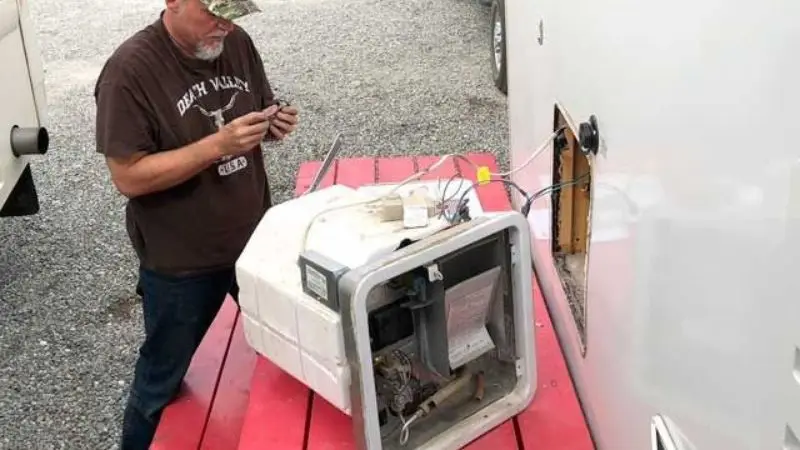
Flush Tank
To get rid of dirt and mineral buildup, you must flush the RV water heater. This helps you get clean water and maintains the efficiency of your RV heater.
Steps to flush the RV water heater:
- Turn off the water and power supplies to flush the RV water heater.
- Allow the water to cool.
- The pressure relief valve should be opened.
- Take out the drain plug.
- Allow the water to run off completely.
- Rinse the tank’s interior with a hose.
- Close the valve and replace the drain plug.
- Turn the water supply back on and check for leaks.
Anode Rod Check
The anode rod protects your RV water heater from rust. You need to check it during annual maintenance and replace it if it looks worn.
How to check the anode rod:
- Turn off the power and water.
- Remove the anode rod from the tank.
- Look for heavy corrosion or missing pieces.
- Replace the rod if it looks thin or damaged.
- Put the new rod in and tighten it.
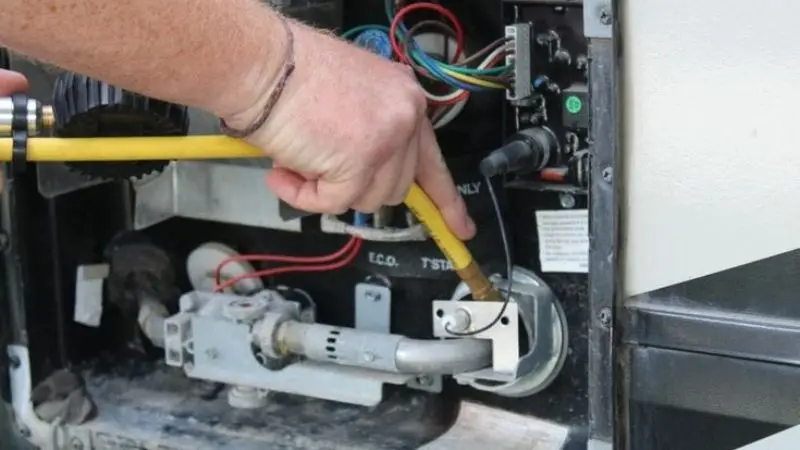
Pressure Relief Valve
The pressure relief valve keeps your RV safe by releasing extra pressure. You need to test it during seasonal maintenance.
Steps to test the pressure relief valve:
- Turn off the power and water.
- Lift the valve lever to let some water out.
- Watch for water flow and listen for hissing.
- If water does not flow, replace the valve.
- Lower the lever and check for leaks.
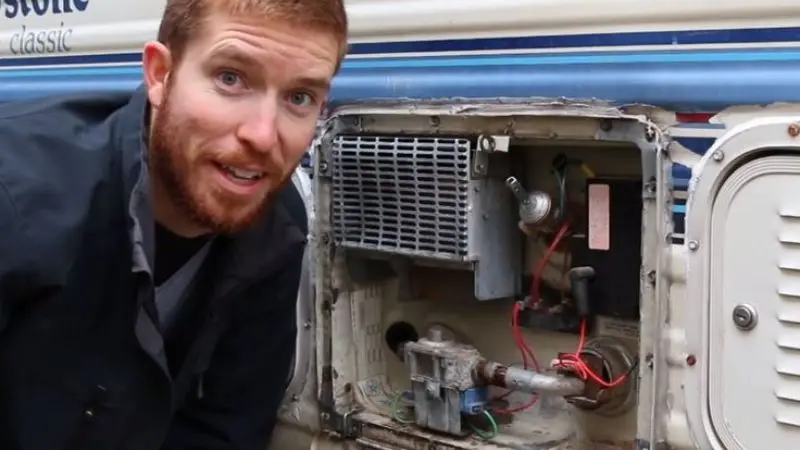
Clean Vents
Clean vents help your RV water heater run safely and use less energy. You need to clean them every season.
How to clean vents:
- Turn off the power.
- Remove dust and dirt from the vent covers.
- Use a soft brush or cloth.
- Check for blockages or damage.
- Put the covers back on.
Leak Inspection
Leaks can damage your RV and waste water. You need to check for leaks every month and after long trips.
Steps for leak inspection:
- Look around the tank and pipes for water spots.
- Check under the RV for drips.
- Feel for wet areas near water heater parts.
- Fix leaks right away or call a professional.
Professional Tune-Up
You need to schedule professional tune-ups once a year. A technician checks your RV water heater and tankless water heater for hidden problems.
What happens during a tune-up:
| Task | What the Technician Does |
| Inspect tank | Look for rust and damage |
| Test controls | Checks the thermostat and switches |
| Clean burner | Removes dirt from the burner |
| Check connections | Tightens water heater parts |
| Review safety | Test all safety features |
Professional tune-ups help you catch problems early. You keep your RV water heater running safely and extend its life.
Complete Guide: Sanitizing Your RV Water Heater
When to Sanitize
You need to sanitize your RV water heater to keep your water clean and safe. Bacteria and minerals can build up inside the tank. If you notice a bad smell, strange taste, or cloudy water, it is time to clean the system. You should also sanitize after long storage or before your first trip of the season. Many RV owners add this step to their regular RV water heater maintenance routine.
How to Sanitize
You can follow these steps to sanitize your RV water heater and keep your RV’s hot water safe for use. Make sure you turn off the power and let the water cool before you start.
- Drain all water from the RV water heater and fresh water tank.
- Close the drain and replace the plug.
- Mix one-quarter cup of household bleach with one gallon of water for every 15 gallons in your tank.
- Pour the bleach solution into the fresh water tank.
- Fill the tank with clean water.
- Turn on the water pump and open all hot water faucets until you smell bleach.
- Close the faucets and let the solution sit for at least four hours.
- Drain the system and refill with fresh water.
- Run the faucets until you no longer smell bleach.
| Step | Action | Purpose |
| 1 | Drain water | Remove old water |
| 3 | Add bleach solution | Kill bacteria |
| 6 | Run faucets | Spread solution |
| 8 | Rinse with fresh water | Remove bleach |
Troubleshooting RV Water Heater Issues
When you use your RV, you want your RV water heater to work every time. Sometimes, problems can stop your hot water. Use this troubleshooting guide to find and fix common issues. Good RV water heater maintenance helps you avoid these problems, but knowing how to troubleshoot saves you time and stress.
No Hot Water
If you turn on the faucet and get cold water, check these things first:
- Make sure the water heater is on.
- Check the power source. Plug in your RV or check the propane supply.
- Look at the thermostat. Set it to the right temperature.
- Inspect the fuse or breaker.
Leaks
A leaking water heater can cause damage to your RV. You should look for water under the tank or around the fittings. Common causes include:
- Loose connections
- Cracked tank
- Worn-out gaskets
| Problem | What To Do |
| Small drip | Tighten fittings |
| Large puddle | Turn off the water, call a pro |
Odors or Discoloration
If your RV hot water smells bad or looks rusty, bacteria or minerals may be in the tank. You can sanitize the tank and flush out the water. Replace the anode rod if needed.
- Run the water until it is clear.
- Clean the tank with a bleach solution.
Ignition Problems
If your RV water heater won’t light, check the igniter and the gas supply. Make sure the vents are clean. Look for error codes on the control panel.
Winterizing and Storage
Winterizing Steps
Winterizing your RV protects your RV heater during cold months. You need to winterize before freezing temperatures arrive. Start by turning off the power and water supply. Drain all water from the RV water heater and pipes. Remove the drain plug and open the pressure relief valve. Let the water flow out completely. Flush the tank to clear any leftover water. Close all valves and replace the drain plug. Add RV antifreeze to the water lines if your RV will stay in freezing weather.
Winterizing Checklist:
- Turn off the power and water
- Drain the RV water heater and pipes
- Flush tank
- Add RV antifreeze to water lines
- Close all valves
Long-Term Storage
If you plan to store your RV for several months, you need to prepare the water system. After winterizing your RV, clean the RV water heater and tank. Remove any debris from the vents. Store your RV in a dry place. Check the RV every few weeks for leaks or pests. Cover the RV to protect it from snow and rain.
| Storage Task | Why It Matters |
| Clean tank | Prevents bacteria |
| Check for leaks | Stops water damage |
| Cover RV | Blocks snow and rain |
De-Winterizing
When spring arrives, you need to de-winterize your RV. Remove RV antifreeze from the water lines. Flush the RV water heater and tank with fresh water. Check for leaks and make sure all parts work. Turn on the power and test the water temperature. Run all faucets until the water smells and tastes clean.
De-Winterizing Steps:
- Drain RV antifreeze
- Flush water system
- Inspect for leaks
- Test the RV water heater
Call a professional if you find any damage after winterizing your RV.
Conclusion
You keep your RV water heater in top shape by following a regular maintenance routine. Check your RV water heater, flush the tank, and inspect for leaks. Clean vents and replace worn parts. This maintenance gives you safe, hot water and protects your RV. You enjoy reliable RV hot water on every trip.
Take care of your RV water heater, and you travel with peace of mind.
FAQ
How frequently should your RV water heater be flushed?
Every season, you should flush your RV water heater. Dirt and minerals are eliminated by flushing. This keeps your water clean and improves the efficiency of your heater.
What indicators point to the need to replace your anode rod?
Check for a thin rod, missing parts, or severe corrosion. Replace the anode rod if you notice these symptoms. This keeps your tank from rusting.
Can you sanitize your RV water heater with ordinary household bleach?
Yes, ordinary household bleach can be used. Add water to the proper amount. After sanitizing, always give the system a thorough rinse to get rid of the bleach odor.
Why does the hot water in your RV smell?
Minerals or bacteria in the tank are the source of unpleasant odors. This can be resolved by cleaning and disinfecting your water heater. If necessary, swap out the anode rod.
If you discover a leak, what should you do?
Cut off the water and electricity. Look for cracks or loose fittings. Let’s tighten ties. For large leaks, contact a professional.


