
There is no need for special equipment or years of experience to make a rolling grill cart that will add a whole new level of fun to any backyard barbecue. Think about owning your own DIY rolling grill cart, one that fits perfectly in your area and is your style. A robust, functional rolling grill cart can be assembled to facilitate grilling and keep all the essentials in one place. You can build a strong, portable cart using simple equipment and durable materials that protect against the weather. It presents innovative customization options to suit your outdoor lifestyle. It offers a smart way to combine mobility, storage, and prep space into one compact solution. This manual will take you through the process step by step. It will show you how to select the appropriate grill and materials, assemble everything, and securely attach your system. With the right design, it can function as a prep space, storage unit, and patio furniture all in one. In this blog, you will find out how you can make your own grill cart with the help of very few tools and materials that can be found in the nearest shops. It will allow you to impress your friends and relatives with your DIY skills!
A Complete Guide to Choosing Materials, Tools, and the Right Grill
It is a do-it-yourself guide to building an outdoor rolling cart for a grill. It also emphasizes the need to plan and use weatherproof materials to avoid wasted time and to design a cart that can withstand rain, sun, and frequent use during a barbecue. It is geared towards the correct choice of the grill depending on the needs of the user, such as size, weight, and airflow, to make it stable and safe. Altogether, all these conditions, proper materials, correct planning, and the right choice of the grill can make the process of building less problematic, and the end product strong and pleasant to deal with. Exquisite materials, equipment, and a suitably fitted grill are guaranteed to provide the necessary control of the heat during outdoor cooking.
Required Materials for Rolling Grill Cart
Assemble the necessary materials to build your DIY rolling grill cart before construction. This is one of the measures that make the project easier. This allows you to identify the materials needed before work commences. It also saves the time and effort a user might otherwise spend determining which materials they need. It also reduces assembly time, allowing users to focus on building. The materials that are not sensitive to rain, sun, and heavy traffic should be used. The cart will be lifelong and will appear much better at any BBQ. It is much easier to be prepared with the right materials, making the process more efficient. A robust rolling grill cart relies on a material that is well-balanced in strength.
To start with, the following list should be helpful:
- Frame and shelves/weather/pressure-treated wood (wood) or pressure-treated lumber.
- Powerful caster wheels (at least two of them should be lockable)
- Screws and bolts (galvanized outdoor).
- Metal braces or corner braces.
- Wood or outdoor paint.
- Handles or drawer pulls.
- Hooks for utensils
- Grill sheet or mat (to put under the grill)
Required Tools for DIY Grill Cart
To build a DIY grill cart, a few simple tools are needed to ensure the build is correct and the assembly is safe. The ability to select the required features on a rolling grill cart is helpful, as it makes the cart ready and eliminates guesswork during installation. It tells users which tool they need before they start work. It reduces confusion and apprehension. It also aids in working with more ease, tim,e and working safely. By knowing which tools they need, users can prepare their workspace. This is not a complicated DIY project of a mobile bbq station. Safety in the project must also be preserved by wearing personal protective equipment. Most of these tools can be found in your garage or shed:
- Holes are made using a drill.
- A saw is used to cut wood to size.
- A proper measurement by an extension gauge.
- The screwdriver was assembled.
- To file the rough edges, sandpaper will be used.
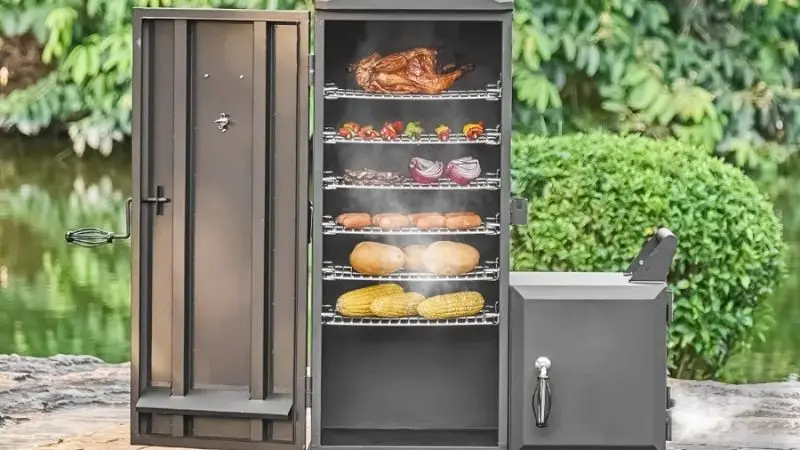
Choosing the Right Grill
Choosing the right grill is essential for a DIY rolling grill cart. Consider the way you prefer to grill. Would you prefer a small charcoal grill or a gas grill? Measure your grill, then build your cart. Ensure the cart has sufficient capacity for your grill’s weight and size. You may need more space to prepare or store food if you cook outdoors. Always ensure your grill is safe and not blocking airflow. This attribute helps users ensure the grill fits the cart correctly and operates safely and comfortably. It is clear which type of grill is best suited to the cart. It reduces the risk of accidents and makes outdoor cooking safer for everyone. This manual helps users confidently choose a grill that fits well and operates efficiently on the cart. It eliminates guesswork and helps users avoid common issues that can arise when a grill is too large. It also helps ensure the grill sits entirely on the surface without hanging over the edges.
Step-by-Step Construction and Installation Guide for Grill Cart

This tutorial takes you through the process of creating the custom roll grill cart in your backyard. It focuses on designing and measuring the grill and cart to ensure proper installation and balance. Users are taught to create a stable frame, add wheels to the space, and build shelves and storage. It also includes a guide to sanding, painting, and finishing to protect the cart from external conditions. Lastly, it describes the grill installation as stable, safe, and reliable.
Plan Your Design and Measurements
Begin your DIY project by drawing your rolling grill cart, and then take a pencil and paper. You consider the space you need for your grill, shelves, and storage. Measure your outdoor rolling cart for the grill and determine your grill’s sitting position. This measure will allow you not to make errors in the future. It allows users to assemble or select a cart that suits their space, grill, and cooking style. It ensures the grill remains stable on top, is not suspended on the sides, and is not unbalanced. It will prompt users to think through their actions before taking them, helping them avoid future issues. You must measure twice before you cut any piece of wood. You desire everything to work out perfectly.
Frame Assembly for Grill Cart
Prepare your pressure-treated timber and then cut it with a saw to size. A solid rectangular base, to which you secure the legs on all four corners, should be constructed. You should secure all of these with galvanized screws and metal brackets. You are also interested in a robust frame for your DIY rolling grill cart. This helps keep the grill securely in place on top and prevents it from hanging over the sides or becoming lopsided. It also ensures the cart can move freely through gates or storeys when not in use. A well-measured frame makes cooking more relaxing, particularly for mobile BBQ stations or when preparing food for service. This aspect enhances safety, comfort, organization, and durability while saving time and energy.
Add Wheels for Mobility
You should find a way to invert your frame and glue heavy-duty caster wheels to both corners. You should ensure that two of the wheels are locked. This keeps your rolling grill cart stable while you cook. The cart is easy to move around the backyard thanks to its wheels. It enables users to move their grill cart wherever they want without lifting it. It also allows users to roll the cart over patios, decks, or yards with ease. The outdoor rolling cart for the grill is also more fun to use with wheels. It is particularly useful for individuals with small patios or shared outdoor spaces. The wheels transform an immobile grill into a movable, convenient cooking station. This feature enables outdoor cooking and makes it safer for everyone.
Build Shelves and Storage
Cutting wood is another step that is used to produce shelves and storage areas. You can use screws to fix them to the frame. Hooks should be added to bbq utensils. You may use a drawer or a basket for additional storage. These shelves are used to store your outdoor cooking appliances. It provides designated areas to store all necessary items while grilling, preventing hard-to-reach spaces from crowding users. It can also be designed to prevent flammable objects from being placed near heat, creating a safer cooking area. It transforms the rolling grill cart into an entire outdoor grilling station. This consolidates everything in one place, saves time, and adds comfort and convenience.
Sand, Paint, and Finish
Clean the rough edges using sandpaper and remove dust. These areas are sanded out, making the cart feel secure and comfortable to touch. It also avoids spikes, scratches, or cuts when using the cart. Paint your home-made DIY rolling grill cart using outdoor paint or sealant. This protects your cart from rain and sun and allows everything to dry before you proceed. It also creates a protective coating that shields the cart from outdoor conditions, including sun, rain, and moisture. It also allows users to select a color that complements their patio, deck, or personal taste. This is followed by the final procedure, such as a sealant or clear coating, which provides additional protection. It renders it more problematic and more wipeable after cooking.
Mount the Grill Safely
Firstly, place a heat-resistant mat or metal sheet on the top shelf. You must set your grill on top and secure it with brackets if needed. How to build a rolling cart for your grill? Follow these instructions from your grill’s manual. Safety matters when building a rolling cart for BBQ use. If the grill isn’t mounted correctly, it could tip over while cooking, causing burns, fires, or damage to the cart. A well-mounted grill helps keep the cart in good condition, extending its life and preserving its appearance. It also helps keep surrounding surfaces and materials safe from heat damage.
You now have step-by-step instructions for building a DIY grill cart that fits your outdoor space and style!
DIY Rolling Grill Cart: Storage, Prep Space, and Personalization Ideas
The grill cart also stores tools in readily accessible locations, making grilling easier and safer. It provides an additional prep area, making it easier to fit a fold-down side table or a detachable cutting board. Personalizing your cart with a paint or stencils is a way to add style, durability,y and a distinctive touch to your cart. These modifications transform a simple grill cart into a convenient, organized, and attractive outdoor cooking station.
Adding Hooks and Utensil Holders
You want your DIY grill cart to keep your tools within easy reach. Some hooks and utensil holders will make your outdoor rolling cart for the grill more convenient. You can attach metal hooks to the side of your grill cart’s roller. You can then hang the tongs, spatulas, brushes, etc., so that you can easily pick them. Use a magnetic strip with knives. Even a small basket can be used for sauces or spices. This small input can make a massive difference in the overall cooking experience. It provides each with a place, making it easy to retrieve tools when needed and return them to their proper location. It maintains the cooking space clean and effective. The hooks and holders minimize bending, stretching, and tool movement.
Installing a Side Table or Cutting Board
An additional side table or a cutting board can provide additional food-preparation space. You can use the fold-down table attached to your rolling grill cart. Ensure it is strong, using solid hinges. A detachable cutting board is highly convenient for chopping vegetables or slicing meat. You can move it out as needed. These features would make your DIY grill cart look more like a real grill station. An inbuilt side table provides an additional surface where needed. It saves time and energy, especially when preparing meals for the family or guests. It minimizes clutter and ensures increased hygiene. The fold-down side table is handy, as it can be opened whenever needed and folded down when not in use. It is flexible, removable for cleaning or storage, and fits easily.
Personalizing with Paint or Stencils
You may be stylish using paint or stencils. Choose outdoor paint that withstands sun and rain, and consider a bright colour or pattern. You are supposed to use stencils on amusing shapes or your initials. You may even put flames or food designs. These special touches make your rolling grill cart the center of your outdoor room. You make an ordinary workout outdoors, something special. After your friends see your DIY rolling grill cart, they will want to make their own. You have just been taught how to make a rolling grill cart in your outdoor area. You thought it out, manufactured it, and gave it your own touch. You will be able to cook and entertain using your new cart.
- Check your cart often for loose screws and keep it clean for long-lasting use.
You’ll feel proud every time you fire up the grill!
Wrap Up
One can build a DIY rolling grill cart to extend the life of outdoor cooking. By designing the cart correctly, selecting appropriate materials, and following step-by-step assembly instructions, you will have a long-lasting, safe cart that fits the space. This is achieved by incorporating casters, shelves, hooks, and utensil holders into the cart to make it more mobile, organized,d and easy to use. It is also fashionable and long-lasting, which shows your character. Your grill cart on wheels can be rolled throughout the BBQ season with proper maintenance. The project is creative, functional, and convenient, and it can turn any backyard into a more improved grill.
FAQs
What can I do to ensure the weather doesn’t damage my grill cart?
Outdoor paint or a wood sealant should be used. When not in use, keep your cart under a cover or shed.
Hint: It is best to wipe down your cart after it gets wet.
Can I use any kind of grill on my cart?
Most small charcoal grills or gas grills can be used. Make sure you check the weight and size before building. Ensure your cart can support the grill and does not fill with air.
What if my cart feels wobbly?
Check all screws and bolts. Tie loosely fitting things.
Add extra brackets if needed.
Before you begin cooking, lock the wheels.
How do you wash my rolling grill cart?
Clean the surfaces with a wet cloth. Mild soap water should be used when dealing with difficult stains.
Note: Avoid harsh chemicals. They can damage paint or wood finish.


