It is essential to ensure that vinyl records sound great and last long. The most efficient way to get your records clean is through ultrasonic technology. With an ultrasonic cleaning service, you get rid of all the mold, dust, and dirt that is practically impossible to remove manually. This will clean your records without scratching them like a brush or rag would. Using an ultrasonic record cleaner protects every record, reduces surface noise, and preserves sound quality in your collection. This cleaning process, both gently and powerfully, enhances the performance of your vinyl.
- What Is Record Cleaning Ultrasonic and How It Works
- Benefits of Using Ultrasonic Cleaners for Vinyl Records
- How to Choose the Best Ultrasonic Record Cleaners
- Step-by-Step Guide to Cleaning Vinyl Records with Ultrasonic
- Common Mistakes to Avoid When Using Ultrasonic Record Cleaners
- How to Maintain Vinyl After Ultrasonic Cleaning
What Is Record Cleaning Ultrasonic and How It Works
If you want to keep your records always sounding as good as new, always keep them clean. An ultrasonic record cleaner utilizes advanced technology to clear dirt and grime from grooves too small for brushes or cloths. By utilizing sound waves and not scrubbing, traditional cleaning would likely damage the fine vinyl. This technique maintains your records in proper condition while enhancing playback quality.
How Ultrasonic Cleaning Works to Remove Dirt and Dust
Ultrasonic cleaning technology relies on water and high-frequency sound. These bubbles are carried into the grooves present on your records by these waves. When these bubbles burst, dirt, dust, and mould are lifted without harming the vinyl. Rough scrubbing is avoided, and no chemicals are used, so it is safe for all records. The procedure is accurate and strikes a target that manual cleaning cannot achieve. That is why many collectors prefer to keep their collection clean.
Cavitation Explained and How It Cleans Deep Grooves
Cavitation is the magic of ultrasonic cleaning. An ultrasonic cleaner produces sound waves that create millions of bubbles in water once powered on. When these bubbles burst, they produce powerful shock waves that help dislodge dirt trapped in the grooves. Cavitation offers a thorough clean not possible with brushes and cloths. This method not only removes the microscopic dirt that builds up on your records but also helps in conditioning your vinyl so that it does not get scratched.
Why Ultrasonic Record Cleaning Is Better Than Traditional Cleaning
Traditional cleaning methods, such as using a brush or a wet cloth does not remove the dirt from the record. In the grooves, they often leave behind dirt that can affect the quality and even scratch your vinyl over time. On the other hand, how to clean records with an ultrasonic cleaner certainly cleans dirt more effectively and carefully. Using an ultrasonic cleaning machine not only saves time and reduces the wear on your records – it also delivers consistently excellent results with each session. Your collection will look and sound better all the time.
Benefits of Using Ultrasonic Cleaners for Vinyl Records
Using ultrasonic cleaning improves sound quality and durability. By eliminating concealed dust and grime, it minimizes pops, crackles, and muffled sound, improving the clarity and detail of music. When the records are cleaned without contact with a machine, that helps in keeping the shiny, smooth surface. Also, it helps in resisting scratches and wear that could happen with the manual method. Cleaning both your vinyl and stylus on a regular basis with an ultrasonic device lets you preserve your investment and enjoy the music.
How Ultrasonic Cleaning Improves Sound Quality of Records
Soiled grooves have the ability to make music sound uninspired. The ultrasonic record cleaning procedure extracts residue from deep within the vinyl, uncovering details in the sound that may have been overlooked. Once cleaned, the music sounds brighter with less noise. People who collect records often find that old records sound clearer and fuller; thus, ultrasonic cleaning is a useful way to ensure vinyl is in good shape. Not only does it make it more stable, but it also protects it further from dirt and dust damage.
How Ultrasonic Cleaning Extends the Life and Appearance of Vinyl Records
Get ultrasonic cleaning and increase the life of your vinyls. Dust, dirt, and mold can cause irreversible damage over time. However, ultrasonic cleaning is gentle on the surface, does not scratch them, and keeps them smooth. Cleaning a record regularly ensures maintenance of its shine and shelf appearance. Purchasing the best ultrasonic record cleaning machine will help you maintain your collection in fine condition, save you dollars, and help you appreciate the sound and the look of the vinyl.
Limitations of Ultrasonic Cleaning and What to Expect
Although ultrasonic cleaning is very effective, there are limitations. Intense scratches, major warping, or serious stains may be difficult to remove. Follow the recommended cleaning timings, as over-cleaning can wear grooves. The technique is most effective when used as part of regular maintenance, rather than a solution for badly damaged records. An ultrasonic cleaner for vinyl records review of a high-quality model will guide you toward ones that balance safety, efficiency, and cleaning performance for your records.
How to Choose the Best Ultrasonic Record Cleaners

Choosing the right ultrasonic cleaner is critical to protecting your vinyl and getting results. Different machines come in different sizes; they have different cleaning abilities and features. Knowing what you need will help you choose the best ultrasonic record cleaning machine for your collection and cleaning needs. A well-chosen ultrasonic cleaner saves time and damage, so your records will sound great for years to come.
Key Features to Look for in an Ultrasonic Record Cleaner
Consider these essential factors when selecting ultrasonic cleaners. How many records you can wash at once depends on tank size, while the frequency of ultrasonic waves affects penetration and gentleness. Machines with an adjustable cleaning time can help avoid over-cleaning. Furthermore, many machines come with drying features for easy handling. Safety features protect your records and machine from damage, like the auto shut-off. A safe and effective ultrasonic record cleaning process is guaranteed if you choose a cleaner with these features.
Popular Types and Models of Ultrasonic Record Cleaners
Ultrasonic record cleaner has a different capacity and function. According to some visualization models, it cleans 10 records alternatively, one at a time. Machines may have manual buttons or digital screens for easy use. Brands like CleanerVinyl, Degritter, and HumminGuru are popular thanks to their modular designs, built-in dryers, and more. To enhance results and accelerate drying, certain collectors employ vacuum record cleaning machines. A detailed ultrasonic cleaner for vinyl records review will help you compare models to pick one suitable for your collection size and cleaning habits.
Budget Considerations and Value
Ranging from hundreds to thousands of dollars, ultrasonic record cleaners are costly. Basic models have fewer features, which means they clean effectively, while advanced machines clean faster and often have drying functions too. Think about how often you clean your records and how many you have. The best ultrasonic record cleaning machine of a higher end will save you time, save your records, and sound better overall. To get the best value for your money, compare features, starter kits, and cleaning solutions before buying.
Step-by-Step Guide to Cleaning Vinyl Records with Ultrasonic
For ultrasonic cleaning to be successful, it needs equipment to be set up and handled correctly. Using a methodical process makes certain that your documents are safeguarded, properly cleaned, and allowed to dry. Knowing how to clean records with ultrasonic cleaner techniques will not only protect the lifespan of your collection but also enhance playback.
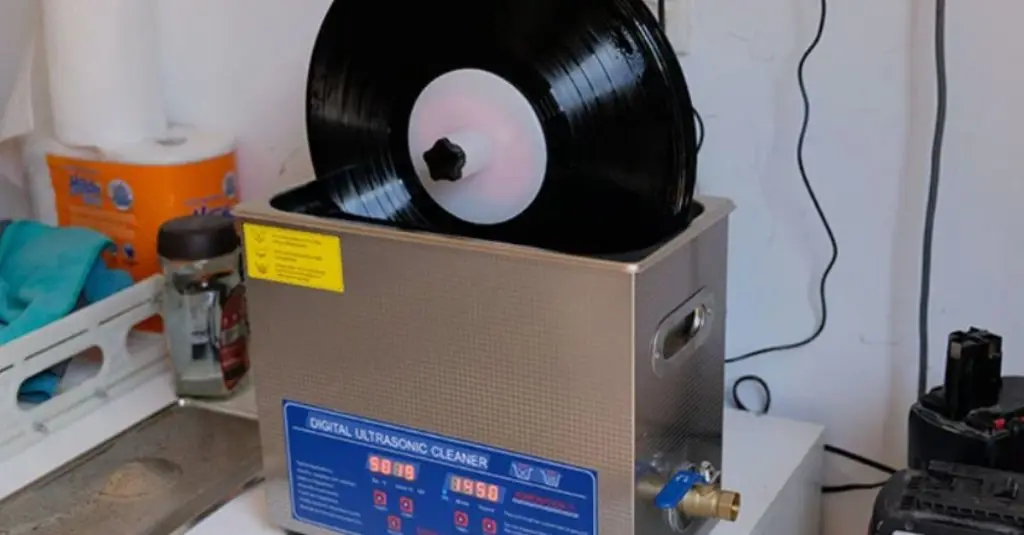
Setting Up Your Ultrasonic Cleaner
Choose a stable flat surface and place the ultrasonic cleaner. Fill the tank with distilled water and, if you want to, add a drop of cleaning solution that’s safe for vinyl. Make sure that the water touches the grooves and not the label. Choose the cleaning time normally between 5 and 10 minutes per record. Do not forget to follow the manufacturer’s instructions, as each model has its own method for ultrasonic record cleaning.
Safe Cleaning Practices for Vinyl Records
Ultrasonic cleaning can damage manuscripts not handled properly. When handling a record, always touch the edges and be careful to avoid touching the grooves. Finger grease can get transferred into the grooves, which can deteriorate sound quality and make the record sound bad. To prevent scratches, pre-brushing dust that is loose dust and cleaning only with vinyl-safe solutions. Use the recommended ultrasonic frequency to provide gentle but deep cleaning. While the machine is in use, ensure the water bath is clean so that your record cleaning ultrasonic process works optimally and your records are not damaged.
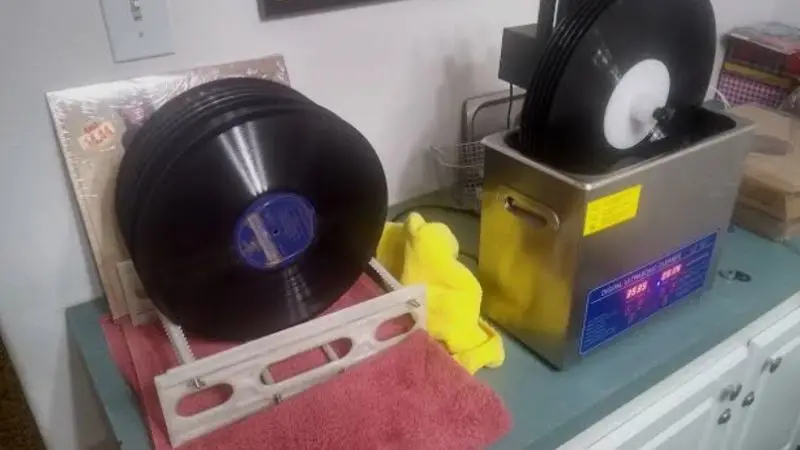
Post-Cleaning Handling and Storage
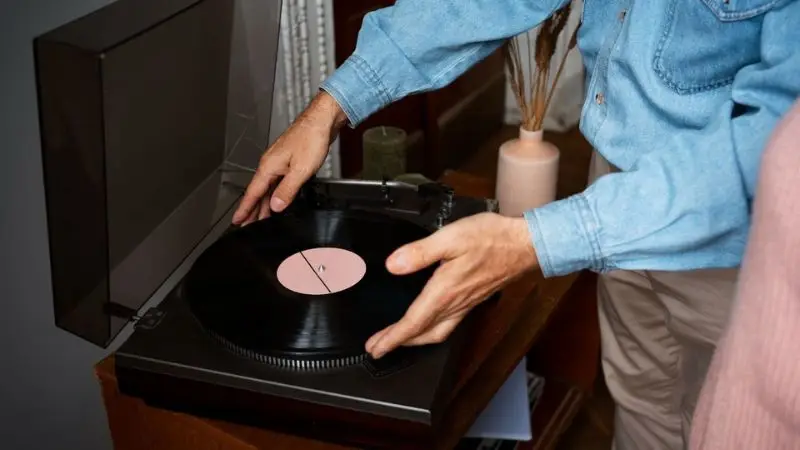
Once you clean the records, lift them by the edges and place them on a rack to dry. A lint-free cloth can help speed drying, but be sure that no moisture remains before playing or putting away. Avoid stacking records flat, as this can distort your records over time. Store them in clean sleeves standing upright. By cleaning your stylus prior to playback, you prevent adding dust back into your freshly cleaned grooves. To ensure consistent performance in your next usage, make sure to empty and dry the tank after using your ultrasonic cleaner. How you handle your records after cleaning will directly affect the benefits that your records may receive from the ultrasonic cleaning process.
Maintaining a Routine Cleaning Workflow
Ultrasonically cleaned with the right approach are always safe. Get your vinyl cleaner ready with distilled water and a vinyl-safe solution. Use the brush to wipe off the loose dust on the vinyl. Place the records securely in the vinyl cleaner and start the cleaning cycle. Let the vinyl air dry after the process takes place. Safely store your records and clean your stylus for the best playback. By taking these steps, cleaning records with an ultrasonic cleaner is an easy and reliable way to preserve your collection. Ultrasonic cleaning routinely helps to remove dirt you can’t see, prevents scratching, and keeps records looking and sounding their best.
Common Mistakes to Avoid When Using Ultrasonic Record Cleaners
While ultrasonic record cleaning can be effective, mistakes can lessen the results or damage your vinyl. It is smart to know the common errors to protect your records and enhance the ultrasonic cleaner performance. To keep your machine sounding and working well for many years to come, avoid skipping any preparation steps, using the wrong settings for the cycle, over-cleaning, or anything that can cause damage.
Skipping Pre-Brushing Before Ultrasonic Cleaning
Many collectors mistakenly believe the ultrasonic process cleans everything. If you don’t pre-brush your record, you will run the risk of dirt scratching the grooves when cleaning. A soft brush should always be swept across the record’s surface gently before ultrasonic record cleaning. Before toothpaste can be applied, the unit will remove larger particles to help the ultrasonic bubbles work their magic. This is better than just pushing particles deeper into the grooves. By doing this, you protect your vinyl as well as clean better.
Using Incorrect Settings or Solutions
Ultrasonic cleaners have different frequencies and times, so if you get them wrong, you can damage your records. When playing records, low frequencies don’t clean the grooves sufficiently, and high frequencies can damage vinyl. If you use a product other than the one specified for vinyl, make sure it does not contain any harsh chemicals. Essential points to follow:
- Adjust the ultrasonic frequency based on your cleaner’s manual.
- Use cleaning solutions safe for vinyl
- Stick to the recommended cycle times for each record.
Making use of appropriate settings makes ultrasonic record cleaning safe and prevents any unwanted damage.
Risks of Over-Cleaning Records
Ultrasonic cleaning is powerful, and too much cleaning will wear down vinyl grooves and make them sound worse. Only clean records if they are dirty or the playback is compromised. There is no gain from over-cleaning, but it can shorten the life of your collection. Things you can do include
- Only clean when it is needed after every play.
- According to the manufacturer, limit the cycle duration for each record.
- Put cleaned records in protective sleeves to prevent dust.
Maintaining a cleaning schedule preserves the quality of sound and the component itself.
How to Maintain Vinyl After Ultrasonic Cleaning
Equally as important as cleaning, storing, and handling matters, too. Protecting your collection with good habits improves record life.
How to Store and Handle Them?
To protect vinyl records.
- Store records at an upright position on solid shelves. Never stack them flat, as that will warp them.
- When you handle the records, always use the edge, not the grooves.
- Use clean inner sleeves; replace old or damaged sleeves.
- Store records away from heat, bright light, and moisture
With proper handling and storage, a vinyl disc will remain shiny, clean, and playable for decades.
Set Up Routine Cleaning Schedule
Regularly clean the tools for the best sound quality and to ensure they do not get damaged in the long run. You can use your ultrasonic cleaner to perform a super clean, and a soft brush for light dusting. A suggested schedule.
- Use your ultrasonic cleaner for deep cleaning every 10 to 20 plays.
- Prior to each play, lightly dust removal with a soft brush.
- It is replaced as necessary for adequate protection.
By understanding the cleaning interval, you are able to maintain your collection without over-cleaning.
Maintaining Your Ultrasonic Cleaner
Ultrasonic cleaners require proper maintenance for long-term use. At the end of a session.
- Make the tank empty and dry.
- Clear the hue or dust off.
- Give the tank a rinse with distilled water only.
- Check the recording medium and spindle for debris.
- Change filters or parts as suggested.
Regular maintenance of your ultrasonic cleaner will keep it working efficiently, allowing you to safely and effectively how to clean records with ultrasonic cleaner every time you use it as intended. Taking care of your machine will protect your records.
Wrap Up
Ultrasonic cleaning is a safe, effective, and full cleaning method for your records. By utilizing ultrasonic technology for record cleaning, you can eliminate dirt, dust, debris, and grime. By selecting the most effective ultrasonic record cleaning machine and properly preparing, cleaning, and performing post-cleaning steps, your records will sound amazing! Key takeaways: Don’t miss the pre-brushing, clean more than necessary, and stay consistent. Your record will look and sound its best for years to come with proper handling, storage, and maintenance. Ultrasonic cleaning allows old records to sound new again.
FAQs
How often do you use an ultrasonic cleaner on your vinyl records?
Clean your records every 10 to 20 plays maximum. If you see dust or hear noise, clean them sooner. Cleaning your records regularly will keep them sounding clear.
Does ultrasonic cleaning damage your records?
You can use ultrasonic cleaning safely if you follow the guides. Avoid using harsh solutions or using long cycles. Utilize distilled water and appropriate settings for your equipment.
Is a special Cleaning Solution Recommended for Ultrasonic Cleaners?
Although only distilled water can be used, a vinyl-safe cleaning solution helps remove stubborn dirt. Avoid using domestic cleansers. They can do damage to your files.
Is it possible to clean many records?
Some ultrasonic cleaners allow simultaneous cleaning of multiple records at once. Refer to your machine’s manual. While cleaning, ensure that records are not touching each other.