
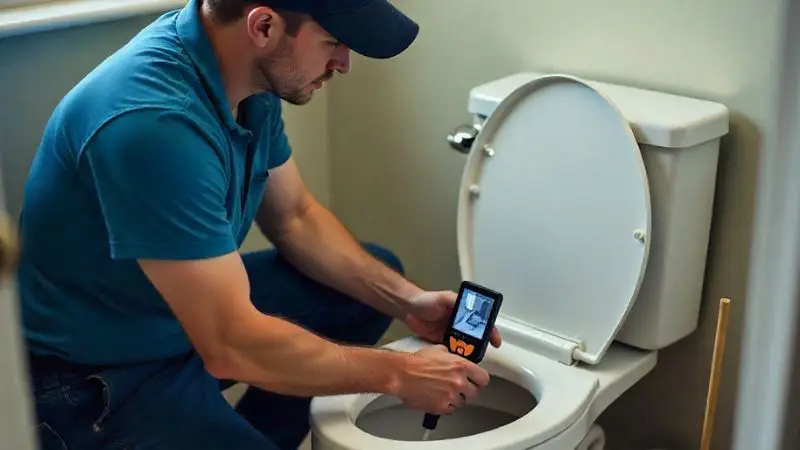
Checking your pipes doesn’t have to be hard. With a plumbing inspection camera, you can see inside your pipes clearly without guesswork. Simply guide the camera through the pipe and watch the screen to spot clogs, leaks, or damage. Even if you’ve never done this before, it’s simple to learn. Just follow a few easy steps, take your time, and you’ll know exactly what’s happening in your plumbing. Using this tool saves you time, prevents costly repairs, and gives you the confidence to handle small plumbing issues like a professional.
What Is a Plumbing Inspection Camera?
A plumbing inspection camera for clogged drains is a tool that lets you see inside your pipes without taking them apart. You can use it to check for clogs, cracks, leaks, or even tree roots. The camera comes with a long, flexible cable and a small camera at the end. Simply push the cable into the pipe and watch the live video on the screen. This tool saves time and helps you understand exactly what’s wrong with your plumbing.
Using a camera means no guessing, no guesswork, and less risk of making costly mistakes. Whether you’re a homeowner or a professional, the best plumbing inspection camera for home use can make inspections simple and accurate.
Key Features of a Plumbing Inspection Camera
When you look at a plumbing camera for clogged drains, you’ll notice some helpful features that make inspections easy:
- Flexible Cable: Bends and twists to fit through tight or curved pipes.
- LED Lights: Bright lights help you see clearly inside dark pipes.
- Waterproof Design: Safe to use even in wet conditions.
- High-Resolution Screen: Shows a clear picture of what’s happening inside your pipes.
- Recording Option: Some cameras let you save videos or take photos for future reference.
For larger drains, an affordable sewer inspection camera for plumbers often has a longer, stronger cable and a durable design.
Main Uses of a Plumbing Inspection Camera
The best plumbing inspection camera for home use can be used for many tasks around your home. Here are some common ways to use it:
- Find Blockages: Spot clogs or buildup slowing down your drains.
- Check for Damage: Detect cracks, leaks, or broken pipe sections.
- Locate Tree Roots: See if roots have grown into your sewer line.
- Inspect Before Repairs: Understand the problem before calling a plumber.
- Routine Maintenance: Keep your pipes in good shape with regular inspections.
Using a plumbing inspection camera approach is simple: push the camera into the pipe, watch the screen, and identify any issues. You don’t need special skills to start. Following a few basic steps is enough to inspect your pipes like a pro.
Preparation Steps Before Using a Plumbing Inspection Camera
Before you start inspecting your pipes, it’s important to get ready. Proper preparation saves time and prevents mistakes. Whether you are a homeowner or a plumber, following these steps makes your work easier and more accurate. Using the best plumbing inspection camera for home use or an affordable sewer inspection camera for plumbers is simple if you prepare properly. Let’s go step by step.
Gather Your Equipment
Having the right tools ready makes your inspection faster. You don’t want to stop halfway because you forgot something. Here’s what you need:
- Fully charged pipe inspection camera or sewer inspection camera
- Gloves (disposable or rubber)
- Safety glasses
- Flashlight
- Towel or wipes to clean spills
- Notebook or phone to take notes
- Extra batteries or a charger if your camera needs them
Lay everything near your work area. For small pipes, a plumbing camera for clogged drains works best. For larger pipes, an affordable sewer inspection camera for plumbers is better. Picking the right tool makes the job easier.
Check Your Pipe Inspection Camera
Before inspecting, check your equipment carefully. This ensures that your “how to use a plumbing inspection camera“ process is smooth.
- Power and Battery: Turn on your camera and check the battery. Charge it if needed.
- Cable Check: Look for cracks or damage. A broken cable makes the inspection difficult.
- LED Lights: Test the lights to see if they shine bright inside dark pipes.
- Screen and Recording: Make sure the screen shows a clear picture. If your camera records, check the memory space.
Checking your best plumbing inspection camera for home use before you start saves time and avoids frustration later.
Set Up Your Workspace
A clear workspace makes inspections safe and simple.
- Move anything that could get in your way.
- Place a towel under the pipe opening to catch drips.
- Keep your plumbing camera for clogged drains within reach.
Spending a few minutes preparing your affordable sewer inspection camera for plumbers gives confidence. You can focus on spotting clogs, cracks, and tree roots without distractions. A tidy workspace makes your inspection smooth, fast, and safe.
Safety Tips for Using a Plumbing Inspection Camera
Safety should always come first when inspecting pipes. Using the best plumbing inspection camera for home use or a plumbing camera for clogged drains can be simple and safe if you follow the right steps. Protecting yourself prevents accidents, keeps your workspace clean, and ensures your equipment lasts longer.
Personal Protection
Before starting, protect yourself from germs, dirty water, and sharp edges. Wearing the right gear makes inspections safer and easier.
- Gloves (disposable or rubber) for grip and hygiene
- Safety glasses to protect your eyes from splashes or debris
- Old clothes or coveralls to avoid stains
- Closed-toe shoes to protect your feet
If you use a sewer inspection camera for plumbers outside, wear boots. Mud and water can get messy fast. Even small jobs with a drain camera can surprise you. Following these steps keeps you safe and your workspace clean.
Safe Handling of Your Camera
Using your camera carefully protects both you and your equipment. The cable is flexible, but forcing it can cause damage. Always guide how-to-use-a-plumbing-inspection-camera slowly into the pipe.
- Insert the camera gently.
- Avoid pushing hard against blockages.
- Use both hands to control the cable.
- Keep the camera dry when not in use.
Watch the LED lights and screen as you go. Adjust slowly around bends or obstacles. Careful handling helps your plumbing camera for clogged drains last longer and gives clearer images. You’ll feel confident every time you inspect your pipes.
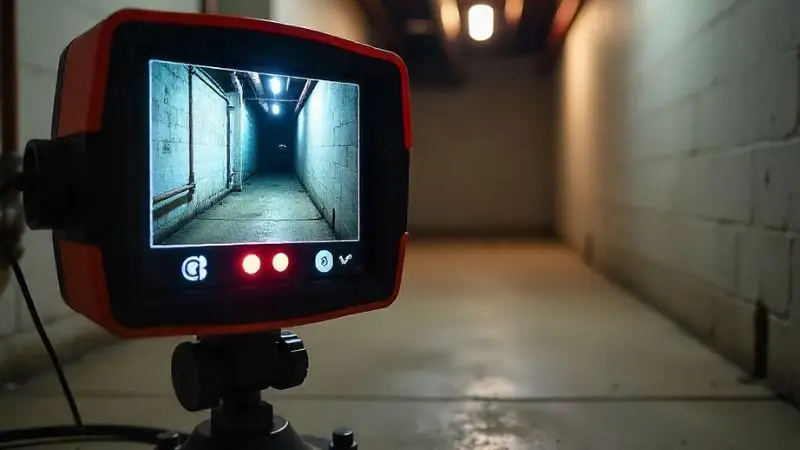
Using the Drain Inspection Camera
After preparing your tools and workspace, it’s time to inspect your pipes. Using the best plumbing inspection camera for home use helps you find clogs, cracks, or roots quickly. Moving slowly and watching the screen carefully is important. Following the steps correctly keeps your equipment safe and gives clear results.
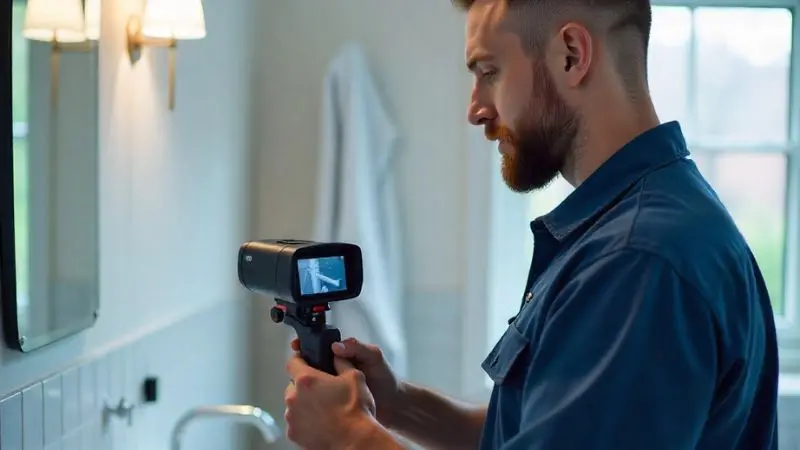
Inserting the Camera
Stand near the pipe opening and hold your pipe inspection camera with both hands. Slowly push the camera head into the pipe. Don’t force it. If you feel resistance, pull back a little and try again. Most drain inspection cameras have flexible cables that move through bends easily.
For larger pipes, a sewer inspection camera has a thicker cable for stability. Keep your eyes on the screen while inserting. Watching the live video ensures the camera moves smoothly and does not get stuck. Moving carefully protects the camera and gives accurate results.
Navigating and Observing
Once the camera is inside, turn on the LED lights if your plumbing camera for clogged drains has them. The lights help you see clearly in dark pipes. Move the camera slowly and watch the screen. You may see water, buildup, or small objects. Look for clogs, cracks, leaks, or roots.
Stop if you feel resistance. Adjust your angle and continue slowly. Watching carefully helps you spot problems early. Moving too fast can damage the cable and reduce visibility. Patience ensures you inspect every part of the pipe effectively.
Recording Findings
As you inspect, record what you see if your model of how to use a plumbing inspection camera allows it. Most cameras let you save videos or take photos. Recording helps you review problems later or share information with a plumber. Watch the screen and capture images of any clogs, cracks, or roots. Move slowly while recording to avoid blurry images.
Keeping a clear record ensures you understand pipe issues. Using your best plumbing inspection camera for home use this way makes fixing problems easier. It also helps prevent future damage and keeps your plumbing in good shape.
Review and Maintenance
After inspecting your pipes with the best plumbing inspection camera for home use, it’s important to review your results and take care of your equipment. This step helps you understand problems clearly and keeps your camera working for future use. Regular maintenance ensures you get accurate inspections every time.
Reviewing Your Results
After finishing the inspection, watch the video you recorded on how to use a plumbing inspection camera carefully. Look for clogs, cracks, leaks, or roots. Pause when you notice something unusual. Note the location and problem so you know what needs fixing. If you inspect a sewer line, pay attention to larger blockages or damaged areas.
Here are some simple steps to follow:
- Watch the footage from start to finish.
- Pause at each problem area.
- Write down what you see and where it is.
- Use your notes to plan the next steps.
Reviewing carefully helps you decide whether you can clear a clog yourself or call a plumber.
Cleaning Your Pipe Camera
Keeping your plumbing camera for clogged drains clean helps it last longer and work better. Start by wiping the camera head and cable with a damp cloth to remove dirt or debris. If the pipe is very dirty, rinse gently with warm water. Dry everything completely before storing it.
Follow these steps for proper cleaning:
- Unplug the camera and turn it off.
- Wipe the cable and lens with a soft cloth.
- Check for any damage or wear.
- Store the camera in a dry place.
Regular cleaning and careful storage of your affordable sewer inspection camera for plumbers ensures it’s ready for your next inspection and keeps it working like new.
Wrap Up
Using the best plumbing inspection camera for home use makes checking your pipes simple and effective. With a plumbing camera for clogged drains, you can spot blockages, cracks, leaks, and roots without guesswork. Following the steps carefully, moving slowly, and watching the screen helps you find problems early.
After inspecting and reviewing your results, keeping your camera clean ensures it works well for the future. Whether you use an affordable sewer inspection camera for plumbers or a smaller home model, regular use saves time, prevents costly repairs, and keeps your plumbing in great shape. Start inspecting today with confidence.
FAQ
How do you know if your plumbing camera is working correctly?
Turn on your plumbing camera and check the screen for a clear image. Test the LED lights. Make sure the cable moves smoothly. If you see any problems, fix them before starting your inspection.
Can you use sewer inspection cameras for all types of pipes?
You can use sewer inspection cameras for most pipes, especially larger drains and sewer lines. For smaller pipes, pick a camera with a thinner cable. Always check the camera size before you begin.
What should you look for during plumbing inspections?
Watch for clogs, cracks, leaks, and tree roots. Use your sewer camera to spot buildup or damage. Take notes and record video if you find anything unusual. This helps you fix problems faster.
How often should you inspect your pipes?
You should inspect your pipes once a year. If you notice slow drains or bad smells, use your plumbing camera sooner. Regular checks help you catch issues early and keep your plumbing in good shape.
Can you fix problems you find with a sewer camera?
You can clear small clogs or debris yourself. For big cracks or roots, call a plumber. Your sewer camera helps you show the plumber exactly where the problem is.


