
A smooth, even lawn not only looks excellent but also makes mowing and outdoor activities more enjoyable. However, bumps and dips can leave your yard looking uneven and difficult to maintain. Many homeowners feel stuck, unsure where to begin or what tools to use.
In this blog, you’ll learn how to level a lawn with a rake by using a lawn leveling rake and the correct technique. With a little prep and patience, you can achieve a clean, professional-looking lawn—no expert help needed.
Preparation
Mow and Water
Start by mowing your grass short. This step helps you see the bumps and dips more clearly. Brief grass also allows the leveling mix to reach the soil more effectively. After mowing, lightly water your lawn. Moist soil makes it easier to level a lawn because it moves and settles without turning into mud. Avoid soaking the ground. You want the soil damp, not soggy. The best lawn leveling rake for uneven yard helps smooth the surface evenly.
Tip: Mowing and watering the day before gives the soil time to settle, making leveling easier and less messy.
Mark High and Low Spots
Walk around your yard and search for uneven spots. Some areas feel bumpy under your feet, while others dip down. Use small flags, sticks, or even stones to mark these spots. This step helps you remember where to focus when you start leveling. If you want, use a longboard or a string to check for low spots. Lay the board flat on the ground and look for gaps underneath. These gaps show you where you need to add more leveling mix, which is part of how to level a lawn with a rake.
Gather Tools
Before you begin, gather all the necessary materials. Here’s a quick checklist:
- Lawn leveling rake (the primary tool for this job)
- Leveling mix (sand, topsoil, or compost)
- A shovel or a wheelbarrow for moving material
- Gloves to protect your hands
- Markers for high and low spots
Having your tools ready saves time and keeps you focused. When you have everything on hand, you can level a lawn without stopping to search for missing items. A DIY lawn leveling rake guide can also help you follow the proper steps and fix an uneven lawn with less stress.
Choose Tools
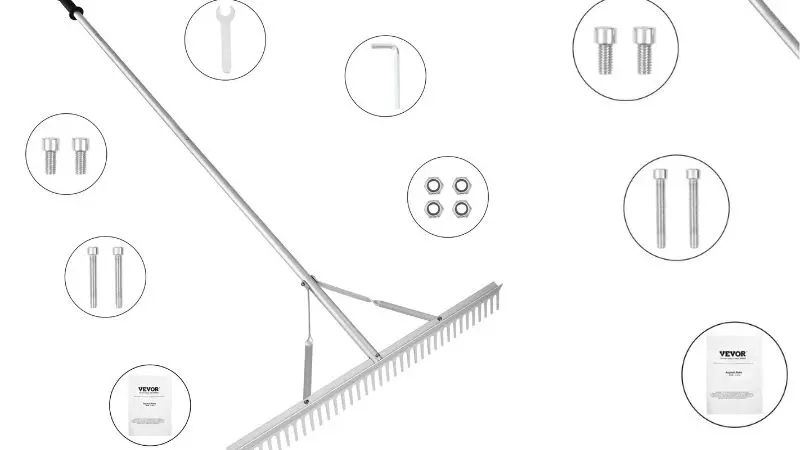
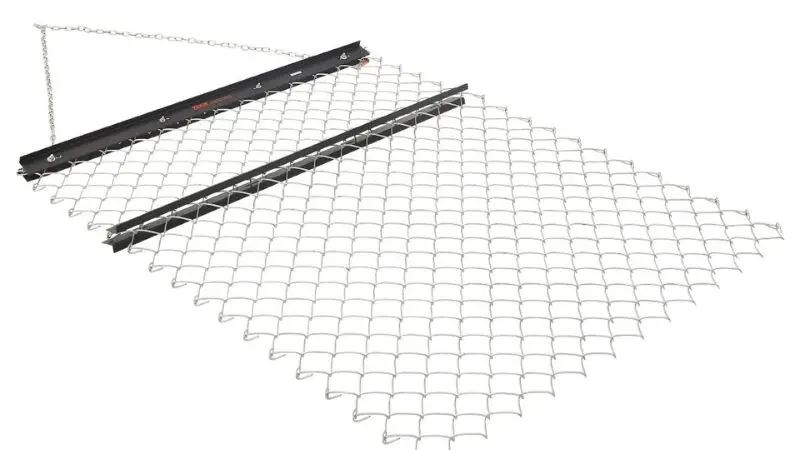
Lawn Leveling Rake Types
When it comes to choosing the right tool, you have a few options. The most typical kind features a broad, flat head with a few bars or slats. This shape makes it simple to scatter dirt or sand evenly over your yard. Some rakes feature adjustable handles, making the task easier if you’re tall or need to reach distant areas.
You could also see rakes made of aluminum or stainless steel. Aluminium offers easy maneuverability, while stainless steel versions last longer and can withstand heavy use. A smaller rake works well if your yard is small. A wider rake saves you time on bigger lawns.
Tip: When you’re in the store, try holding a few rakes. Choose one that you can easily handle and feel good in.
Materials for leveling
To fill in poor spots and make your lawn smooth, you need the correct mix. Most people typically use a mix of sand, topsoil, and compost. Sand helps water drain and keeps the ground level. Topsoil helps your grass grow back strong by giving it the nutrients it needs. Compost provides even more nutrients and helps maintain healthy soil.
You can either buy leveling material that has already been blended or mix your own at home. A little covering of sand or dirt works nicely for tiny bumps. Use a combination with extra compost for deeper dips, and focus on top dressing lawn with leveling rake for best results.
| Material | Best For | Extra Benefit |
| Sand | Drainage, smoothing | Easy to spread |
| Topsoil | Grass growth | Holds moisture |
| Compost | Nutrients | Improves soil health |
Other Equipment
Besides your DIY lawn leveling rake guide and leveling mix, you will also need a few additional tools. A shovel helps you move the material where you need it. A wheelbarrow makes it easy to carry heavy loads across your yard. Gloves protect your hands from blisters and dirt. You can use a garden hose to water the area after you finish. Some people like to use a push broom to help spread the mix in tight spots. Having all your tools ready before you start makes the leveling process go much smoother.
How to Level a Lawn

Spread Leveling Mix
Start by spreading your leveling mix over the low spots you marked earlier. Use a shovel or your hands to drop small piles of mix onto these areas. You do not want to dump too much at once. Keep the layer thin—about half an inch thick. If you add too much, the grass may struggle to grow through it. This method is essential when top dressing lawn with a leveling rake to ensure healthy grass growth.
Tip: Thin layers work best. You can always add more later if needed.
Work in small sections. It helps you control the amount of mix and makes it easier to see your progress. If you want to level a lawn the right way, patience is key. Take your time and check your work as you go.
Compact Low Spots
After you spread the mix, you need to compact it. Use your feet to gently press down on the low spots. You can also use the flat side of a shovel. Compacting helps the mix settle into the soil and prevents future bumps from occurring. If you skip this step, the ground might sink later, and you will have to level the lawn again.
Following a DIY lawn leveling rake guide can also help smooth the surface before and after compacting. Stroll over the area. Step lightly to avoid damaging the grass. Leveling a yard takes effort, but you do not want to rush.
Use Lawn Leveling Rake
Now, grab your tool. Hold it with both hands and stand behind the area you want to smooth. Pull it toward you, then push it away. The broad head spreads the mix evenly and fills in the dips. If you notice extra mix building up, transfer it to another location.
Note: Learning how to level a lawn with a rake helps you use the correct technique for even coverage and fewer repeat fixes later.
Keep your passes gentle. Let the weight of the rake do most of the work. If you press too hard, you might dig into the soil or pull up grass.
Criss-Cross Pattern
For the best results, use a criss-cross pattern. First, rake the lawn with a leveling rake in one direction, like north to south. Then, go over the same area from east to west. This pattern helps you cover every spot and blend the mix into the grass.
- Overlap your passes to ensure you don’t miss any areas.
- Check for bumps or dips as you go.
- Add more mix if you see low spots, then rake again.
Pro Tip: Criss-cross raking gives your lawn a smooth, even look. It also helps the leveling mix settle better.
To learn how to level a lawn like a pro, follow these steps. Work slowly, using thin layers, and take breaks when needed. Soon, you will see your yard transform.
Aftercare
Water and Fertilize
After you finish leveling, your lawn needs a little extra care. Give the area a thorough watering. It helps the soil settle and supports your grass as it recovers. Water thoroughly, but avoid flooding the yard. You want the soil moist, not soggy. If you see dry spots, use a hose to give them a gentle soak. Before watering, follow a DIY lawn-leveling rake guide to smooth out any remaining uneven spots.
Fertilizer can help your grass recover more quickly. Select a balanced lawn fertiliser and follow the instructions on the label. Spread it evenly over the leveled area. This provides your grass with the nutrients it needs to grow strong and healthy.
Tip: Water in the morning or evening. This technique keeps the sun from drying out your lawn too quickly.
Monitor and Repeat

Over the next few weeks, keep a close watch on your lawn. Watch for new bumps or dips as the soil settles. Occasionally, you may need to add a bit of leveling mix to low spots. If you notice grass struggling to grow through the new soil, provide it with more water and a small amount of fertilizer. When top dressing your lawn with leveling rake, be sure to spread the mix smoothly and evenly to avoid further unevenness.
You may need to level a lawn more than once, especially if your yard has numerous uneven areas. Most people check their lawns every spring and fall. Minor touch-ups keep your yard looking smooth all year.
- Check for uneven spots after heavy rain.
- Fill in dips as soon as you notice them.
- Stay patient—great lawns take time!
Common Mistakes
Many people make the same mistakes when leveling their lawns. Here are a few to watch out for:
| Mistake | How to Avoid It |
| Adding too much mix | Use thin layers each time |
| Skipping watering | Always water after leveling |
| Ignoring low spots | Mark and fill all dips |
| Rushing the process | Take your time and check often |
Remember, patience pays off. If you avoid these mistakes, your lawn will stay smooth and healthy.
Conclusion
You now know how to use a lawn leveling rake for a smooth, healthy yard. Here’s a quick recap:
- Mow and water your lawn.
- Mark high and low spots.
- Gather your tools and leveling mix.
- Spread, compact, and rake in a criss-cross pattern.
- Water, fertilize, and check your progress.
Anyone can get outstanding results with a bit of patience and practice. Stick with it, and you’ll enjoy a lawn that feels amazing under your feet!
FAQ
How often should you level your lawn?
You should check your lawn every spring and fall, and if you see bumps or dips, level those spots with a lawn-leveling rake. Most lawns only need a complete leveling once a year.
Can you use just sand to level your lawn?
Sand works for minor bumps, but mixing it with topsoil and compost helps your grass grow better. Pure sand can dry out your lawn and cause problems.
Will a lawn levelling rake damage your grass?
If you use gentle passes and thin layers, your grass will stay safe. Heavy raking or thick layers can hurt the grass. Take your time and check your work as you go.
What if you see new bumps after levelling?
- Add a little more leveling mix to those spots.
- Rake gently to smooth them out.
- Water the area to help the soil settle.
Sometimes, lawns settle unevenly. Touch-ups keep your yard looking great!


