
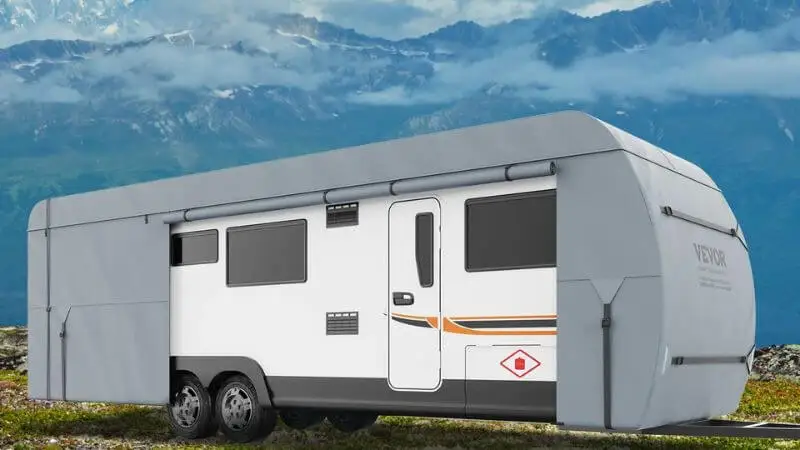
Winterizing your camper helps keep it safe when the temperature drops. You protect pipes and systems from freezing by using a winterizing checklist. Many beginners worry about how to winterize a camper, but it can be done with simple steps. Winterizing an RV may seem daunting, but with the right plans and a comprehensive checklist, it’s a straightforward process. Winterizing an RV means draining water, using antifreeze, and sealing your camper.
When you know how to winterize a camper, you avoid expensive repairs. Adequate winterization allows you to use your camper again in the spring. Preparing for winterization is critical. If you’re eager to learn how to winterize your RV, follow this step-by-step guide for your camper.
When to Winterize Your RV
Why Timing Matters
You may wonder when to start winterizing your RV. Timing makes a big difference. If you wait too long, cold weather can catch you off guard. The water inside your camper can freeze, causing pipes to burst. That leads to expensive repairs. You want to protect your camper before the first freeze hits. Most people choose to winterize an RV in the fall. It gives you plenty of time to get ready before winter arrives. If you’re unsure where to start, learning how to winterize a travel trailer can help you take the necessary steps early on. Knowing how to winterize a camper enables you to avoid last-minute stress and anxiety.
Tip: Check the weather forecast for your area. If you see freezing temperatures coming, it’s time to act fast.
Signs It’s Time to Start
You don’t have to guess how to winterize a camper or when to do it. Look for these signs:
- Nighttime temperatures drop close to or below 32°F (0°C)
- You plan to store your camper for more than a few weeks
- You notice frost on the ground in the morning
- Campgrounds start to close for the season
If you notice any of these signs, prepare to winterize your RV. Don’t wait for a severe freeze. It’s better to be early than too late. Whether you’re preparing a travel trailer or learning how to winterize a fifth wheel camper, timing matters. Knowing how to winterize a camper properly can save you from costly repairs down the road.
Supplies for Winterizing a Camper
You need to get the right supplies before you start. If you forget something, you might have to stop in the middle. Learning how to winterize a pop-up camper begins with good preparation. Let’s review the items you need to simplify the winterizing process.
Essential Tools and Materials
You only need a few things to begin. Here are the tools required for how to winterize a camper:
- Non-toxic RV antifreeze (it is usually pink)
- Water heater bypass kit (if your camper does not have one)
- A water pump converter kit or a hand pump
- Basic hand tools (like screwdrivers and pliers)
- Gloves to keep your hands safe
- Buckets for catching water
- Flashlight for dark places
- Owner’s manual for your camper
Tip: Always use non-toxic RV antifreeze. Do not use car antifreeze in your camper’s plumbing.
You can buy these items at RV stores or online. These basic supplies are essential for learning how to properly winterize a camper. Check your owner’s manual to see if you need special tools for your camper.
Optional Items for Easier Winterizing
When learning how to winterize a camper, using a few optional tools can make the process faster and easier.
- Air compressor with a blow-out plug (for blowing out water lines)
- Tank cleaning wand for cleaning black and grey tanks
- Funnel for pouring antifreeze into drains
- Water pressure regulator to protect your pipes
- Sealant for fixing small leaks or cracks
Here is a table to help you decide what to add:
| Item | Usefulness |
| Air compressor | Blows out lines |
| Tank cleaning wand | Cleans tanks |
| Funnel | Easy pouring |
| Water pressure regulator | Protects pipes |
| Sealant | Seals leaks |
Having the right tools on hand is extremely helpful when determining how to properly winterize a camper. You will feel more ready and complete the job more quickly.
Winterizing an RV may sound intimidating, but it’s a straightforward process if you follow a step-by-step guide. Let’s walk through the process of winterizing a camper so you don’t miss anything important. These steps to winterize will help you protect your camper and get it ready for cold weather.
Turn Off the Power and Remove Batteries
A critical step in winterizing a camper is turning off all power sources. Start by turning off all power sources in your camper. Unplug from shore power and switch off the main breaker. Remove the batteries from your RV and store them in a dry, well-ventilated area. It keeps them from freezing and losing charge.
Tip: Label your batteries and cables so you remember where everything goes in the spring.
Remove Water Filters
Next, remove any water filters from your camper. If you leave them in, adding antifreeze or blowing out your water lines can damage or crack them. Store the filters inside your house for the winter. Cleaning the filters is a key step in winterizing a camper effectively.
Drain Water Tanks and Heater
Now it’s time to drain your RV. Open the valves and drain the freshwater and wastewater tanks. Ensure you drain and flush the black and gray water tanks. Use a tank cleaning wand if you have one. After that, drain the water heater. Let it cool first, then open the plug and pressure relief valve. This step keeps water from freezing and causing damage. Draining your tanks and water heater is a crucial part of how to winterize a camper.
Always check your owner’s manual for special instructions before you drain the water heater.
Open Faucets and Low-Point Drains
Go through your camper and open all faucets, including the shower and toilet. Don’t forget the outside shower if you have one. Open the low-point drains under your RV. This action lets water flow out of the pipes. Leave the faucets and drains open until you finish the next steps. This step plays a key role in how to winterize a camper and prevent trapped water from causing damage.
Blow Out Water Lines
If you want extra protection, blow out your water lines. Use an air compressor with a blow-out plug. Set the pressure to 30-40 PSI. Attach the plug to the city water inlet and blow out your water lines. Move through each faucet and fixture, allowing air to push out any remaining water. This step helps prevent pipes from freezing and bursting. It’s a popular method used to winterize a camper and adds an extra layer of protection.
Note: Some people skip this step, but it adds peace of mind.
Bypass Water Heater
Before you add antifreeze, bypass the water heater. Most campers have a bypass valve. Turn it so that antifreeze does not enter the heater. If your camper does not have a bypass, you can install a kit. This procedure saves you money because you won’t need to fill the whole heater with antifreeze. This step is part of how to winterize a camper and prevents frozen pipes.
Add Antifreeze to RV Plumbing
Now you’re ready to introduce antifreeze. Use only non-toxic RV antifreeze, usually pink in color. You need at least two gallons for most campers. Use a water pump kit or hand pump to push antifreeze through the plumbing, starting with the faucet closest to the pump. Run each faucet until you see pink antifreeze come out. Don’t forget the shower, toilet, and any outside faucets. Adding antifreeze like this is a significant part of how to winterize a camper and protect it from winter damage.
Alert: Never use car antifreeze. Only use RV-safe antifreeze for your plumbing.
Pour Antifreeze into the Drains
After adding antifreeze to the pipes, pour a small amount into each drain. This includes the kitchen sink, bathroom sink, shower, and toilet. This step protects the traps and keeps water from freezing in the drains. Ensure you pour enough to fill the traps, typically about a cup per drain.
Pro Tip: Double-check that all faucets and drains are closed when you finish.
Here’s a quick checklist for you on how to winterize a camper step by step:
- Turn off the power and remove the batteries
- Remove water filters
- Drain and flush all tanks
- Drain the water heater
- Open faucets and low-point drains
- Blow out your water lines
- Bypass the water heater
- Add antifreeze to the RV plumbing
- Pour antifreeze into all drains
- Close all faucets and drains
Winterize Your RV: Interior & Exterior Prep
Clean and Seal Exterior
Start by giving your camper a thorough wash. Dirt and grime can cause damage if left all winter. Check the roof, windows, and doors for cracks or gaps. Seal any openings to prevent leaks and pests. Fix any loose caulking, clean, and dry the awning before rolling it up. Cover your camper with a breathable RV cover for extra protection. These exterior tasks are just as important when planning how to winterize a camper properly.
Tip: Walk around your camper with a flashlight. You might spot small holes or cracks you missed in daylight.
Prep Interior for Storage
Inside your camper, remove all food and anything that can spoil. Clean the fridge and keep the door open to prevent mold growth. Wipe down counters, tables, and floors. Remove bedding and towels to keep them fresh and clean. Open cabinets for airflow and place moisture absorbers to prevent dampness. Set out a few mouse traps or repellents to keep pests away during winter storage. These are all crucial steps when learning how to winterize a camper for storage and avoid costly damage during the off-season.
Storage Tips
Pick a safe spot for winter storage. Try to park your camper on a level surface. Choose a covered area or use a sturdy RV cover. Store your batteries in a dry, warm place. Charge them every few weeks to keep them healthy. Check your camper during winter storage. Understanding how to winterize a camper helps prevent damage and ensure its longevity.
Remember, when you winterize your RV, you protect your investment and make spring camping much easier!
Conclusion
You can handle winterizing your camper by breaking it down into simple steps. Each part of the process helps you avoid winter damage and saves money. If you follow the checklist, you will feel confident, even if this is your first time. Good RV maintenance keeps your camper ready for spring. If you have questions about how to winterize a camper, refer to the FAQs or your owner’s manual for additional help.
FAQ
1. How much RV antifreeze do I need?
Most campers need about 2 to 3 gallons of pink, non-toxic RV antifreeze. If your camper is bigger, you might need more. Always check your owner’s manual for the best amount. Knowing the correct amount is part of understanding how to winterize a camper properly.
2. Can I use regular car antifreeze in my camper?
No, you should never use car antifreeze in your camper’s plumbing. Only use non-toxic RV antifreeze. It is safe for your water system and the environment.
Tip: Look for the pink color. That means it is RV-safe!
3. Do I have to blow out the water lines?
Blowing out the lines isn’t required, but it adds protection. If you skip it, use enough antifreeze to prevent your pipes from freezing. It’s an optional but effective method for thoroughly winterizing a camper.
4. What if I forget to winterize my camper?
If you forget, water can freeze inside pipes and tanks. These conditions can cause cracks and leaks. You might face expensive repairs in spring. Always winterize before freezing weather starts.


