
There are simple steps involved in how to sand a drywall patch so that you get a professional, smooth finish. Ensure that your patch is 100% dry. Sanding too early can ruin your drywall. Apply gentle, even pressure as you blend your patch in with the surrounding wall. Be extra attentive to edges and high spots. If you want to learn how to sand a drywall patch without dust, you need to be patient and have a good level of skill. Take your time, and enjoy the process, checking your work often to ensure that with the right techniques and tools, like a drywall sander, your wall will be ready for paint.
Tools and Materials Needed to Sand a Drywall Patch
Having the right materials when tackling any sanding project increases efficiency and safety. Working with the right supplies will smooth your patched drywall with the least amount of effort, and here are the materials needed:
- -Dust mask or respirator
- -Drop Cloth or plastic sheeting
- -Power sander (optional)
- -Safety goggles
- -Sanding sponge or block
- -Sandpaper (various grits)
- -Vacuum or broom
- –Drywall sander
Choosing the Best Sandpaper Grit for Drywall Patching
Having the right grit is crucial when it comes to patching drywall. For drywall patches, you will want to start with a mid-level grit, which is the numbers that range from 100-120, to take away excess compound. Then, finish with fine grit (150–220) to prepare the drywall patch for painting. You will want to avoid any coarse grits that leave deep scratches that will be difficult to fix.
- 100-120 Initial sanding for rough areas
- 150-220 Final smoothing for a clean surface
Before using any new sandpaper, it is important to run some tests on a small patch to ensure a smooth finish without any potential damage that the new sandpaper could cause. This step is one of the most important instructions on how to sand a drywall patch properly.
Manual Sanding, Sanding Sponges, and Power Sanders
There are several options for drywall patch sanding tools, each suited for different situations. Choosing the right tool makes your sanding easier and more effective.
- Manual Sanding: Sanding blocks and sheets of sandpaper are excellent for offering you control with respect to the direction and pressure. This works for small patches and tight spots.
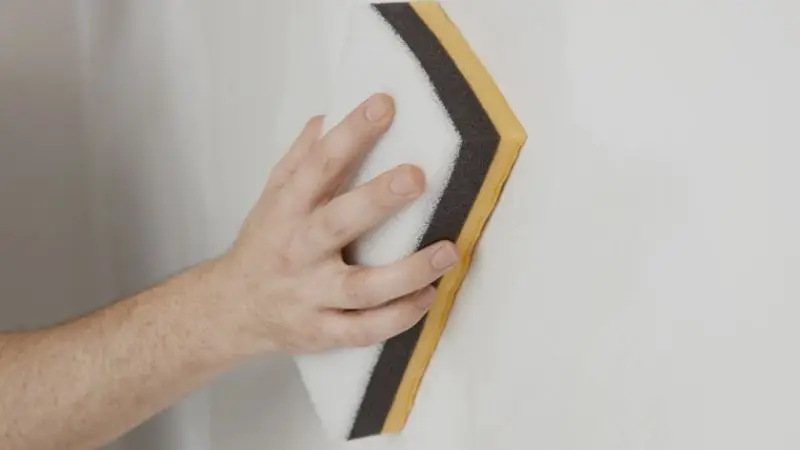
- Sanding Sponge: These give your fingers a break, are flexible, and help you to reach the different corners and curves of your drywall. They generate minimal dust, so they are perfect for that cleaner sanding.
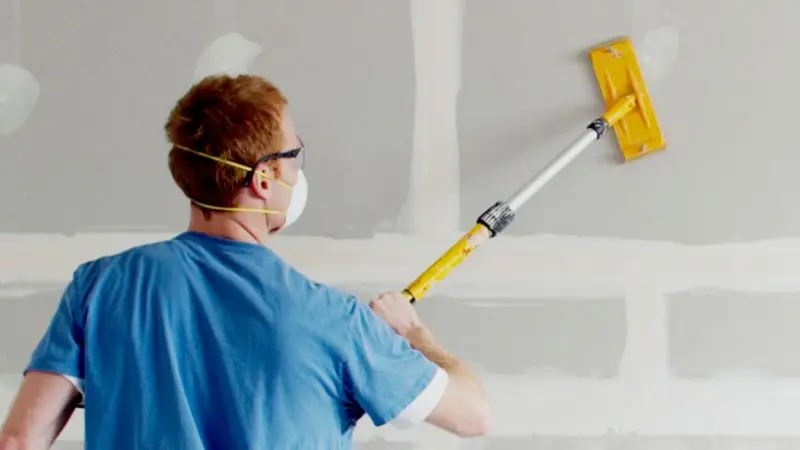
- Power Sander: These sanders are best for large patches and rough large areas. They require a little more pressure to get the sanding done, and more dust is generated, so it’s best to wear a dust mask with these.
Selecting the right tool depends on the size of your patch and your comfort level. Proper tools make it much easier to smooth a patched drywall wall quickly.
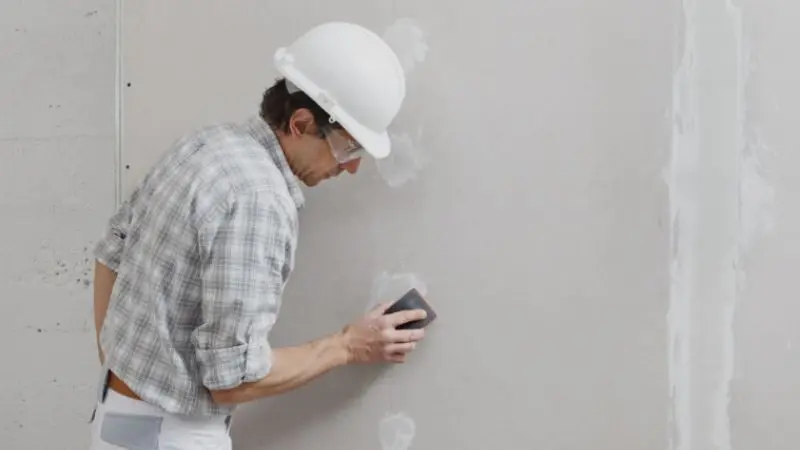
Essential Safety Gear for Sanding Drywall
The fine dust generated from sand drywalling can irritate your eyes and lungs, so work to protect yourself.
- Wear a dust mask and a respirator so that you don’t inhale any particles.
- Put on protective goggles to shield your eyes.
- Dust sheets can capture dust, so cover the floors in the work area.
- It’s a good idea to keep a vacuum handy for easy and quick cleanups.
Using safety gear and making sure your workspace is clean are part of the process of making the sanding process more comfortable. These tips will show you how to sand a drywall patch and keep your workspace tidy.
When to Sand a Drywall Patch
It is important to know how and when to start sanding to ensure that your patched drywall looks smooth. Sanding too early can ruin the work you’ve done already, while leaving it too long can make the patch too hardened to be sanded down. Getting the timing right can help make sure that the wall looks even. Let’s break down what to look for that lets you know your drywall patch is ready for sanding.
How Long to Let Joint Compound Dry Before Sanding
When it comes to knowing how to sand a drywall patch, you need to make sure the joint compound is completely dry before anything else. Compounds that are standard and used for drywall take a good 24 hours to dry completely, while those that set quickly may only take a few hours to dry completely. These instructions can differ for each product, so make sure to read the instructions before beginning the process.
- Standard joint compound: Wait 24 hrs
- Fast-setting compound: 1-5 hrs, depending on the type
Room temperature and humidity will affect how long things take to dry. Dry air will speed things up, while cold and damp air will slow drying time. If the air is dry, it is best to take your time. Dry air ensures more even surfaces and makes finishing easier.
Signs the Patch Is Ready to Be Sanded
Knowing when it is time to sand the patch is simple. You can observe the look of the patch and feel the surface. Before starting to sand, look for these indicators:
- The patch is dry and looks matte, no shininess
- The color is even throughout the patch
- The surface isn’t soft or sticky; it is firm
Gently press the surface with your finger. If the surface is firm and you mark it with your finger, the patch is not ready for sanding. If the surface is soft, you need to wait longer. Patience at this stage helps you achieve a smooth patched drywall wall without unnecessary scratches or imperfections. It helps the sanding process go more smoothly, and the more time you spend waiting helps the finished drywall looks.
How to Sand Drywall Patch Step by Step
Sanding a drywall patch correctly is key to a smooth patched drywall wall and a professional-looking finish. Following a step-by-step process ensures you avoid common mistakes and get consistent results. Each step builds on the previous one, making it easier to prepare a drywall patch for painting later.
Step 1 – Inspect the Drywall Patch for High Spots
Before you sand, inspect the patches you want to sand. Use your fingers to feel for patches with unfinished drywall. They feel rough, and a bit raised, and are sanded unevenly. Mark these patches with a pencil. This will help you avoid sanding too much. YouTube has multiple drywalling finishing techniques. Assessing the unfinished drywall first will help the process even more.
Step 2 – Start with the Correct Sandpaper Grit
Choosing the correct grits is essential for you to get the best results when sanding your wall. For example, when working with the wall’s patches, 120-grit, which is medium, is best. When addressing your wall’s finishing touches, you should use 220-grit, which is fine. Use medium grit first to remove any bumps on the wall. When you are finishing up, make your way to fine grits. Before sanding the patches with your chosen grit, always do a scratch test to check if the sanding paper is scratch-free. Having control to ensure you get scratch-free sandpaper is very important in how to sand a drywall patch without dust.
Step 3 – Use Light, Even Pressure When Sanding
It is best to use the same amount of pressure when sanding, so you should hold your drywall sander very comfortably. Move your sanding sponge in little circles, while leaving pressure light, to avoid uneven areas. Make sure you do not leave your power sander in one spot for too long, or you will make yawning wounds in your wall. Too much pressure will also make the surface have a bunch of bumps, and having a perfect pressure balance is the last thing you want to do when working on your drywall.
Step 4 – Feather the Edges to Blend with the Wall
To achieve a seamless appearance, the blending of the patch with the surrounding wall is paramount. Concentrate on sanding the perimeter rather than the core of the patch, gently tapering in to the wall. To create a soft border, the sanding should be directed outward from the patch in all directions. The smudging of the border is a crucial technique to achieve a flawless finish and to help the patch blend in with the surrounding wall. With this particular step, the wall can be made to look professional and seamless post-painting, with the repair being virtually invisible.
Step 5 – Check Smoothness with Your Hand or Light
Finally, to feel for rough spots, use your hand to assess the patch of repair. To identify any unsanded spots and roughness, an angled beam of light should be directed parallel to the wall and close to the surface. Areas that require to be sanded more to smooth out should be identified ,and this check can be repeated if necessary. This test ensures the final processed surface is completely ready for the next step, preparing the patch for paint. A lot of the work should be put into this step to achieve a professional finish. This allows the patch to blend with the rest of the wall.
How Smooth Should a Drywall Patch Be Before Painting
Painting a wall over a patch repair gives a nice and clean finish; however, for it to blend in with the rest of the wall, it has to be meticulously sanded. It has to feel completely smooth. Once the paint dries, bumps, lines, or rough spots will be noticeable and will destroy the professional look. Careful sanding of the patch will help the repair disappear and help it blend with the rest of the wall.
How to Tell If You’ve Sanded Enough
By checking the patch, you will know when to stop sanding. By running your hand over the patch, your skin should feel completely smooth with no bare bumps or rough ridges. Another method to check is shining a flashlight over the wall. If the wall works, cracks and holes will be visible in the wall.
When checking you have sanded enough, look for these cases.
- The patch is smooth and feels like a wall.
- No high spots or bumps.
- Edges blend in with the rest of the wall.
- It looks even under direct light.
If you feel uncertain, paint a small test area. This will reveal flaws and spaces you might have overlooked. This is a key part of patch sanding drywall for painting, and will ensure the best results.
Fixing Imperfections After Initial Sanding
Some small imperfections can show after the first round of sanding. It is a good idea to fix these before painting, so the wall surface is as good as it can be before the finish. These can be filled with a little bit of joint compound. After the compound is dry, sand it with fine-grit and repeat the process as necessary until the repair is smooth to the touch and blends with the surface.
Common imperfections include:
- small bumps that can be sanded to be flat.
- tiny holes that can be filled with joint compound, sanded after the compound is dry.
- rough edges that can be feathered with a sanding sponge
These tips show how to sand a drywall patch for the finish to be as good as possible. Regularly check the finish after every round.
Common Mistakes to Avoid When Sanding Drywall Patch
To get a smooth finish, learning how to sand patches is very important. Many people unknowingly ruin the finish of the wall with mistakes when sanding. Knowing the mistakes and how to avoid them is the best way to improve the finish every time.
Over-Sanding the Patch Area
Sanding too much can give you the opposite of the effect you intended. Sanding too much can wear down the joint compound. If you sand too much, you can expose the mesh tape or the wall underneath. Then you will have dips and uneven areas in the wall.
To avoid over-sanding patch areas, do the following:
- Sand with even and gentle pressure
- Stop when the patch feels level with the wall
- Use your eyes and hands to check your work frequently
When you lightly sand, be more careful; patching the wall with joint compound can avoid damage from over-sanding.
Using the Wrong Sandpaper Grit
Using coarse sandpaper can damage the wall, while using too fine a sandpaper can cause you to put in a lot of effort with no results. Finding the right sandpaper can make your work much more efficient.
To ensure a proper sandpaper selection, do the following:
- Use medium-grit (100–120) sandpaper to remove rough areas
- Use fine-grit (150–220) sandpaper to smooth and finish the edge
- To make sure you have the right sandpaper, test it on a small area first.
Choosing the right sandpaper is essential for the sanding of a patch and makes subsequent sanding more efficient.
Sanding Without Proper Dust Control
Dust from drywall has a tendency to annoy the eyes and lungs and create a mess. Effective dust control can help keep your home and your health safe.
Steps to consider when trying to control dust:
- Use a dust mask or a respirator
- Protect your eyes with safety goggles
- Use drop cloths to protect floors and furniture
- While sanding, either vacuum or sweep regularly
You can sand drywall patches without dust; however, avoiding the common mistakes when controlling dust and following the careful steps will help you prepare the drywall patches for painting and help achieve a professional finish with more confidence.
How to Minimize Dust While Sanding a Drywall Patch
The dust from drywall can spread quickly and make cleaning up a mess. To keep your workspace clean, consider dust control and safe sanding.
Easy Ways to Control Dust
There are many ways to minimize the amount of dust generated while sanding drywall patches. Before starting any work, it’s best to cover all furniture and carpets with plastic sheets, as this speeds up the cleanup process. It can also be helpful to close the doors and vents to ensure that dust does not settle into different rooms of the house. It can be advantageous to use sanding sponges rather than sandpaper, as this generates less dust.
If you have a power sander, you may be able to attach a vacuum to it. This can help vacuum less dust. After sanding and vacuuming, run a damp cloth over surfaces to collect dust sweeping misses. It is important to always wear a dust mask and safety goggles to protect your lungs and eyes. Following these steps makes it easier to smooth a patched drywall wall while keeping your home clean.
Wet Sanding Drywall Patch: Pros and Cons.
Wet sanding is where you use a damp sponge instead of dry sandpaper. While dry sanding creates a lot of dust, wet sanding traps dust with water. The water helps you get a better finish. Wet sanding is ideal for small patches or when making final touch-ups. Wet sanding is slower than dry sanding, and because the wall is damp, you will have to wait for the wall to dry before you can paint.
Wet sanding is not great for removing large bumps on the wall. You must rinse the sponge frequently while wet sanding, or else you will get streaks. Wet sanding is great for polishing and smoothing, and ideal for small, delicate areas that need a dust-free wet-sanding solution.
Wrap-Up
Learning how to sand drywall patches properly can help you attain that polished look. There are several tools you can buy to sand patches efficiently and control dust. Be sure to wear appropriate personal protective equipment when sanding in a closed area. If you are looking to paint the wall, both dry sanding and wet sanding will work. A little patience will help your patches blend in and look like they were never there.
FAQ
How do you clean up drywall dust after sanding?
Most dust can be vacuumed up, and a damp cloth will help to keep dust from settling. If you sanded near air vents, be sure to replace your air filter.
Can you sand drywall patches by hand?
Sanding drywall can be done by hand. Using a sanding sponge or a sanding block can help. Applying light pressure and moving in a circular motion will give you control and prevent damage.
What to do when bubbles and cracks appear after sanding?
Using a fine knife, apply a thin layer of joint compound to the cracks. Allow it to dry completely, then sand the area with a fine-grit sandpaper. Make sure the area is smooth before continuing with your paint job.
Do you need to sand the drywall patches before painting?
Yes, the patching repair is needed. It sometimes makes fillings, sanded patches, and repairs less visible. It will also make the surface of the paint layer more consistent.


