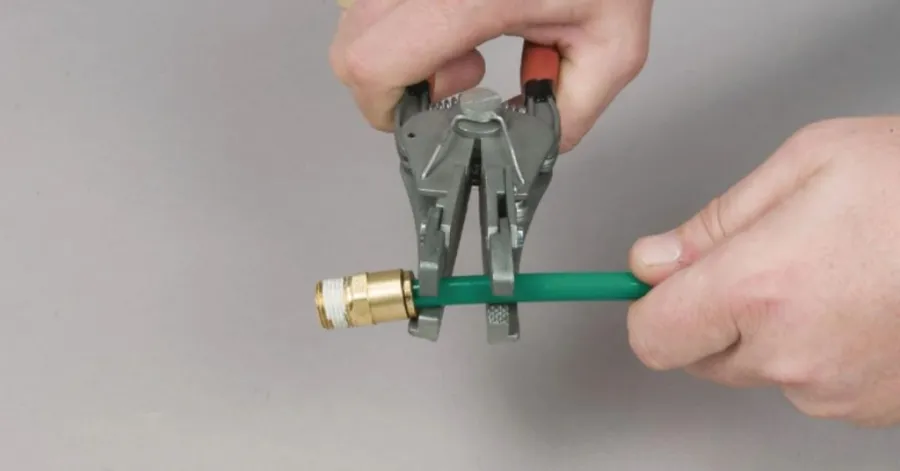
A garden hose is a tool necessary for watering plants, cleaning the outdoor area, and performing other everyday tasks in the garden, yet its end is frequently damaged first by regular use and pressure. When this occurs, being aware of how to replace the end of a garden hose can save time and money. Rather than replacing the broken end of the hose, you can easily repair it at home with simple tools and a few basic steps. This guide will show you how easily you can perform the process to restore proper water flow, stop leaks, and make your hose work like new again.
- Why You May Need to Replace the End of a Garden Hose
- Common Signs Of Damage At The Hose End
- Tools and Materials Needed for Hose End Replacement
- Easy Step-by-Step Process to Replace a Garden Hose End
- How to Choose the Right Replacement Hose End
- Common Mistakes to Avoid During Hose Repair
- Tips to Make Your Garden Hose Last Longer
Why You May Need to Replace the End of a Garden Hose
Occasionally, a garden hose may begin to perform poorly even when the main pipe remains intact. The hose end with the connector or fitting, which may be weak over time, is the most common problem. This section outlines the key causes of the problem so you can decide on the appropriate remedy. Knowing these problems will also help you avoid wasting water and money and maintain your garden watering system in flawless condition.
The actual problem is usually apparent by a simple glance at the hose end before the situation deteriorates.
Common Signs Of Damage At The Hose End
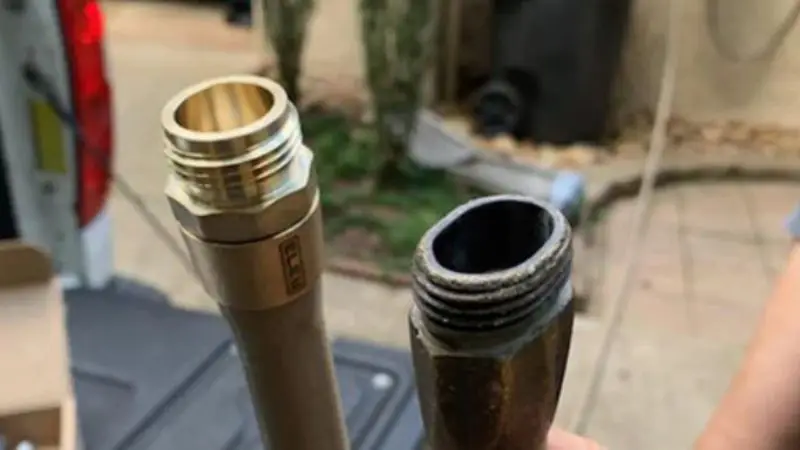
Among the first things you might notice is the damage at the point where your hose connects. The end is normally wearing out, and this is indicated by cracks, bending, or loose fittings. In some cases, the water sprays are uneven, or the connector does not stay tight. These symptoms may not be overlooked since they tend to deteriorate with age. When learning how to swap the end of a garden hose, these signs will be noticed early, making the work much easier and preventing bigger leaks in the future.
Water Leakage and Pressure Loss Issues
Water leakage at the hose end is another common issue that can easily cause low water pressure. Instead of flowing normally, the connection may cause water to drip or spray. This complicates watering your plants and wastes water. In most instances, the solution to this problem can be achieved in a very short time due to the fix and replace leaking end of garden hose DIY guide. Small leaks tend to imply that the fitting is not sealing up properly anymore and requires attention before it breaks down completely.
Worn-Out Connectors And Fittings
As time passes, the hose connectors and fittings wear out, of course, due to daily usage and water pressure. They may loosen, rust, or crack, and it may be hard to fit the hose in place. When it occurs, you might have to study how to install the end fitting of garden hoses step-by-step to regain its normal operation. Broken fittings also make implementation inefficient and may lead to a continual loss of water. By replacing them, you can increase the life of your hose and increase the overall performance in your garden work.
When Repair Is Better Than Replacement
There are instances when you do not have to replace the whole hose, but only the damaged part. In case the primary hose remains in good condition, it would be better to repair it. The reason why many people like to change a garden hose connector without special tools is that it is easy and cost-effective. Another simple method you can use to fix and replace a broken hose end coupling at home is to follow a few simple steps. This can save you money while maintaining your watering system in good working order without the need to hire professional assistance.
Tools and Materials Needed for Hose End Replacement
All the fundamental tools and materials should be in place before you begin working on your garden hose. Being prepared will save time and make the repair process less challenging. This job does not require any complex equipment, and all you need to perform this job are a few simple items that are readily available at home or any hardware store. This section will help you determine what you need to work safely and complete the task without impediments.
When your tools are prepared, the fix will be much quicker and easier to handle.
Hose Repair Kit Or New Connector
The most significant thing that you will need is a hose repair kit or a new connector. It helps you replace the broken part and restore the normal flow of water. The connectors supplied with most kits are compatible with standard hose sizes. Selecting the correct one would ensure a tight seal and prevent leaks. If you are following the procedure for replacing the end of a garden hose, this will be the main component you use. Always check the size when purchasing to ensure it fits your existing hose.
Screwdriver And Utility Knife
The simple tools used in the process are a screwdriver and a utility knife, which simplify the repair. The utility knife is used to cut the damaged section of the hose neatly, and the screwdriver is used to tighten the clamp or fittings. Such tools are usually applied in the process of learning how to replace step by step the end fitting of the garden hose. Ensure your knife is sharp enough to make a smooth cut, and use your screwdriver carefully to avoid damaging the connector or hose surface during installation.
Hose Clamp Or Crimp Ring
To firmly keep the new connector in place, a hose clamp or crimp ring is used. It avoids water escaping from the connection. In its absence, the hose end can be easily loosened over time. These pieces are used by many when following a DIY guide to fix and replace a leaking garden hose end. They are effortless to install and offer a good grip. This is always important to ensure that the connection remains intact during use, as the clamp is properly tightened.
Safety Tips Before Starting Repair
A repair should never be started without first turning off the water supply and emptying the hose to the last drop. This will ensure that workplace accidents are not caused by water pressure. Wear gloves whenever possible to prevent your hands from being cut by sharp objects. These safety measures are important even when learning to change a garden hose connector without special tools. Also, it is recommended to work in a stable and dry environment to prevent accidents or errors. A few minutes of safety will ensure that the process of repair becomes much smoother and much safer in general.
Easy Step-by-Step Process to Replace a Garden Hose End
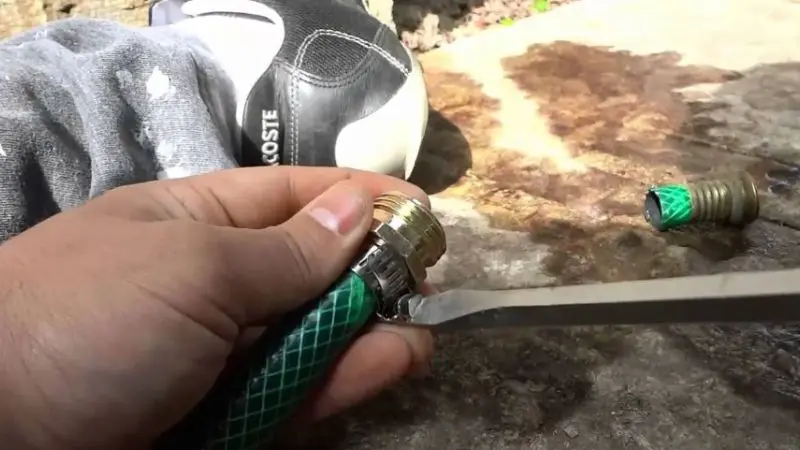
This part describes a very simple procedure for repairing a damaged end of a hose at home. No special skills or costly equipment are required. Then, simply take each step at a time, and you will be able to get your hose back in operation as soon as possible. This guide has been made very simply so that anyone can understand it without misunderstanding. In case your hose is leaking or at the end, then these steps will help you repair it correctly and safely.
And now we will proceed step by step to help you complete the repair with no stress whatsoever.
Cut the Damaged Hose End Cleanly
Begin by cutting off that part of the hose that is broken or cracked. A utility knife is required; a straight, clean cut should be made. Do not cut at an angle, as this may cause future leakage. This is a key step in the process of replacing the end of a garden hose, since a clean cut will help the new connector to fit securely. Never cut off more than you have to to get the hose length sufficiently short.
Clean and Prepare the Hose End for Fitting
Once cut, remove the end of the hose and clean it. Clean off any dirt, rubber bits, or dust, and smooth the surface. Ensure that it is dry, and then attach anything. This is a significant step in the process of replacing the garden hose end fitting step by step, since a clean surface facilitates a strong and tight connection. With proper preparation, leaks are prevented, and the new fitting will not have problems and will last longer.
Insert and Fit the New Hose Connector
Next, remove the new connector and force it into the end of the hose. Ensure that it is inserted straight and that it fits. Do not leave holes, and in the future, water will leak through. The step is usually used in an amateur guide on how to repair and replace a leaky garden hose end, since it restores the correct flow of water. It is important to always select the right size connector to get a good and strong fit.
Tighten the Clamp to Lock the Connector
Then, put a hose clamp or crimp ring over the connector and screw it tightly together. A screwdriver can be used in case it is necessary to secure it. This holds the connector in place and prevents it from slipping. Many people prefer changing a garden hose connector without special tools because it is extremely simple and quick. All you have to do is not over-tighten, which could damage the hose material.
Check Water Flow and Fix Any Leaks
Lastly, turn on the water and make sure to inspect the repaired area. Check for any water dripping or weak areas. When it is all tight, the water will move without leaking. This last step is part of the simple process of repairing or replacing a damaged hose end coupling. When you see any small leaks, tighten the clamp a little until it stops.
How to Choose the Right Replacement Hose End
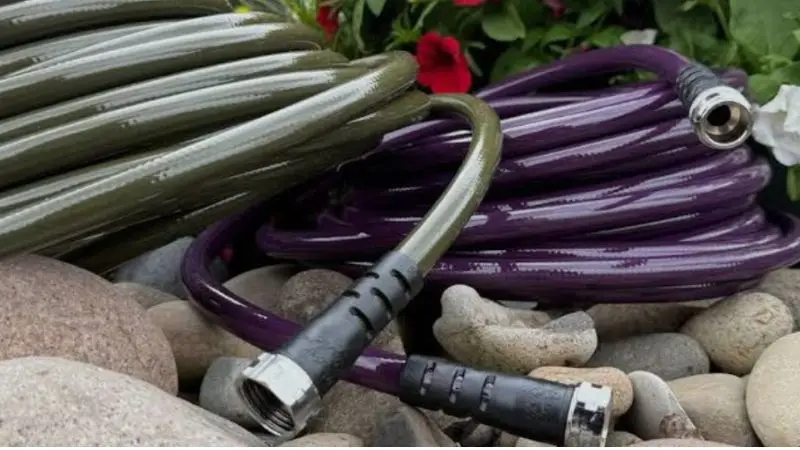
Selecting the correct replacement hose end is very important, as it determines how successful the repair will be. The ill fit may lead to leaks, poor water flow, or even secondary damage. This section will help you determine what to look for before purchasing a new connector. When you choose the correct type, your repair will be more durable, stronger, and much more dependable in the daily garden work.
One moment of looking at this point spares you the hassle of repairing it several times over later.
Match the Hose Size and Diameter Correctly
The most vital and the initial one is to align the size of your hose with the connector. Garden hoses are available in various diameters, so you need to get one that fits but isn’t too loose or too tight. The wrong size will always result in leaks or poor water flow. It is quite helpful when learning how to replace the end of a garden hose, as proper sizing ensures a secure connection from the start.
Plastic vs Metal Hose Connectors Comparison
Hose connectors are typically crafted from plastic or metal, each with its advantages. Plastic connectors are lighter and less expensive, but they may wear out more easily. Metal connectors are more durable and endurable, although they may be a bit costlier. It is also useful in understanding how to replace a garden hose end fitting step by step, since the right material is chosen, and it determines how long it lasts. When it is used frequently, metal is typically more appropriate, whereas plastic is suitable when doing minor work in the garden.
Choose Strong and Leak-Proof Fittings
Always select fittings that are robust, well-constructed, and leak-free. A decent connector will form a tight seal and withstand water pressure without loosening. Low-quality fittings can lead to numerous leaks and frustrations. This is particularly crucial when using a DIY guide to fix and replace the leaking end of a garden hose since the right one is guaranteed to yield long-term outcomes. In the long-term, a durable, leak-proof fitting will save time, water, and energy.
Common Mistakes to Avoid During Hose Repair
In the process of repairing a garden hose, the slightest of errors can result in leakage or a drop in water pressure. Some individuals rush the procedure or omit key phases, resulting in similar issues. This part will help you identify the most frequent mistakes so you can avoid them and repair them properly the first time. By taking every step into consideration, your hose will run without problems and last much longer.
Being aware of such errors will save time, effort, and additional repair costs.
Cutting the Hose Unevenly
A major error is cutting the hose unevenly or roughly. The jagged edge may prevent the connector from fitting properly and lead to future leaks. Never use a dull utility knife and always make a straight cut. This is crucial when replacing the end of a garden hose, since a smooth edge will ensure a tight, secure connection. Spending a few additional seconds to make a proper cut will strengthen the repair and make it more dependable.
Over-tightening or Leaving Fittings Loose
The other error is either over-tightening or under-tightening the clamp. In case it is too loose, water will leak out. When it fits too tightly, it may damage the hose or connector. The idea is to find a balanced grip that is neither too loose nor damaging to the material. This is frequently emphasized in the step-by-step process of replacing the garden hose end fitting, because proper tightening is key to a safe, long-lasting repair and prevents unnecessary damage.
Using the Wrong Connector Size
The most frequent issue is the use of the incorrect size connector, which results in the inability to fit and water leakage. A mere difference in size may prevent the hose from sealing correctly. Before purchasing a connector, always examine your hose size. This is particularly crucial in a DIY guide to fixing or replacing a leaking garden hose end, since the correct size helps ensure a smooth flow of water and eliminates the need for repeated repairs. When a proper fit is provided, it will be more performance-wise and durable.
Skipping Leak Testing After Repair
A common mistake is failing to test hoses after completing the repair, a serious oversight. Small leaks may go unnoticed without investigation and can worsen over time. It is always advisable to turn on the water and ensure the connection is checked. This last step is a key part of changing a garden hose connector without special tools, as it ensures the repair is successful. Testing ensures that everything is fine and your hose is set to operate normally without any problems.
Tips to Make Your Garden Hose Last Longer
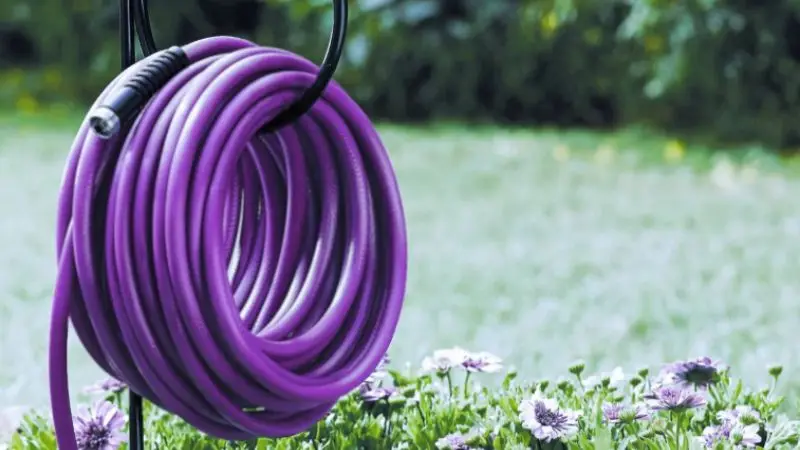
A garden hose can be used for years, provided you take proper care of it. A majority of the damage occurs due to improper use, improper storage, or ignoring of minor problems. By making a few basic habits, you can extend the life of your hose and cut back on the number of repairs you have to do. In this section, one can find simple and useful tips that anyone can implement at home to ensure that his/her hose remains in good condition and works long.
Minimal daily nurturing can make a significant difference in long-term outcomes.
Proper Storage After Every Use
After using your garden hose, always store it properly instead of leaving it lying on the ground. By neatly coiling it, it can be prevented from cracking, tangling, and being damaged by pressure. You can attempt to store it in a shaded location since direct sunlight may cause the material to weaken over time. The correct storage is also beneficial when considering the process of replacing the end of a garden hose, because a properly maintained hose would not need a lot of repairs. Proper storage practice will ensure that your hose is strong and fit to be used again.
Avoid Sharp Bends and Pressure Damage
Acute turns and high pressure may easily destroy your hose, particularly at the ends. Always try to keep it straight when using water, and do not pull it too hard. Overbending the hose may break the inner layer and lead to future leaks. This plays a key role in the process of replacing the end fitting of a garden hose step by step, as they are easily damaged due to mismanagement. Light use helps to keep the flow of water and avoids the possibility of cracks or breakage with time.
Frequent Inspection and Maintenance
Looking after your hose will help you discover minor issues before they turn into major issues. At the ends, look for cracks, leaks, or loose fittings. Should you see some initial damage, you can repair it in the shortest time possible, rather than replacing the entire hose. The habit can be applied in a DIY guide to fix and replace a leaking garden hose end since the early repair saves both time and money. Periodic maintenance will ensure that your hose is working efficiently and its overall life-span is increased.
@tada.greenhouse VEVOR Metal Garden Hose, Max. 200 ft Rust Proof Stainless Steel Water Hose, Heavy Duty Backyard Hose with 10 Function Nozzle, No-Kink & Flexible Water Pipe, Lightweight Metal Hose for Yard, Outdoor #tiktokshopcreatorpicks #falldecor #vevortools #waterhose #garden
♬ original sound – TaDa Greenhouse
Wrap Up
Replacing and maintaining a garden hose is easy when you do it right and use the right tools. Starting with cutting the damaged end to attaching a new connector, every step is aimed at restoring normal water flow and eliminating leakages. You can easily make your hose last longer, without spending a lot of money, with a little care. Regular checks, proper handling, and the speed at which repairs are made keep everything running smoothly. Through these simple procedures, your garden hose will continue to be healthy, effective, and fit to be used daily in your garden.
FAQ
Am I able to repair the end of a garden hose at home?
Yes, you can easily repair a garden hose end at home with some simple tools such as a cutter, a connector, and a clamp. It involves basic procedures and does not need any professional assistance in the majority of typical cases of hose damage.
Do I require special equipment to repair the hose?
Most hose repairs do not need any special tools. Typically, a utility knife, screw driver, and clamp can easily and effectively replace or repair the hose end without complex tools.
What is the life of a repaired hose?
A well-fixed leakage hose would take a long time to wear out if it is used sparingly. Regular check-ups, proper fitting, and proper storage will help prolong its life as well as avoid future leakages or damage.