
| Difficulty Level | Estimated Cost | Duration |
|---|---|---|
| Moderate | $500 to $1500 | A full day |
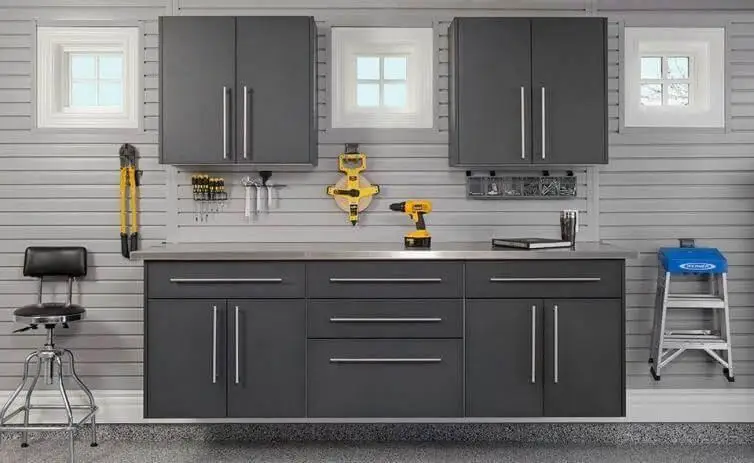
Are you fed up with the clutter in your garage and looking for relief? Garage tool storage and organization solutions like garage pegboards and garage cabinets might answer all your storage and organization woes. While garage pegboard ideas are a topic for another article, in this article, we are going to discuss all about garage cabinet installation. Besides walking you through the process of installing cabinets in your garage, we will also help you out in choosing the right garage cabinets to meet your storage needs.
Garage cabinets are ideal for organizing, improving functionality, and optimizing the storage space of any garage. You can keep everything from gardening tools to automotive tools and supplies in garage cabinets for safe storage and proper organization.
Let us find you a set of garage cabinets that will perfectly meet your storage needs.
How to Choose the Right Garage Cabinets For Your Needs?
When selecting garage cabinets, many factors should be taken into consideration to ensure they not only fit in your garage but also meet your garage tool storage and organization needs:
a) Examine Your Storage Requirements and Available Space
Before you get cabinets for your garage, consider the available space in your garage and all the items that need to be stored in the garage. This is crucial to ensure that you do not get cabinets that are either too big to fit your garage without taking your workspace or too small to meet your storage needs.
b) Establish the Perfect Cabinet Size, Style, and Material
Based on your storage needs and available space, determine the ideal cabinet size and configuration for you. Decide whether wall-mounted, freestanding with wheels, or freestanding with the option for wall mounting will be a perfect fit for your garage setup.
c) Consider additional features
When planning for storage solutions for your garage, think carefully about which extra features would help optimize garage storage. For instance, consider adding adjustable shelves to accommodate items of differing sizes and drawers for proper organization. Depending on your needs, you might also want to look for features such as locks, magnetic doors, etc.
Once you have the cabinets in your garage, it is time to get garage cabinets installed.
If you do not know how to install cabinets in the garage, continue reading as we are now going to discuss just that.
How to Install Garage Cabinets?
Garage cabinet installation could be an exciting and overwhelming endeavor. Follow the below step-by-step instructions to install garage cabinets effortlessly.
1. Clear and Prepare Workspace

Before beginning installation, clearing any existing cabinets or obstacles in your garage that might obstruct the workflow is essential. Also, tidy up both floor and walls to create an optimal working environment.
2. Accurate Measurement Taken

To ensure a perfect fit, you must take precise measurements of the available space where cabinets will be installed. Use a measuring tape to take width, height, and depth measurements. Mark a reference line with a pencil or marker as a guide during the garage cabinet installation process.
3. Assembling Cabinets
For easy and effective assembly of cabinets, you must refer to the manufacturer’s manual that comes with the product. In case you are installing VEVOR’s garage cabinets, here is the manual for tool cabinet assembly. Before you begin the installation, you must ensure you have all the supplies and tools necessary for effective assembly.
4. Mounting Cabinets
Once you have assembled the garage cabinets, you can begin mounting them onto the wall unless it is a freestanding garage cabinet.
a) Securing a Ledger Board to the Wall
Begin by installing a ledger board made from sturdy lumber horizontally along the wall where your cabinets will go. Use a level to make sure that it is perfectly aligned. Using screws, secure this piece to the studs. You can consider using a stud finder to help ensure that you are drilling into studs.
What is a Ledger Board?
A ledger is nothing but a simple lumber board that you use to hold the cabinets in place while you secure them by drilling screws into the studs in the wall. The ledger board holds up most of the weight of the cabinets, allowing you to easily hold the cabinet in place and secure it with screws. Once the garage cabinets are secured into the wall, the ledger is removed.
b) Aligning Cabinets
Start by aligning base cabinets to their marked positions on the wall. If required, use shims to level them and ensure enough clearance between adjacent walls or cabinets.
c) Attaching Cabinets to Walls
After ensuring that the cabinets are aligned, you can go ahead and secure them to the wall with screws. Ensure that all the screws pass through the back of the cabinet walls into the studs. When cabinets are secured, you can remove the ledger.
d) Adjusting Cabinets
Utilizing a level, verify that your cabinets are plumb (vertically upright) and level (horizontally even). Make any necessary adjustments by adding or subtracting shims from under the cabinets as necessary.
e) Attaching Adjacent Cabinets
Repeat this process for each additional cabinet, making sure they are aligned and leveled. Secure each one to both the wall and adjacent cabinets using screws.
5. Anchoring cabinets to ensure their stability
Anchoring cabinets securely is essential to ensuring their stability and preventing them from tipping over. So depending on their design and your desired method of anchorage, you may choose between the following:
a) Attaching Cabinets to the Floor
If your cabinets have bases or legs, they can be secured to the floor using screws or brackets. Drill pilot holes through these areas before attaching them with anchors or brackets as appropriate.
b) Establish a Foundation
If your cabinets lack legs, consider adding one from sturdy materials like wood or metal and attaching it securely to the floor using anchors or brackets.
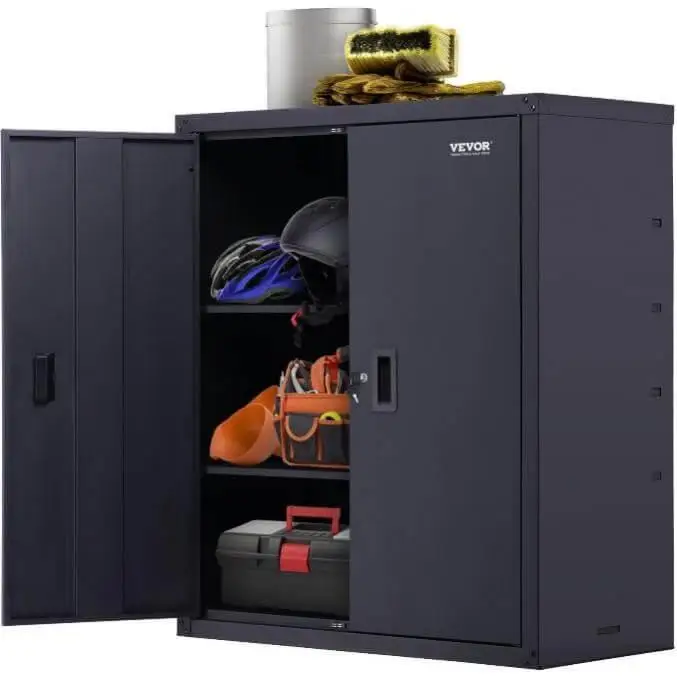
Garage cabinets are heavy, and they are used to store garage tools, which are also heavy. Therefore, it is strongly advised that you even anchor your freestanding garage cabinets for maximum stability and safety. It is only to accommodate this concern; VEVOR features mounting holes at the back of its freestanding garage cabinets to allow them to be securely mounted in the wall.
6. Add Finishing Touches
Now that your cabinets have been properly installed, it is time to complete your project by adding the finishing touches:
a) Double-Check Alignment
Carefully examine all cabinets to ensure they are level, straight, and spaced appropriately for an appealing visual presentation. Make changes where required. Consider using shims if the alignment needs any adjustment.
b) Attach additional hardware
Following the manufacturer’s instructions, attach handles, knobs, or pulls on cabinet doors and drawers to add functionality and enhance the overall aesthetics of garage cabinets.
c) Clean Up the Workspace
Clean the workspace to rid it of debris, packaging materials, or tools used during the installation process. Lastly, wipe down cabinets and the surrounding area to bring out the appealing look of the cabinets.

Tools and Materials Required for this Project
Before beginning the installation of garage cabinets, you must gather all the necessary tools and materials.
Tools Required for Garage Cabinet Installation
For the efficient installation of garage cabinets, you must have all the necessary tools.
1. Measuring tape: For accurately measuring available space and marking locations on walls.
2. Level: To ensure cabinets are plumb and level during installation.
3. Drill: Needed for making pilot holes and driving screws into cabinets and walls.
4. Screwdriver: Used for tightening screws and attaching hardware.
5. Stud finder: Allows for the easy identification of wall studs that provide secure attachment points.
6. Shims: To level cabinets and fill gaps as necessary.
7. Rubber mallet (or hammer with soft covering): Needed when tapping shims or adjusting cabinet positions.
8. Pencil or marker: For marking measurements and locations on walls.
9. Safety goggles: To protect eyes during drilling and assembly processes.
Material Required for Installation of Garage Cabinets
1. Garage Cabinets: When choosing cabinets for storage needs and space availability, choose cabinets that meet both criteria.
2. Screws: Make your selection according to cabinet and wall construction type as well as manufacturer recommendations regarding appropriate screw sizes. Generally, screws come along with cabinets.
3. Anchors: Wall anchors may be necessary to provide extra support for cabinets.
4. Ledger board: For supporting base cabinets during installation.
5. Shims: It is essential to fill gaps for perfect alignment and level.
6. Handles, knobs, or pulls: These are imperative to enhance functionality and improve the appearance of cabinets. Typically, they also come along with the cabinets.
FAQs on Garage Cabinet Installation
Q: How Do I Secure the Cabinets to the Wall And Floor For Stability?
For maximum stability, you should ensure that all screws are secured into the studs present in the wall. Besides securing cabinets to the wall, you can anchor cabinets directly to the floor with brackets or screws. You can also add a foundation to the cabinet and attach it to the floor for maximum stability.
Q: What Types of Cabinets Are Suitable for Garage Installation?
Metal cabinets are most suitable for garage installations. They are sturdy and resistant to moisture and pests and can support heavy tool storage.
Q: Is the VEVOR Garage Cabinet Fireproof?
Yes, VEVOR garage cabinets are fireproof. They can help keep your tools safe in case of an unfortunate fire incident.
Q: Should I Choose Pre-Made Or DIY Cabinets?
Your choice between pre-made and DIY cabinets depends on your skills, time commitment, and budget. Where pre-made cabinets are very convenient, they could be very costly. Conversely, DIY cabinets could be time-consuming, requiring skills and necessary tools, but they do tend to be a cheaper option. Also, the DIY option would allow maximum customizability.
Conclusion
Garage cabinet installation could appear daunting at first. But if you follow our easy step-by-step guide on how to install cabinets in the garage, garage cabinets can be installed seamlessly.
Installing garage cabinets will transform your garage into an organized and functional workspace. When installing cabinets, make frequent use of the level to ensure proper alignment. If necessary, take the help of a neighbor, friend, or family member for garage cabinet installation, as they tend to be heavy.
So, act now and install cabinets in your garage to get rid of the clutter. If needed, consider installing garage pegboards for using vertical space to maximize storage optimization. If you are interested in adding pegboards to your garage, you might want to check out our article on garage pegboard ideas.


