
A question is how to disinfect a chicken coop? It is not as difficult as it sounds. Washing your coop is one of the best ways to keep your chickens safe against germs, bacteria, and disease. The routine will also benefit from removing old bedding, scrubbing surfaces, and disinfecting all corners. Feeders, waterers, and nesting boxes, where germs can also lurk. Depending on your choice, you can use natural products such as vinegar or stronger chemical disinfectants. Learning how to cleanse the chicken coop you provide a new and safe dwelling to your flock. These are just a few tips that will ensure your chickens remain happy, healthy, and productive throughout the year.
When to Disinfect a Chicken Coop
A clean chicken coop is good for the health and comfort of your flock. It not only involves cleaning dirt, but also preventing the transmission of germs. You can clean and disinfect at the right time, which makes it a lot easier when you know when to wash and disinfect. To be able to adhere to the step-by-step chicken coop cleaning guideline and avoid being confused, it is also possible to stick to a rather simple routine.
Regular Cleaning vs Deep Cleaning
The coop should be cleaned periodically after every few days. This involves getting rid of droppings, changing bedding, and clearing food remnants. It serves to keep the space clean and controls the smell. This is also the time when you can easily tell if something is wrong with your chickens.
Deep cleaning is more elaborate and is concerned with the killing of germs. This step is extremely important in case you are studying how to disinfect chicken coop. You are required to scrub walls, floors, and any place where bacteria can hide. Cleaning the chicken coop and then disinfecting it appropriately every few months is the best method of keeping the coop hygienic.
After Sick Chickens
A chicken falls ill, and then it is urgent to clean the coop. Any disease will spread through bedding and garbage, both of which should be eliminated. Germs may be hiding in such internal crevices as cracks, feeders, and corners; cleaning should be taken care of.
If you’re considering how to clean a chicken coop safely, use gloves and wash your hands afterward. Always ensure that all surfaces have been washed before the re-entrance of the chickens. It is also a good occasion to experiment with the disinfection of a chicken coop without chemicals, in case you want a healthier and more natural way to keep the flock.
Seasonal Cleaning
There can be differences in the cleaning requirements by the seasons, and therefore it is necessary to vary your routine. A major spring clean-up can eliminate winter dirt and waste. Damp spots may form during summer, so you have to check frequently to see if there is moisture and whether mold is present.
During the fall, it is important to empty the old bedding to prepare the coop against cold weather. In winter, emphasize dryness and cleanliness of the coop due to frozen refuse. Adhering to a seasonal plan will help you clean up the chicken coop for the rest of the year and will help you develop an idea of how to clean the coop seasonally.
@frankbrooks8 This @Vevor Store US chicken coop and run was perfect for what we needed and so easy to assemble! #chickencoop #coop #vevor #chickensoftiktok #tiktokshopfalldealsforyou
♬ original sound – FrankzFindz 🗝️
Essential Chicken Coop Supplies
Make sure all your supplies are ready before cleaning. This is faster and lets you clean the coop without having to stop mid-process. When all the necessary is prepared, it is less difficult to trace the process of disinfecting the chicken coop in a simple and systematic manner. The right tools can also help you go through your step-by-step guide to clean your chicken coop without the strain.
Protective Gear for Cleaning
The dust, germs, or even mold may be exposed to you when cleaning a chicken coop. This is one of the reasons it is important to wear adequate protective equipment. It gets you covered and puts the task of the job at ease.
You should use:
- Gloves to save your hands and harsh cleaners.
- A mask to prevent respiration of dust and relatively dangerous substances.
- old clothing or coveralls that you cannot mind having spoiled.
- Waterproof footwear to be able to clean after use.
Wash your hands properly after you are done. The given simple habit is a valuable component of learning how to clean a chicken coop safely and be able to remain healthy.
Choosing Safe Cleaning Products
When disinfecting your coop, it is a serious procedure to use the appropriate cleaning products. Others prefer the natural variants, and some prefer the more powerful disinfectant to clean the surroundings even more. They can both be used depending on your needs for cleaning.
Light cleaning is good, using natural alternatives such as vinegar and baking soda. They can be useful in case you wish to know how to disinfect the chicken coop without using chemicals, in a safer manner. Deep cleaning should use chemical substances such as bleach or poultry-safe disinfectants to kill tough germs. Cleaning of a chicken coop should be followed by the right product to maintain a bird’s home in a clean environment.
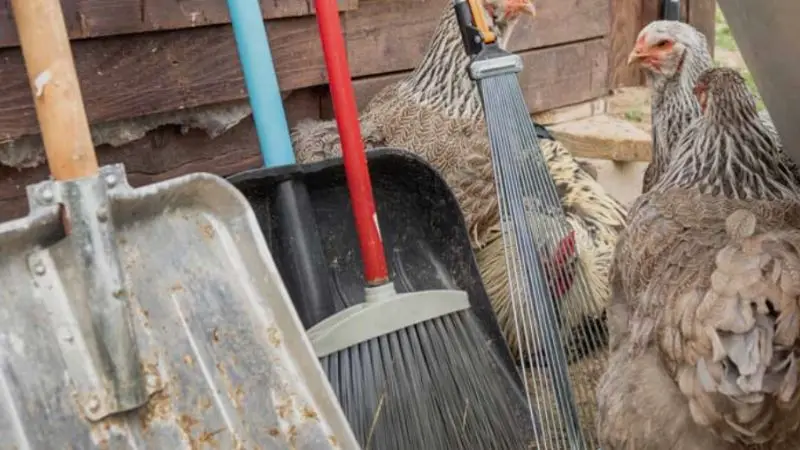
Basic Tools for Coop Cleaning
Simple tools can help you to complete your cleaning job much more easily and quickly. You do not need high-cost goods; only simple items that help you clean every part of the coop properly.
Make sure you have:
- A hard brush to sweep dirt and droppings.
- Scraper to clear the sticky waste.
- Water and cleaning solutions buckets.
- A wiping sponge or cloth.
- A spray bottle to make the disinfectant even by spraying.
When all this comes ready to begin, the whole of it becomes easy. It also aids in remembering how to disinfect the chicken coop and makes your chickens safe and comfortable.
Step-by-Step Chicken Coop Cleaning
Cleaning your coop in the correct sequence simplifies and increases the efficiency of the work. A correct way of doing it will not just get the dirt out but also kill other unpleasant germs. This easy activity will enable you to learn how to disinfect a chicken coop in a safe and feasible manner. It is also an all-in-one, step-by-step guide to cleaning your chicken coop that you can always follow.
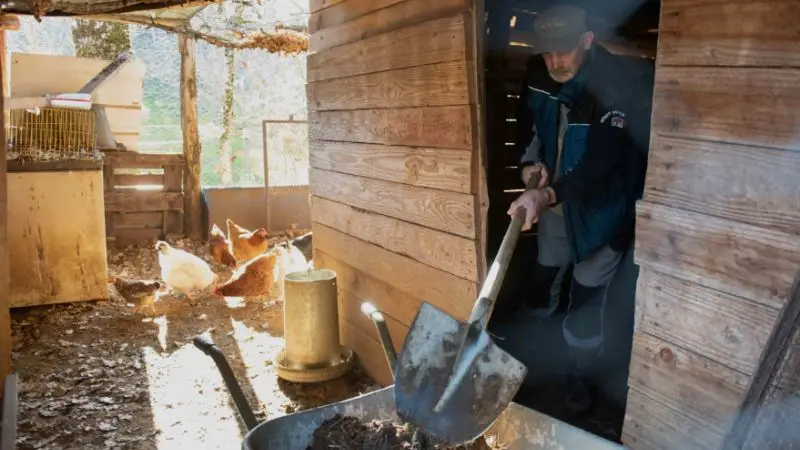
Remove Chickens and Old Bedding
And begin by taking your hen out of the coop and into a safe and secure area, such as a temporary run. This keeps them off dust and cleaning products. After the coop empties, remove all bedding, straw, and nest material. Do not leave anything behind because latent forms of waste may contain bacteria.
Feeders and waterers should also be removed so that you can clean all parts of the space well. Moving everything out means starting with a clean sheet and simplified subsequent steps. This is the initial and most vital step in training how to wash the chicken coop securely without neglecting any grimy spots.
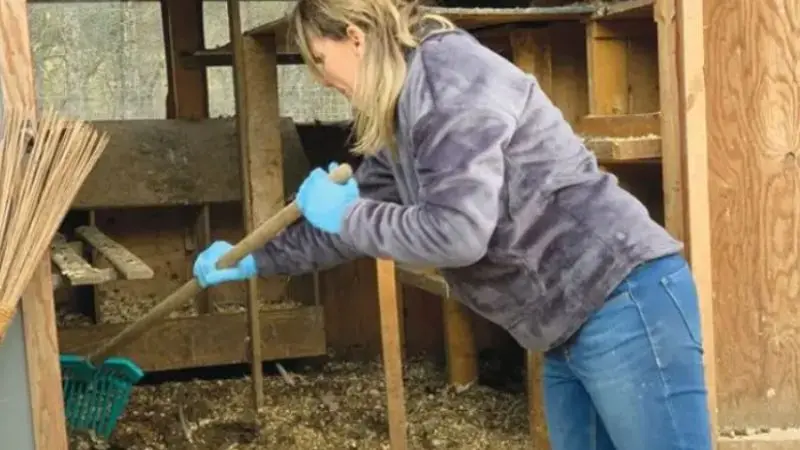
Scrape and Sweep All Debris
Once the coop is emptied, start clearing the accumulated dust and refuse. Removal of old droppings— Use a scraper or a brush to remove hard-dried droppings that stick on the floors, walls, and perches. This can be an effort, but it helps to eliminate the majority of the mess before handing it over to the washing department.
Then brush off loose dirt, feathers, and dust everywhere. Be careful of areas and spots where dirt accumulates readily. Proper cleaning of such places counts a lot when the final result is concerned. This preparation of the coop is a step towards deep cleaning it and, therefore, plays a crucial role in the most efficient way to disinfect a chicken coop.
Wash All Coop Surfaces
The coop is now the time to be washed clean. Put the cleaning agent in a bucket filled with warm water. Clean floors, walls, nesting boxes, and roosts with a brush or sponge. Wipe off all surfaces and ensure that they are clean.
Once scrubbed, then after this, everything must be washed with clean water in order to remove any remaining residue. Allow room to be aired before proceeding to the next step. This is because when learning how to disinfect a chicken coop, proper washing is highly important due to the fact that disinfectants can tend to be used effectively on clean surfaces.
Apply Disinfectant Properly
After cleaning the coop, put your disinfectant on all surfaces. Depending on the product you are using, you can spray it or wipe it. Always go around and cover all the corners, even the under perch area and around nesting space, where germs like to hide.
Read the instructions on the product label, particularly the waiting time. At this point, complete sanitation of the coop is carried out. In case you want to use a natural process, you may also consider learning how to disinfect a chicken coop without chemicals using less harmful alternatives. Wear a mask and at all times wear gloves to remain safe in this process.
Dry Coop and Set Up Again
Once the disinfectant is finished, wash the surfaces with clean water when necessary. Open doors and windows to make the coop dry. Drying is highly important in that moisture allows the growth of molds and bacteria.
After the items are dry, clean up, feeders and waterers should be returned to the interior and fresh bedding added. And lastly, take back your chickens to the clean and safe home. Now you know how to disinfect the flock of chickens all through the year by following these steps.
Natural vs Chemical Disinfectants
Using the correct disinfectant is a significant element of maintaining a clean and nice coop. Other consumers are drawn to natural products, whereas others are inclined to stronger chemical products that can deep cleanse them. These two approaches might be effective based on your needs. The difference will allow you to select how to disinfect a chicken coop in the most appropriate way and incorporate it into your cleaning schedule.
Advantages of Natural Cleaning Alternatives
Vinegar and baking soda rank among the common natural cleaning products adopted due to their simplicity and safety of use. They can be used regularly when cleaning, when you do not want harsh cleaning, or when you want to keep things less rough on your chickens.
They are safe for chickens and free of harmful residues. They are readily available in the stores and are often cheap. They are also soft on other surfaces, such as wood and metal, thus they tend to make your coop last longer. They are also more desirable to many people due to their environmental friendliness.
These are some of the best options to use in case you are learning how to disinfect a chicken coop without chemicals. Application: They can effectively be used to eliminate light dirt and to maintain odors. Nevertheless, they might be too weak to destroy every bacteria when deep cleaning or for every illness.
Chemical Disinfectants Pros and Cons
The stronger ones are chemical disinfectants, which are usually used when a deeper clean is required. The advertising of products such as bleach or poultry-safe disinfectants aims to kill harmful bacteria as effectively and quickly as possible. They are particularly handy after illness or when the coop has been overdue for cleaning.
Their greatest strengths are that they kill most germs and are quicker than natural alternatives. This is why they are a good option whenever you want a deep cleaning. They should, however, be utilized with caution since they can irritate your skin or breathing when they are handled in the wrong way. There can also be a strong smell of some products.
Always take instructions in detail when using these products. It is a significant component of the way to disinfect a chicken coop correctly and safely without harming your flock and yourself.
Safe Use Around Chickens
Regardless of the kind of disinfectant you end up with, first things first. The correct procedure will save you and your chickens in the process of cleaning.
Cleaning up on your chicken. Start by taking them out of the coop first. This separates them from dust and cleaning products. Keep yourself safe by wearing a mask and gloves, particularly when applying harsh disinfectants. Disinfection should be followed by the rinsing of all surfaces with clean water to eliminate that which is remaining.
Allow your coop to dry out and then allow your chickens to go back inside. This is a crucial stage when it comes to safely cleaning a chicken coop, as it prevents moisture and debris from building up. These few steps will ensure that you maintain a clean coop and healthy chickens.
Wrap Up
The most effective method of ensuring your flock is disease and stress-free is to keep your chicken coop clean. It is possible to keep your environment healthy throughout the year by adhering to a basic routine and with the help of the correct supplies. No matter which option you take (natural or chemical), by understanding how to disinfect a chicken coop, you are able to clean with confidence. Always emphasize safety, timing, and drying fully. It will be easier and more effective to do it because of a regular schedule founded on a step-by-step chicken coop cleaning guide that will help keep your chickens happy, safe, and productive.
FAQ
What is the frequency of disinfecting your chicken coop?
You need to clean your coop with disinfectants after some time. Clean and disinfect immediately in case your chickens are unwell. A weekly cleaning schedule can prevent the presence of germs.
Is it possible to cleanse a chicken coop with bleach?
Bleach is yes. Combine bleach with ten times its quantity of water. Wipe down all the surfaces. Allow the coop to dry, and then bring your chickens back into the coop.
Which disinfectant is the safest to use on chickens?
Vinegar is effective in routine cleaning. It is simple and secure to locate. In deep cleaning, animal-housing products are recommended. The coop should always be rinsed and dried, and then the chickens should go.
Do I have to debride the chicken initially, then disinfect?
Sure, be sure to wash your chickens first. This protects them against fumes and swampy floors. You may use a makeshift pen, or you may run.


