
Garages often become cluttered and disorganized with the accumulation of tools—always coming your way when you are working in your garage. It becomes frustrating when you do not have ample space to properly store your tools without sacrificing your workspace. But fret not; there is a perfect solution for you: pegboards.
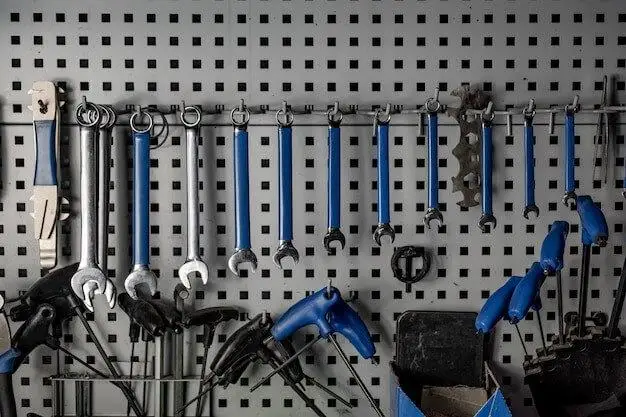
Vertical storage offered by garage pegboards will help not only organize your tools for easy accessibility but will also help save you a lot of space. Garage pegboard storage is the ideal space-saving and tool organization solution for any garage!
Organizing a garage with pegboard could be daunting—not knowing where to begin, how to install pegboard on garage walls; and how to organize tools on pegboard. But worry not. In this article, we are going to discuss all about organizing your garage tools with pegboard.
Continue reading for helpful insights and brilliant pegboard ideas for the garage.
Getting Started with Garage Pegboards
Garage pegboards offer an effective and versatile solution for decluttering and organizing your garage tools. But before you implement the tool pegboard ideas in your garage, let’s take a brief look at a few things that you need to consider before you start organizing your garage with pegboard:
1. Assess Your Storage Needs
Before embarking on the task of organizing your garage with pegboards, you must assess your storage needs first. Pay special attention to tools, equipment, and items that need organizing. This will allow you to estimate how much wall space and the number of pegboards you will need for proper garage pegboard organization.
2. Choosing the right pegboard material and size
For sturdiness and long life, you need to make sure that you select the right pegboard material. As far as the size of the pegboard is concerned, you need to select it based on the number of tools that need to be organized and the available wall space for the pegboard. Pegboards are typically made of plastic, wood, or metal, with metallic pegboards being the most popular.
3. Essential tools and supplies for installation
Before you begin the installation process, make sure that you have gathered all the essential tools and supplies you might need. Some essentials include a drill, screws, level, and stud finder. These tools should help create pilot holes to securely attach the pegboard to the wall, and level will help ensure that pegboards are aligned and leveled. Besides these tools, you also need to ensure that you have a person or two to help you with the installation.
Now that you have all the tools for the installation, you need to make sure that you have all the supplies for customization, such as hooks, brackets, shelves, containers, etc., to accommodate all your tools. If you do not have a pegboard yet, consider getting pegboards with accessories.
When you have checked all supplies and tools, put on a pair of protective gloves to prevent potential injuries as you begin the installation process.

How Can You Install A Pegboard?
Installation of a pegboard in your garage can be a daunting task, but if you follow this simple step-by-step process, it can be an effortless experience:
Step 1: Place your hanging board against the wall where you want to install it and align its edges. Once properly aligned, use a pencil or a nail to mark holes for mounting.
Step 2: Create holes and prepare the wall for mounting the pegboard. You can use a drilling machine with the appropriate drill bit size for concrete walls to create holes of about 8mm in diameter and 40mm in depth at the marked points. As far as the wood walls are concerned, be careful with drilling; it might crack. Drill holes about s 3mm in diameter and 40mm in depth.
Step 3: For concrete walls, insert suitable expansion plugs or anchors completely into each hole and then screw self-tapping screws into them, leaving about 3 to 5mm outside. For wooden walls, you can skip the insertion of plugs into the holes and directly screw self-tapping screws into the holes.
Step 4: Now that the wall is prepared, you can hang the pegboard on the self-tapping screws. And after ensuring that screws are hung into the mounting holes of the pegboard, you can go ahead and tighten the self-tapping screws. Before tightening the screws, ensure that the pegboard is properly aligned and leveled. Be mindful when tightening the screws, as overtightening might damage the pegboard.
Step 5: Now that you have installed done pegboard successfully, you can repeat these steps to install additional pegboards. While installing additional pegboards, ensure proper alignment as well as equal spacing.
By following these simple installation steps, you can easily install a pegboard on your garage wall for tool storage and organization. Once the pegboard is set up, you can go ahead and start organizing tools on the pegboard.
How Do You Organize Garage Tools on a Pegboard?
Properly organizing your garage tools is essential to increasing productivity and keeping a clutter-free workspace. Consider the following strategies when organizing garage tools on pegboard:
1. Organize Tools by Size
Categorizing tools according to their size is an effective way of organizing them on a pegboard. Consider grouping small tools like screwdrivers, pliers, and wrenches in one section while hanging larger tools such as hammers and mallets in another. You can also consider placing large, heavy tools such as sanders and electric drills at the bottom of the pegboard. This ensures that you do not have heavy tools falling from the top of the pegboard, making your garage safer.
2. Organizing Tools by Usage
One efficient method of organizing garage tools on the pegboard is by categorizing them according to their usage or function, such as gardening tools, automotive tools, or hand tools. Create sections on the pegboard dedicated specifically for these categories so you can quickly locate specific tools when required, allowing you to continue your operations seamlessly. This arrangement makes finding tools much faster when required, saving you both time and effort.
3. Strategic placement for frequently used items
It is best to keep frequently used tools within easy reach. The best practice is to place tools at eye level, which ensures instantaneous identification and access during work. Placing mostly used garage tools on the pegboard in such a way allows both easy visibility and arm’s reach, promoting efficiency and reducing time spent searching for tools you use regularly.
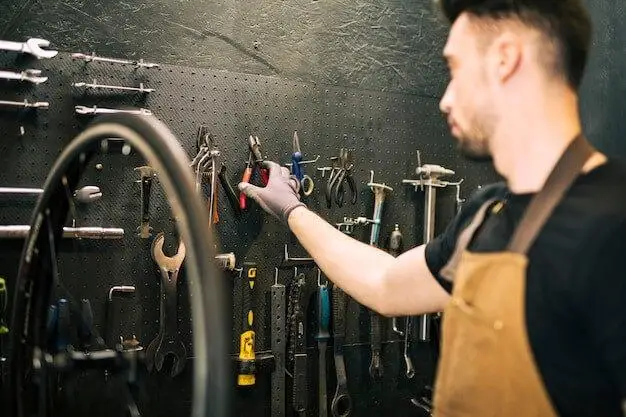
4. Hooks, Brackets, and Hangers
Pegboards offer various hooks, brackets, and hangers designed for optimal storage of individual tools or multiple tools with handles such as paintbrushes or scissors. You may want to utilize single hooks for individual tools, while double hooks may be more appropriate when supporting larger or bulkier items like power drills or gardening shears. The trick is to use various accessories until you find the one that works perfectly.
5. Group Similar Items
Arranging similar items together creates an organized workspace and makes finding tools easier. For instance, you can consider hanging all measuring and marking tools together or devoting an area to electrical tools and accessories. This strategy improves organization while streamlining workflow by keeping related tools together.
You can easily establish an efficient pegboard system to enhance garage tool organization by implementing these garage pegboard storage strategies.

Pegboard Ideas for Garage Tools Organization
Besides the standard organization strategies discussed above, below we have discussed a few more garage pegboard ideas to help you take your garage organization to the next level:
1. Maximizing Vertical Space With Shelves and Bins
To maximize garage storage space, you need to maximize vertical space by using every inch above or below the pegboard. One way to do so is to install shelves and bins to organize and store items that you cannot easily put on the pegboard directly, such as containers of nails and screws, etc.
2. Create Custom Tool Outlines or Shadow Boards
Take organization one step further by creating tool outlines or shadow boards on your pegboard. Simply trace around each tool on its designated spot until a visual outline forms. Not only does this add a professional touch to your organization, but it can also quickly identify missing tools as it serves as a visual reminder.
3. Add a Magnet Strip to Your Pegboard
Add a magnetic strip to your pegboard to organize and store items that cannot be secured using hooks and hangers. You can also consider adding a magnetic strip to your most frequently used tools section for instantaneous retrieval.
4. Utilizing Special Pegboard Accessories for Specialized Tools
Explore pegboard accessories designed specifically to accommodate specialized tools or equipment. For instance, you can find specialized hooks to hang your bike on the wall. Similarly, you can find specialized holders for storing lead extensions. These special pegboard accessories allow you to organize your pegboard accounting to your needs effortlessly.
5. Utilizing Labels and Color Coding
Add labels or color coding to your pegboard for even greater organization and ease of use. Label hooks or sections with items belonging there. Consider color-coding certain areas to designate specific tool categories or tool types. This visual system simplifies finding and returning tools, ensuring a seamless workflow.
Conclusion
Pegboards provide the ideal way to maximize space and organize your garage tools. But you need to ensure that you get the right pegboard by considering your storage needs. To begin installing the pegboard on your garage wall, you can follow the steps discussed above or follow the instructions in the manual if one comes with the pegboard. Once you have installed the pegboard, you can take inspiration from the garage pegboard organization strategies and the garage pegboard ideas discussed in the article to begin organizing your tools on the pegboard.


Would be great to have links to the products in the article 👍