
Want to turn your garage into a cheap, sturdy DIY work table? You don’t need expensive materials or fancy tools to do this project. With just a few basic supplies and some time, you can make something that works. This process will be quick and easy on your wallet. No matter how much DIY experience you have, you will be able to do this build with ease.
Plan Your Table
Size & Design
You want your simple garage workbench to meet your needs. First, think about what you want to do at the table. Will you use it to make things, fix things, or do crafts? Put your plans down on paper. This step will help you determine how big and sturdy your workbench needs to be. Some people like simple things. Some people want drawers or shelves. You can draw your ideas on paper. If you need ideas, search the web for simple garage workbench plans. There are a lot of choices that are right for your level of skill.
Garage Location
Choose the best place in your garage for your workbench. You need enough room to move around. Don’t block doors or windows. Look for nearby outlets. You might need lights or power tools. Before you start building, measure the space. Find the studs in the wall if you want to attach your workbench to it. This makes your table strong. Some plans say to put the workbench in a corner. This keeps your garage neat and saves space.
- Find a flat surface.
- Check that the lighting is good.
- There should be room under the table for storage.
Measurements
Grab a tape measure and note the size of your chosen spot. Write down the length, width, and height you want for your easy garage workbench. Most plans use a height of 34 to 36 inches. This feels comfortable for most people. Use a table to organise your measurements:
| Part | Length (inches) | Width (inches) | Height (inches) |
| Table Top | 60 | 30 | 36 |
| Bottom Shelf | 54 | 24 | 6 |
Double-check your numbers before you buy materials. Good measurements make building easier. You will avoid mistakes and save money. Plans with precise measurements help you finish your project faster.
DIY Work Table Materials & Tools

Lumber & Plywood
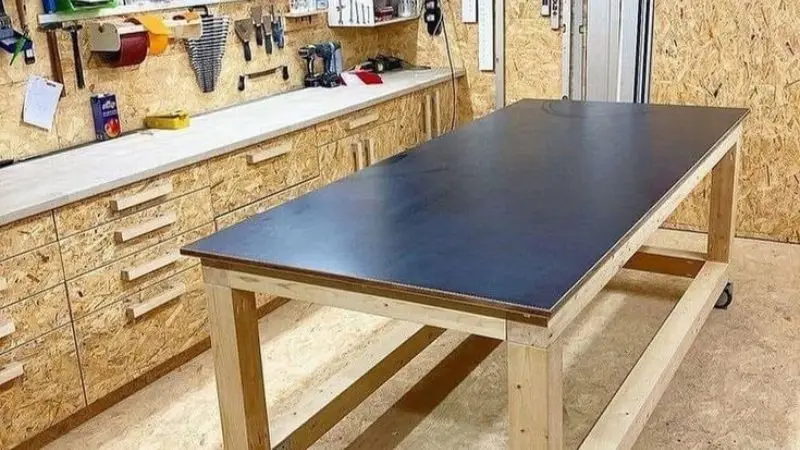
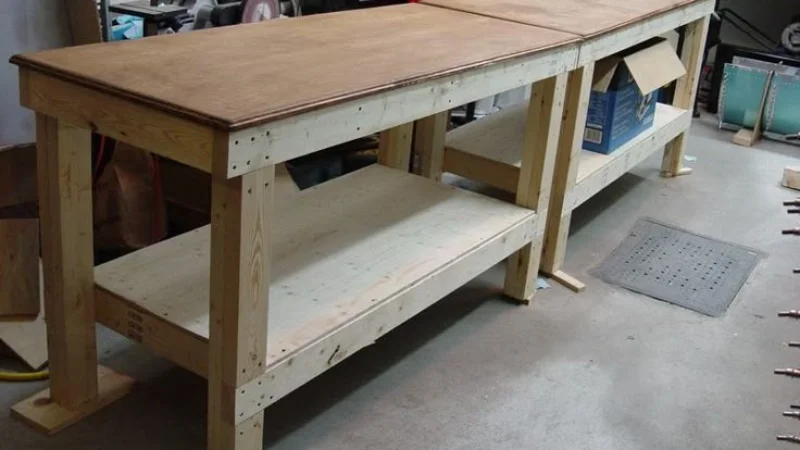
You want your DIY work table to last a long time. Begin with sturdy wood. The frame and legs are usually made out of 2x4s. If you want a lighter table, you can also use 2x3s. Choose 3/4″ plywood or MDF for the top. Both give you a flat surface to work on. Double the plywood for added strength. You can put a smaller piece of plywood on the bottom shelf.
Tools and Fasteners
To keep your DIY work table stable, you need the correct fasteners. Most joints can be held together well with decking screws. Use lag bolts to assemble the main frame and attach the table to the wall. These keep everything in place. You might need washers to help you grip better. Get some heavy-duty wheels or casters if you want to add them.
Tools Needed
You don’t need fancy tools for this diy project. A tape measure helps you get the right size. Use a saw to cut lumber. A drill makes it easy to drive screws and bolts. You need a level to check your table. A square helps you keep corners straight. Safety glasses protect your eyes.
DIY Work Table Build Steps
How to build a DIY work table? Building your diy work table is easier than you think. You can finish the whole project in about one hour if you follow these instructions. Grab your tools and let’s get started!
Cut & Prep Parts
Start by cutting your lumber to the measurements you specified. Use your tape measure and mark each piece. You want your 2x4s for the frame and legs to be straight and smooth. Cut your plywood for the work surface and shelf. Sand the edges to avoid splinters. Lay out all your parts on the floor. Double-check that you have everything before you move on.
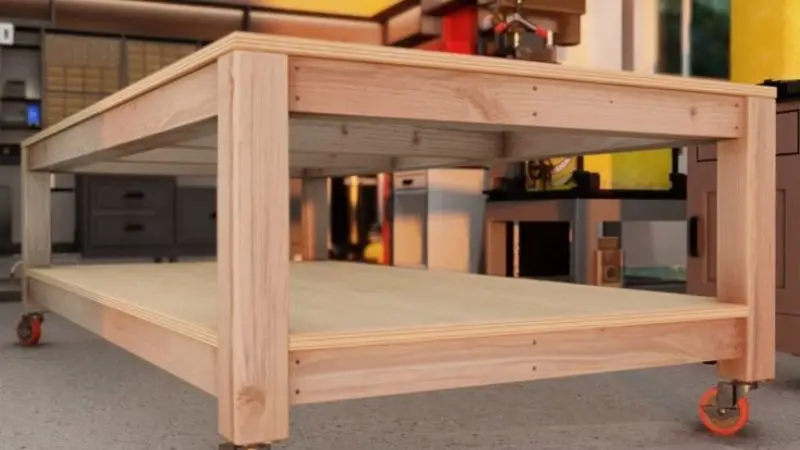
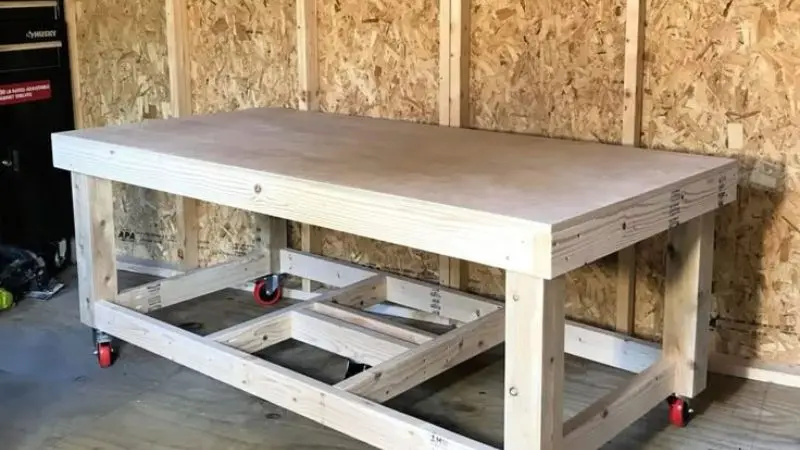
Assemble Frame
Now you can build the frame for your workbench. Place the 2x4s on the ground like a rectangle. Attach the corners with decking screws. Make sure the frame is square by using your carpenter’s square. Stand up the legs and space them like joists under the frame. Secure each leg with lag bolts. If you want extra strength, add a cross brace between the legs. This keeps your diy work table steady.
- Attach the back of the frame to the wall studs with lag bolts.
- Use washers for extra grip.
- Check that the frame sits level before you tighten everything.
Attach Top & Shelf
Lift your plywood onto the frame. This will be your main work surface. Line up the edges and make sure it fits snugly. Use decking screws to attach the plywood to the frame. Space the screws every 8 inches for a solid hold. If you want a shelf, slide the smaller plywood piece between the legs near the bottom. Secure it with screws. Now you have a spot for tools and supplies under your workbench.
Reinforce Structure
You want your diy work table to last for years. Add extra screws or bolts at stress points. Check the corners and legs for any movement. Tighten all fasteners. If you see gaps, fill them with wood glue. For more stability, install a diagonal brace under the work surface. This keeps your workbench from wobbling. Test the table by pressing down on the work surface. If it feels solid, you did a great job!
Your diy work table is ready for action. You have a sturdy work surface for any project. Whether you build, repair, or create, your workbench will support you. Enjoy your new workspace and keep your garage organised!
Safety & Upgrades
Stability Tips
You want your work table to stay steady while you work. Place your table on a flat spot in your garage. Check the legs for any movement. Tighten all screws and bolts. If you notice a wobble, add a diagonal brace under the top. This simple step boosts stability. You can also use shims under the legs if your floor is uneven. Test the table by pressing down on each corner. If it feels solid, you have good stability.
Durability Advice
You want your table to last for years. Pick strong lumber and thick plywood. Seal the wood with a clear finish or paint. This protects against spills and scratches. Clean your table after each project. Avoid leaving heavy tools in one spot for too long. If you see any cracks or loose screws, fix them right away. Regular checks help you keep stability and strength over time.
Add-ons
You can make your DIY work table for small spaces even better with a few upgrades. Add a bottom shelf for extra storage. Install casters if you want to move your table around the garage. Attach a power strip to the side for easy access to tools. You can also add hooks or bins for small parts. These upgrades help you keep your workspace organised and improve stability when you lock the wheels.
Troubleshooting
Wobbly Legs
You notice your work table shakes when you use it. This can make projects more complicated and less safe. Here’s what you can do:
- Check all screws and bolts. Tighten any that feel loose.
- Look at the floor. If it’s uneven, slide a shim or a small piece of wood under the short leg.
- Add a diagonal brace between the legs. This helps stop the wobble.
- Attach the back of your table to the wall studs for extra support.
Problems with the Surface
The top of your table can get rough, stained, or uneven at times. You need a smooth surface for your work. Try these solutions:
- Use fine-grit sandpaper to smooth the top and remove bumps and splinters.
- After each project, clean up the dust and dirt.
- Use a damp cloth and mild soap to remove stains.
- Fill deep scratches with wood filler, then sand them again.
- If the plywood bends, get a new piece.
To Sum Up
You now know how to plan your table, choose the right materials, build a strong frame, and make improvements. Every project in the garage is easier and safer with a strong DIY work table. You save money and get a place to work that works for you. Are you ready to start? Get your tools and start building right away!
FAQ
How much weight can my work table, which I made myself, hold?
Most home projects can be done on your work table. It should be able to hold at least 300 pounds if you use strong wood and secure screws. Before adding heavy tools or equipment, always test with lighter loads first.
Can I put this work table together by myself?
You can build it by yourself, yes. With help, some things, like lifting the tabletop, are easier. If you’re working alone, take your time and use clamps to keep things steady.
What if the floor of my garage isn’t level?
You can use shims under the legs to fix this. Check each corner to see if it moves. Make changes until you have a solid base for your work. This keeps your table from wobbling and lets you work safely.
Do I need any special tools for this job?
No, you only need a few basic tools. You can do the job with a saw, a drill, a tape measure, and a level. You might need a wrench or screwdriver if you want to add upgrades later.


