
You may think making an outdoor shower is complicated, but with a few basic tools and some imagination, it’s not as complicated as you think. Using simple plumbing, a plastic barrel or a copper pipe shower, you can create a workable and stylish place in the backyard of your house. This step-by-step guide includes everything from selecting the perfect location to preparing the plumbing, to adding all the final touches to your DIY outdoor shower! After you finish your project, you’ll have a cool off place that nobody else is allowed to touch, and you’ll have a cool place to relax in the heat after swimming or gardening, you will have a more relaxing and fun backyard.
How to Plan Your DIY Outdoor Shower Project for Your Backyard
Creating a retreat in your backyard begins with proper planning. Your DIY outdoor shower can be a relaxing space if you take careful preparation. This guide will help you find the right spot, select materials that won’t go bad any time soon, and follow rules so that your project runs smoothly. Taking the time to plan would make building your shower easier and ensure that it becomes a beautiful, functional addition to your yard.
How to Select the Most Optimal Location in Your Yard for Your Outdoor Shower
Before putting up a poolside shower or backyard shower, consider the issues of comfort and privacy. You want a place that won’t be too far off in the middle of nowhere, but that is easy to get to. Sunlight is important because that will keep the area warm and dry after it is used. Trees, fences, or even a corner of your yard may offer natural privacy. Also, think about the concentration of your water source – with your DIY outdoor shower, you will need plumbing connections. Check to make sure that the ground is flat and stable, so that your setup will be secure and safe. A little observation and imagination is all it takes now, and it will pay off later.
Why You Should Know About Local Building Codes and Permits Before Building
Every city or county has rules regarding outdoor plumbing. Before you begin, try to find out if you require permits for your outdoor shower ideas. Some areas have specific drainage systems or water usage requirements. Contact your local office or find out online what is applicable to your backyard. Following these rules will help you avoid fines as well as the need to cut down your DIY outdoor shower after your installation. Planning around local codes helps keep your project legal, safe, and worry-free.
How to Choose the Appropriate Materials to Make Your Outdoor Shower Last
What you decide to use will determine how many years you will get from your DIY wood base outdoor shower for summer. Look for options that are resistant to rain, sun, and wind. Pressure-treated wood provides a natural appearance, though it may require sealing, and stainless steel or copper pipe shower installations are resistant to rust and are of a modern design. Plastic is light and cheap but not as strong. Think about your budget, style & how your shower fits with your backyard theme. Picking the right materials for a long-lasting outdoor shower with a privacy screen DIY that will keep your summer cooling ideas fresh year after year.
Essential Tools and Materials You Will Need for Building an Outdoor Shower
Before you begin your DIY outdoor shower, it’s important to have all the right tools and materials on hand. Having everything is key to saving time and making sure your project goes smoothly. From plumbing parts to the shower frame materials, being organised helps you avoid mistakes. This section will help you navigate the plumbing parts, building materials, and necessary tools to make your backyard shower strong, stylish, and perfectly functional.
What Plumbing Components Will You Need for Your DIY Outdoor Shower
In order to make your poolside shower or your backyard shower work properly, you need the right plumbing components. Start with a garden hose or PVC pipe to get water. A hose adapter can hook up your shower to an outside faucet pretty easily. Choose, for your shower, a valve that will enable you to control the water flow, and a showerhead to match your taste, either modern or rustic. Don’t forget the properly fitting pipe fittings, connectors, and Teflon tape to ensure no leaks. When it comes to warm water, think about a solar heater or a plastic barrel that is warmed in the sun. With the proper parts, your step-by-step outdoor shower guide will come easily to follow.
Choosing Wood, Metal, and Composite Materials for Your Shower
Your shower frame and enclosure can be made of wood, metal, or composite material. Wood is natural and gives a warm look and can be used in a DIY wooden outdoor shower, during summer days, but it may need to be covered to keep out the weather. Modern, sleek, and stainless or metal frames are smooth and corrosion-free. The composite materials are made of a mixture of wood and plastic so as to be of high strength, durable, and demand minimum maintenance. Consider your general backyard style, budget, and length of your out-of-shape outdoor shower with privacy screen DIY. Selecting the appropriate material would solve the problem, and you would ensure that your plans for backyard cooling would keep you cool and attractive over the years.
Tools You Need to Build and Install Your Outdoor Shower
Having the right tools enables easier and quicker building of your DIY outdoor shower. You will need a drill, screwdriver, saw, and tape measure to cut and assemble parts. A level keeps everything straight, and a wrench is for plumbing connections. Safety gear, such as gloves and goggles ensure your safety during construction. Sandpaper comes in handy to smooth rough edges if you’re using wood. Keeping your tools organized and within reach can help you work efficiently and avoid frustration. With the proper materials and tools, your cheap backyard outdoor shower idea can become a reality, a beautiful one in your yard.
Step-by-Step Instructions for Creating Your DIY Outdoor Shower
Building your DIY outdoor shower can be easy if you follow the right steps. From site preparation to putting finishing touches, this is a guide that takes you from the first step to the final step. A well-planned project makes sure that your poolside shower or your backyard shower is stable, functional, and stylish. Each step incorporates practical construction tips that also give you ideas on how to make your backyard cooling ideas fun all summer long.
How to Prepare the Location and Make a Strong Foundation for Your Outdoor Shower
The first step is to select the most suitable location for your home-made outdoor shower. Rough up the ground and clear the grass, rocks, and debris, and level the ground with a shovel. In case you are interested in a free-standing shower, mark the space with some stakes and string. Pour gravel or pavers to ensure that it is a firm and stable foundation, and the water will be able to drain. In case you are willing to use a raised platform, then you can construct a wooden base. The drainage allows ensuring that your cheap backyard outdoor shower ideas are useful and durable with no chances of pooling up water and causing harm.
How to Install Plumbing Lines and Fixtures for Your DIY Outdoor Shower
Once the foundation work is finished, it’s time to install plumbing. Connect your DIY outdoor shower kit to a garden hose or PVC pipe using the included pipe fittings and connectors. Attach a shower valve to control the flow of water and select a showerhead, from modern to rustic. For warm water, put a plastic barrel in the sun and heat water naturally. Installing everything tightly to stop leaks and get your step-by-step outdoor shower working well, you’ve got a good and working shower in your back garden.
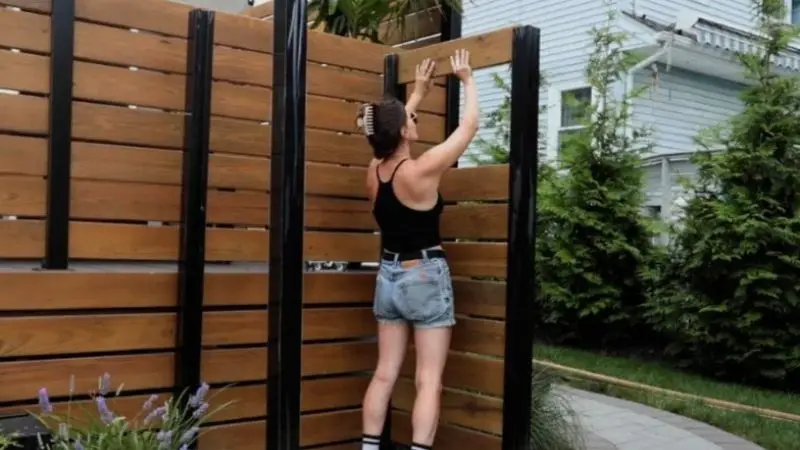
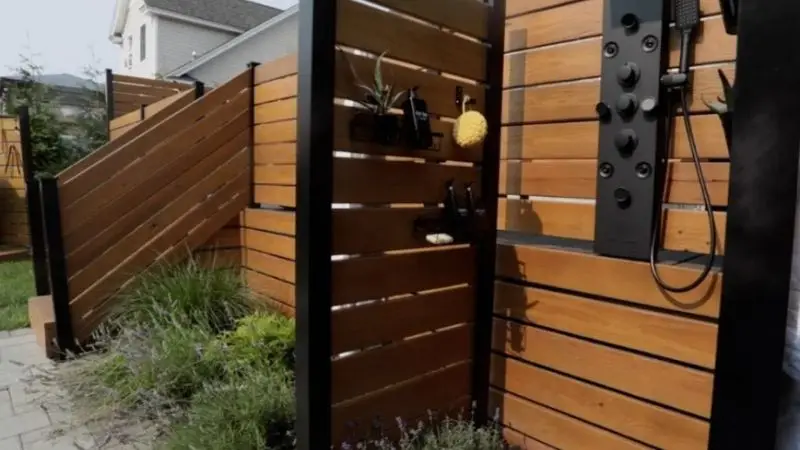
How to Build the Shower Enclosure for Privacy and Style
The second step is to make the enclosure of wood, metal, or composite panels out of your kit. Trace and cut all the pieces, and screw or fasten them. You may make something free-standing, or you may join it to a fence to give it more support. Install towel hangers and shelf holders to locate soap, having both functional and attractive mechanisms. After this privacy screen outdoor shower DIY tutorial, you can make an intimate experience that feels comfortable and secure, and yet, appears to be as good as it should be in your backyard.
How to Add Flooring, Drainage & Waterproofing to Get a Clean Shower
Proper flooring and drainage make your DIY outdoor shower safe and dry. Cut a hole in the floor for the drain and attach it to a pipe to transport water away from your setup. Use waterproof sealant around edges and incorporate gravel or pavers to encourage water flow in natural areas. Installing the drain correctly is important to keep your shower clean and water in the pool. This step is paramount when it comes to making your cheap backyard outdoor shower ideas into a practical and enjoyable outdoor space.
How to Install the Showerhead and Put the Finishing Touches
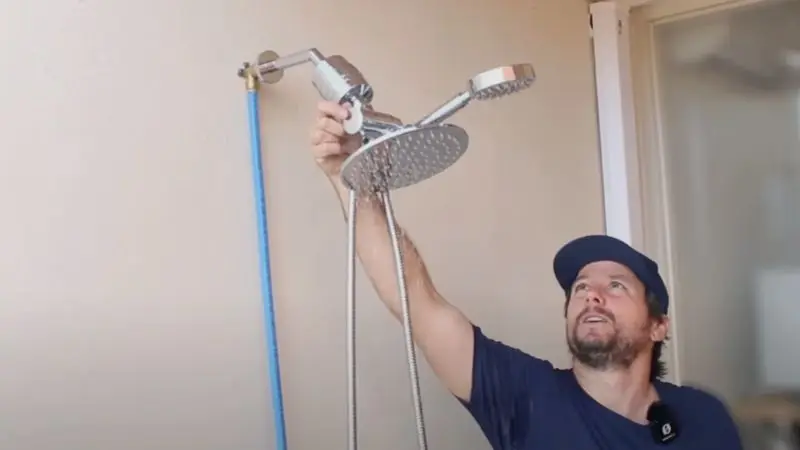
Lastly, remove your showerhead assembly using the clip and ensure that there is an opening to get the water flowing. Make it comfortable with an adjustment of the height, and have some finishing details, including a curtain, plants, or light, to make the location welcoming. It is these small touches that turn your homemade outdoor wooden summer shower into a summer vacation. Put your kit aside to be repaired or upgraded. The use of this step-by-step outdoor shower guide would definitely result in a beautiful and functional backyard shower that would be as good as new after swimming or doing some gardening.
How to Maintain and Care for Your DIY Outdoor Shower
Building your Do-it-yourself outdoor shower is only the start. Proper maintenance keeps it functional, safe, and stylish year after year. From seasonal maintenance to cleaning and some additions, this guide will help your backyard shower stay a relaxing retreat. Following these simple steps keeps your poolside shower or backyard shower durable, fresh, and fun throughout every season.
How to Ready and Winterize Your Outdoor Shower Each Season
To make sure that your DIY outdoor shower can be used all through the year, you should winterize your shower during the fall. Get the pipes emptied all the way and put the showerhead away, somewhere dry. In case of units standing freely, move them to a secure place or put a tarp or a plastic bag on them to prevent snow and ice. During spring, check whether the plumbing is leaking, clean the space, and put the shower back in place. The seasonal preparation will make sure that your ideas of a cheap backyard outdoor shower are ready to go, and even your ideas of the backyard cooling are ready to go on year after year.
How to Prevent Mold and Mildew in Your Outdoor Shower
Mold and mildew can rapidly grow in damp outdoor areas. Keeping your DIY outdoor shower dry is very important. After each use, always wipe down walls, floors, and any wooden surfaces. Open the enclosure so it will have better airflow and avoid moisture accumulation. If your shower has wood, make sure you reseal it every year. To scrub corners, drains, and surfaces, use a mild cleaner and treat any mold you see immediately. Following these steps is how to keep your outdoor shower with a privacy screen DIY fresh, hygienic, and ready for regular use.
Simply Upgrades to Make Your Outdoor Shower Comfortable and Stylish
Furnish your backyard shower with some extras. Assign easy accessibility beds like benches or stools, towels, and robes hooks, and evening showering solar lamps. Summer potted plants can also add a nice touch to your prop constructed wooden outdoor shower, and a colorful curtain can be used to instantly give the appearance a fresh look. These simple upgrades enable you to personalize your poolside shower and make your area entertaining once again. Trying out a few basic modifications, your step-by-step outdoor shower excursion will serve as an excellent and trendy display in your yard.
Wrap-Up
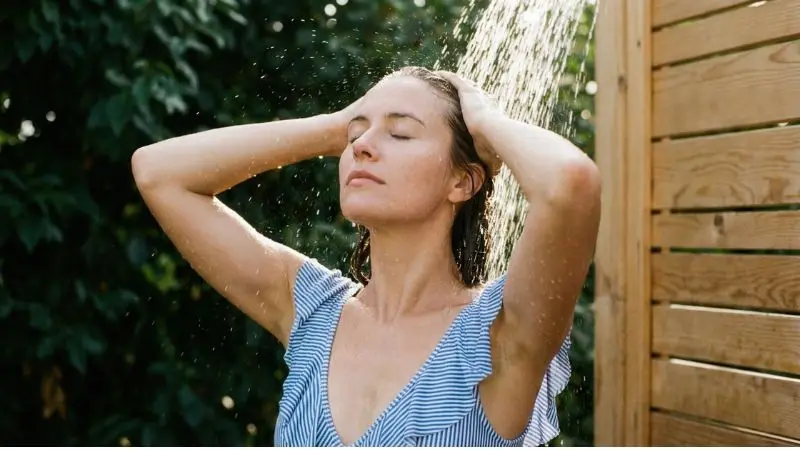
A DIY outdoor shower turns your backyard into a place of rest. This guide will take you through the selection process, fitting of plumbing, enclosures, and also the decorative features. Easy upgrades, routine upkeep, seasonal attention, and common care assist your poolside shower in retaining its functionality, cleanliness, and welcoming desirability throughout the year. Regardless of the decision you make as to whether you want a DIY wooden outdoor summer shower or a copper pipes shower, it is your personal oasis. These step-by-step outdoor shower guide tips will help you design a convenient, classy, and exclusive outdoor shower that includes value to your outdoor living as well as your ideas to cool your backyard and share with your friends and family.
FAQ
What is the cost of constructing an outdoor shower?
It is possible to make a simple outdoor shower for 100-300 dollars. The cost will vary with the materials you use and the availability of the tools that you have. Plastic barrel and basic plumbing will result in low expenses.
Will it be possible to use hot water in case I have an outdoor shower?
Yes! A solar shower bag or a dark plastic barrel left in the sun will help you to heat water. To be more comfortable, have your shower plumbed to your hot water line in your house, but you might desire more plumbing.
Should my outdoor shower have a drain?
A drain is used to maintain the area of the area. The water could be diverted using gravel, pavers, or a simple pipe. Other individuals will leave the water to flow into the ground in case the local laws allow.
What do I do to remain secret about using my outside shower?
Try these ideas for privacy:
Besides, include a bamboo shower curtain or screen.
Build a wooden enclosure.
Use tall plants or shrubs in the shower.
Will bugs come to my open-air shower?
Whatever, you may find bugs around water, but you can go down on them. Clean the area often. Cover drains with screens or covers of mesh. Plant herbs that are used to keep away bugs, like mint or lavender, around the premises.


