
Want to have a DIY chicken coop but not sure where to start? Don’t worry—you can do it, even if it’s your first time. How to build a chicken coop may sound tricky, but with simple tools and a clear plan, it’s easier than you think. A DIY chicken coop gives your flock a safe, warm, and comfortable home. You can choose the best materials for a chicken coop to make it last and keep your birds happy year-round. With patience and the right steps, anyone can build a coop that’s both practical and fun, no matter their skill level.
Plan Your DIY Chicken Coop
You should take some time to organize first before deciding to swing a hammer. Good planning will help you save your time, money, and efforts, particularly when you are building a DIY chicken coop for the first time. This will be the step-by-step guidance on how to make a secure and comfortable place in which you keep your flock. No matter whether your goal is low-cost DIY designs of chicken coops or a more permanent solution, planning will be your key to success.
Check Local Rules
Before you begin, research your local regulations. Some towns have specific laws about keeping backyard chickens. You may need a permit for your coop, and there could be rules about:
- The number of chickens you can own
- Minimum distance from property lines or neighboring homes
- Placement of the coop within your yard
Taking the time to confirm these rules prevents future issues. For example, if you’re learning how to build a chicken coop for six chickens, your local laws may limit the number you can keep, so it’s better to check first.
Choose Location & Size
Pick a coop location that gets both sun and shade throughout the day. A dry area that won’t flood in heavy rain is best. Make sure you can see the coop from your house, so it’s easy to monitor your flock.
When it comes to size, remember:
- Each chicken needs about 3–4 square feet inside the coop
- If you plan to expand your flock later, add extra space now
- Good design ensures happier, healthier chickens
This is especially important if you’re following a step-by-step chicken coop guide or working on a small-space chicken coop DIY project.
Gather Materials & Tools
Once your location and design are set, gather your materials and tools. Here’s a simple starter list:
Materials:
- Plywood
- 2×4 lumber
- Treated wood for the base
- Screws and nails
- Polycarbonate roofing
Tools:
- Hammer
- Saw
- Drill
- Measuring tape
- Bolts
If this is your first build, look for an easy DIY chicken coop for beginners plan. The right design will keep your chickens safe, make cleaning simple, and give them a comfortable place to roost.
How to Build a Chicken Coop: Step-by-Step
Building a chicken coop doesn’t have to be overwhelming. By breaking it into clear stages, you can create a sturdy, safe, and comfortable home for your flock. Whether you’re aiming for cheap DIY chicken coop ideas or a more detailed design, these steps will guide you from start to finish. This is the perfect step-by-step chicken coop guide for beginners and small flock owners.
Step 1: Prepare the Foundation
The solid foundation is the initial process of a DIY beginner chicken coop. A good foundation makes the coop level, dry, and free of pests. The most common choices are concrete blocks, pressure-treated wood, or a gravel pad. Put it down in the place where the coop shall be and have it about level and sound.
Keep your coop a few inches above the ground so that moisture does not accumulate and predators cannot dig underneath. This is a little detail, but it can dramatically prolong the life of your coop and keep your chickens safe, particularly when the learner is learning how to make a 6-chicken coop.
Step 2: Build the Frame
The frame forms the backbone of your coop’s structure. Use 2×4 lumber for strength and stability, cutting each piece to the correct size. Secure the boards with screws or bolts, and check that all corners are perfectly square.
A level will ensure your frame is even, which is important for attaching walls and the roof later. If you plan to add an outdoor run in the future, mark the spot where it will connect now. A sturdy frame not only supports the coop but also makes future upgrades easier for your small-space chicken coop DIY project.
Step 3: Install Walls
Once the frame is ready, attach plywood panels to create the coop’s walls. Secure them with nails or screws, and leave room for windows or vents to promote airflow. Good ventilation is vital for your chickens’ health. Use treated wood for the lower sections to protect against rot and pests.
Check for gaps where wind or rain could enter, as a draft-free coop keeps your flock comfortable year-round. This step is important in any DIY chicken coop build because proper walls protect your hens from harsh weather and make cleaning easier over time.
Step 4: Add Roosting Rails
Roosting rails give chickens a safe place to sleep. Install them about two feet off the ground using smooth, sturdy wood to prevent injury. Space them so each bird has enough room to perch without crowding. Placing a removable tray or board underneath the rails makes cleaning droppings much easier.
Well-placed roosting rails keep your flock happy and prevent fights for space at night. In any DIY chicken coop for beginners, this step is just as important as nesting boxes because it directly affects the health and comfort of your hens.
Step 5: Sheathe the Walls
Sheathing provides additional strength and weatherproofing to your coop. Cover the outer walls with exterior-grade plywood, siding, or any other hardwearing sheeting material. Lap the panels to exclude rain, and caulk all the seams to exclude drafts.
Not only does this enhance durability, but it also gives your coop an overall more finished look. Even on a cheap DIY chicken coop idea, good sheathing is worth taking the time and effort over, since it will save your efforts against moisture damage and help increase the life of the whole structure.
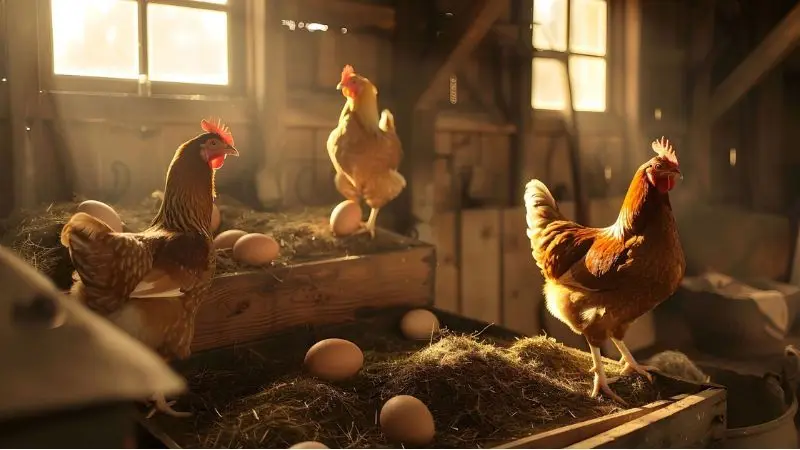
Step 6: Build Nesting Boxes
Egg collection depends on nesting boxes. The boxes must be approximately 12×12 inches, with one for every three or four hens. Fix them a little higher than the floor level and put a lip to prevent the loss of bedding. To be convenient, make the boxes such that they can be accessed externally, preferably outside the coop- this will simplify the process of collecting eggs.
Having comfortable nesting boxes motivates your hens to lay in the proper location, as eggs will stay cleaner and be more likely to avoid being dropped. They are a significant component of any step-by-step chicken coop guideline.
Step 7: Install Doors
Any coop should have two doors, one that people can use and one that your chickens can use. You can use heavyweight plywood or solid wood and fix them using heavy-duty hinges and heavy latches. It is advisable to cover any ventilation or openings with hardware cloth so that predators can be kept out.
Make sure that doors open and close properly to avoid the difficulty of feeding and cleaning every day. In a DIY chicken coop, properly fitted doors are key to an easy chicken coop, particularly when it comes to locking your chickens in at night.
Step 8: Add the Roof
The final step in construction is installing a durable roof. Polycarbonate panels or metal roofing are excellent options for protecting against rain and snow. Slope the roof so water runs off easily, and extend the overhang to shield the walls.
Adding vents under the eaves ensures good airflow, preventing dampness and odors. The roof is not just a finishing touch—it’s an essential shield against the elements, making your small space chicken coop DIY project complete and ready for happy hens.
Chicken Coop Run & Finishing Touches
Once your main coop structure is ready, it’s time to focus on the run and extra details that will make life easier for you and healthier for your flock. These steps will help you finish your DIY chicken coop strong, whether it’s a small-space DIY chicken coop or a larger setup. Proper finishing touches ensure your hens have a safe, comfortable, and functional home.
Build a Chicken Run
A chicken run provides your chickens with a secure and enclosed space where they can roam, scratch, and peck. Fasten it directly to your coop by strong wire mesh or hardware cloth on the sides and on the top. This excludes hawks, raccoons, etc.
Build the run high enough that you can walk around inside—this helps when you clean, feed, and gather eggs. When you place your run on the grass or dirt, it will enable your flock to dig and seek bugs in their nature. A safe run is also a mandatory pasture as a step-by-step coop chicken guide to keep chickens in motion and safe.
Predator-Proofing
Predators can be persistent, so strong defenses are essential. Bury hardware cloth at least 12 inches into the ground to stop animals from digging underneath. Cover all vents and windows with secure mesh, and use heavy-duty latches on every door and gate.
For added safety, choose locks that raccoons can’t open. Close the coop door every night to keep your hens safe while they sleep. A well-predator-proofed setup is one of the most important parts of how to build a chicken coop for six chickens, ensuring your flock stays safe year-round.
Add Accessories
Accessories make your coop more functional and your chickens happier. Install a feeder and waterer inside the coop, keeping them slightly off the ground to stay clean. Add a dust bath in the run so hens can keep their feathers healthy and free of parasites. You might also include fun extras like swings or perches. Optional upgrades include:
- Wheels on the coop for easy moving
- Removable trays for faster cleaning
- Automatic doors for added convenience
These small improvements turn a basic design into a comfortable, low-maintenance DIY chicken coop for beginners.
Test Accessibility
By the time you declare your project finished, you should walk inside your coop and run around to test accessibility. Lubricate doors and windows and ensure your ability to reach every corner to clean it or make repairs.
Test an increasing clean-up to find out whether there is something that prevents your movement. Having easy access not only speeds up chores, but it can also keep your flock healthier. A considered design will save you time and stress and cause your cheap DIY chicken coop ideas to be a professional-looking build.
Wrap Up
Building your own chicken coop can be a rewarding project that saves money and gives your flock a safe, comfortable home. With the right plan, materials, and a step-by-step chicken coop guide, even beginners can create a sturdy design. From choosing the location to adding a run and accessories, each step helps keep your hens healthy and happy. Whether you’re exploring cheap DIY chicken coop ideas or learning how to build a chicken coop for six chickens, good planning makes all the difference. With a little effort, you’ll have a functional, long-lasting coop and plenty of fresh eggs to enjoy.
FAQ
How many chickens can I hold in my coop?
You need to give each chicken at least 3-4 sq. feet in the coop. If you are looking to have ten chickens, you should plan for 30-40 sq. ft. More room for happy, healthy chooks.
What is the best bedding chicken coop has to offer?
Pine shavings seem to do the job. They keep odor from building up and are dry. You can also use straw or sand. Try to avoid using cedar shavings because they are toxic to your chickens.
How often do I clean my chicken coop?
Clean the coop once per week. Take out old bedding and give it a brand-new alternative. Clean scrub waterers and feeders. Clean coop = healthy/safe happy hens.
Do you have to insulate a chicken coop?
You do not require fancy insulation. Ensure that trips to one’s coop are dry and drafty. Good ventilation helps more than thick walls do. In cold regions, add extra straw for warmth.
Am I just solo enough to build a chicken coop?
You can! Lots of people either do the first coop themselves. Use great layouts and relax. Get a friend to assist you in lifting heavy parts.


