
You don’t need to visit a professional car wash to make your car shine. A DIY car wash at home is easy, affordable, and gives you full control. You choose gentle cleaners, avoid scratches from automatic brushes, and spend quality time caring for your vehicle. Washing your car yourself isn’t just smart—it can be relaxing and satisfying too.
With a few basic supplies and the right steps, you’ll protect your car’s paint and get a deep, clean shine. Skip the drive-through—learn how to wash your car at home the right way and enjoy pro-level results without the extra cost.
DIY Car Wash Preparation
Learning how to do a DIY car wash at home starts with the right prep. When you’re ready and organized, you’ll get better results and enjoy the process. Let’s get everything set before the first rinse.
Gather Essential Supplies for Car Wash
Before you begin your DIY car wash, ensure you have all your supplies ready. You do not want to run around looking for things once your car is wet. Here’s a simple checklist to help you get started:
- Two buckets (one for soapy water, one for rinsing)
- Car wash mitt or soft sponge
- Car shampoo (or make your own with a few drops of dish soap in a bucket of water)
- Microfiber towels for drying
- A wheel cleaner and a brush
- Vacuum cleaner for the inside
- Glass cleaner
- A trash bag for any garbage inside your car
You can make a DIY car wash soap at home by mixing a small amount of dish soap with warm water. This works well if you do not have special cleaning products.
Choose the Best Place for a Car Wash
For a proper step-by-step car wash guide, location matters. Always wash your car in the shade or in a cool garage. Sunlight dries water too fast and can leave spots or streaks. Pick a space with enough room to move freely around the car. Avoid grassy areas, which get muddy.
Use a driveway or quiet corner with water access. Washing your car in a shaded, open spot helps you apply soap evenly and rinse thoroughly. A smart setup improves your results and protects your car’s paint from watermarks and heat damage.
Abide By All Safety Tips
Washing your car is fun, but safety matters—especially if you’re learning how to do a DIY car wash at home. Water and soap can make surfaces slippery, so walk carefully. Use gloves if you’re using strong products, and avoid getting them in your eyes.
Keep electrical tools like vacuums and extension cords dry. If you’re cleaning under the hood later, follow tips on how to clean a car engine bay safely—never spray directly on electrical parts. Safety keeps your car wash fun and problem-free, while also protecting your tools, car, and yourself.
Clean the Interior First
When learning how to do a DIY car wash at home, always start inside. Cleaning the cabin before the exterior avoids dragging dirt onto your newly washed car. A tidy interior instantly makes your car feel newer and more comfortable.
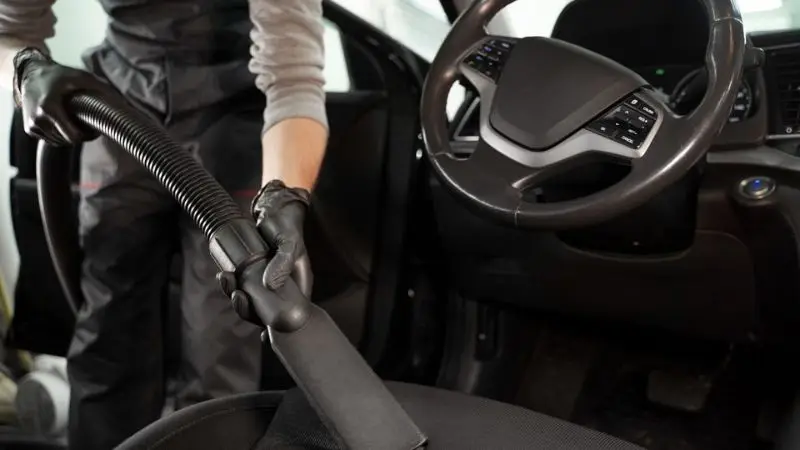
Vacuum All the Interior
Before vacuuming, remove all trash and personal items. Grab a small trash bag and clear out old papers, bottles, or wrappers. Then, use your vacuum on seats, mats, and under the seats. Slide the seats to reach tight areas. Use a brush attachment for your dash, door panels, and vents.
This is the best way to wash your car yourself—from the inside out. If you have pet hair, try a lint roller. Clean the trunk too for a full refresh. Interior dirt adds up fast, so taking your time here makes a big difference in your car’s overall feel.
Wipe Car Surfaces
After vacuuming, wipe down surfaces using a soft microfiber cloth and a gentle cleaner. Focus on the dash, steering wheel, gear shift, and door handles—places you touch most. Spray the cleaner on the cloth, not the surface, to avoid streaks.
Use a brush or an old toothbrush for cup holders, air vents, and tight corners. This part of the step-by-step car wash guide gives your car a polished look inside. Always test new products on a small hidden area first. A clean interior makes every ride better, and it’s a key part of how to do a DIY car wash at home right.
Clean Wheels and Tires
When learning how to do a DIY car wash at home, always clean the wheels and tires first. They collect brake dust, mud, and road grime. Starting here keeps the dirt from splashing back on your clean car later.
Apply Wheel Cleaner
Wheels need special care because they face the roughest conditions. Place the wheel over the car service ramp. Then spray a wheel cleaner generously over the tires and into tight spots around the rims. Let it sit for one or two minutes. This loosens grime and brake dust. If you don’t have a wheel cleaner, make a DIY mix with water and vinegar.
Avoid using strong household cleaners—they can ruin your wheel’s finish. Using the best way to wash your car yourself means using the right products. Start with the front wheels, then move to the back. Cover all angles, and let the cleaner do its job before scrubbing.
Scrub and Rinse
Use a soft or dedicated wheel brush to scrub the wheels gently in circles. Focus on tough areas—behind spokes, around lug nuts, and tire edges. If the dirt is stubborn, apply a bit more cleaner. Use a different brush for tires to avoid scratching the rims. This part of the step-by-step car wash guide gives your wheels a professional look.
After scrubbing, rinse the wheels well using clean water from a hose or bucket. Dry them with a microfiber towel to avoid water spots. Clean wheels boost your car’s appearance and protect them from rust or long-term damage.
Clean Your Engine Bay the Right Way
A clean engine bay doesn’t just look good—it helps you spot leaks early and prevents dirt from damaging key parts. You might wonder how to clean a car engine bay, but it’s easier than it sounds and makes a great final touch to your DIY car wash.
Ensure All Safety Measures
Before cleaning, always let your engine cool completely. A hot engine can be dangerous and may be damaged by cold water. If you’re using a lot of water, disconnect the battery. If not, cover it securely with plastic wrap or a bag. Also, cover delicate parts like the air intake, open filters, and exposed wires.
These parts can get ruined by water or cleaning products. This quick prep step keeps your car safe and helps you avoid short circuits or costly repairs later. Safety first makes the whole process smoother and protects your vehicle from damage.
Remove the Loose Dirt
Start with dry cleaning before you touch any water. Use a soft brush or compressed air to remove leaves, dust, and loose dirt sitting on and around the engine block. This helps prevent grime from turning into sticky messes later. Removing dry debris also helps you see areas that need more attention.
It’s a simple, quick step that makes your cleaning easier and keeps things tidy. Always begin dry to avoid pushing dirt deeper into your engine bay. With just a few minutes of brushing, you’re setting yourself up for a better and safer clean.
Apply Degreaser
Once the surface dirt is gone, it’s time to tackle the grease. Spray a degreaser that’s safe for cars, or mix water with a few drops of mild dish soap. Focus on areas with visible oil stains and built-up grime. Let it sit for about five minutes to break everything down.
Be careful not to use strong chemical cleaners—they can crack hoses or damage plastic. This step loosens the grease so it’s easier to remove in the next phase. Using a gentle cleaner helps you protect your engine parts while still getting them fresh and clean.
Scrub and Rinse the Required Area
Apply a little dab of oil or stubborn stain with a gentle, soft brush. There is no need to scrub it hard, only to loosen off grime. Wash with weak water or a humid towel. It is never advisable to spray water directly in the engine bay. Rather, one part should be cleaned at a time, and nothing should get soaked.
It is aimed at cleaning without flooding. Be careful and patient not to break anything or create electrical problems. Start slow, working slowly around every bit. Light rinsing will aid the removal of dirt without exposing all the parts to danger, in particular, delicate places, such as wires and sensors.
Dry Engine Bay and Add Details
After cleaning, take a microfiber cloth and dry the entire engine bay thoroughly. Don’t leave water behind—it can cause rust or electrical issues. Remove the plastic wraps from the battery, wires, and air intake. Now, if you want a polished look, apply a bit of engine bay dressing to plastic and rubber parts.
This adds shine and protects them from drying out or cracking. A clean engine bay not only looks impressive but also helps you maintain your car better and can increase resale value. It’s a satisfying final step in your car cleaning routine.
Pre-Rinse Exterior Part of the Car
Before using soap or a wash mitt, give your car a full rinse to remove loose dirt. This step helps you avoid scratching the paint and sets the stage for a cleaner, safer wash.
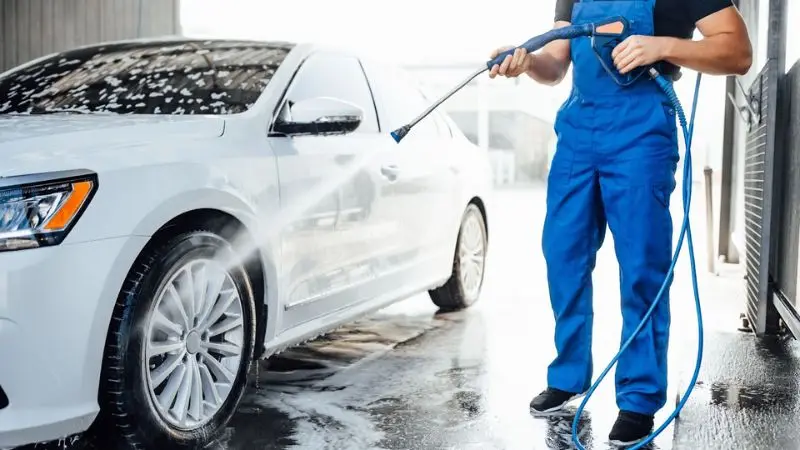
Remove Loose Dirt
Before starting your scrub, it’s important to rinse off all loose dirt and dust. During a DIY car wash, skipping this step can cause sand and grime to scratch your paint when you start scrubbing. The best way to wash your car yourself is by spraying clean water over the entire surface.
Begin at the top—roof first—and slowly work down to the sides, windows, trunk, and bumpers. Pay extra attention to the lower sections where dirt collects. This early rinse removes grit and makes cleaning easier. Always rinse before touching your car with any mitt or sponge.
Get all the tools
Knowing how to do a DIY car wash at home means having the right tools—and making sure they’re clean before use. Dirty equipment can scratch your car’s surface, so always check for leftover grit in nozzles, buckets, and hoses.
Here are some great options for rinsing:
- Garden hose with spray nozzle – Gentle and effective for removing loose dirt.
- Pressure washer – Works well, but use on low settings to avoid paint damage.
- Bucket with a large cup or pitcher – A good backup if you don’t have a hose.
Use slow, even pours and clean tools to protect your paint and ensure a smooth wash.
Wash the Car Body
Washing your car at home can be easy, fun, and rewarding. You don’t need fancy tools—just the right method and a bit of time. If you want to know how to do a DIY car wash at home, follow these simple steps to protect your car’s finish and get professional-looking results. Even beginners can wash a car like a pro!
Adopt the Two-Bucket Method
Wondering how to wash your car without scratching the paint? Use the two-bucket method! One bucket holds soapy water, the other holds clean water for rinsing your mitt. This keeps dirt off your car and avoids swirl marks.
Here’s how it works:
- Fill one bucket with clean water (rinse bucket)
- Fill the other with soapy water (wash bucket)
- Dip the mitt in soap, wash a section, then rinse it in the clean bucket
- Repeat for each section
Start with the cleanest areas and leave the dirtiest (like bumpers) for last. This easy method gives your car a safer, cleaner finish.
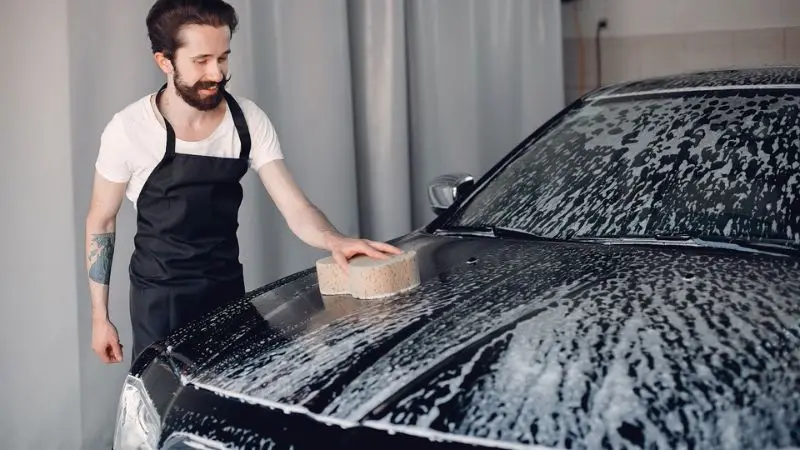
Try Car Shampoo or DIY Soap
The soap you use matters. The best way to wash your car yourself is by using car shampoo. It’s gentle on paint and removes dirt effectively. But if you’re out, a simple DIY mix works too. Just add a few drops of dish soap to a bucket of water—but don’t overdo it. Too much can strip wax from your paint.
Compare your options:
- Car shampoo: Paint-safe, foamy, but pricier
- DIY soap: Cheaper, easier to make, but it can remove wax
Avoid using laundry detergent or strong cleaners. Always pair your soap with a soft mitt and rinse often.
Try Top-Down Wash
A top-down wash is one of the smartest steps when learning how to wash your car. Start at the roof and work your way down. This keeps your mitt cleaner and prevents dragging dirt across already-washed areas.
Follow this top-down order:
- Roof
- Windows and windshield
- Hood and trunk
- Doors and side panels
- Bumpers and lower panels
Rinse each section right after washing it. This stops soap from drying on the paint and leaving streaks. For a streak-free shine, work in the shade and take your time. It’s easy and satisfying when done right!
Rinse and Dry the Car
Now that your car is fully scrubbed, it’s time to rinse away all that soap and dry the surface to a perfect shine. These final steps are essential in how to wash your car without streaks or spots.
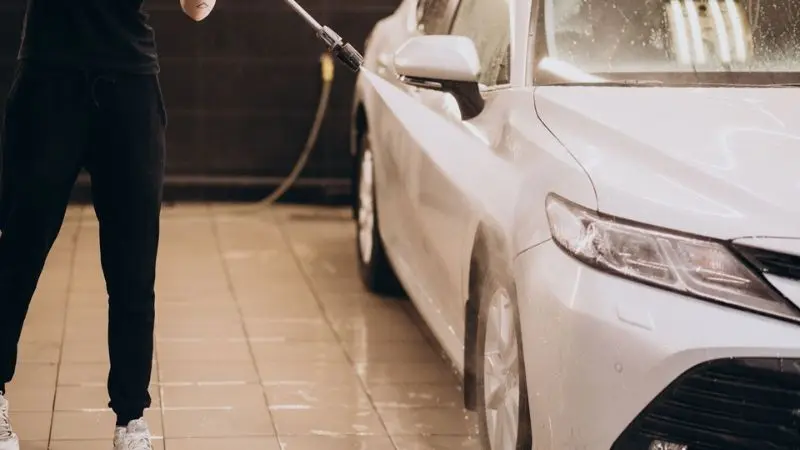
Rinse Off the Soap from the Car
After scrubbing, you need to rinse every part of your car with clean water. Start from the top—the roof—and work your way down. This helps the soapy water flow off easily. Use a hose, or if you’re using a bucket, pour water gently over each panel.
Focus on these areas:
- Roof, windows, doors
- Mirrors, handles, and trim (soap hides here)
- Lower sections and wheel arches
If it’s a sunny day, rinse one section at a time to stop soap from drying too fast. Always check for leftover suds and keep rinsing until you see clear water.
Dry with Microfiber
Knowing how to dry a car after washing is just as important as cleaning it. Use a clean microfiber towel—they’re soft, absorbent, and won’t scratch your paint.
Here’s the best way to dry your car:
- Start at the roof and work downward
- Gently drag or pat the towel across each section
- Flip the towel when it’s soaked
- Use a second towel for bumpers and wheels
Avoid paper towels or old rags—they can leave marks or scratches. For a polished finish, buff with a dry microfiber towel after drying. That’s the best way to wash your car yourself—clean, streak-free, and shining bright!
Optional Extras for Your Car
If you want your car to look even better after washing, try these simple extras. They don’t take long, and each one adds a finishing touch. These bonus steps fit perfectly into any step-by-step car wash guide and make your car look like it was detailed professionally.
Spray Clay Bar
After rinsing and drying, use a clay bar to remove leftover dirt stuck to your paint. It makes the surface feel smooth and clean. Just spray clay lubricant on a small section and glide the clay bar gently back and forth.
Steps to follow:
- Spray lubricant
- Glide the clay bar (don’t press hard)
- Wipe off with a microfiber towel
Always use plenty of spray so the clay doesn’t stick. This step is a great upgrade in any DIY car wash to give your car that extra-smooth finish.
Repair Scratches on Your Car
Minor scratches make your car look older, but most are easy to fix at home. Start by cleaning the scratched area. Then, apply a scratch remover or polishing compound with a soft cloth. Rub gently in small circles.
To repair light scratches:
- Clean the area
- Apply polish or scratch remover
- Rub gently and check results
- Repeat if needed
This simple step fits well into your DIY car wash routine and brings your paint job back to life. For deep scratches, consider getting help from a pro.
Do Waxing
Waxing gives your car a glossy shine and adds a protective layer over the paint. It also helps water slide off and makes future washes easier. Choose a liquid or paste wax and apply it with a foam applicator.
How to wax your car:
- Apply thin, even layers
- Let it dry to a haze
- Buff with a clean microfiber towel
Wax every few months for best results. It’s the best way to wash your car yourself and keep that showroom shine lasting longer.
Do Trim and Tire Care
Don’t forget the trim and tires. Use a trim restorer to bring back faded plastic. Wipe it on with a sponge or cloth. For tires, use a tire shine product. Spray or wipe it on the sidewalls. This step makes your car look finished and new.
Here’s a quick checklist:
- Clay bar for smooth paint
- Scratch remover for small marks
- Wax for shine and protection
- Trim and tire care for a complete look
Clean Glass and Mirrors
Crystal-clear windows and mirrors make your car look sharp and help you drive safely. Smudges, fingerprints, and streaks can block your view. You want your glass to shine, inside and out. Let’s make it happen!
- Clear Glass Improves Safety: Clean windows and mirrors improve visibility and make your car look well-maintained inside and out, especially in bright sunlight or nighttime driving.
- Remove Smudges and Streaks: Even a small fingerprint can distract you while driving, so keeping your glass clean is important for both appearance and safety.
- Take a Few Extra Minutes: Spending a little extra time on your glass during a DIY car wash helps your whole car sparkle and leaves a lasting, polished impression.
- Clean Both Sides: Don’t forget to clean both the interior and exterior sides of your windows and mirrors for the clearest, streak-free results.
- Use the Right Tools: Safe cleaners, microfiber towels, and smart wiping techniques make it easy to get professional-looking glass without much effort.
Self-Service Car Wash Tips
Not every car owner has the space or tools for a full DIY car wash at home. That’s where self-service stations come in—giving you affordable access to pro-level washing gear.
When to Use Self-Service
A self-service car wash is a great option when you’re short on space or tools. Whether you’re traveling or living in an apartment, it’s a flexible, budget-friendly alternative.
Use these stations when washing at home isn’t practical. You’ll find them almost anywhere, and they’re perfect for quick cleanups on road trips or long drives.
- No space at home? Self-service car washes offer space, tools, and flexibility if you live in an apartment or don’t have a driveway.
- Ideal for travel stops. On road trips, these stations help you wash off dirt quickly and get back on the road with a clean car.
- Save water and stay eco-friendly. Compared to home washes, self-service stations often use less water and help reduce waste—an environmentally smart choice.
- Bring your own products. For the best results, pack your favorite soap and clean microfiber towels instead of relying only on what’s available at the wash bay.
Best Practices for Washing Your Car
To make the most of your self-service visit, timing and technique matter. Following the right steps keeps your car looking great and prevents paint damage or streaks.
These easy car wash tips help you get a clean, streak-free finish every time.
- Prepare before you pay. Get your quarters or tokens ready and clear trash from the car before starting the timer to avoid wasting valuable wash time.
- Always rinse before washing. Use the high-pressure hose to rinse top to bottom and remove loose dirt before touching your car with a brush or sponge.
- Inspect the foaming brush first. Check the brush for dirt or grit. Rinse it well to avoid scratching your car’s paint with leftover debris.
- Clean one section at a time. Washing in sections gives you more control and helps prevent soap from drying too quickly and leaving spots.
- Rinse and dry completely. Give your car a final rinse, then dry it with clean microfiber towels to avoid streaks and water spots on paint or windows.
Final Check
Before you wrap up your DIY car wash, give your car one last careful look. This move makes sure that your hard work is actually put on display and no speck is left behind.
Inspect for Missed Spots
A walk-through will enable you to notice anything you have missed. Try to use natural daylight and a flashlight to find water spots, streaks, or remnants of grime, especially on hidden corners. It has become one of the greatest assets taken in a step-by-step car wash guide.
And here are a few items on the checklist:
- Hood and roof: Search remaining morsels of water under the sun.
- Doors and panels: All doors, including the panel, should be checked on both sides to make sure that they have no streaks or drip marks.
- Bumpers and low points: They accumulate a lot of dirt–check grime twice.
- Mirrors and windows: No more smudges or fingerprints should be left.
- Wheels and tires: Tires and wheels collect a lot of dirt in their cracks, and it is a good idea not to forget about it.
Step back and check from different angles for the best view of missed spots.
Do Some Touch-Ups
In case you see something in your final check, there is no need to panic because small retouches are fast and easy to do. To prevent moving dirt, wash clean microfiber cloths to use on every surface.
Here’s how to fix common areas:
- Glass: Buff away smudges or streaks with a dry microfiber towel.
- Paint: Light water spots? Use a damp towel to gently wipe and buff.
- Wheels/Trim: Use a separate towel or brush to remove dirt and polish edges.
Always keep towels separated by area—paint, glass, and wheels should never share the same cloth. This extra care keeps your car spotless and protected.
Take a final look from every angle. Your car is clean, shiny, and ready for the road. Whether you’re heading out or just admiring your work, these finishing touches make all the difference.
You’ve now mastered every step in a complete DIY car wash—from start to sparkling finish.
Wrap Up
A DIY car wash is easy and fulfilling to look after the car. Given the proper procedure, your car can be cleaned comprehensively either at home or in a self-help station. Whether it entails rinsing and scrubbing, drying and making touch-ups, or all of that, all these measures enable your vehicle to appear in its finest shine.
Polished wheels, clean glass, and glossy paint make a lot of difference. Make it slow and easy. Performing a DIY car wash means saving cash but also having the car washed in a way you want. The end result will be that you will feel proud to see your car clean, fresh, and ready to get into!
FAQs
How often should you wash your car at home?
You should wash your car every two weeks. If you drive in harsh weather or on dirty roads, wash it more often. Regular cleaning keeps your vehicle maintenance routine on track and helps protect your paint.
Can you use dish soap to wash your car?
You can use dish soap in a pinch, but car shampoo works better. Dish soap can strip wax from your paint. Try to use products made for cars for a proper DIY car wash finish.
What is the three-bucket system?
The three bucket system uses one bucket for soapy water, one for rinsing your mitt, and one just for wheels and tires. This method keeps dirt away from your paint and helps prevent scratches. It’s a pro tip in any step-by-step car wash guide.
Do you need to dry your car after washing?
Yes, you should always dry your car after washing. Use a clean microfiber towel. Drying stops water spots and keeps your car looking shiny—an essential step in how to do a DIY car wash at home.
Why should you clean the wheels first?
Wheels collect the most dirt and brake dust. If you clean them first, you stop grime from splashing onto your clean paint later. This step makes the rest of your wash easier and is part of the best way to wash your car yourself.
