
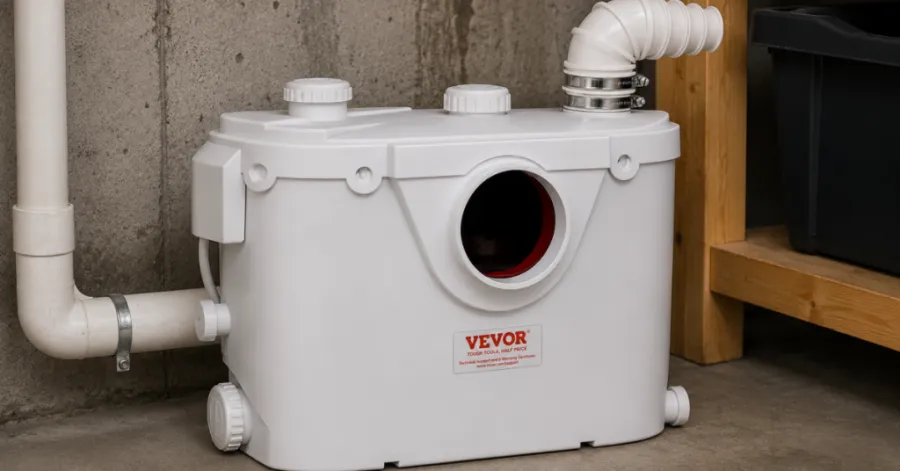
If you have a basic understanding of plumbing and the required equipment, you may install a basement bathroom macerator pump as a practical solution. Always use a GFCI outlet and vent properly when working. This means you can be sure you are doing things securely. If you want a leak-free solution, you need to take your time and not rush any step. Should you have any questions or concerns about any subject whatsoever, it is strongly recommended that you contact a specialist as soon as possible. You want to ensure your restroom is safe and continues to function properly.
In this article, we’ll walk you through the basics of installing a macerator pump in a basement bathroom. You’ll learn the basic installation methods, safety concerns, proper venting and electrical requirements, and ideas for building a dependable, leak-free plumbing system.
Table of Contents
Tools and Materials Needed for Installation
Do I need a macerator pump for a basement bathroom? Ensure that you have gathered all of the necessary materials and equipment before you start the project. Because of this, you can complete your work in less time and with fewer mistakes. Let’s look at what you need to complete the task now that we’ve gotten that out of the way.
Recommended For Your Project
Essential Tools
You don’t need any special tools for this job. These instruments are already in most houses. A simple list follows:
- Adjustable wrench
- Screwdriver set (flathead and Phillips)
- Pipe cutter or hacksaw
- Tape measure
- Level
- Drill with bits
- Utility knife
Required Plumbing Materials
Before installing your best basement bathroom macerator pump, collect all the plumbing components you need for a tight, secure fit to your bathroom fixtures. You will require a macerator pump unit for waste removal, a toilet, 1 1/2- or 2-inch PVC pipes for the drain and discharge lines, and the appropriate pipe fittings to connect the plumbing. [9] Hose clamps are used to hold flexible hoses in place. Use Teflon tape on threaded connections to help prevent leaks. Finally, a flexible water supply connector attaches the toilet to the water supply. Having these items on hand will make installation easier, safer, and more efficient.
Safety Equipment
Always wear the required safety equipment before installing a basement bathroom macerator pump cost. Work gloves protect your hands from sharp edges and instruments. Safety eyewear helps protect your eyes from dust and debris. A dust mask will keep you from breathing dirt and construction particles while you install. If you do not have a GFCI outlet tester, be sure that the electrical outlet is safe and properly protected before plugging in the pump. With the right safety gear and tools readily available, the installation process can be easier, safer, and more efficient from start to finish.
How to Install a Basement Bathroom Macerator Pump

Step 1: Choose the Best Location
You want your basement bathroom macerator pump reviews to be near the toilet and other fixtures. Choose a location where the pump is hidden but accessible. Ensure you have enough room for pipes and wiring. Check the level of the ground. If you detect uneven spots, put shims under them or use leveling compound. For safety, choose a location near a GFCI outlet. Find a well-ventilated spot. It keeps scents in and protects the macerating pump.
Step 2: Install the Toilet and Pump Unit
You may now know basement bathroom macerator pump installation. Put the toilet where you want it. Then connect the macerator pump to the line behind the toilet. Follow the manufacturer’s directions. Fasten the pump to the floor. Make sure that the pump is sitting flat and not wobbling. Attach the pump inlet to the toilet outflow. Achieve a tight seal with pipe fittings and hose clamps.
Step 3: Connect the Drain Pipes
How does a basement bathroom macerator pump work? The macerating pump will need to be connected to the drain lines from the sink, shower, or other fixtures to complete the procedure. Pipes ought to be cut to the required lengths. It was decided to use Teflon tape on the threaded connectors. Lock down all of the fasteners. Check for any leaks. Immediately fix the connection and proceed with the process if you notice water.
Step 4: Install the Discharge Pipe
The discharge line should be connected to the pump outlet. The pipe should be connected to the primary garbage line. Maintain as much straightness as you can with the tube. Stay away from sharp turns. Fix the pipe in place with brackets. A significant step in installing the basement bathroom macerator pump reviews system is underway.
Step 5: Connect the Water Supply
Attach the flexible water supply line to the bathtub and ensure all fittings are secure. After the installation is complete, turn on the water supply and inspect for leaks. Tighten any loose connections as necessary to prevent drips and ensure that the system runs safely and efficiently.
Step 6: Connect the Electrical Supply
Always use a standard outlet to protect yourself from electric shock. Using the plug, connect the pump to the GFCI outlet. To conduct safety inspections, you need to use a GFCI outlet tester.
Step 7: Test the Macerator Pump
The toilet should be flushed, and water should be turned on at other fixtures. Pay attention to how the best basement bathroom macerator pump in the downstairs restroom operates. Watch out for strange sounds. If you hear any unusual sounds, you should pause and examine the connections. The flushing setting should be installed last. If everything goes according to plan, your bathroom will be ready.
Common Installation Mistakes to Avoid
I assume you want your basement bathroom to do what bathrooms are supposed to do? When it comes to basement bathroom macerator pump installation, what are some of the most typical mistakes that people make? We will discuss some of these issues in this post. If you are successful in avoiding these, you will save yourself a significant amount of trouble.
Using the Wrong Pipe Size
Many DIYers will use whatever pipe they have on hand. That’s a tremendous error. If the piping is too small or too large, a basement bathroom without breaking concrete will not perform properly. Maybe you have clogs or leaks. Refer to the manufacturer’s instructions for the suitable pipe size. Usually, 1 1/2 or 2 inches of PVC pipe is needed. If not, check with your local hardware shop.
Ignoring Venting Requirements
Do I need a macerator pump for a basement bathroom? You may think venting is not vital, yet it keeps your system safe and odor-free. If the venting isn’t set up correctly, your macerating pump will struggle. Or you can get foul smells or even pressure difficulties. Be sure to install a vent pipe as instructed. This promotes airflow and keeps your bathroom smelling clean.
Poor Electrical Connections
It is necessary to rush through electrical work, which can result in a shock or a pump failure. Always be sure to use a GFCI-protected outlet. Install the pump and test it. It is not recommended to utilize extension cables or standard outlets. Also, make sure all cables are kept dry and secured. Contact an electrician if you are unsure about something.
Incorrect Pump Placement
When the basement bathroom macerator pump cost is located in a tight space or on uneven floors, there is a risk of damage. You need access that is easily accessible to perform maintenance functions. The pump ought to be positioned near the restroom and kept level. If you decide behind your pump walls, it will be difficult to repair any future leaks or clogs.
| Mistake | What Can Go Wrong | How to Fix It |
| Wrong pipe size | Clogs, leaks | Use the correct pipe diameter. |
| No venting | Odors, pressure issues | Install a vent pipe. |
| Bad electrical setup | Shocks, pump failure | Use a GFCI outlet. |
| Poor pump placement | Hard maintenance, leaks | Place a pump for easy access |
Basement Bathroom Macerator Pump Maintenance Tips

You might be surprised to find that maintaining the appropriate performance of the macerator pump in the basement bathroom is far less hard than you might think. The better you treat and run your pump, the better it will work. Here are a few vital recommendations to help you prevent issues and keep your system in working order. These recommendations are all elementary.
Clean the Pump Regularly
How does a basement bathroom macerator pump work? Your pump ought to be cleaned at least once every couple of months. To begin, the device should be disconnected. If your model is equipped with an access panel, open it. One should use a gentle cleanser and a soft brush to remove any buildup that may have occurred. Use clean water to wash, and then rinse away. It is possible to avoid hurdles and ensure the pump continues to perform correctly by taking this course of action.
Avoid Flushing Harmful Items
Your basement bathroom without breaking concrete will take care of garbage and toilet paper, but not anything else. Don’t flush wipes, feminine products, or paper towels. Such items can clog the blades and stall the pump. If you have children, remind them of what may and cannot go down the toilet.
- Only flush:
- Human waste
- Toilet paper
- Never flush:
- Wipes (even “flushable” ones)
- Cotton swabs
- Dental floss
- Grease or oils
Check for Leaks and Blockages
Check the pump and the pipes around it for any evidence of water. If you detect drips or puddles, tighten the fitting. While the macerator pump is running, pay attention to any unusual sounds. Gurgling or grinding sounds may indicate an obstruction. Resolving small problems now can help you avoid major repairs later.
Schedule Routine Inspections
Do I need a macerator pump for a basement bathroom? Set a reminder on your calendar to perform a system scan approximately once every six months. Carefully examine the vent, piping, and electrical wiring. Check to see that everything is secure. If you observe something peculiar, you should contact a plumber. Your bathroom will remain spotless and free of issues if you perform routine inspections.
Conclusion
Now you know the basic steps to installing a basement bathroom macerator pump. Always check the area where you are going to install the product before you start, follow the manufacturer’s instructions to the letter, and put safety first. Make sure that the pump is plugged into a properly protected GFCI outlet and that the system has proper airflow for reliable operation. Before using it all the time, take your time to inspect all connections and to test the pump. If you have any concerns during installation, call a licensed plumber for assistance. A properly installed macerator pump will work reliably, help prevent plumbing problems, and keep your basement bathroom running smoothly for years to come.
FAQ
How loud is a macerator pump in a basement bathroom?
Most pumps sound like a running dishwasher. When you flush, you may hear a gentle hum or a brief whoosh. Listen for grinding or slamming sounds, then look for blockages.
Can I connect a shower or sink to the same macerator pump?
Yes, you can! Most macerator pumps have additional inlets for a shower or sink. Just follow the directions and use the proper fittings.
How often should I clean my macerator pump?
Change your pump out every three to six months. Keeping everything functioning smoothly means regular cleaning to prevent obstructions.




