A broken toilet pump may soon become a vexing plumbing issue, resulting in slow draining, offensive smells, leakage, or repeated overflows. Changing a toilet pump can save you time and money and restore your bathroom functionality. You may have a standard toilet, a macerator, or an upflush system, but it is important to follow the proper replacement process to ensure safe and reliable use. This guide on how to replace the toilet pump explains the warning signs of pump failure, the tools required, and the overall installation process. You will also know the pitfalls to avoid and thereby ensure your new pump works efficiently over the years.
Table of Contents
Signs It’s Time to Replace Your Toilet Pump
A toilet pump typically sends noticeable signals before a total breakdown. By being mindful of these early warning signs, you can prevent costly plumbing fixes, bad smells, and unforeseen bathroom inconveniences. You may be changing the pump in toilet systems, or you are planning a complete DIY toilet pump change, but regardless, you need to identify these symptoms to be on your way to success in the toilet repair.
Recommended For Your Project
Unusual Noises During Flushing
Sometimes, the first signs of something going wrong are strange sounds from your toilet pump. Rattling, grinding, humming, or loud vibrating sounds can be signs of worn internal parts, a clogged impeller, or a bad motor. These noises may be more pronounced in the case of macerating and upflush systems where the pump may find it difficult to move the waste effectively. These sounds may cause total failure of the pump if ignored. If the noises become more frequent or more intense over time, examine the unit and consider replacing the toilet flush pump components before the issue results in further plumbing damage or leaves the toilet unusable.
Slow Draining or Frequent Backups
When your toilet is slow to drain, or it drains slowly and fills up, then the pump might not be working effectively. A weakened motor, internal blockage, or a worn impeller can clog the discharge pipe and decrease the pump’s ability to push wastewater. Although it can sometimes be caused by flushing inappropriate objects, recurring issues with the drainage system can be an indication of a broken pump. Check the performance and condition of pumps before assuming that the plumbing is blocked. When cleaning fails to resume normal operation, the next significant step is how to replace a toilet pump. A quick replacement will enable proper flushing and avert sewage backing up in your bathroom.
Water Leaks Around the Pump
The water that gathers at the bottom of the pump or at its connections should not be overlooked. These leaks may occur due to cracked housings, damaged seals, loose fittings, or damaged gaskets that no longer offer a watertight seal. A small leak can gradually destroy flooring, walls, and other fixtures surrounding the system, even without treatment. Leaks in macerating and upflush toilet systems can also be a sign of internal pressure on the pump assembly. When tightening the fittings is not enough to eliminate the problem, the most effective and secure long-term solution could be a replacement of the pump in the macerator toilet systems or a new pump.
Pump Runs Continuously or Won’t Start
An indicator that may mean that it needs replacement is a toilet pump that does not run or does not start. A faulty float switch, faulty pressure switch, or faulty motor may then lead to continuous operation, whereas a silent pump can be due to an electrical or mechanical fault. These problems can prevent the system from disposing of wastewater properly and may ultimately cause overflowing or a total system malfunction. When troubleshooting has proven that a repair is no longer feasible, then replacement of the pump in upflush toilet systems is, as a rule, the most suitable measure. A correct toilet pump replacement guide will ensure the new pump is safe and reliable.
Prepare Everything Before Replacing the Toilet Pump
Having the correct tools and spare parts available before you start makes the installation much easier. Effective preparation minimizes delays, enhances safety, and avoids accidental plumbing system damage. Whether you need to know how to change the toilet macerator pump units or you are doing a regular pump replacement, a few minutes of preparation will help you make the whole process more effective.
Essential Tools and Safety Equipment
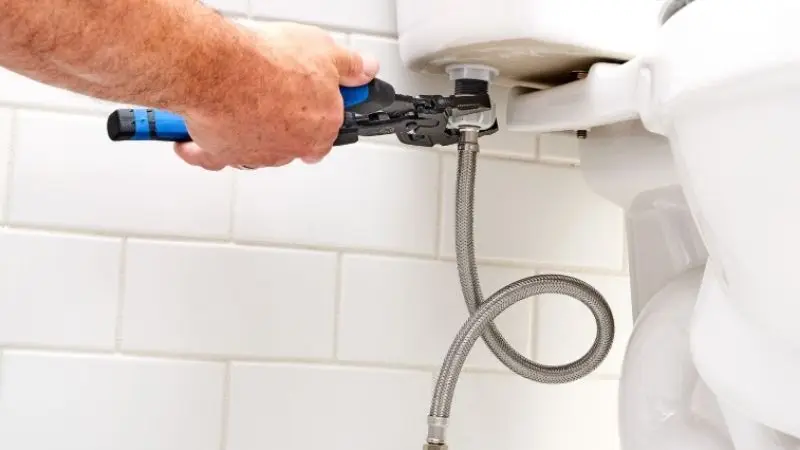
All the tools that you may require before commencing the replacement should be collected. Examples of these include adjustable wrenches, screwdrivers, pliers, a bucket, absorbent towels, work gloves, and safety glasses. You are also advised to turn off the electrical power and water supply that goes to the toilet system before you come into contact with the pump. This minimizes the chances of electrical shock and accidental flooding. It is also useful to have cleaning supplies around since some water might not have left the pump housing. Proper preparation supports the DIY toilet pump replacement process and helps ensure success.
Choosing the Correct Replacement Pump
To ensure effective performance and durability, it is important to choose the appropriate replacement pump. The new pump must be of the same brand, model, discharge size, voltage, and pumping capacity as your existing toilet system. The wrong pump can be installed and decrease efficiency, cause leaks, or break the plumbing system. When replacing a macerating or upflush toilet, make sure you specifically select the replacement based on the type of unit you have. Before buying, it is best to check the manufacturer’s specifications to ensure a good fit. The first step to changing a toilet pump is getting the right replacement, which will make the replacement easier and reduce the risk of future mechanical issues.
How to Replace a Toilet Pump Step by Step
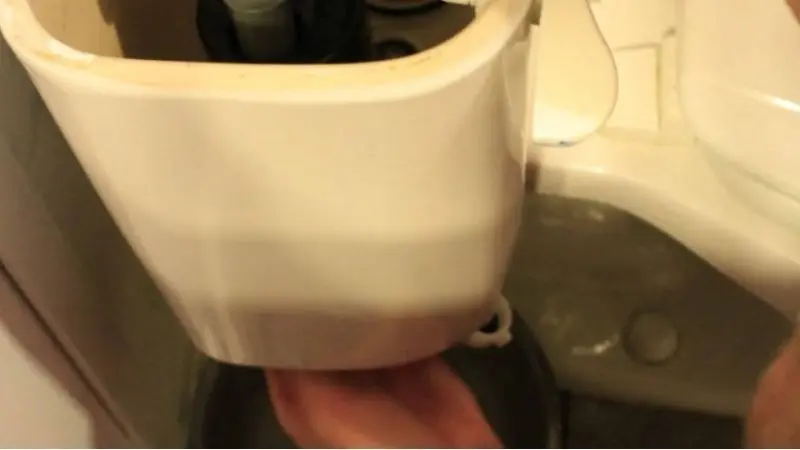
When the proper order is followed, it is much easier to change a toilet pump. Slowness in every phase will prevent leakage, electrical problems, and installation errors that may compromise the working of the system. Whether you’re replacing a pump in a toilet system or it’s your first time replacing a toilet pump, these steps will help you make a safe, reliable installation.
Turn Off the Power and Water Supply
When doing any work, turn off electrical power to the toilet pump at the circuit breaker before commencing any work. This is particularly important for macerating and upflush toilet systems, since the pump is electrically operated. When turning off the power, shut the water supply valve to avoid water going inside the toilet during the replacement. Flush the toilet by pressing the flush button to get as much water as possible into the bowl and tank. Ensure that the pump is fully shut down and then continue. These precautions help to make the working environment safer and are a necessary initial step when undertaking a DIY work of replacing a toilet pump.
Drain the Toilet and Disconnect the Pump
Switch off the power and water, empty all the water in the toilet system and pump. Wipe out or brush dry with a small container, towel, sponge, or squeegee, or empty standing water in the bowl and pump chamber. Put a bucket beneath the plumbing connections to drain all the wastewater residue before the discharge pipe and inlet connections are detached. Always review the wiring instructions so that the electrical wiring can be properly disconnected. The labels can also come in handy to facilitate reinstallation in the future. Good drainage and disconnection reduce mess, accidental spillages, and make changing the components of the toilet flush pumps easier.
Remove the Old Pump
Once you have removed the plumbing and electrical connections, carefully take out the old pump from its mounting. Loosening mounting bolts, brackets, or retaining clips may be necessary depending on the type of toilet system before the pump can be lifted free. Examine the immediate installation area to see whether it is corroded, has mineral deposits, has broken fittings, or has damaged seals, which need to be resolved before installing the new unit. Washing the installation area can help ensure a smooth fit of the replacement pump and efficient performance. When changing the pump in macerator toilet systems, take care not to break the pipes involved or internal parts.
Install the New Pump
Install the new pump according to specifications that were given by the manufacturer and attach it with mounting hardware. Make sure that the pump is placed flat and in the right position in relation to the plumbing connections to avoid unnecessary stress on the pipes. Install new seals, gaskets, or O-rings that may be supplied with the new pump instead of the old ones. Make sure that all fasteners are tightened, but not over-tightened, as this may crack plastic fittings or even damage the pump housing. To know how to replace toilet macerator pump units, refer to the instructions provided by the manufacturer to make sure that it works efficiently and without failures.
Reconnect Plumbing and Electrical Connections
Re-hook up the inlet and discharge pipes, ensuring that all the fittings are correctly aligned and tightened. Replace hose clamps or connectors if they show wear or corrosion. Once the plumbing connections are done, reconnect the electrical wiring as per the manufacturer’s wiring diagram. Check again to ensure all connections are in place before power is switched back to the system. Weak electrical or plumbing connections may minimize the effectiveness of the pumps and cause more leaks or equipment breakdown. Careful attention in this step makes pump substitution in upflush toilet systems far more competent and helps avoid future service problems.
Test the New Pump for Proper Operation
When all is hooked up, first turn on the water supply and then turn on the toilet system to refill. Next, turn electrical power on and flush the toilet several times whilst noting the pump. Check that it operates freely without grinding, excessive vibration, or strange noises. Check any plumbing connections that could leak and ensure that the waste water is evacuated promptly and effectively. In case all goes as planned, the installation has been done successfully. A complete toilet pump replacement manual will make sure your new pump works properly and will be reliable over many years of service.
Common Mistakes to Avoid During Toilet Pump Installation
A quality replacement pump may result in issues when installed improperly. Being aware of the most frequent errors can improve the installation process and minimize future failures. Paying close attention to each step of replacing a toilet pump will help your new pump function properly and last longer.
Installing the Wrong Pump Model
One of the most frequent installation errors is using the wrong replacement pump. All toilet pumps are specific to the discharge height, plumbing size, electrical needs, and type of the system. Fitting a pump that is not compatible may lead to low flushing capabilities, more wear, cycling, or even failure of the entire system. Check the model number, voltage, pumping capacity, and manufacturer recommendations before buying a replacement. Possibly one of the most significant aspects of a replacement pump in toilet systems is the selection of the right unit since it guarantees its compatibility, stable functionality, and reduced service problems in the long run.
Forgetting to Replace Worn Seals
Old seals, gaskets, and O-rings may appear to be in good condition; however, they can become brittle over years of service. Using used sealing elements may allow water to escape around the pump soon after installation. Any time you are installing a new pump, replace all the recommended seals with new ones provided by the manufacturer or approved replacements. Check fittings in the vicinity also before re-fitting. This little trick greatly enhances the dependability of the repair and helps avoid post-repair leaks after replacing toilet flush pump parts or doing any other DIY toilet pump repair.
Overlooking Electrical Safety
Neglecting electrical safety can create dangerous situations when changing the pump. Always de-energize at the circuit breaker prior to removing or installing the pump. Always avoid working on wet electrical contacts and examine wires before reconnecting them. When wiring is frayed, corroded, or not insulated, repair or replace and then restore power. Strict adherence to electrical instructions provided by the manufacturer can help in safeguarding the pump and the individual making the installation. Electrical safety should never be compromised, particularly when changing the pump in upflush toilet systems or other electrically powered toilet pumps.
Skipping the Final Leak Test
It is during normal functioning of the system that many installation issues can be realized. Once installation is done, flush the toilet a few times and examine all the plumbing connections, seals, and fittings to determine whether there is leakage or not. Monitor the pump cycle and make sure it starts, runs, and shuts off properly without any strange sounds or excessive vibration. Spending some additional minutes to conduct a thorough inspection can avoid water damage and unwarranted repairs in the future. A good final check is a necessary part of any toilet pump replacement manual and serves to ensure that the installation has been done successfully.
Wrap Up
Replacing a toilet pump might not be easy initially, but with the right preparation and the appropriate replacement parts, the process becomes a lot easier. From detecting warning signs to installing and testing the new unit, every stage plays a significant role in the unit’s performance. Be it replacing a pump in toilet systems, doing a DIY toilet pump replacement, or knowing how to replace toilet macerator pump units, proper installation can help prevent future repairs and leakage. With this guide and the right parts, you can get your toilet back in operation and keep your plumbing system running effectively for years.
FAQs
What is the telltale of knowing whether or not my toilet pump requires replacement?
Typical symptoms include strange noises, slow flushing, a water leak, frequent refills, and a continuously running or stalling pump. These symptoms tend to show internal wear or failure of the pump.
Am I able to change a toilet pump by myself?
Yes, it can be easily done by replacing the toilet pump on your own, subject to following the guidelines of the manufacturer, disconnection of power and water supply, and the use of the proper replacement pump for your system.
What is the time to change a toilet pump?
Toilet pump replacements require between one and three hours depending on the type of toilet, the plumbing arrangement, and your familiarity with simple plumbing and electrical set-ups.
Are there any differences in the replacement process of macerator and upflush toilets?
The simple procedures are comparable; however, to replace the pump in a macerator toilet and upflush systems, it is necessary to use compatible pumps and take into account electrical and discharge connections.
Must I change the seals when fitting a new toilet pump?
Yes. Always use new seals, gaskets and O-rings when installing to avoid leaks, enhance the performance of your new toilet pump, as well as to prolong the life of your new pump.
.