
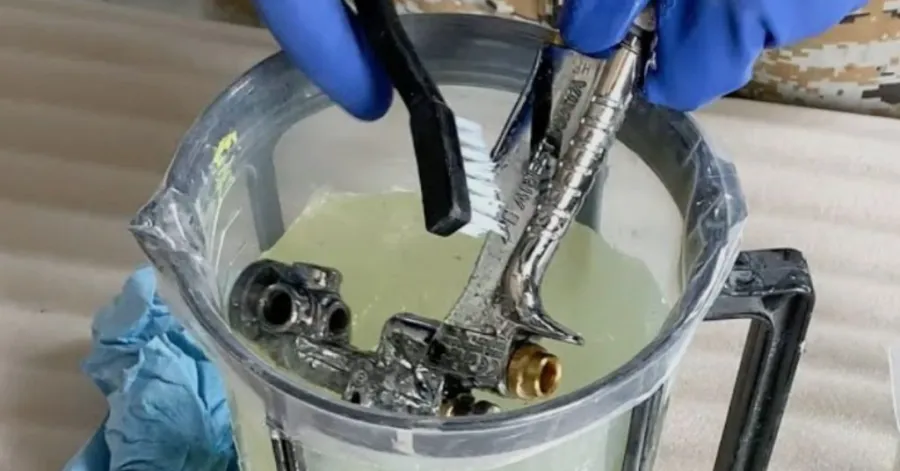
It is imperative to clean your spray paint gun to achieve smooth, professional paint finishes. A contaminated spray gun may cause nozzle clogging, asymmetric spray patterns, and costly repairs in the long run. Whether you’re a professional painter or a DIY enthusiast, this guide shows you how to clean a spray paint gun step by step, while preserving your equipment’s performance and longevity. Frequent cleaning also helps to avoid the accumulation of dried paint in the most important elements. Whether it is learning how to clean a spray paint gun when you are a beginner, or it is about the best spray paint gun cleaning method at home, with proper maintenance, your spray paint gun is always reliable and is at the ready whenever you are ready to take up any project.
Gather the Tools and Materials You Need
Ensure you have everything you need on hand before cleaning your spray paint gun. The presence of the correct tools would make it easier to avoid any damage to the delicate gun parts. Be it learning how to clean a spray paint gun as a beginner or already experienced, it all depends on proper preparation as the initial step towards effective maintenance.
You can also step-by-step learn how to clean a spray paint gun in a well-organized workspace without any distractions. You will save time by taking a few minutes to assemble supplies and maintain your spray gun in good condition.
Essential Cleaning Supplies
And if you want to learn how to properly clean spray paint equipment, you need the right cleaning supplies. The appropriate materials will help eliminate paint residues and increase the shelf life of your spray gun.
Before starting, you should have the following items ready:
- Paint thinner or a suitable cleaning solvent.
- Delicate parts cleaning brushes.
- Pipe cleaners or detailing brushes.
- Paper towel or lint-free cloths.
- A container to soak removable parts.
- A spray gun cleaning kit for deep cleaning
The supplies are also convenient to clean in hard-to-reach parts like the nozzle, fluid passages, and paint cup. This is the preferred method to clean a spray paint gun at home in the opinion of many professionals, since it is the only sure way of making sure every part of the spray gun is cleaned and in good working order.
Wearable Safety Equipment
Cleaning a spray gun can be a risky thing, as it may imply using chemicals and strong fumes, and protective equipment is necessary. Appropriate safety gear reduces the risk of skin irritation, eye damage, and inhalation of harmful vapors.
Before you start, be sure to wear:
- Solvents: To protect your hands, wear protective gloves.
- Safety glasses to protect your eyes from splashes
- Face mask or respirator in the case of work with strong cleaners.
- Long sleeves or worn clothes so as to avoid stains and skin contact.
Safety must not be compromised in any way, particularly when learning how to clean a spray paint gun with thinner, since thinner may give off strong fumes. With the right protective equipment on, you can concentrate on the process of cleaning a spray paint gun safely and comfortably after use, and with minimal mess and waste, in order to have a more efficient maintenance procedure.
How to Clean a Spray Paint Gun Step by Step
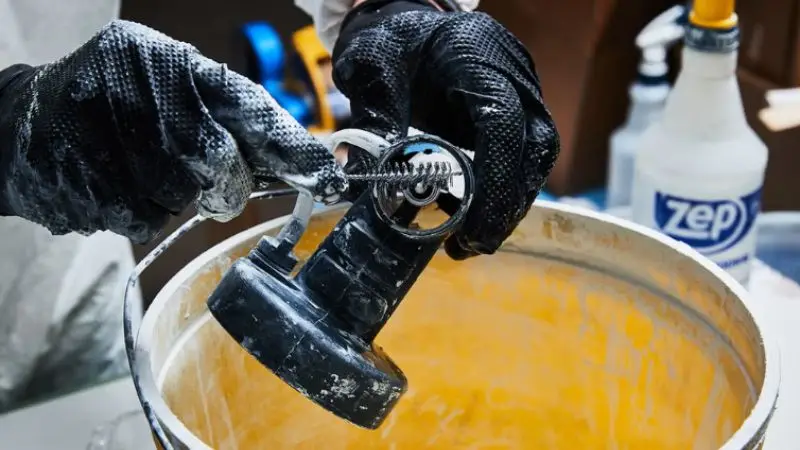
Washing a spray paint gun after each project helps keep the equipment running smoothly and prevents paint buildup. Dried paint may clog key parts, resulting in poor finish and uneven spray patterns.
With the help of instructions on how to clean a spray paint gun in steps, you will be able to maintain your spray gun in perfect condition and prolong its time of use. This set of steps will cover the whole process, whether you want to know how to clean a spray paint gun as a beginner or just need to enhance your maintenance schedule.
Step 1: Empty and Flush Out Remaining Paint
Cleaning a spray paint gun after use will first involve removing the paint left in the cup. Dispose of unused paint either by pouring it back into its original container, which is still in usable condition, or by disposing of it as per local regulations. After emptying the cup, wipe away excess paint with a clean cloth or paper towel.
Then, pour an appropriate cleaning solution into the paint cup. Use water in case of water-based paints and an appropriate solvent in the case of oil-based paints. Hold the cleaning liquid in the gun and spray it into a garbage container until it runs dry. This flushing action removes the greater part of the paint residue and prepares the gun for further cleaning.
Step 2: Disassemble the Spray Gun Carefully
After the first flushing, remove the spray gun and take it apart, as indicated in the manufacturer’s directions. Remove parts such as the air cap, fluid nozzle, needle, and paint cup. Taking the gun apart enables you to clean places where the paint is mixed that are not easily spotted.
Keep all tiny pieces in a tray or container to ensure that they are not lost. One should not use too much force when extracting parts, as fragile ones may bend or break. The correct dismantling is a key component of the cleaning process of spray paint gun equipment and its safety.
Step 3: Clean the Nozzle, Needle, and Air Cap
The nozzle, needle, and air cap significantly contribute to the formation of a steady spray pattern. The areas are prone to clogging, sputtering, and uneven finish due to paint residual and therefore should be handled with caution.
Clean up with soft brushes, pipe cleaners, or a spray gun cleaning kit to remove paint buildup. On hard-to-remove residue, wet the components in a suitable cleaning solution for a few minutes. When you are learning how to clean a spray paint gun with thinner, only use thinner as advised and never use sharp metal objects that may ruin the sharp edges of the parts. Wipe clean to keep the performance of these sensitive parts.
Step 4: Wash the Paint Cup and Internal Passages
The smaller parts should be cleaned, then the paint cup and fluid passages inside should be thoroughly washed. Add cleaning solution to the cup and clean the inside with a soft brush to get out all of the paint that is left behind.
Add more cleaning solvent to the end of the gun to clean up internal channels that are inaccessible to the hands. This is particularly necessary when it comes to learning how to clean a spray paint gun following latex paint, since latex paint dries fast and may form stubborn blockages. Flush out until all the paint has disappeared.
Step 5: Dry and Reassemble the Spray Gun
After cleaning all the parts, dry all the parts thoroughly using a lint-free cloth or leave them to dry. Water retained in the gun may interfere with subsequent paint finishes and possibly cause corrosion in the long run.
Inspect every part before reassembling it to make sure it is thoroughly clean. Put the spray gun back together with all the parts put back in the right place. Following this last step on how to clean a spray paint gun in stages will practically ensure that your spray gun is prepared to use in the next project, and it will further work as best.
Cleaning Methods for Different Types of Spray Guns
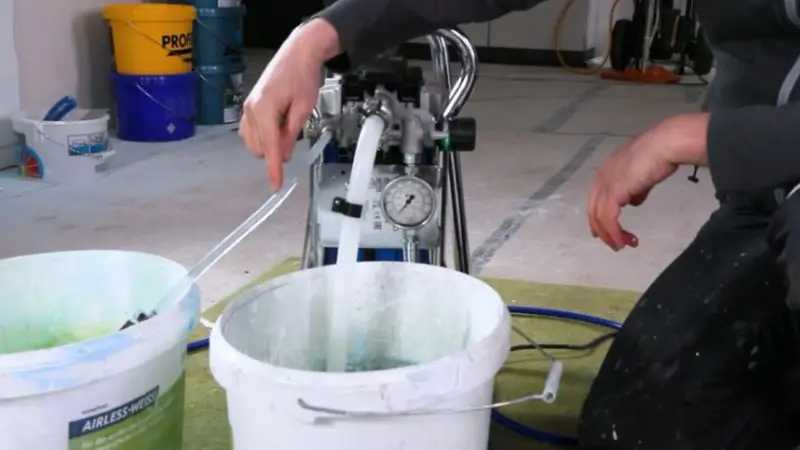
Various spray guns differ in shape and, therefore, may clean slightly differently. The appropriate cleaning procedure for your particular equipment will help preserve performance, prevent clogs, and prolong the life of the spray gun.
These differences also help to understand how to clean a spray paint gun properly, step by step, in a much easier way. Whatever spray device you are using, an HVLP spray gun, a gravity feed model, or an airless paint sprayer, proper cleaning of the equipment at the end of any project will guarantee good and professional work.
How to Clean an HVLP Spray Gun
HVLP (High Volume Low Pressure) spray guns are popular due to their ability to offer good transfer of paint and minimize overspray. Cleaning an HVLP spray gun involves emptying all the paint from the cup, then wiping off any residual paint. Then insert the relevant cleaning solution, and spray it using the gun until the liquid is clear. The air cap, notch, and needle must be flushed off and thoroughly cleaned. The buildup of paint in these parts should be removed using soft brushes, and then these parts should be rinsed and allowed to dry completely before reassembling the gun. Regular cleaning is a significant part of cleaning a spray paint gun after use and helps maintain a smooth, consistent spray pattern.
How to Clean a Gravity Feed Spray Gun
A gravity feed spray gun is a type of spray gun that holds its paint in a cup on the top of the gun, where the paint automatically flows through the system. These guns have narrow fluid passages; thus, they should be cleaned right after painting. Begin by pouring the paint into the cup and wiping off any leftover paint. Rinse the gun with an appropriate cleaning solution to get rid of any remaining residue in internal channels. After being flushed, wipe down the nozzle, needle, and cup and remove them for a more thorough cleaning. Clean all parts with soft cleaning brushes and ensure that they are dry before reassembling the gun. This is particularly useful as a way of cleaning a spray paint gun for those learning how to clean a spray paint gun, as it maintains the equipment in good condition and minimizes the chances of clogging.
How to Clean an Airless Paint Sprayer
Airless paint sprayers are not similar to the traditional spray guns as they are operated by high pressure in order to spray paint. Consequently, cleaning is directed towards flushing the whole system completely. Prior to cleaning, empty all the pressure from the sprayer to handle it safely. Wipe off the paint left in the container and then pour the cleaning solution recommended into the system. Spray the cleaning liquid until it runs clear, meaning that all paint residues are washed away. Spray tip and filters are also to be removed and cleaned separately to avoid any blockages. This is what is deemed by many homeowners to be the most effective method of cleaning a spray paint gun at home, since normal flushing safeguards internal parts and makes the spray paint gun reliable in future painting tasks.
Common Mistakes to Avoid When Cleaning a Spray Gun
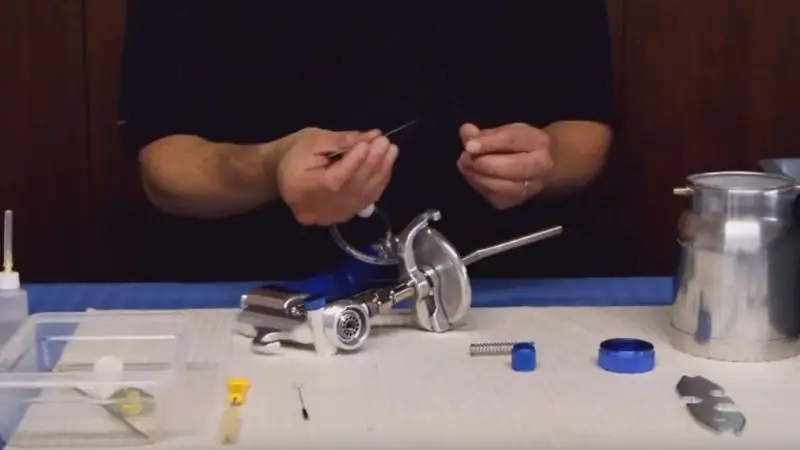
It might be easy to clean a spray gun, but even minor errors can diminish its functionality and decrease its lifespan. Several spraying problems, like clogging, non-uniformity in spray patterns, and poor flow of paint, are the result of improper cleaning of the gun.
It is just as important to know what not to do as it is to learn how to clean a spray paint gun step by step. These are some of the pitfalls to avoid in order to maintain your spray gun in the best condition and achieve professional results, regardless of the project.
Using the Wrong Cleaning Solvent
Among the most common errors is using a cleaning solvent incompatible with the paint type or even the spray gun material. Water-based paints typically need to be washed in water or a solvent suggested by the manufacturer, whereas oil-based paints typically need to be thinned or cleaned with a particular solvent. Incorrect usage of the product can leave behind some traces of paint and can even harm seals, gaskets, and internal parts. When you are learning to clean a spray paint gun with thinner, always read the instructions of the manufacturer before applying any solvent. Using the right cleaner will not only serve to preserve your equipment but will also make sure that all traces of paint are cleaned.
Leaving Paint to Dry Inside the Gun
The paint can be stubborn because it may be allowed to dry in the spray gun, and this will result in poor performance in terms of spraying. A little bit of remaining paint can solidify in the nozzle, needle, or internal passages, and subsequent cleaning becomes even more challenging. This is the reason why cleaning a spray paint gun after use is so essential in maintaining the equipment. Once you are finished painting, pour the leftover paint out and rinse the system with the correct cleaning agent. Washing the gun right away will ensure that it does not accumulate and that all parts will run well the next time you paint.
Skipping Routine Maintenance
The fact that many users clean their spray guns only when they have some issues, and do not take care of them regularly, may cause damage in the long term. Daily checkups and cleaning can be used to know when parts are worn, seals are damaged, or clogged components before they impact performance. To anyone who is learning to clean a spray paint gun, it is vital to have a maintenance routine. Besides cleaning it after each use, clean periodically the nozzle, needle, air cap, and filters, making sure that they are in a good state. Regular maintenance enhances the quality of the spray, prolongs the life of the equipment, and minimizes the expensive repairs or replacement.
Maintenance Tips to Keep Your Spray Paint Gun in Good Condition
To achieve smooth and consistent results with your spray paint gun, it is important to maintain it on a regular basis. Even a good spray gun may get clogged, leak, or spray unevenly unless one maintains it in the right way.
Learning how to clean a spray paint gun properly, step by step, is only part of the process. Regular maintenance and ongoing care prevent costly repairs, enhance performance, and ensure your spray gun is ready for the next painting project.
Clean the Gun After Every Use
Cleaning the spray gun after every painting session is the most significant maintenance practice. The remaining paint in the gun dries and solidifies, thereby obstructing the nozzle, needle, and internal tubes. This is the reason that cleaning of a spray paint gun after use should always be included in your painting routine. Once you are done with your work, dispose of the remaining paint and empty the system. Flush the system with the correct cleaning solution and clean out all the removable components. Frequent cleaning helps in avoiding accumulation, keeping the spray pattern smooth, and prolonging the longevity of equipment. Regular maintenance also minimizes the possibility of unforeseeable performance problems.
Lubricate and Inspect Parts Regularly
Besides cleaning, it should be checked and lubricated regularly to ensure that the spray gun is functioning properly. Wearing will occur on parts of the machine that are in constant motion, such as the needle, trigger, and the parts where the packing will be placed. Once cleaning, apply a lubricant to the areas that are recommended, by the manufacturer, to make sure that there is smooth operation. During the inspection of the gun, check for worn seals, broken nozzles, or loose parts that can influence the performance. This maintenance schedule is particularly beneficial for novices learning to clean a spray paint gun, as it helps detect minor issues before they escalate into major problems. Effective lubrication also minimizes friction and increases the life of internal parts.
Store the Spray Gun Properly
Storage is a significant factor in maintaining the condition of your spray paint gun. Always ensure that all the parts are dry and clean before storing the equipment. During storage, leftover paint residues or moisture may result in corrosion, clogging, and damage. After cleaning, reassemble the gun and store it in a clean, dry environment free of dust and extreme temperatures. Many professionals believe that the best way to clean a spray paint gun at home is through careful storage to ensure the gun serves its purpose over time. The additional ways to prevent accidental damage to the gun are to use a protective case or keep it safe by hanging it to make it available at any time.
Wrap Up
Properly cleaning a spray paint gun is a key factor in maintaining consistent painting performance. Clogs can be prevented, and the life of your equipment can be prolonged by washing the gun after use, with the help of the proper solvents and adhering to a regular maintenance schedule. Various spray guns might need a slightly different procedure of cleaning, but the general guidelines are consistent. Knowing how to clean a spray paint gun with thinner or after using latex paint is key to keeping it performing effectively and delivering a high-quality finish on all painting projects.
FAQs
What is the frequency of cleaning my spray paint gun?
It is necessary to clean your spray paint gun after each time you are done painting. Frequent cleaning will avoid the accumulation of paint, minimize clogging, and allow for a smooth and consistent spray pattern.
Will all spray paint guns be cleaned with thinner?
No, not all spray guns should be cleaned with thinner. And never neglect to consult the suggestions of the manufacturer, since certain paints based on water may need special cleaning agents rather than aggressive solvents.
How do you clean up a spray paint gun at home?
Flushing the spray paint gun right after use, disassembling the removable parts, cleaning all components, and drying before storage is the best way to clean a spray paint gun at home.
What do I do to clean a spray paint gun that has been used with latex paint?
To know how to clean a spray paint gun, immediately after using it, flush the spray gun with warm water or a recommended cleaner so that the paint does not dry.
Is a spray gun liable to damage by dried paint?
Yes, dry paint may jam nozzles, seal internal passages, and influence the quality of the spray. Cleaning the spray gun immediately after each use is beneficial in avoiding damage and prolonging the life of the spray gun.




