Want to learn how to install shower plumbing step by step? You’re in the right place. Installing shower plumbing might sound hard, but with the right plan, it’s totally doable—even for beginners.
This easy DIY guide walks you through the whole process, from rough-in plumbing to final setup. You’ll get a clear shower plumbing overview that helps you avoid mistakes and finish the job with confidence. Whether you’re updating an old bathroom or building a new one, this step-by-step shower installation guide will make everything easier to follow. Grab your tools, take a deep breath, and let’s get started!
How to Prepare and What to Use
Before getting into the plumbing work, it’s important to get organized. Starting with the right tools and a solid plan will make everything easier. This section helps you gather what you need and map out the layout so your project runs smoothly.
Essential Tools
You don’t need fancy tools to begin, but having the right ones on hand saves time. Keep these nearby before you start:
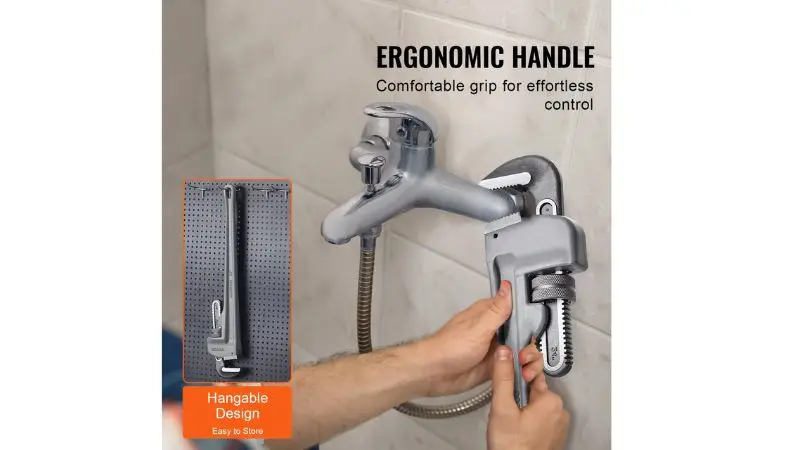
- Pipe wrench – helps grip and tighten pipe fittings.
- Adjustable wrench – for flexible tightening and loosening.
- Pipe cutter or hacksaw – for cutting pipes to size.
- Screwdrivers (flathead and Phillips) – for attaching brackets or fixtures.
- Tape measure and level – ensures accurate and even installation.
- Plumber’s tape and putty – used for sealing threads and joints.
- Soldering kit (for copper pipes) – only if you’re not using PEX or PVC.
- Drill with bits, bucket, and rags – for mounting and cleanup.
Always wear gloves and safety glasses to protect your hands and eyes.
Materials List
Next, gather your materials based on your chosen piping system. This step helps you avoid delays mid-project.
- Shower valve – controls water pressure and temperature.
- Showerhead – delivers the water spray from above.
- Pipes (PVC, PEX, or copper) – carry water through the system.
- Pipe fittings – connect pipes securely.
- Drain assembly – helps remove wastewater.
- Shower pan or base – catches water and directs it to the drain.
- Wall panels or tiles – protect the shower area from moisture.
- Silicone caulk – seals joints and edges.
- Mounting brackets – hold your fixtures in place.
Make sure to match your materials with your pipe type—not all fittings work with every pipe.
Plan Where the Pipes Will Go
A good layout keeps your shower working well and looking clean. Take time to measure and mark where everything goes. Place the shower valve about 48 inches from the floor. The showerhead should sit between 72 and 80 inches high. The drain must sit at the lowest point to help water flow out easily. Use a level to mark each spot and double-check your measurements before you cut. Careful planning now means fewer problems later and a smoother installation process from start to finish.
Steps to Prepare

Now that you’ve gathered your tools and planned the layout, it’s time to prepare the area for installation. A clean and careful start sets the tone for a smooth shower plumbing job. These first steps will help you avoid leaks and keep things organized.
- Turn Off Water Supply
Before anything else, make sure to turn off the water. This prevents messes and protects your plumbing. Locate the main shut-off valve, often near the water meter or in your basement. Turn it clockwise until it stops. Then, turn on the shower faucet to check.
If no water flows, you’re good to go. Some water might still be left in the pipes, so place a bucket under them when disconnecting. Always double-check to avoid any surprise sprays once you open the plumbing.
- Remove Old Fixtures
With the water off, it’s time to remove your old shower parts. Start by unscrewing the showerhead and handle. If needed, use a screwdriver or wrench. Gently cut away any caulk. Then, remove the old shower valve. You might have to open the wall to reach it—go slowly.
Clear out old pipes or fittings if they’re damaged or outdated. Keep everything organized in a bucket or bag. If any parts are rusted, spray some lubricant and wait a few minutes. Don’t force anything; it could break a pipe inside the wall.
- Unscrew the showerhead and handle
- Cut caulk or sealant carefully
- Remove the valve and any old pipes
- Mark and Measure
Next, measure where your new fixtures will go. Use a tape measure and pencil to mark key spots. Start with the valve—it usually sits about 48 inches from the floor. Then mark where the showerhead will be, between 72 and 80 inches high.
Mark the location of the drain at the lowest point of the shower pan. Use a level to keep marks straight. Double-check all your measurements before making cuts. Good measuring now saves you time and frustration later. Accuracy here sets the stage for a neat, working shower.
Step-by-Step Guide: How to Install Shower Plumbing

Installing shower plumbing may seem complex, but breaking it down into clear steps makes the process much easier. From setting the valve to placing the final fixture, each task builds toward a fully working shower. Let’s walk through each part of the installation one step at a time.
Step 1: Install the Shower Valve
Installing the shower valve is the first big step. Start by checking your earlier marks. Hold the valve up and make sure it matches your layout. Use a level to keep it straight. Cut your pipes to fit, then dry-fit everything to check alignment.
Wrap plumber’s tape on the threads to prevent leaks. If you’re using copper pipes, solder them with care. Tighten all fittings using a wrench, but don’t over-tighten. The valve face should sit flush with your finished wall. This part of the process is key when learning how to install shower plumbing in a new bathroom.
Step 2: Connecting the Water Supply
Next, connect the hot and cold water lines to the valve. Measure and cut your pipes so they reach the valve. Dry-fit all connections first to ensure a proper fit. Use plumber’s tape on any threads. If you’re using copper, solder the joints carefully.
For PEX pipes, use crimp rings and a crimping tool. Secure the pipes with mounting brackets so they stay in place. This process is important when understanding how to install shower plumbing with PEX or other pipe types. Check that everything feels snug—there should be no wiggling. A firm connection ensures your shower stays leak-free for years.
Step 3: Install the Drain and Pan
Now it’s time to install the drain and shower pan. Fit the drain assembly into the hole in your shower base. Roll plumber’s putty around the flange, press it into place, and tighten from below. Set your shower pan on the floor.
Make sure it sits flat and that the drain lines up with the pipe underneath. Adjust if needed. Follow the manufacturer’s instructions to secure the pan using screws or adhesive. Installing the pan and fitting the drain properly is essential when learning how to install a shower drain on a concrete floor or any other type of base.
Step 4: Mount Shower Walls
Mounting the shower walls makes your space look clean and keeps moisture out. Start by dry-fitting wall panels or tiles. Use adhesive on the back of each panel and press it firmly onto the wall. Keep your panels straight using a level. Some types may need screws or clips for support.
Once the walls are in place, apply waterproof caulk to all seams and corners. Smooth it with a damp cloth. Allow the adhesive and caulk to dry completely. This is especially important when learning how to install shower plumbing behind a wall for lasting results and no leaks.
Step 5: Install Fixtures
You’re now ready to add your shower fixtures and finish the job. Start by attaching the shower arm to the wall pipe using plumber’s tape on the threads. Screw on the showerhead and tighten it gently. Add the valve’s handle and trim plate. If your setup includes a tub, attach the tub spout. Make sure everything fits well and feels secure.
When installing the shower head and faucet, don’t over-tighten, as this can damage parts. Take a moment to check everything. Once done, your shower should look polished, function perfectly, and reflect a job well done.
How to Test Water Flow and Leaks

Once your installation is complete, the final step is testing everything to make sure it works. This is where you check how well your new shower performs and make sure there are no leaks. Let’s walk through the last key steps before you enjoy your first shower.
- Test Water Flow
Turn your main water supply back on and go to your shower. Slowly turn the valve to check how water flows through the system. You should see a smooth stream coming from the showerhead with no sudden spurts or noise.
Try both hot and cold to test temperature control. This is an important part of how to install shower plumbing in a new bathroom, as it shows whether everything is connected correctly. If the pressure seems low, wait a minute to clear the air in the pipes. A good water flow tells you your plumbing setup is working as expected.
- Check for Leaks
Now, inspect every part of your system to make sure nothing is leaking. Use a dry towel or paper under each connection and wipe to see if moisture appears. Pay special attention to the shower valve, supply pipes, and drain.
If you find a small leak, try tightening the connection or adding plumber’s tape. This step matters whether you’re learning how to install shower plumbing behind a wall or doing a full replacement. Small leaks may seem minor, but can cause damage later, so take time to fix any issues now before sealing up your wall or enclosure.
- Fixing Common Problems
Even with good planning, problems can come up. If the water pressure feels weak, check the showerhead or supply lines for clogs. If hot and cold are reversed, you may have mixed the lines during setup. This is a common mistake, especially when learning how to install shower plumbing with PEX.
If the pipes bang, add extra brackets for support. If you see standing water, inspect the drain. When installing a shower drain on a concrete floor, make sure it’s level and tightly sealed. If issues persist, don’t hesitate to call a plumber to check your work.
Wrap Up
Now that you’ve learned how to install shower plumbing, you can take on this DIY task with confidence. From marking your layout to testing for leaks, each step helps you build a reliable and functional shower system.
Whether you’re working with PEX, installing behind a wall, or setting a drain in concrete, good planning and steady work lead to success. Take your time, check every connection, and don’t rush. With a little patience and the right tools, you’ll enjoy a leak-free shower that looks and works great for years to come.
FAQ
1. What is the time requirement for a plumbing shower?
The majority of the beginners complete one or two days. In case you have problems, you may take more time. Review your work as much as you can and take breaks. Hurrying up may cause errors.
2. May I substitute PEX pipes with copper pipes?
Yeah, you can use PEX pipes. They are elastic and cutable. A lot of beginners prefer PEX since one does not have to solder at all. All you have to do is use proper fittings and tools.
3. What would happen when I complete the task and discover a leak?
When you notice a leak, immediately switch off the water. Make the fitting tighter or put on additional plumber’s tape. In case the leakage is not ceased, then you could change the component or invite a plumber.
4. Should I have permits to carry out shower plumbing?
Some cities need a permit for plumbing activities. Contact your building office in your area and check before you begin. The permits aid in ensuring compliance of the work to the safety codes.


