
Ready to fix the under-sink drain plumbing in your kitchen or bathroom? Don’t worry—it’s easier than you think! With a few simple tools and clear steps, you can handle this DIY project without calling a plumber.
Whether you’re replacing old faucets or stopping a leak, taking on under-sink drain plumbing is a smart way to save money and learn a useful skill. This guide will walk you through each part so you can feel confident and get the job done right. Grab your wrench, take a deep breath, and let’s make your sink work like new again!
Tools and Materials
Before learning how to install under-sink drain plumbing, it’s important to gather everything you need. Having the right tools and materials on hand will make your job easier and help you avoid delays. Whether you’re working on a bathroom or kitchen sink, this checklist gets you fully prepared.
Basic Tools You’ll Need
You don’t need any complicated tools. Most of these are common household items:
- Adjustable wrench: Used to tighten or loosen slip nuts and fittings. It adjusts to different sizes, making it a must-have for plumbing tasks.
- Channel-lock pliers: Great for gripping and turning pipes or nuts. The angled jaws help you get a strong hold in tight spaces.
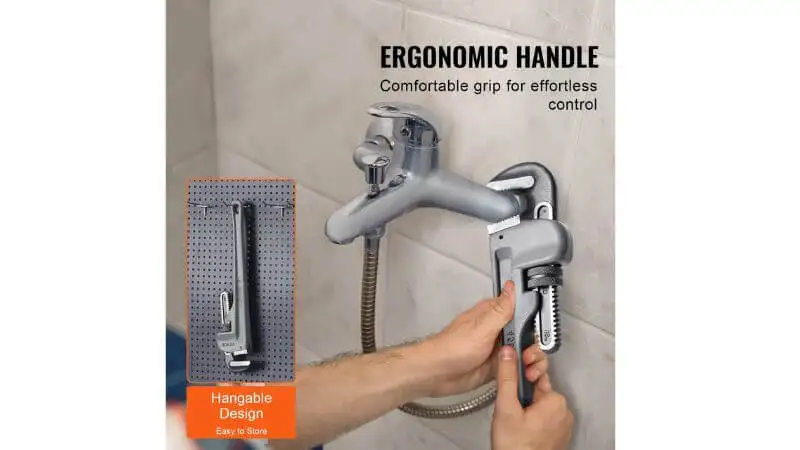
- Pipe wrench: Perfect for older or rusted pipes that won’t budge. A pipe wrench gives extra torque when standard tools aren’t enough.
- Bucket: Place it under your pipes before you start. It helps catch water left in the lines and keeps your area dry.
- Utility knife: Use this to cut open packaging, trim pipe edges, or slice tape. Always keep it sharp for clean cuts.
- Tape measure: Helps you check the alignment and spacing between your sink and wall drain. Accurate measurements prevent leaks later.
- Screwdrivers: Screwdrivers are needed for installing drain assemblies or removing old brackets. Keep both types handy for different screw heads.
- Teflon tape: Wrap this around threaded connections to seal them tightly. It helps prevent leaks in your plumbing joints.
Place your tools on a towel or mat to keep them from rolling and for quicker cleanup.
Drain Plumbing Materials
These parts make up the drain system under your sink. They’re essential to follow any step-by-step sink drain plumbing guide:
- Drain trap kit: This kit connects your sink to the wall drain and prevents sewer gas from coming up. It usually includes everything you need for the basic connection.
- Sink drain assembly: This part connects directly to the sink bowl. A strainer is used in kitchen sinks, while pop-ups are common in bathrooms for opening and closing the drain.
- Plumber’s putty: Used to seal the area around the drain flange. It keeps water from leaking where the drain touches the sink surface.
- Silicone caulk: A waterproof sealant often used instead of putty on stone or composite sinks. It creates a long-lasting, flexible seal around fixtures.
- Flexible slip-joint connectors: These connectors bend and stretch slightly, making it easier to link pipes that don’t line up perfectly. They’re great for older homes or tricky layouts.
- Extension pipes: Use these if the distance between your sink and the wall drain is too far for the standard tailpiece. They help ensure a snug, leak-free fit.
- PVC or ABS pipe: These plastic pipes are commonly used in residential plumbing. Choose the same type that matches your existing drain system—PVC (white) or ABS (black).
- Pipe clamps or brackets: These secure the pipes to the wall or cabinet base. They help keep your plumbing stable and prevent movement that could lead to leaks.
- Rubber gaskets and washers: These create watertight seals between pipe connections. Always double-check they’re seated flat and snug to avoid drips.
Optional Supplies
These items may not be required, but can be helpful, especially if you’re adjusting the layout or improving durability:
- Air admittance valve: This one-way valve lets air into the plumbing system when water flows, helping to prevent gurgling or slow draining. It’s useful when adding a traditional vent is hard.
- Pipe cutter: A pipe cutter gives you clean, straight cuts on plastic pipes. It’s easier and safer than using a saw and helps ensure leak-free joints.
- Pipe thread sealant: Also called pipe dope, this helps seal threaded connections tightly and prevents leaks. Use it on metal or plastic threads where Teflon tape isn’t ideal.
- Gloves: Wearing gloves protects your hands from grime, sharp edges, and sealants. They’re especially helpful when working in tight, dirty spaces under the sink.
- Safety glasses: These keep dust, water, or broken bits of pipe out of your eyes. Always wear them when cutting or tightening pipes to stay safe.
With your tools and parts ready, you’re all set to move on. Double-check your list before starting, so you don’t need to pause midway through your project.
Preparation
Before you start connecting pipes, it’s important to prep your space. This step sets the foundation for a smooth installation. Let’s walk through each part of the setup carefully.
- Remove Old Plumbing
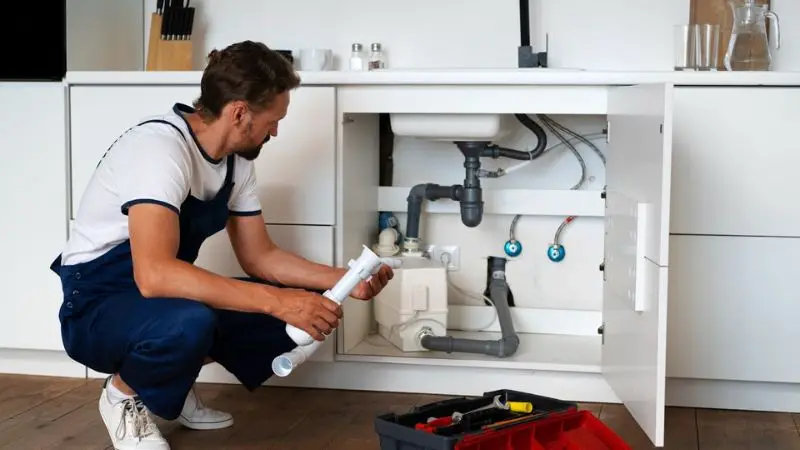
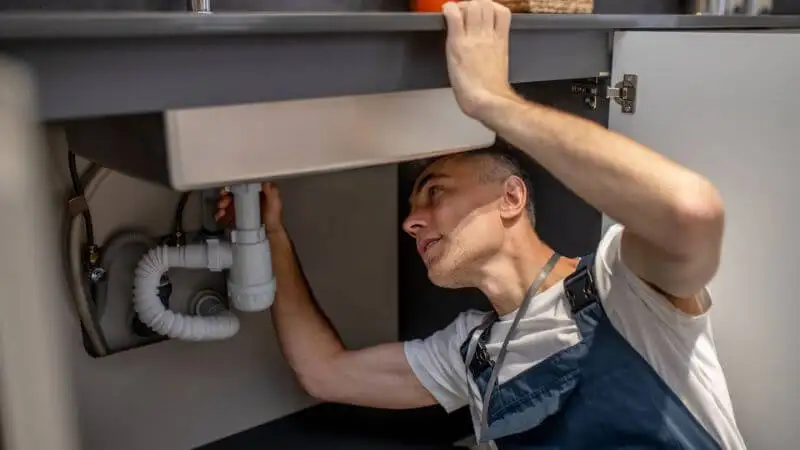
Clear out everything under the sink to give yourself room to work. Place a bucket under the existing pipes to catch water. Use channel-lock pliers or a wrench to loosen the slip nuts, starting at the sink drain and working toward the wall.
Move slowly and gently, especially if the fittings are tight or sticky. Old plumbing may have grime or dried putty that makes removal tricky. Wipe down the area and toss the old pieces. This clears the way for your new setup and supports a clean start for installing under-sink drain plumbing.
- Check Sink and Drain Alignment
Before installing new parts, check if your sink lines up with the wall drain. Measure from the floor to the center of the wall outlet, and then from the sink’s bottom to the floor. This tells you whether the tailpiece can reach the wall opening. If the heights don’t match, use a flexible connector or extension pipe.
Getting this part right helps avoid future problems like poor water flow or leaks. This step also gives you a clearer understanding of the under-sink plumbing diagram and ensures everything fits before sealing things in place.
- Install Faucet and Supply Lines
Before working on the drain, install the faucet and water supply lines. It’s easier to reach behind the sink when the drain assembly isn’t installed yet. Follow the included instructions to secure your faucet and avoid over-tightening.
Attach the hot and cold supply lines to the shut-off valves under the sink. Turn on the valves briefly to test for leaks. If everything stays dry, you’re ready to continue with your step-by-step sink drain plumbing guide. This order of operations saves time and avoids headaches later in the process.
How to Install an Under-Sink Drain: Easy Steps
Now that you’re set up, it’s time to walk through each part of the step-by-step sink drain plumbing guide. These steps apply to both kitchen and bathroom sinks and help you build a leak-free system.
Step 1: Install the Drain Assembly
Start with the drain assembly, which connects your sink to the plumbing. For bathroom sinks, use a pop-up drain. For kitchen sinks, install a strainer. Roll the plumber’s putty into a rope shape and press it under the flange. Set the flange in the sink’s drain hole.
From underneath, slide the rubber gasket and washer onto the drain body, then tighten with a locknut. Use channel-lock pliers for a snug fit—don’t overtighten. Wipe away excess putty. If your sink is stone or composite, use silicone caulk. This first step helps ensure a clean seal in your under-sink plumbing diagram.
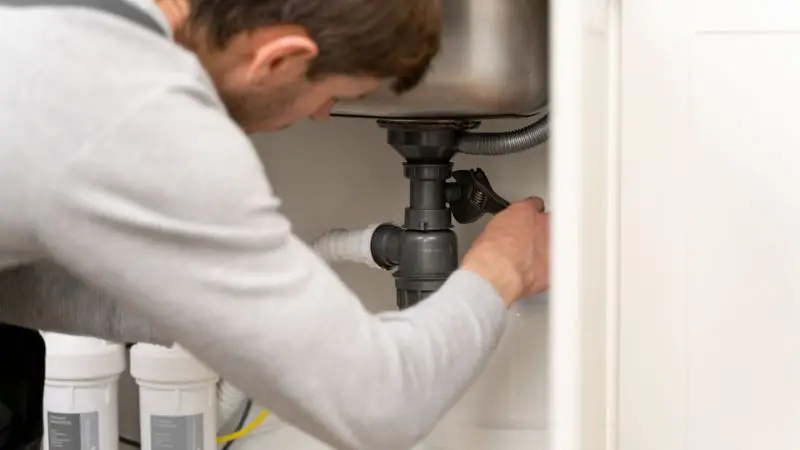
Step 2: Attach the Tailpiece and P-Trap
Now connect the tailpiece, which is the straight pipe that extends downward from the drain. Slide on a washer and slip nut before pushing the tailpiece into place. Hand-tighten the nut, making sure the washer sits flat. Next, attach the P-trap—the curved pipe that holds water and prevents sewer gas from coming up the drain.
Connect one end to the tailpiece using another slip nut and washer. Leave it a little loose for now. If your plumbing is slightly misaligned, a flexible connector works well. This step is key in learning how to install under-sink drain plumbing properly.
Step 3: Connect to the Wall Drain
Line up the other end of the P-trap with the wall drain. Slide a washer and slip nut onto the wall pipe, push the P-trap into position, and tighten the nut by hand. If the pipe is too short, add an extension. For a kitchen setup, you may also need to connect the tailpiece to a garbage disposal.
Use the same process and make sure all pipes have a slight downward slope toward the wall. This keeps water flowing properly and prevents clogs. This step is often where people get stuck when figuring out how to fix a leaking under-sink drain pipe.
Step 4: Check and Tighten Connections
Now go back and check all the joints. Make sure washers sit flat, nuts are hand-tightened, and nothing feels loose. Use a measuring tape to confirm pipe lengths. If you had to cut any pieces, smooth the edges with a utility knife.
Once everything fits well, tighten the nuts slightly more using pliers—just enough to seal, not crack. At this point, leaks often come from over-tightening or misaligned washers. You’re nearing the final stage of your step-by-step sink drain plumbing guide, so take your time here and make sure every part is lined up correctly.
Step 5: For Double Sinks and Venting
If you have a double sink, use a T-fitting or double-branch tailpiece to connect both drains into a single P-trap. Make sure both sides slope slightly toward the trap to help water drain evenly. For homes without wall venting, install an air admittance valve (AAV). This allows air in while blocking sewer gas. Screw the AAV onto a vertical pipe above the trap.
Always check local codes to make sure this is allowed. Bathroom sinks usually use smaller pipes (1¼ inch) compared to kitchens (1½ inch). These are important details in understanding your under-sink plumbing diagram fully.
How to Find and Fix Leaks
You’ve installed everything—now it’s time to make sure it works properly. Testing for leaks is an important final step in installing under-sink drain plumbing. Take your time and check every connection carefully to make sure your work is solid and leak-free.
- Test for Leaks
Before you call the job done, you need to check for leaks. Place dry paper towels under each joint and slowly turn on the faucet. Let water run for about a minute. Carefully watch each connection point. If you see drips or wet spots on the towel, you may have a loose nut or washer issue.
Use a flashlight to spot leaks hiding in dark areas. Most leaks are easy to fix if caught early. Leak testing is the final step in any step-by-step sink drain plumbing guide and gives you peace of mind that your plumbing is tight and secure.
- Fix Common Issues
If you find a leak, stay calm—it’s usually a simple fix. Most small leaks come from loose slip nuts or misaligned washers. Start by tightening the nut just a bit more by hand. If the leak continues, shut off the water and disassemble the part.
Check that the washer is flat and sitting properly. Reassemble and test again. If you overtightened a nut and cracked a pipe, replace that part. You can also wrap plumber’s tape around threads or use a dab of silicone to seal a stubborn drip. This is a key part of learning how to fix a leaking under-sink drain pipe correctly.
- When to Call a Pro
Sometimes, you may face problems that need expert help. If you find leaks behind the wall or under the floor, call a plumber. If parts won’t stay tight or you still smell sewer gas after installing your P-trap and vent, it could be a bigger issue. Plumbing should feel safe and secure.
If something doesn’t seem right, don’t guess—get help. Understanding your under-sink plumbing diagram helps, but even experienced DIYers sometimes need backup. A licensed plumber can solve deeper problems fast and prevent long-term damage to your home.
Wrap Up
With the right tools, clear steps, and a bit of patience, under-sink drain plumbing becomes a simple home project you can handle yourself. From removing old pipes to sealing the last connection, each part plays a role in building a leak-free, reliable setup.
Whether you’re fixing a small leak or installing a new system, following this guide helps you feel confident and in control. Don’t forget to double-check for leaks and know when to ask a pro. Now your kitchen or bathroom is ready to go, and you’ve learned a valuable skill along the way.
FAQ
1. How tight should I make the slip nuts?
Hand-tighten the slip nuts first. Give each one a gentle extra turn with pliers. Don’t over-tighten. If you force them, you might crack the pipe or strip the threads.
2. Can I use plumber’s putty on every sink?
You can use plumber’s putty on most metal sinks. For stone or composite sinks, use silicone caulk instead. Always check the instructions that come with your sink or drain assembly.
3. What if my pipes don’t line up?
Try a flexible slip-joint connector. You can bend it to fit most setups. Extension pipes also help if you need more length. These parts make tricky alignments much easier.
4. Do I need a vent under my sink?
Most sinks need a vent to work right. If you don’t see a vent pipe, you can use an air admittance valve (AAV). Check your local plumbing code before you install one.


