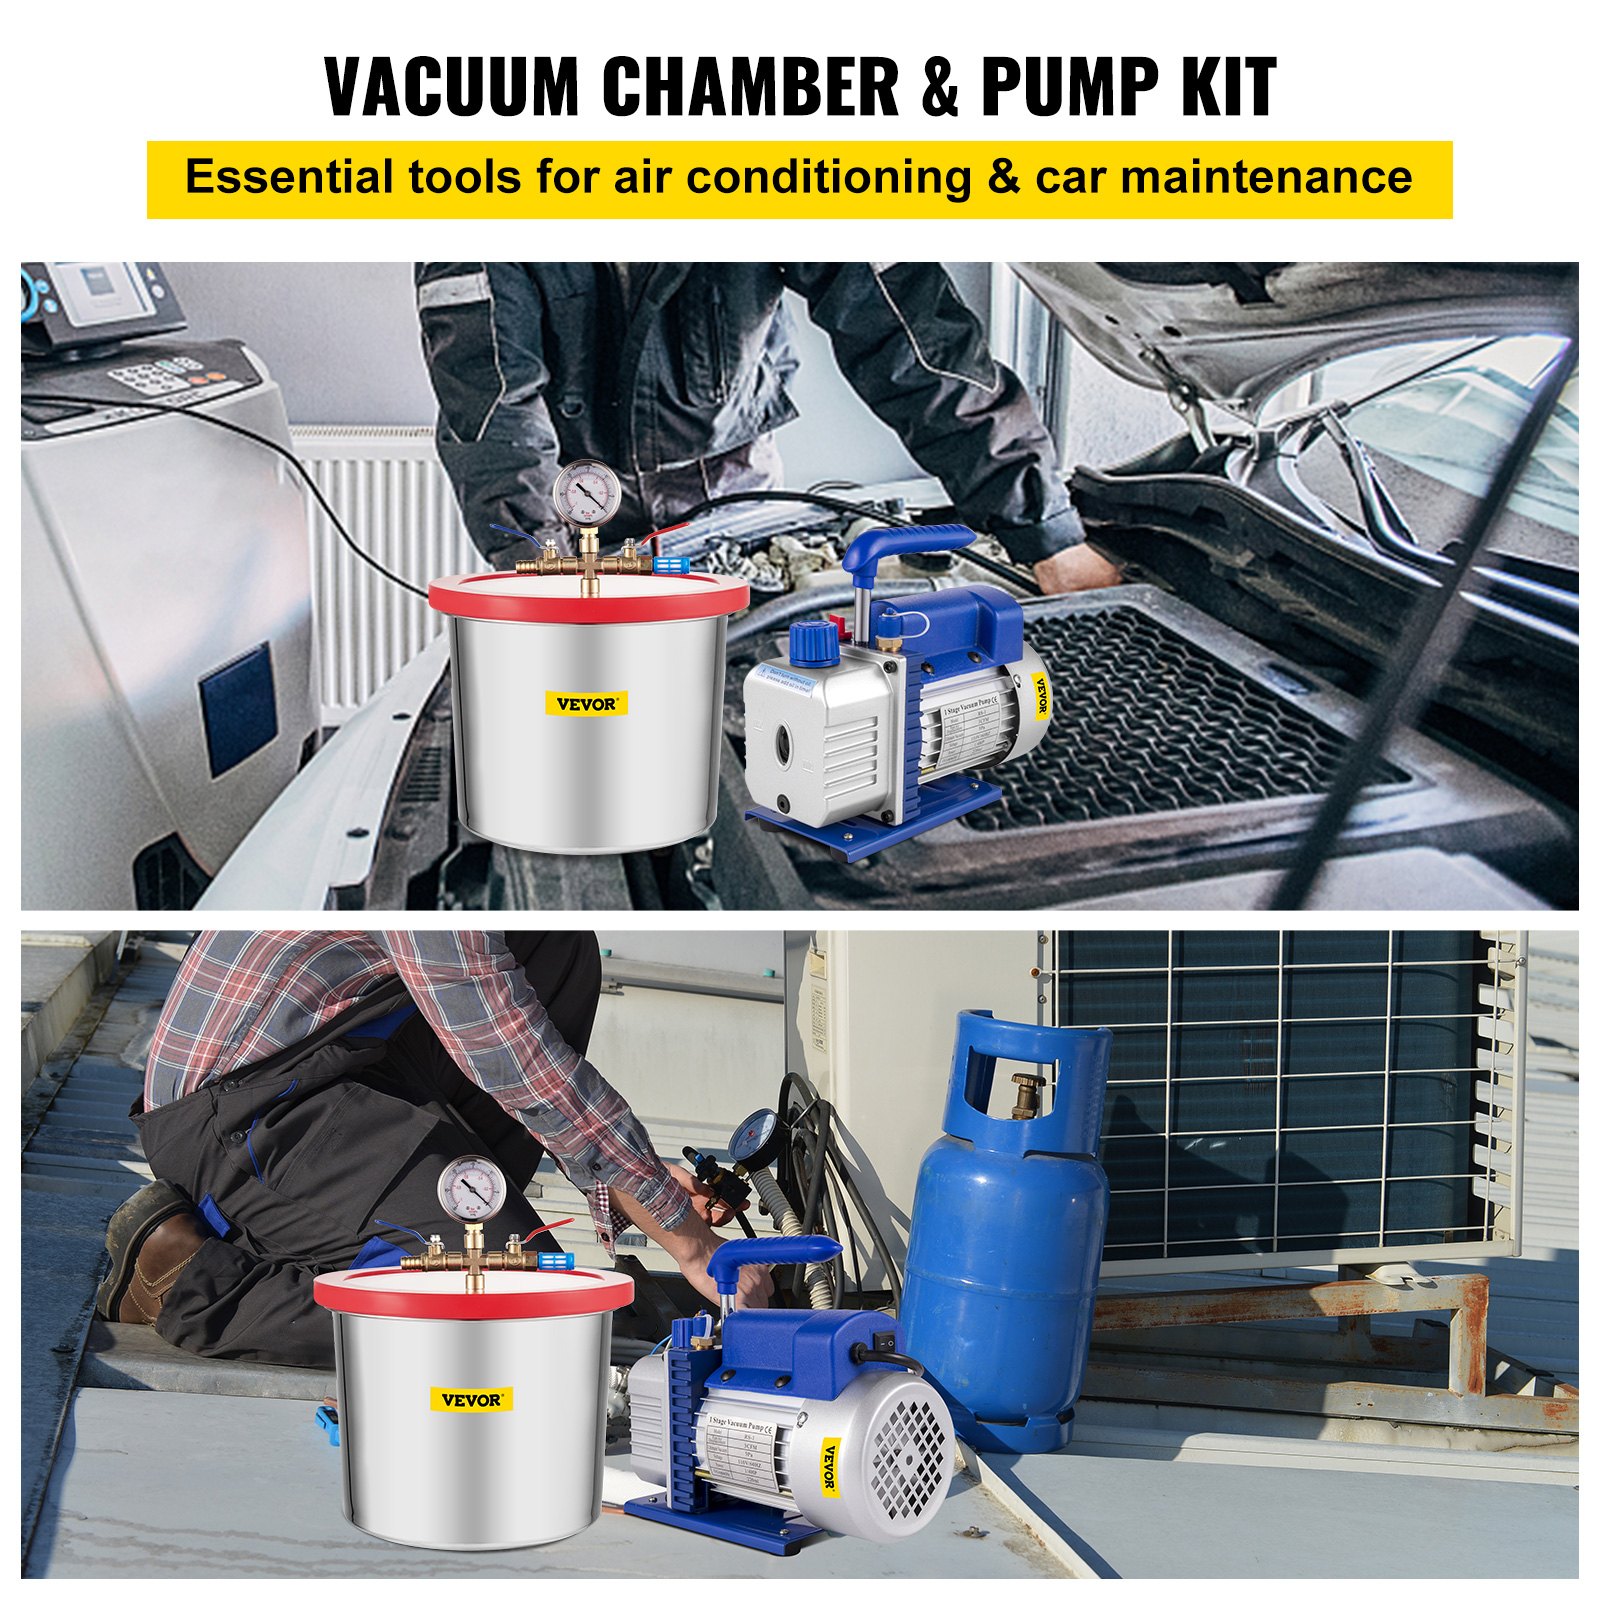

Unlock the full potential of your VEVOR Vacuum Chamber with Pump with our comprehensive product manual download. This detailed guide covers everything you need to know about your 2-Gallon Vacuum Chamber and 3CFM 1/4HP Vacuum Pump, ensuring you can effortlessly set up, troubleshoot, and optimize your vacuum degassing chamber kit for a variety of applications, including automobile maintenance and vacuum packaging.
Our manual provides step-by-step instructions, clear diagrams, and helpful tips to make using your vacuum chamber a breeze. Whether you’re a professional or a DIY enthusiast, this manual is invaluable for maximizing efficiency and achieving the best results with your high-capacity 2-Gallon Vacuum Chamber with pump.
Download now and experience the ease and convenience of having all the information you need at your fingertips.
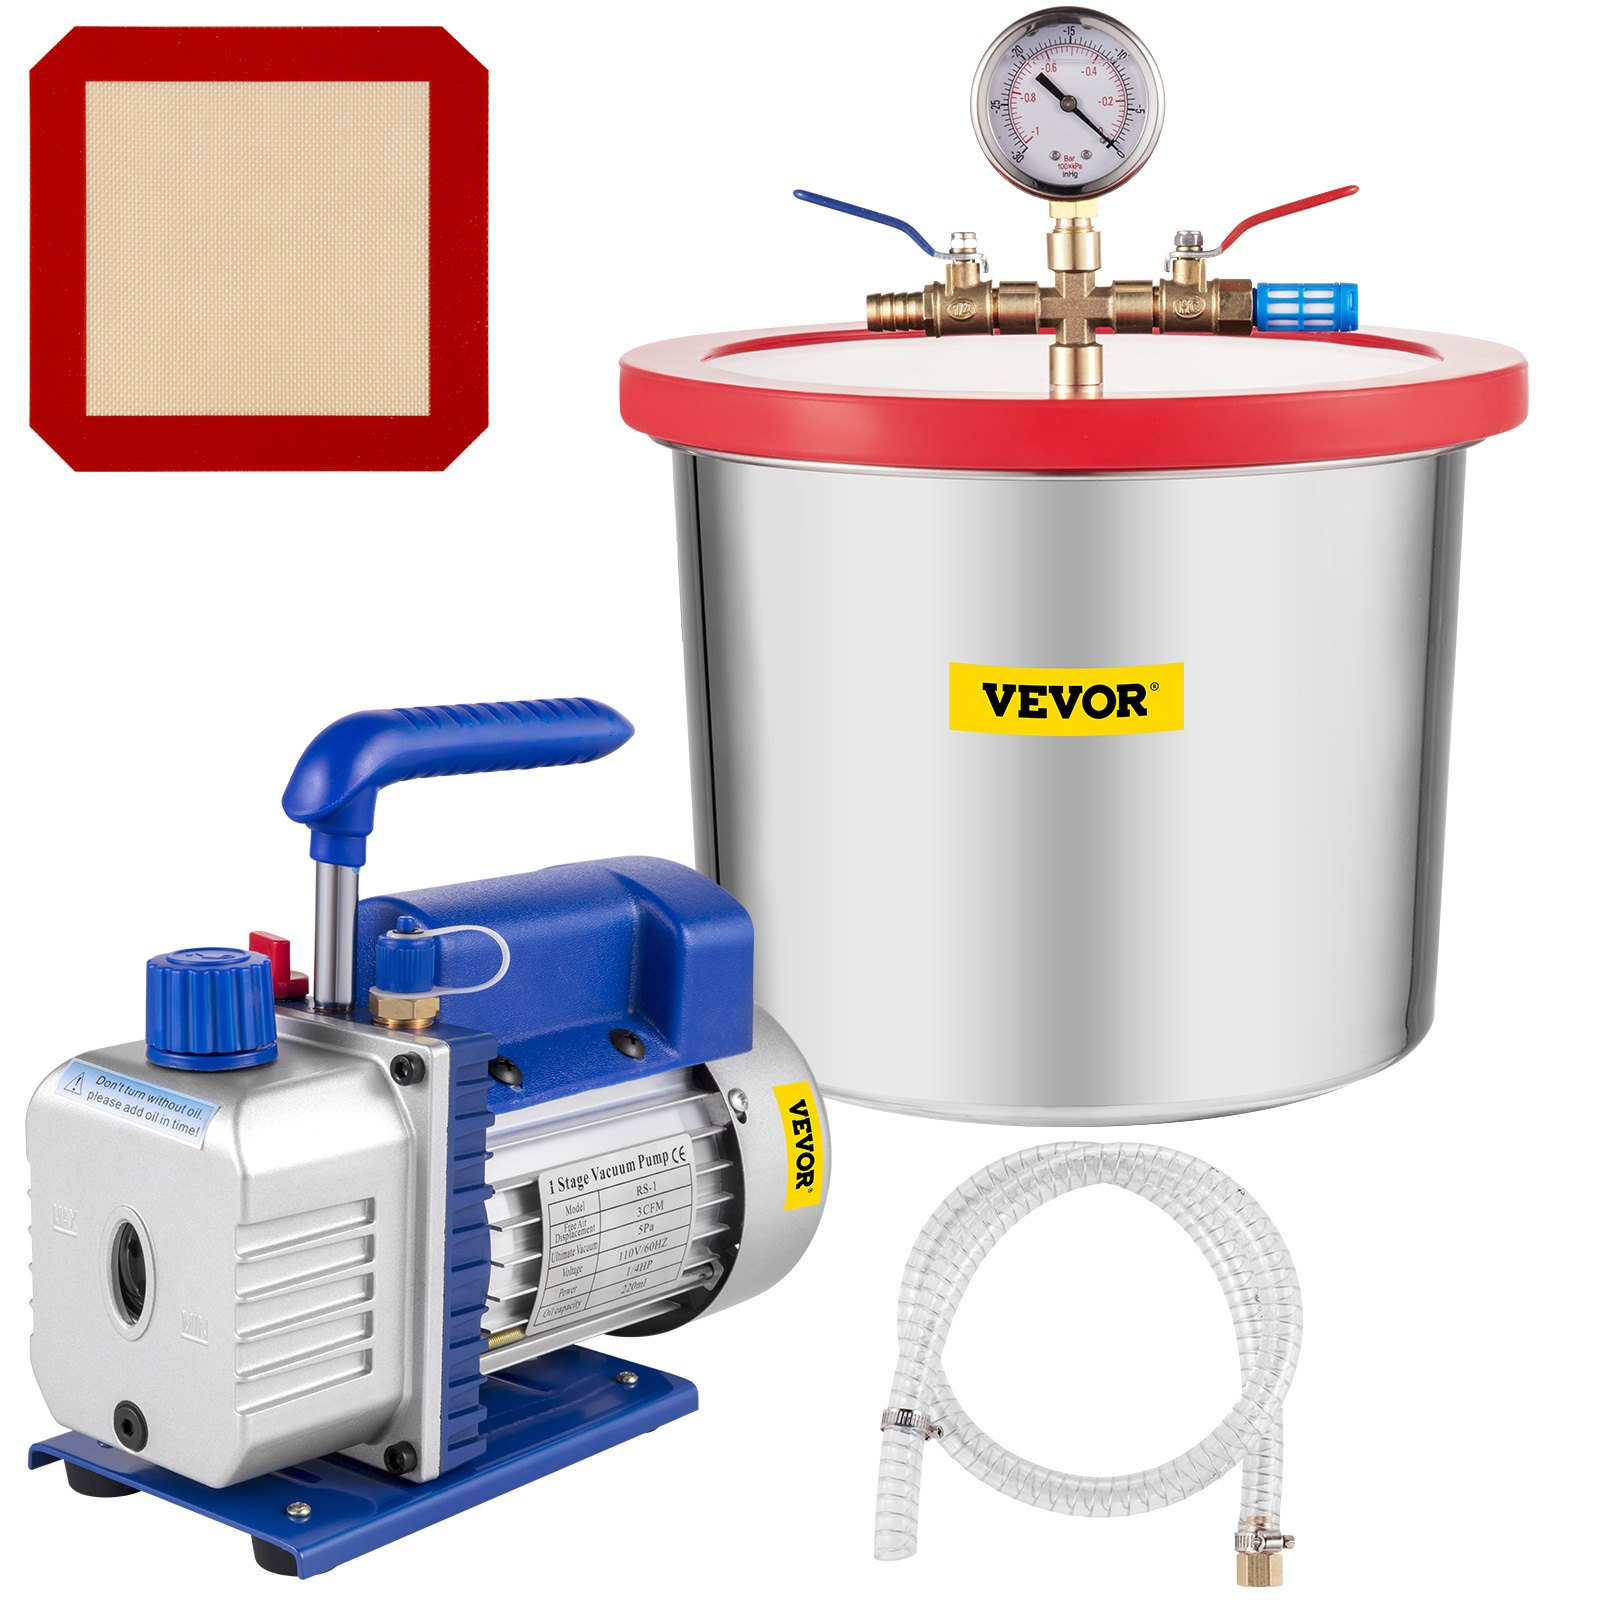
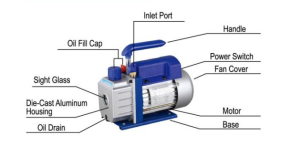
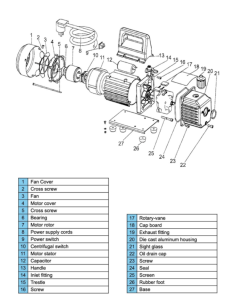
Parts Illustration
User’s Manual
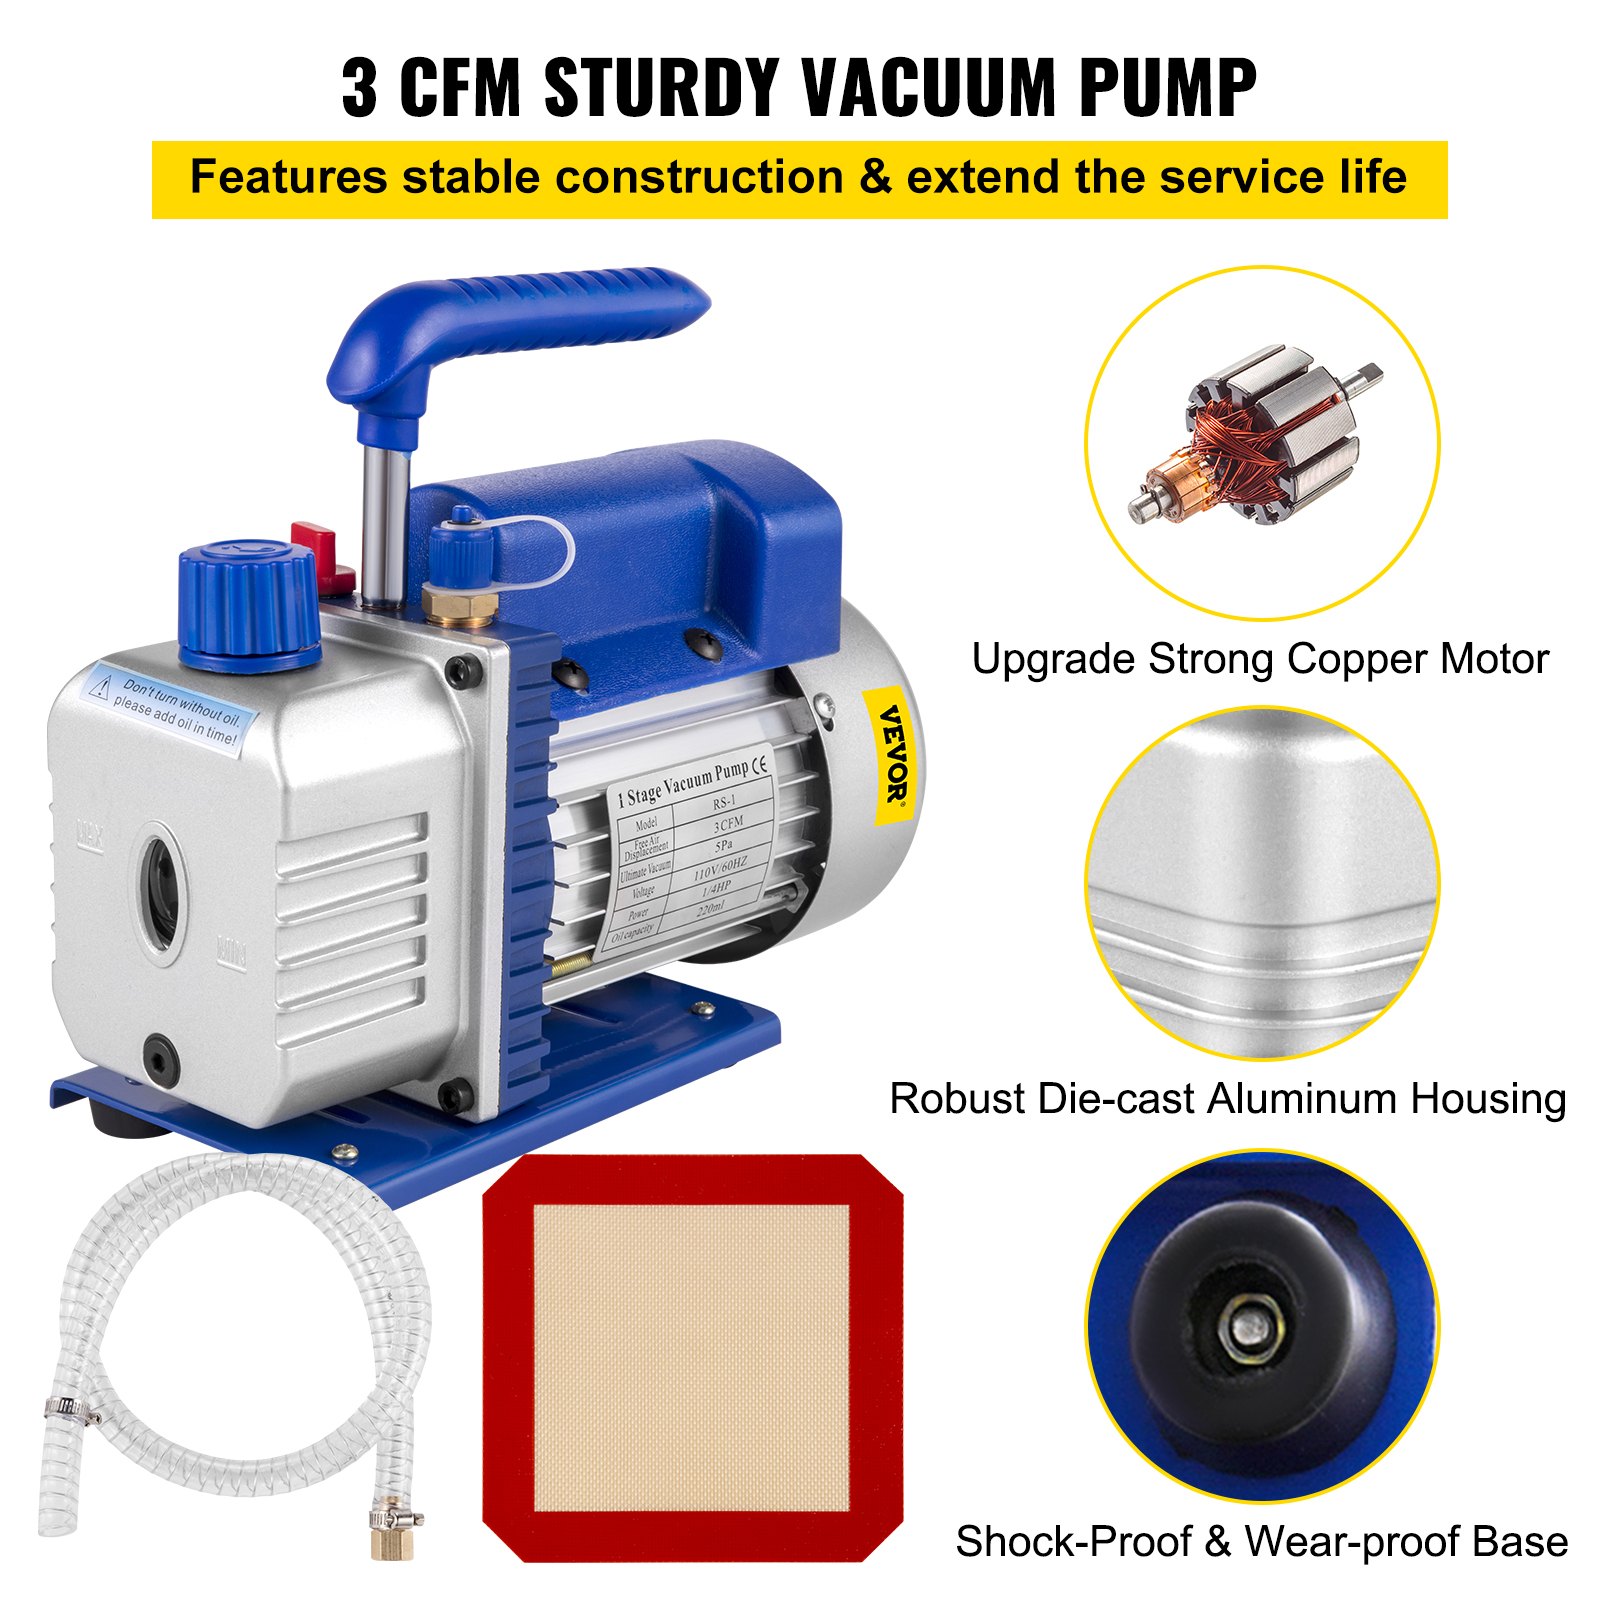
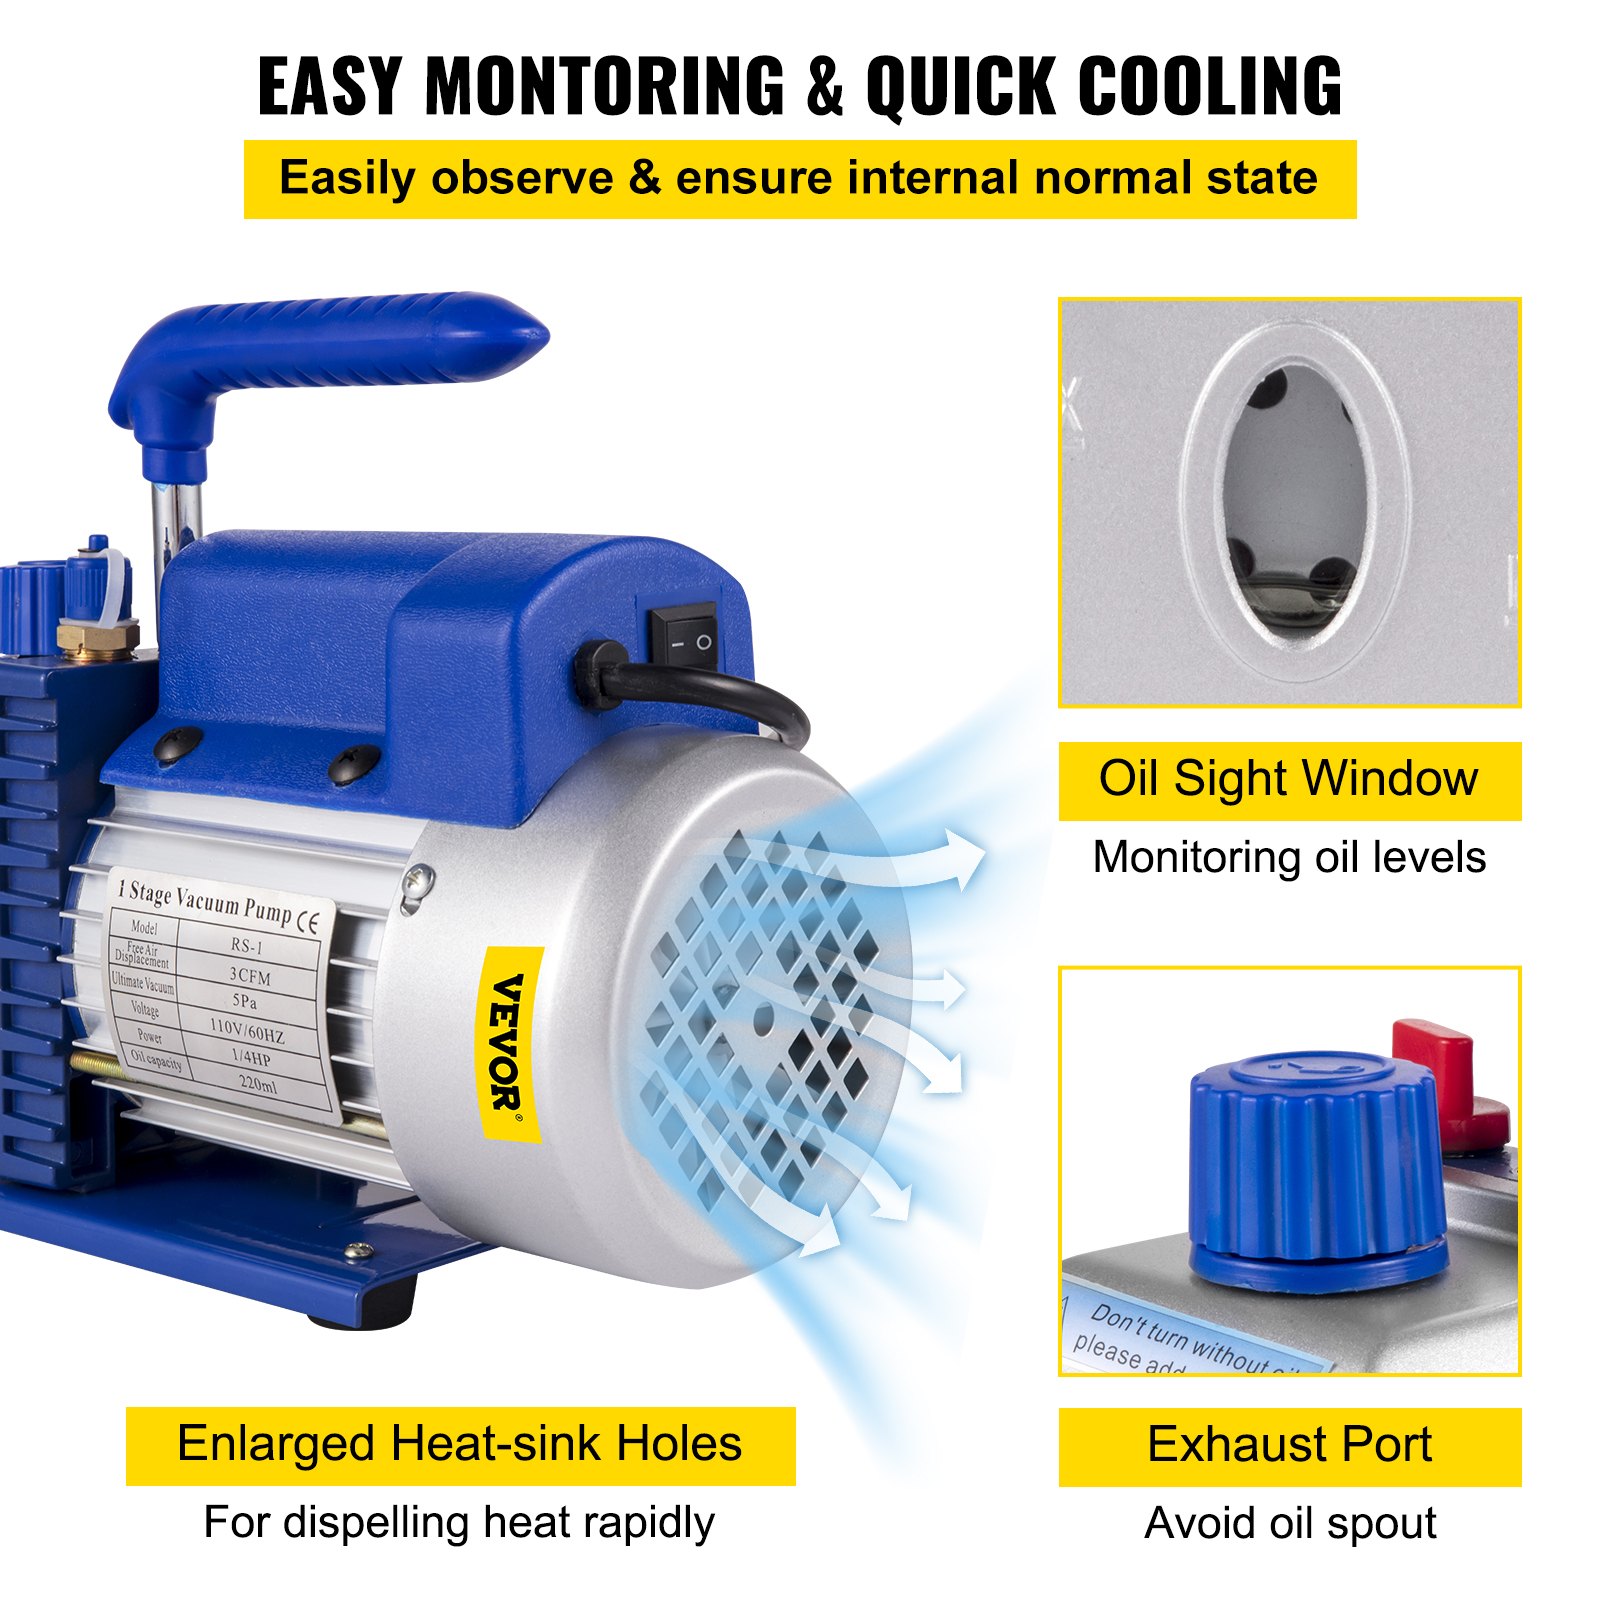
- Examine the oil level before operation, make sure the oil level is not lower than the oil level line. Ensure to fill oil with the right level and oil specification before starting to power on (use high-speed vacuum oil specification “HFV 32”)
- Remove the gas filling cap and connect the pump container. The pipe should be short and sealed to prevent a leak.
- Take off the exhaust cap, plug in, and switch on to prepare for operation and use. The operation will produce oil smoke, which is normal.
- After using the machine, unplug it, remove the connecting pipes, and cover the exhaust cap and oil plug.
Cautions
- Do not pump inflammable, explosive, and poisonous gases.
- Do not pump gases that can corrode metals and can exert chemical changes on the pump oil.
- Do not pump gases containing pellet dust and gases with plenty of steam.
- The temperature of the pumped gas should not be over 80°C, and the temperature of the environment should not be lower than 5°C —6°C.
- Do not use it as a compression or a convey pump.
- Do not use or operate without oil.
- Do not pull on the wire when unplugging from the outlet.
- Do not put heavy weights on the wire to avoid being extruded.
- Do not use the plug or outlet if it is damaged.
- Do not plug or unplug with your wet hands.
- Unplug or switch off the machine when there is any kind of coal gas leak.
Installation
- When using the pump, it should be horizontal and placed in dry and clean ventilation. The distance to the periphery should be over 2cm, and the space between the fronts and back should be at least 5cm. When installing it onto the equipment, make sure that sufficient air can enter the side of the vane shell.
- The gas entering mouth can be connected according to the screw thread of it and can be also plugged with a leather pipe.
- Installation onto a complete set:
- Remove the rubber base from the bottom base and connect with ST4.2 screw nail.
- If you don’t have special equipment for installation, you’re welcome to have our company assist you with this task.
If the pump gases are harmful to one’s health or have a bad effect on the environment, you can extend pipes to extend the exhaust mouth going outside; however, ensure that you practice a logical method that will protect the environment. - If especially needed, an electromagnetic valve can be installed at the gas entering mouth.
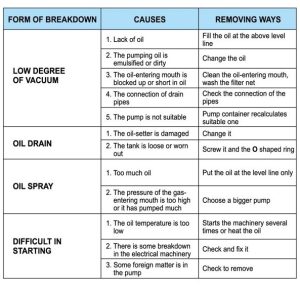
Troubleshooting Guide
Maintenance
- Keep the pump clean and prevent foreign matter from entering it.
- Keep the oil level. Do not keep it running without oil.
- Keep the oil clean. If it becomes dirty, muddy, or contains water or other volatile substances that affect the limit vacuum, the oil should be replaced.
- Before replacing the oil, start the pump and have it run about 30 minutes to make the oil thin, then stop it and let out the oil from the oil-out mouth. Then have it run for 1-2 minutes with the gas-entering mouth open. During this time, add a small quantity of clean oil from the gas-entering mouth to replace the remaining oil in the pump.
- Do it repeatedly. After making sure the pump is clean put on the oil-outing screw plug and then fill clean pump oil to the oil-level line from the oiling mouth.
- If it is not used for a long time, cover the oiling cap and exhaust cap and put them in a dry place. Meanwhile, damp proofing and anti-rust should be considered.
- If it needs removing and fixing, have an experienced or professional technician to do it.
Warranty
- If you find out that it has manufacturing defects within 7 days from the date of purchase, you may return it to us for replacement and bring along the sales invoice and receipt. However, reassure us that there is No Physical damage before replacing the item.
- If the item has a defect after 7 days from the date of purchase, you may call the local dealer for service.
- The vacuum pump has a 1-year warranty for the Parts and motor, except for physical damage.
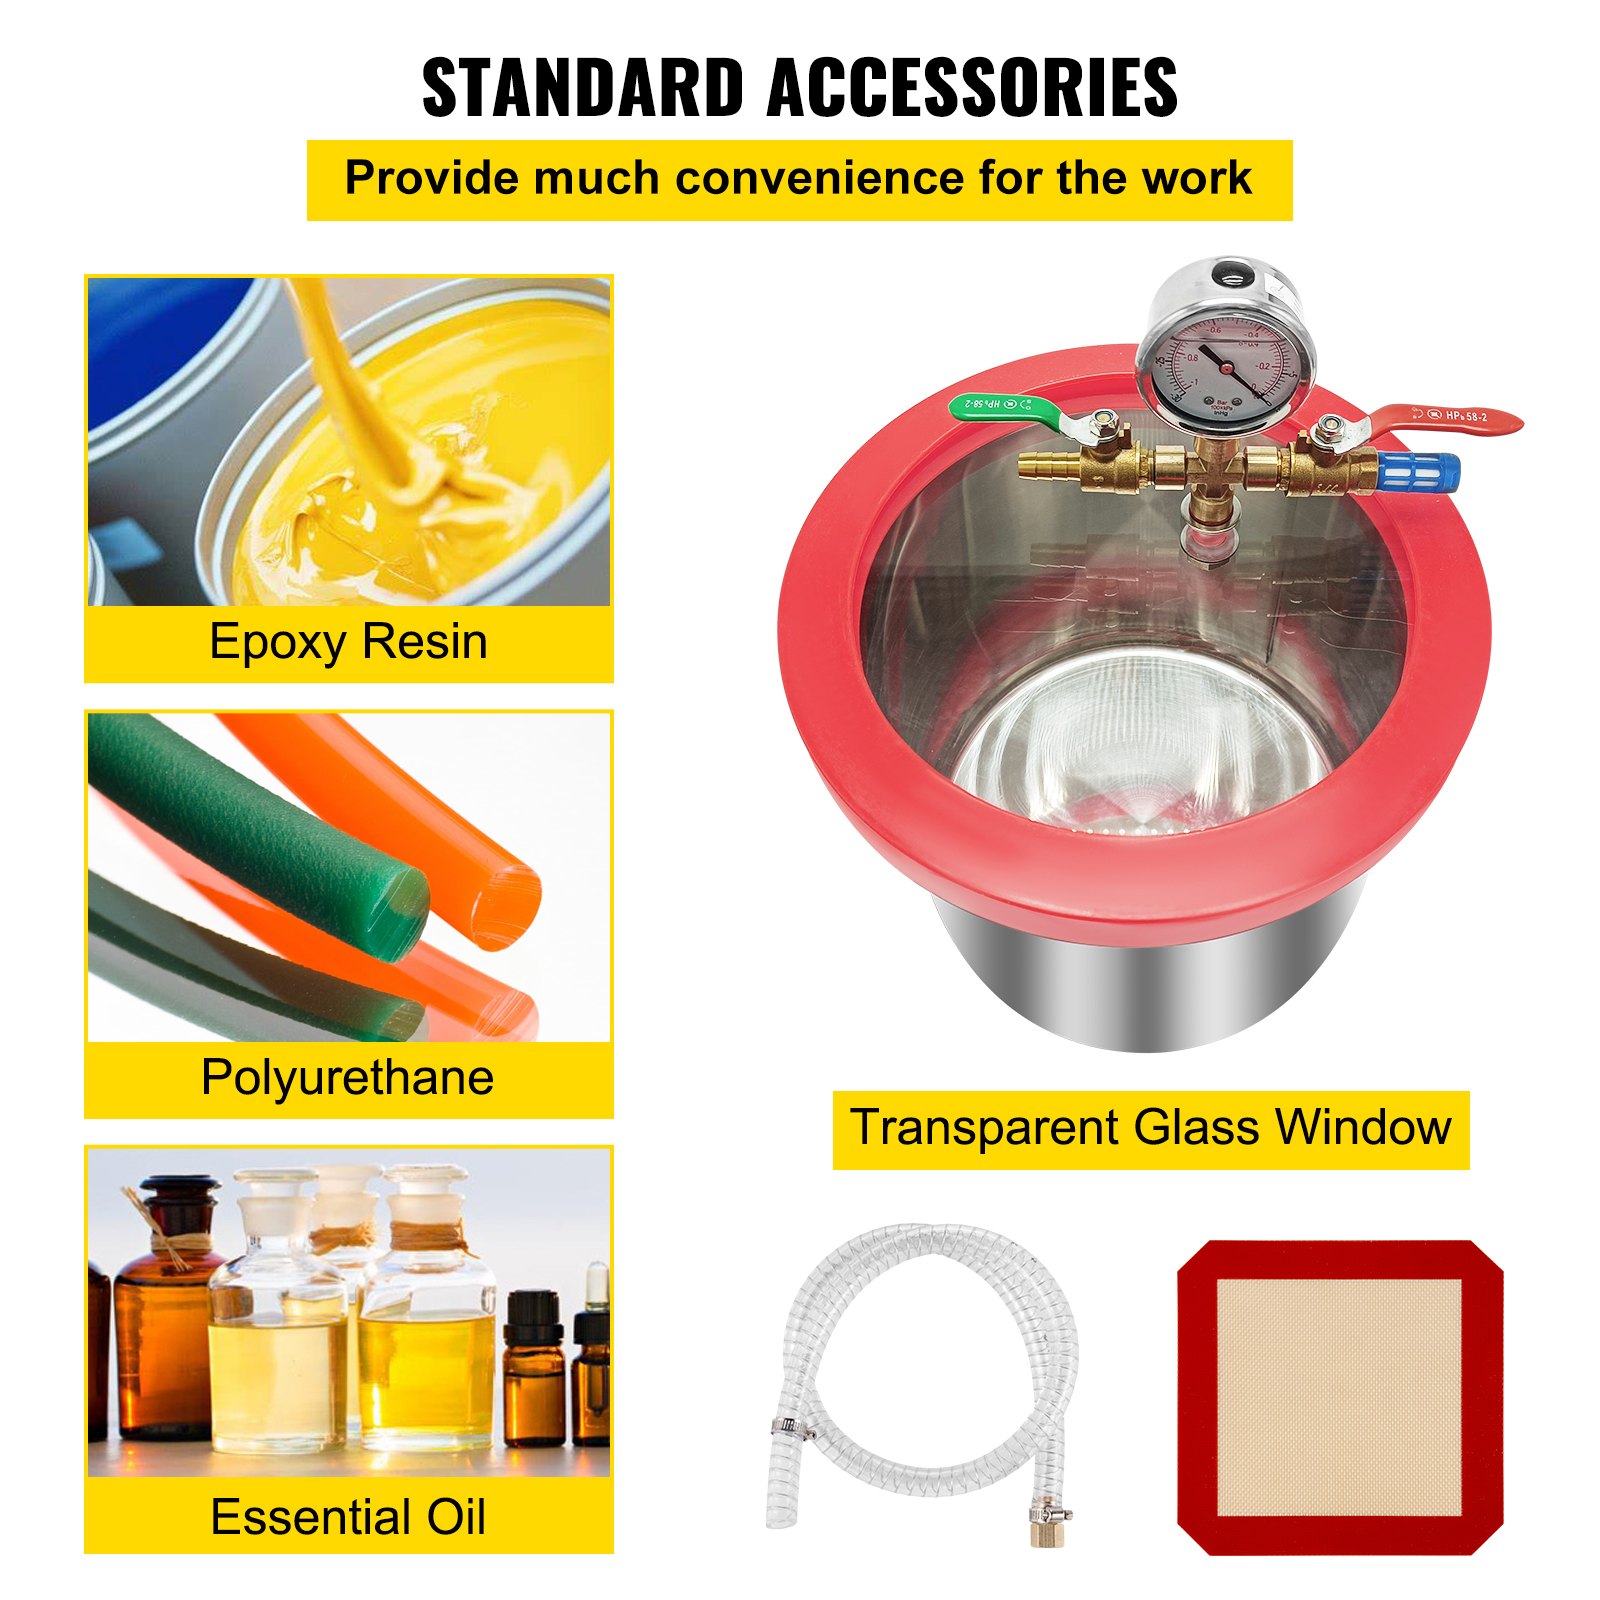
Instructions for Vacuum Chamber With Pump
- Prepare 1 vacuum pump, 1 vacuum drum, and vacuum pump oil.
 After filling the vacuum pump, connect the hose to the air inlet nozzle of the vacuum pump.
- The interface at the other end of the hose is connected with the vacuum gauge, and the valve switch is shown in the figure.
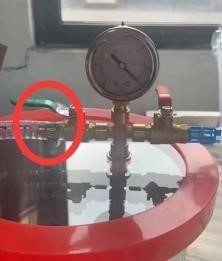
- After the connection, start the power normally, and you can see that the pointer pressure of the vacuum gauge will rotate.
Note
- When the barrel’s vacuum gauge is connected to the acrylic plate, rubber rings must be installed on the upper and lower sides. Otherwise, there will be air leakage.
- The red rubber ring on the outer ring of the barrel cover is sometimes uneven. It is not sealed well when it is directly covered on the barrel. The vacuum gauge shows no pressure response. Treatment: When the vacuum pump is working, press the barrel cover with both hands and press it down for about 5 seconds, then release it after the vacuum gauge pointer rotates.
- The rotation of the vacuum gauge pointer indicates that the vacuum barrel and pump have been operating normally.
Recommended For Your Project
VEVOR Vacuum Chamber with Pump, 2 Gallon Vacuum Chamber, 3CFM 1/4HP Vacuum Pump Manual

Reviews
There are no reviews yet.